Disponible a partir de la versión 1.60.0.1 de Plugin Builder Parts
Before registering the slot, it is necessary to choose the face of the part that will receive the operation. By default, the top face will always be displayed, but you can change the face.
To insert slot in the part, follow the procedures below:
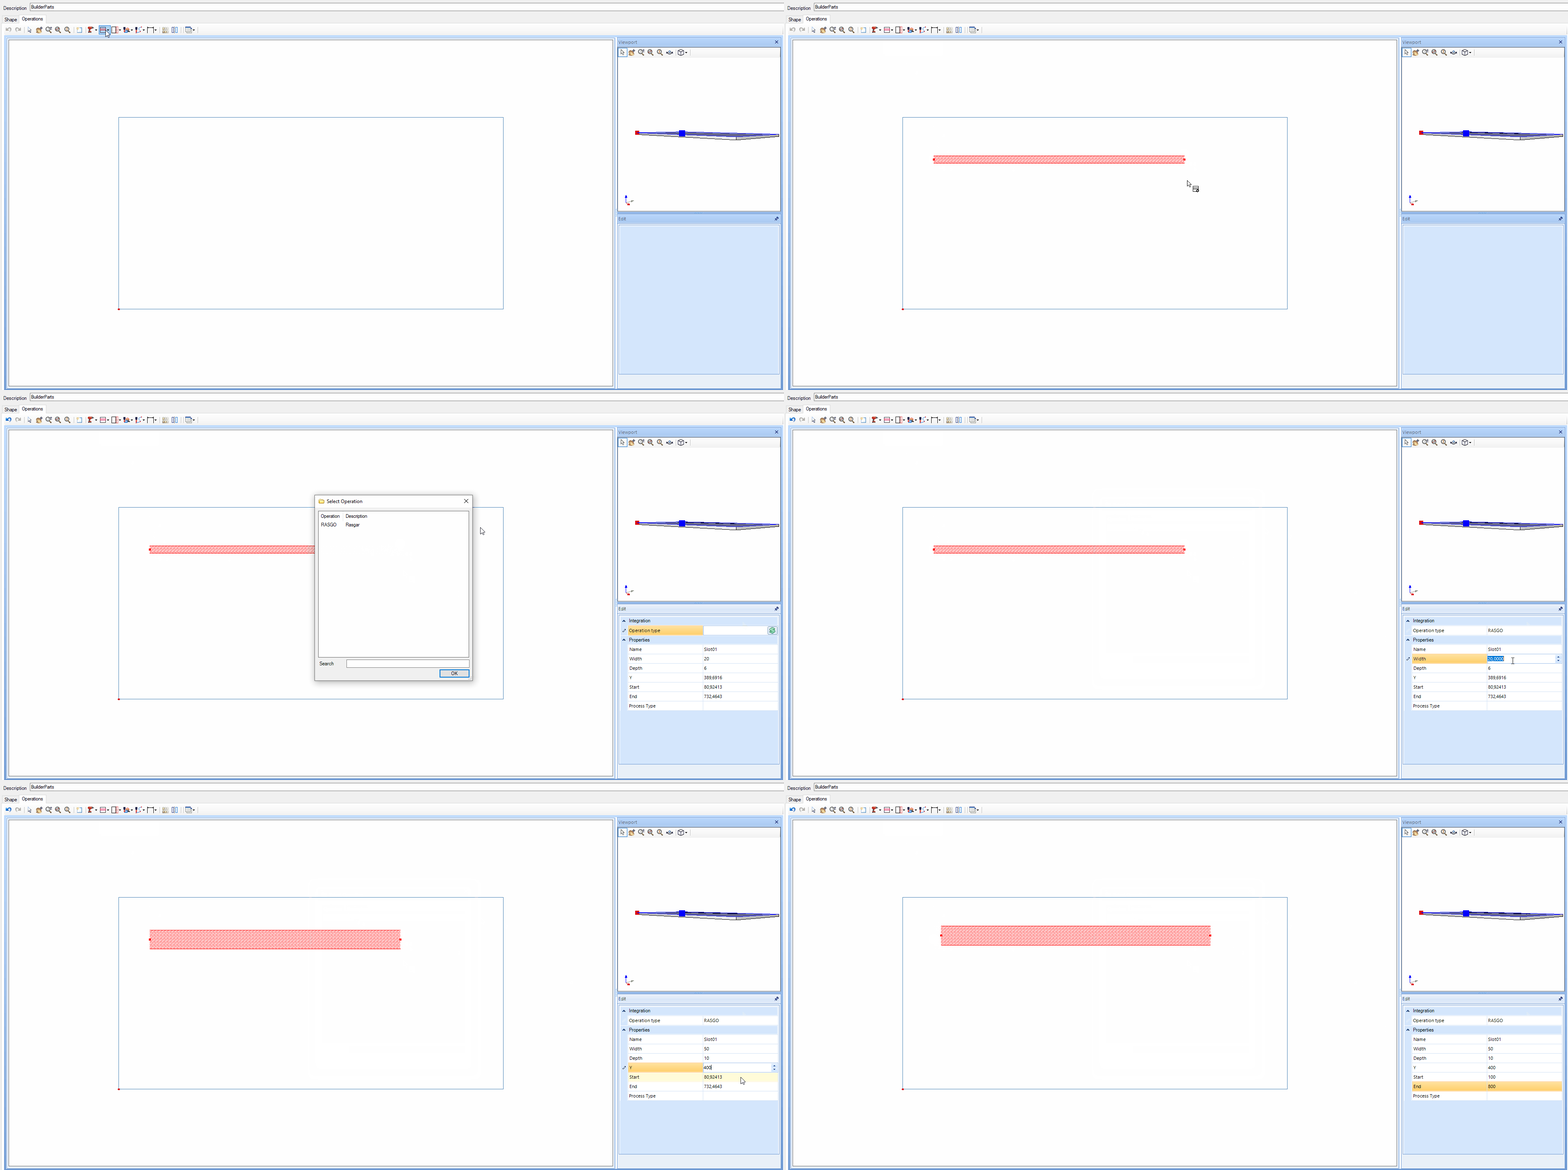
1. In the operations tab, click on the slot menu and then on Add slot.
2. Choose the position where you want to register the slot and with the click and drag of the mouse, insert the slot.
3. After creating a slot, you can choose the following settings:
- Operation type: Operation that will be used for budgeting/integration
- Name: Operation identification
- Width: slot width
- Depth: Hole depth
- Y: Y position of the slot (from the center of the slot), if the slot is horizontal
- X: Position X of the slot (from the center of the slot), if the slot is vertical
- Start: Slot start position
- End: Final slot position
- Process type: Choose the type of process

Remove Slot
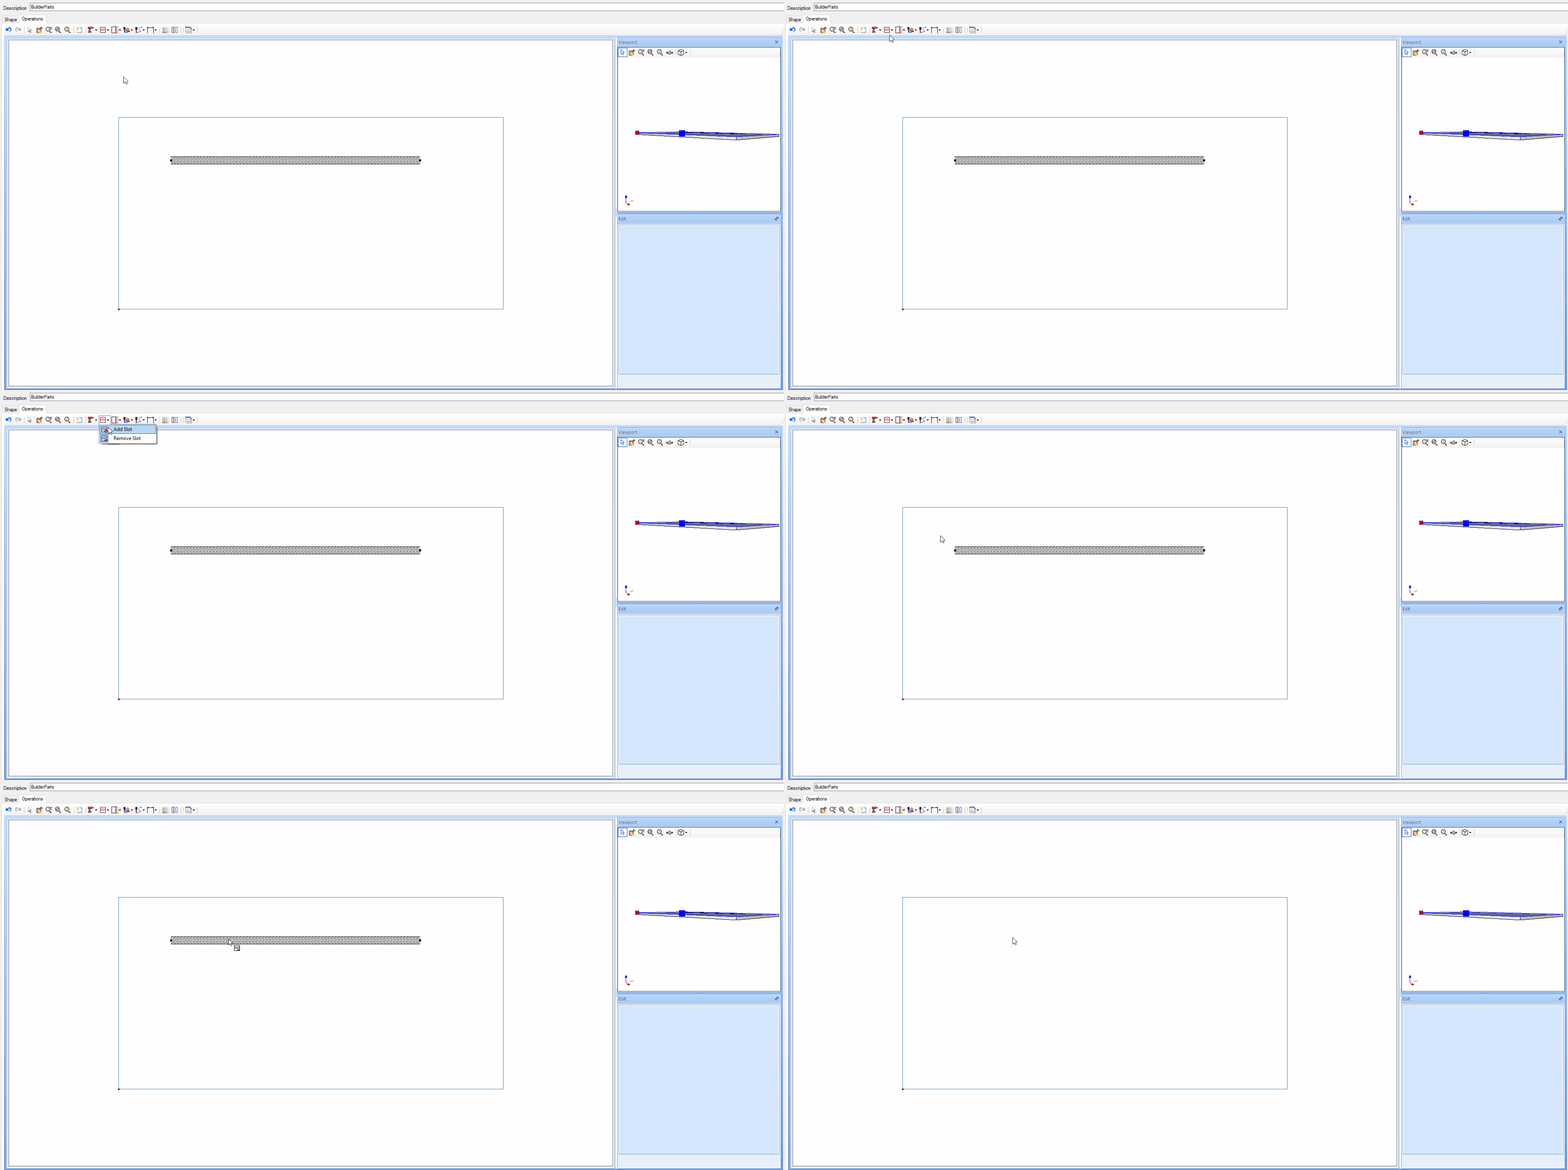
It is possible to remove the slot in two ways:
1. Click the slot icon, select the Remove slot option. Then, click on the slot you want to remove.

2. Click on the slot to be deleted and press the delete button on your keyboard.
TIP: in addition to these two options, it is possible to remove all operations by clicking on the Clean operations tool  .
.