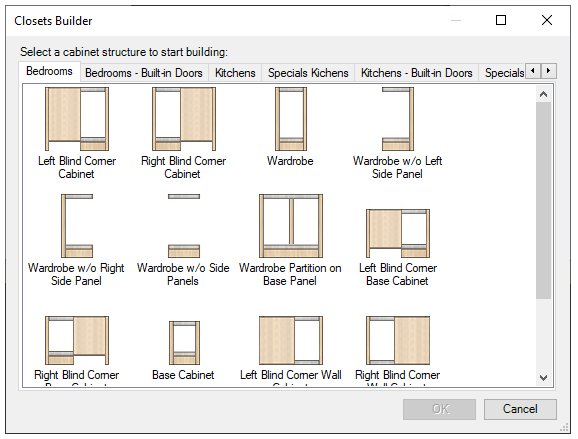
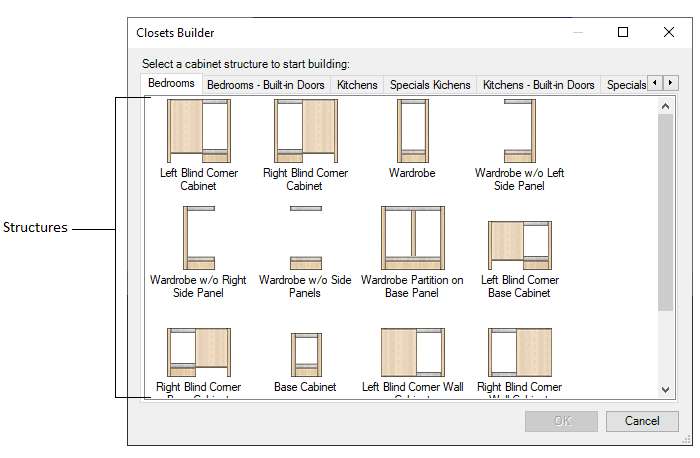
The Structure is a set of components, items and divisions. The structures created by the Promob Catalog closet builder will be displayed in the structure selection window when the user accesses the closet builder through the system, as shown in the image below.
Below are procedures related to the registration of structures:
- Create a category of structures
- Create a structure
- Set up a structure
- Register the components of the structure
- Use the types of structure components
- Register conditions
Create a category of structures
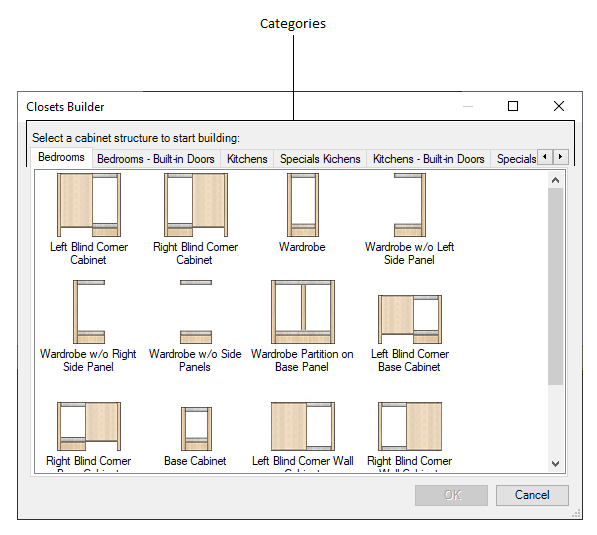
The Structure categories serve to better divide the structures created in Kitchens, Bedrooms and Living Rooms, for example:
IMPORTANT: The Closets tool is available from version 5.2.5.0 (2014) of the Catalog. For more information, click here.
To create a structure category using the Catalog Closet master:
1. Access the Register - Closets - Structures menu.
2. In the window that appears, click Add category.
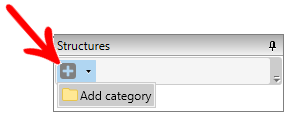
3. The category will be added with the name New Category. Click on the name to change.
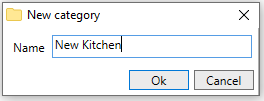
4. The category will be created with the desired name. After creating the structure category, you can create a structure.
Create Subcategory in the Structures Master
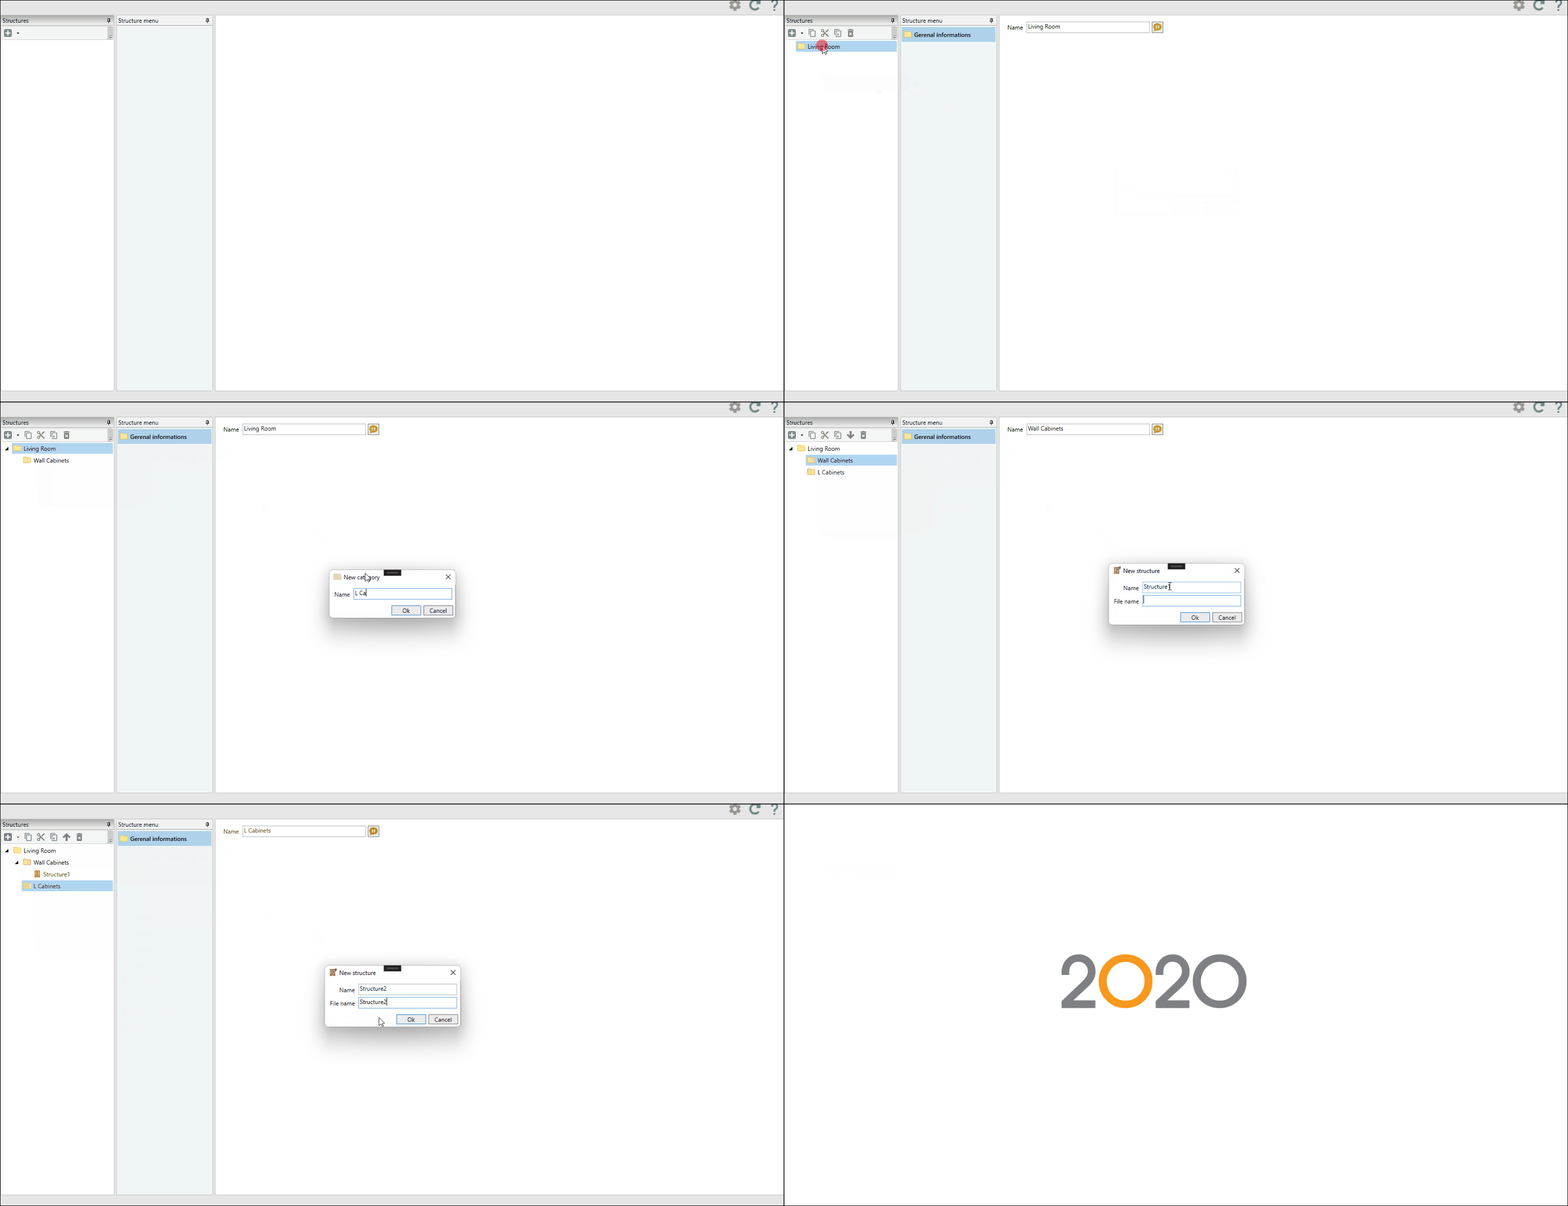
It is now possible to create subcategories within categories in the Structures register. To do so:
1. Access Register - Cabinets - Structures.
2. Right-click on the category in which you want to create the subcategory, and select New - Add Category, enter the desired name for the subcategory, and click Finish. In the subcategory you have created, enter the desired structures.
3. Notice that the categories and subcategories you have created are displayed:
IMPORTANT: There are some restrictions on the subcategories of Structures:
- You cannot have Structures and Categories on the same level;
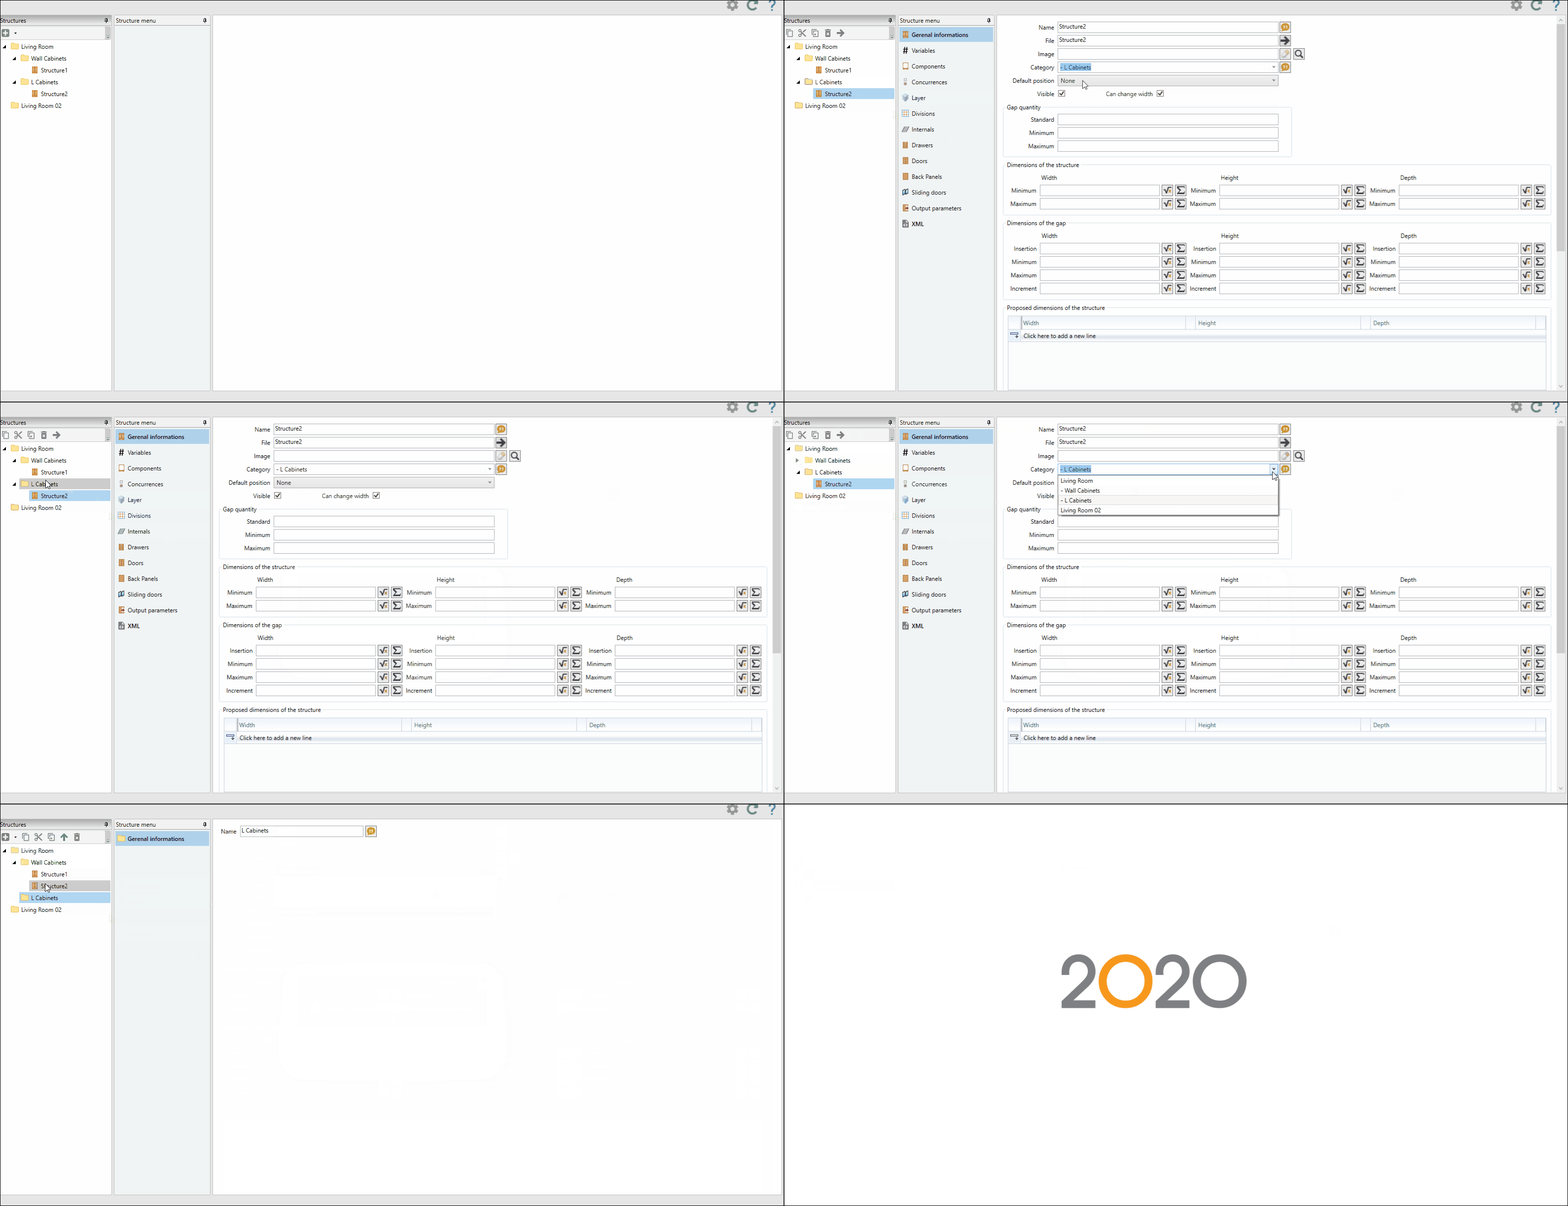
- In the General Information in Categories drop-down list, you can select only those that already exist, thus changing the category structure, as in the example below:
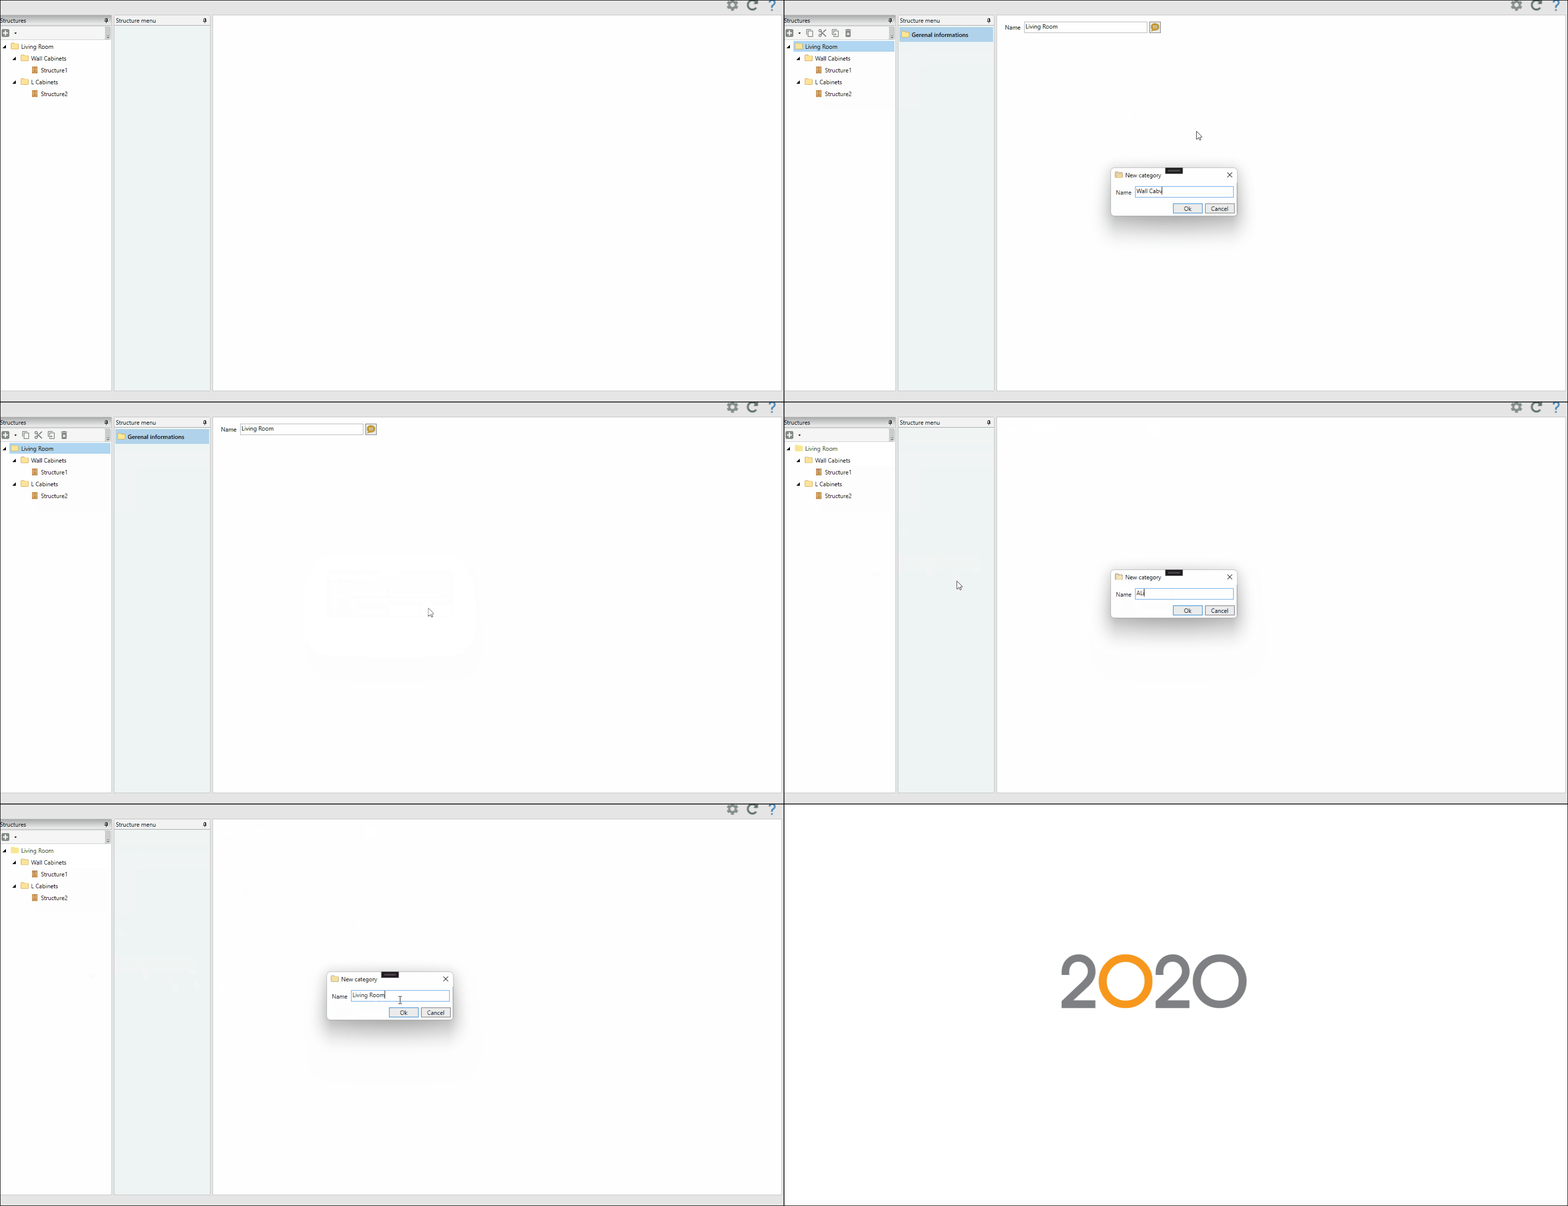
- To avoid conflicts, it is now not possible to have repeated category names on the same level, when trying to register a category with a name that already exists the message This category name is already in use.
In Promob, subcategory registration appears as follows:
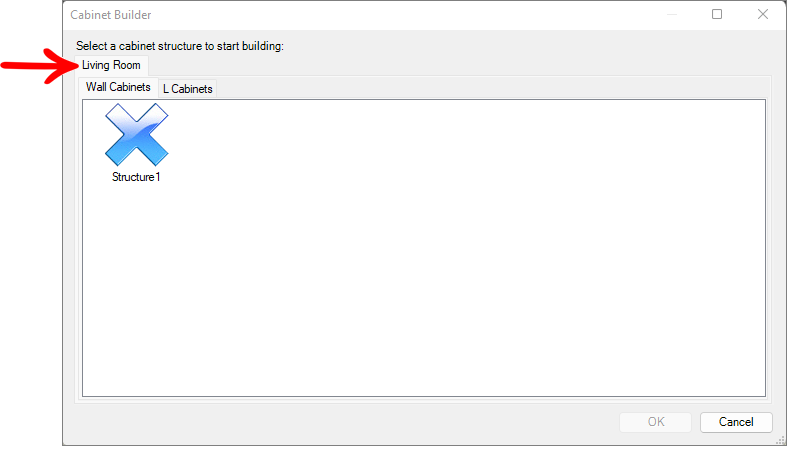
IMPORTANT: the order of the tabs is defined by the client in Catalog, the display order in Catalog will be the display order in Promob. However the invisible categories (displayed for Catalog) are inserted at the end, respecting the current behavior and also that categories that have no structure registered are not displayed in Promob.
Create a structure
The structures created are available for choice at the moment the user executes the Closet Builder on Promob, as shown in the image below:
IMPORTANT: The Closets tool is available from version 5.2.5.0 (2014) of the Catalog. For more information, click here.
To create a structure through the Catalog Closets register:
1. Access the Registry - Closets - Structures menu.
2. In the window that appears, select the category to which you want to add a structure.
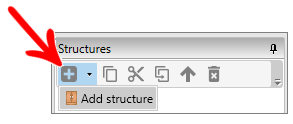
3. Click Add structure.
4. Fill in the Name and File name fields. Remember that file names must not contain special characters.
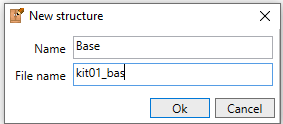
5. Click OK. The structure will be created within the previously selected category.
6. Select the structure you created and click Edit Structure to configure it.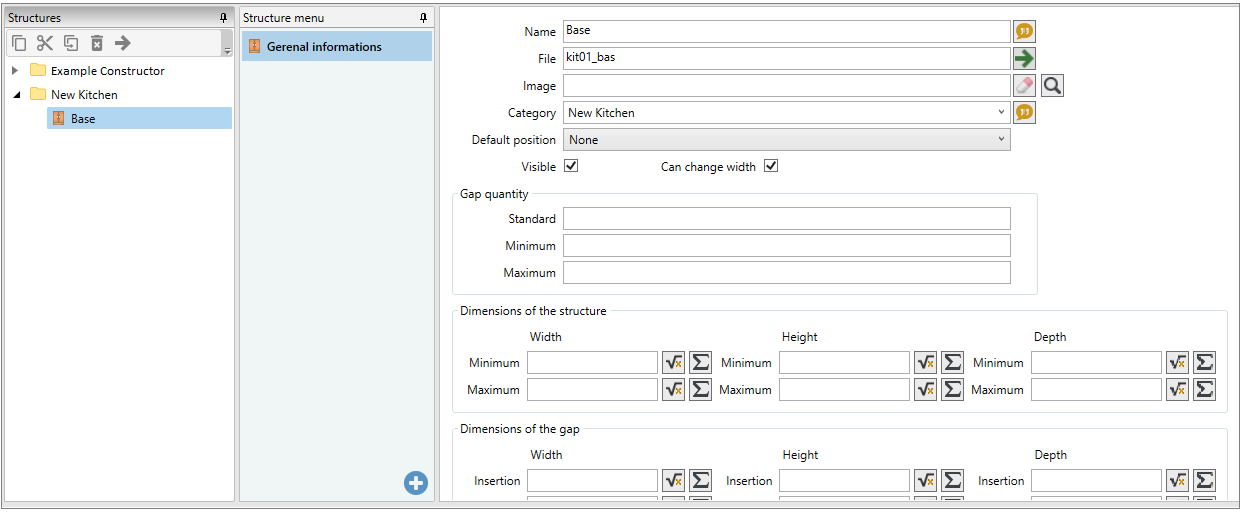
Set up a Structure
IMPORTANT: The Closets tool is available from version 5.2.5.0 (2014) of the Catalog. For more information, click here.
To set up a structure:
1. Access the Registry - Closets - Structures menu.
2. Select the structure you want to edit.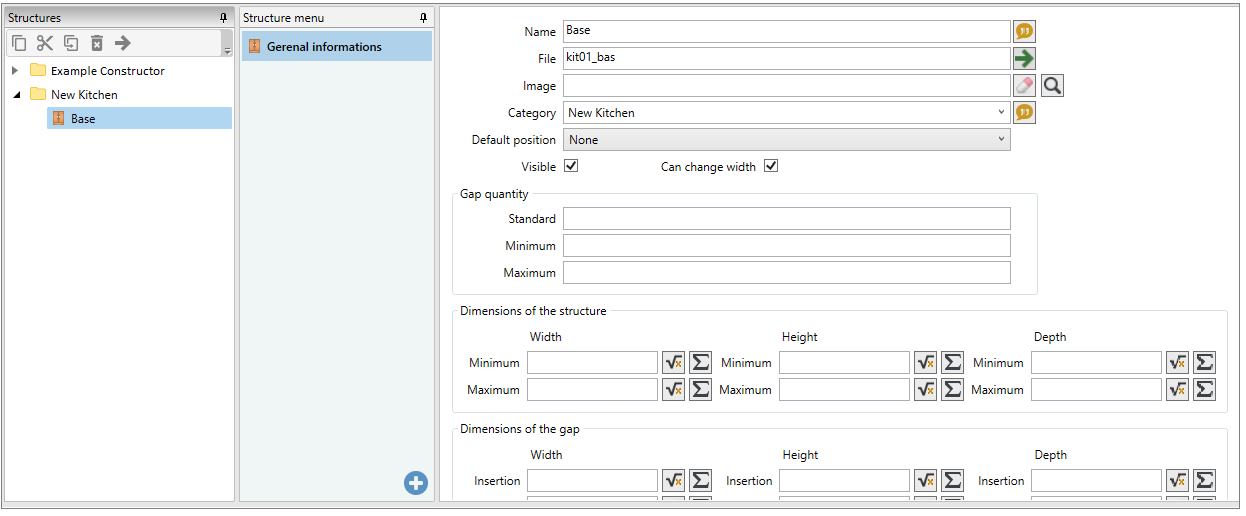
3. In General Informations, configure.
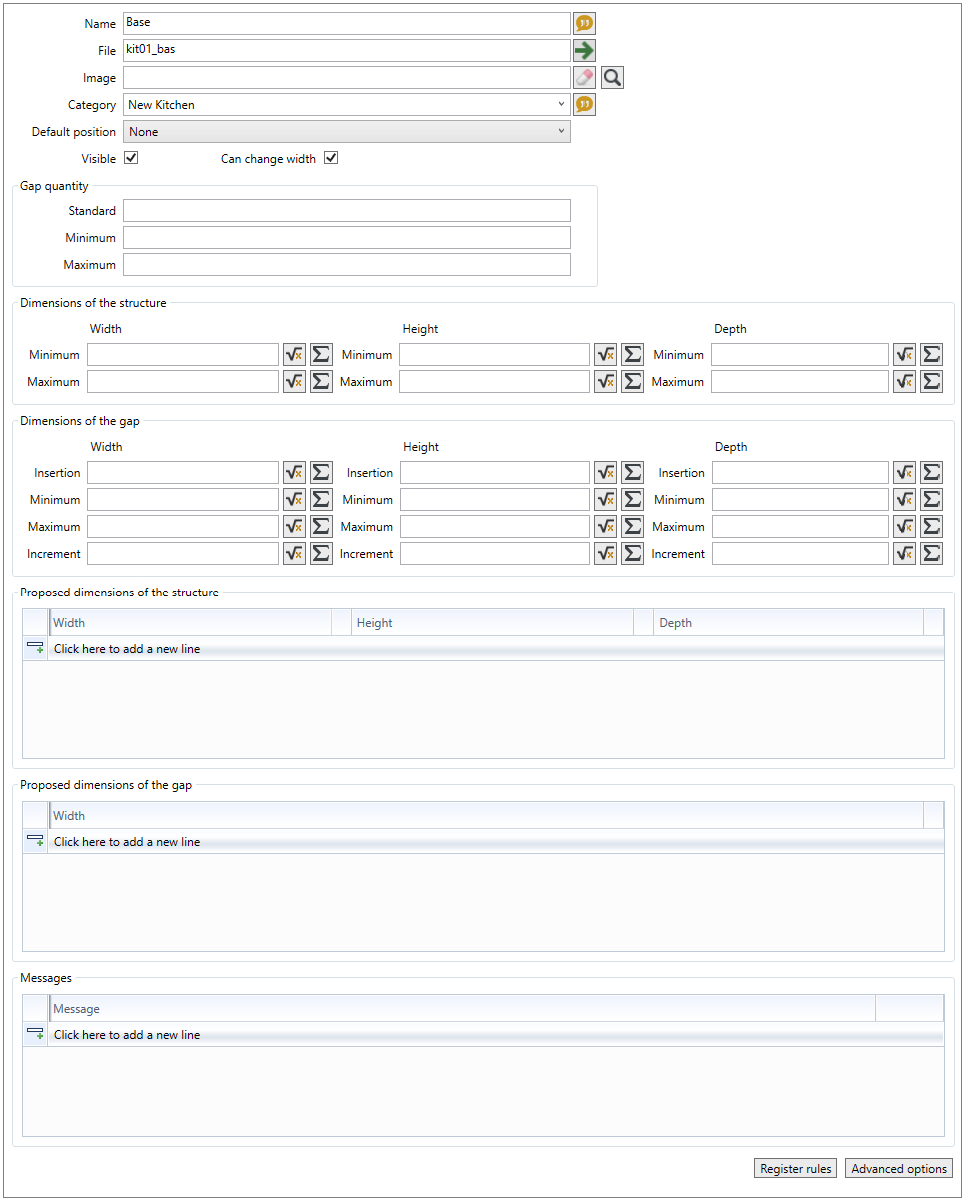
| Name | It is possible to change the name of the structure through this field. |
| Image | Select an image to represent the structure on the closet builder's home screen on Promob. |
| Category | By default, the category is the group in which the structure was created. |
| Default Position | It allows to define the standard position of the structure at the time of its creation in the project. |
| Gap quantity | Defines the quantity of initial structure gaps. |
| Dimensions of the structure | Defines the minimum and maximum values that the structure can have. |
| Dimensions of the gap | It is necessary to configure the minimum and maximum dimensions of the structure gap. The maximum measure will serve, for example, to define from which dimension a new gap will be created. It is not necessary to fill in the “insertion” dimensions. In addition, it is possible to configure the increment. |
| Proposed dimensions of the structure | It allows defining values proposed for the structure in width, height and / or depth. Click here and see how to register proposed values. |
| Proposed dimensions of the gap | It allows defining values proposed for the gap of the structure in width, height and / or depth. Click here and see how to register proposed values. |
| Message | Allows you to define structure-related information that will be displayed in the closet builder, on the Structure tab. |
| Advanced options | You can configure: - Visible: checked, defines that the structure will be visible. Unchecked, the structure will be invisible to choose from when accessing the Builder through Promob. - Allow joins: if there are joins registered, with this option checked the joins will also be applied to the builder's structure. - Automatic height: used for drawer modules that undergo changes in height according to the insertion of drawers. - Resize only upper gap: determines that, when the height of the structure is changed, only the upper gap will be changed (example: mallet). - Process automatic insertion of aggregates: With the option checked, the aggregates of the items of the automatic insertion of the environment that are inserted will also be applied in the structure of the constructor. - Allows to ungroup: with this option checked, it is possible for the user to ungroup the structure by selecting the Ungroup option when right-clicking on the structure, after being inserted into the design. - Allow manual editing: with this option checked, the builder module can be edited manually when in 3D space. - Apply dimension: it allows configuring if the configured width (Minimum, Maximum and Insertion) will be applied in the complete structure or in the structure's gaps. |
4. In Variables, it is possible to create variables to be used in the formulas of the dimensions of the components of the structure, and they are available so that the customer can change this value when creating the module.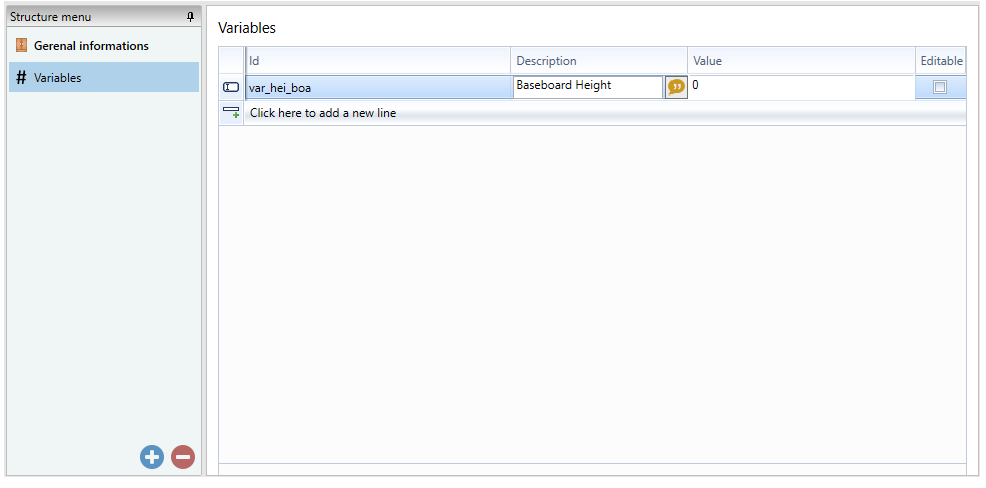
| ID | ID required to create the variable. The ID must be from an existing attribute. For more information regarding specifications each attribute, click here. |
| Description | Description so that it is easy to identify the function of the variable. |
| Value | Default value that the variable will always adopt. |
| Checkbox Editable | Whether or not it allows the customer to change the value of this variable by the manufacturer. |
5. In Components, it is necessary to add the components of the structure. Example: sides, base, battens, feet.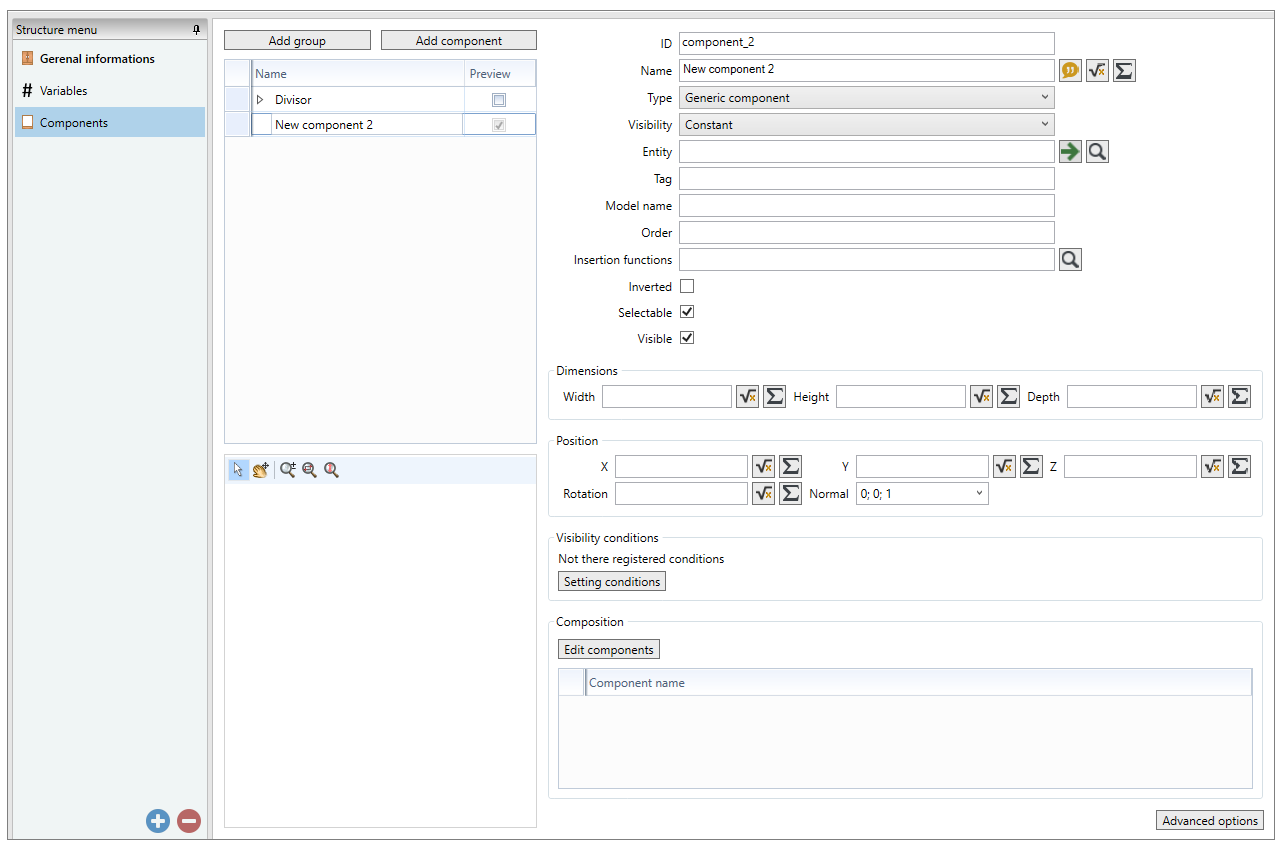
|
Add group |
Creates a group of components. Example: Partitions, Sides, Views, Footers. |
|
Add component |
A window is displayed for selecting the component you want to add. It is possible to select several items simultaneously by pressing the Ctrl key. |
|
Checkbox Preview |
The checkbox must be activated when it is necessary for the component to be visible in the structure preview, as shown in the image below. When deselecting, the item is no longer displayed. IMPORTANT: the checkbox is not available for activation for rooms. |
|
Preview Window |
Displays the components of the structure with the Checkbox Preview enabled. |
|
Component informations |
The fields ID, Name, Type, Entity, Tag, Model Name, Insertion Functions, Visibility and Inverted must be configured according to each component. - ID: in this field you must configure the item ID (without special characters); - Name: The name of the component that will be displayed when selected in the design; - Type: Sets the Type of the Component being created - Entity: you can select the module registration entity corresponding to the structure component being registered. - Tag: Registering by tags allows the creation of several items with the settings made by the Item Register from the modules that contain this same tag registered by the Register of Modules, on the Tags tab. - Model Name: allows you to define the name of the model to which the structure will belong. - Order: - Insertion Functions: allows adding automatic functions previously created in Register - Functions - Automatic Functions. - Visibility: Configures whether the component will have optional visibility, constant or default, as in Inserts. - Selectable: - Inverted: With this option checked, the component being added will be inverted in the structure. |
|
Dimensions |
It allows configuring the dimensions of the component added to the structure, as a module aggregate. |
|
Position |
Contains fields for configuring component placement in the structure, such as module aggregate settings. |
|
Visibility conditions |
It allows adding visibility conditions for the component. |
|
Composition |
It allows adding components to the component being registered, thus creating a composite component. |
|
Advanced options |
It allows configuring if there is any dimension of the editable component, which is the standard editable dimension, and application of attributes. |
6. In Competitions, it is possible to create competitions between the items that can compose the structure.

|
Add Concurrence |
Creates a group of concurrences. |
|
Add Component |
Adds items to compete within the created competition group. Click the Search icon to change the competitor's component. |
|
Require at least one component |
It makes at least one of the competitor's components mandatory for use in the structure. |
| Delete component | To remove a concurrence or component that competes, select the item and press the Delete key or right-click on the concurrence and select the Delete option. |
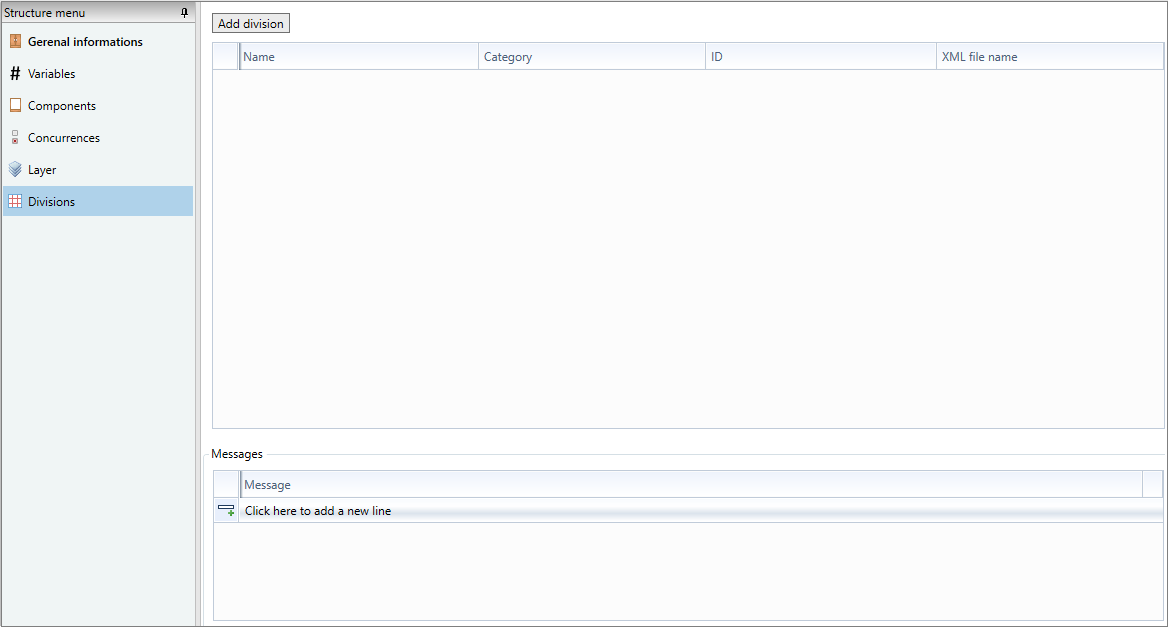
7. In Divisions, you can add divisions already created. To see how to create divisions, click here.
|
Add Division |
Click to add a division already created. |
|
Edit Division |
Double-click on a division to access the Division Registration window or right-click on it and select the Edit option. |
| Remove Division | To remove a division, select the item and press the Delete key or right click on the division and select the Remove option. |
| Messages | Allows you to define information related to the rooms that will be shown in the closet builder, in the Messages tab. |
IMPORTANT: The divisions added here will be available in Promob's closet builder, on the Divisions tab, in the upper right corner.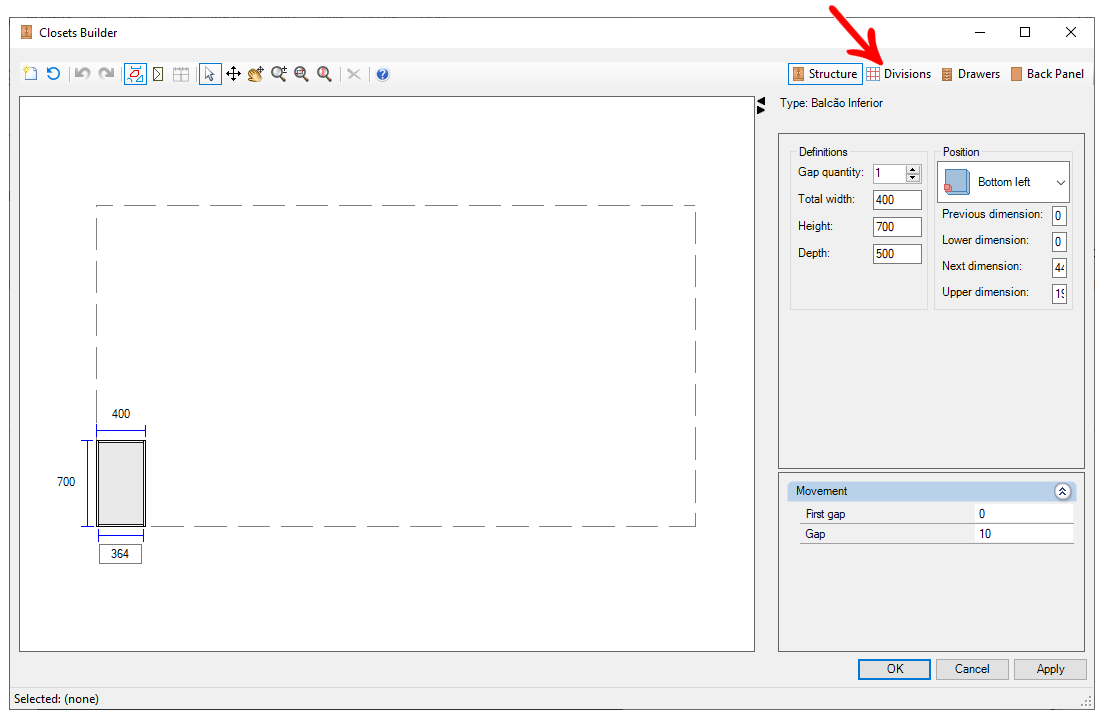
8. In Drawers, Internals, Doors and Backgrounds, items that will be available in Promob's closet builder can be added to be added to the structure, in each project.
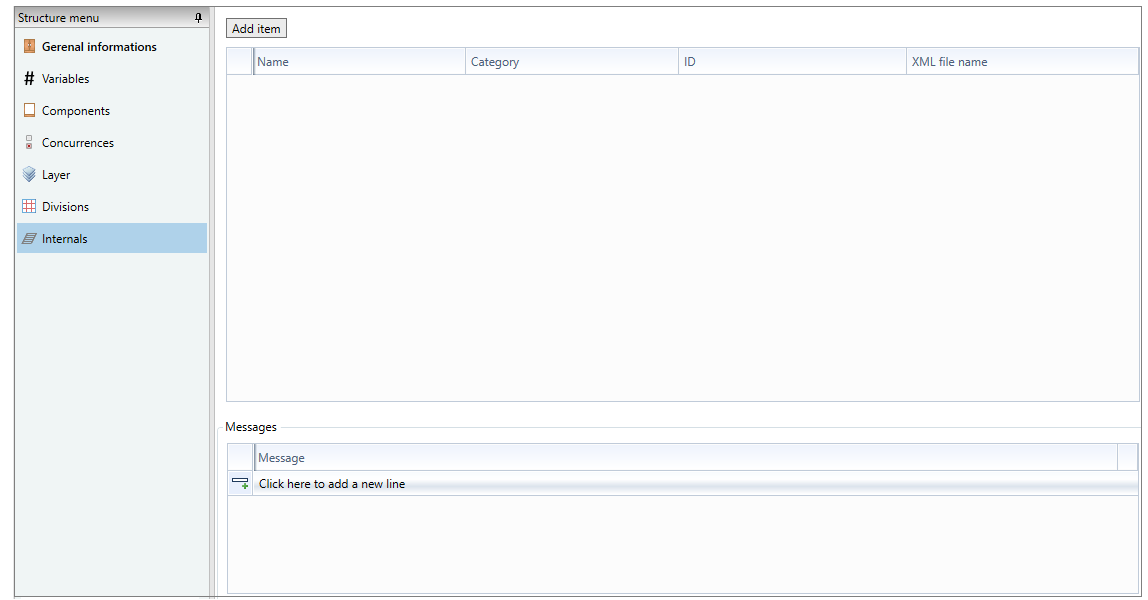
In all options (Drawers, Internals, Doors and Backs) the following options will be displayed:
|
Add item |
Click to add an item already created by the item master. To see how to create an item, click here. |
|
Edit item |
Double-click on an item to access the Item Registration window or right-click on it and select the Edit option. |
| Remove item | To remove an item, select and press the Delete key or right click on it and select the Remove option. |
| Messages | Allows you to define information related to the items that will be shown in the closet builder, in their respective tabs. |
IMPORTANT: Items added in the Drawers, Internals, Doors and Backs options will be available in Promob's closet builder, in the respective tabs, in the upper right corner.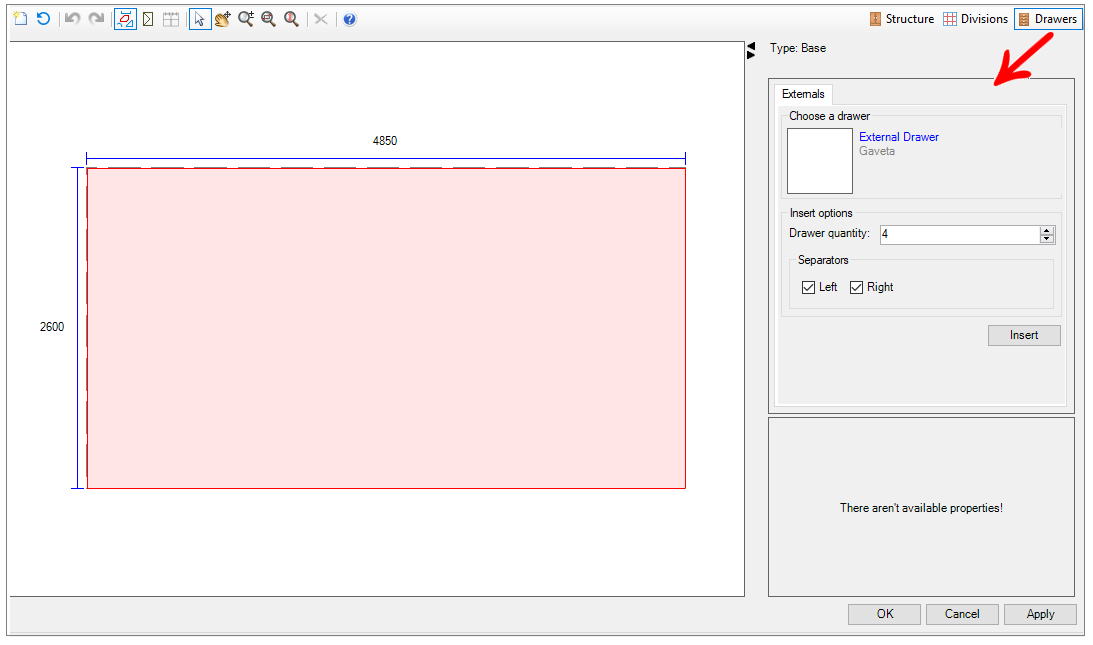
9. In Sliding Doors, it is possible to add the sliding doors that will be available for insertion in the created structure.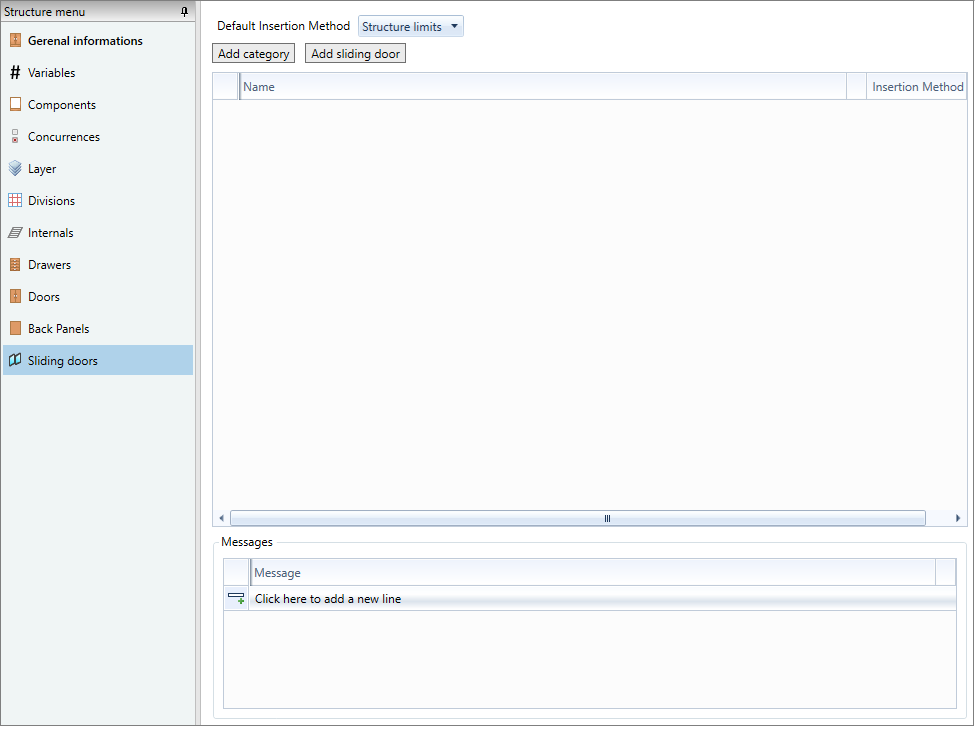
|
Add category |
Click to add a port group. Example: External and Internal Doors. |
|
Add Sliding doors |
Click to select a port already registered in the module register. To change the selected door, click on the Magnifier icon. |
| Delete sliding doors | To remove a sliding door, select and press the Delete key or right click on it and select the Remove option. |
| Messages | Allows you to define information related to the sliding doors that will be shown in the closet builder, on the Sliding Doors tab. |
IMPORTANT: The sliding doors added will be available in the Promob closet builder, on the Sliding Doors tab, in the upper right corner.
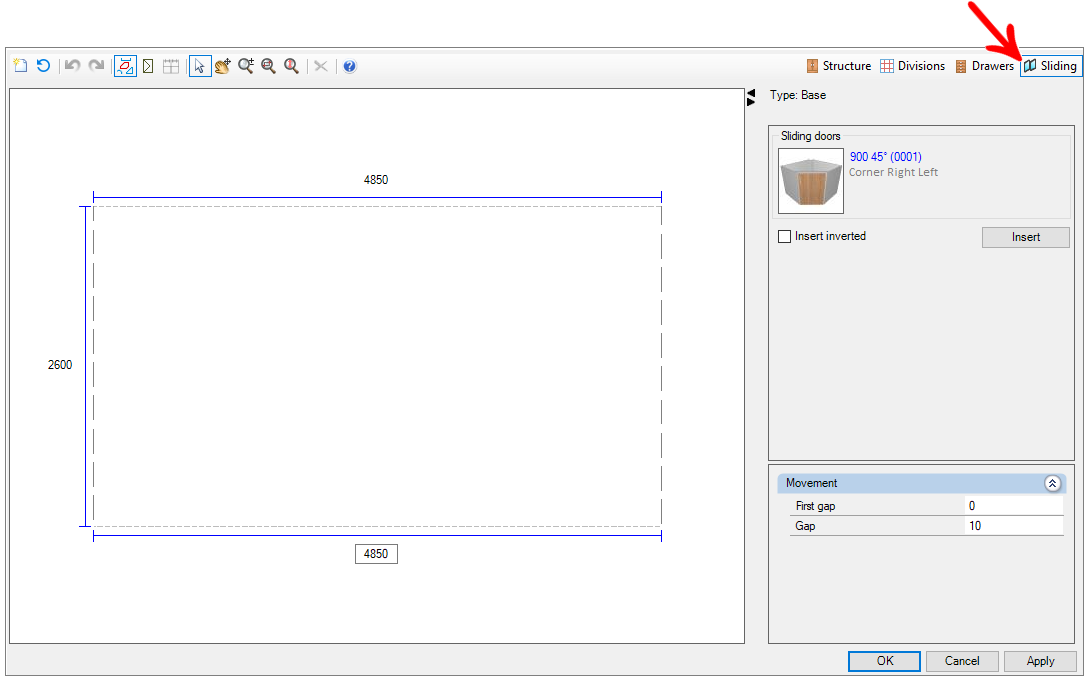
10. Finally, in Output Parameters, it is possible to configure the structure's output information.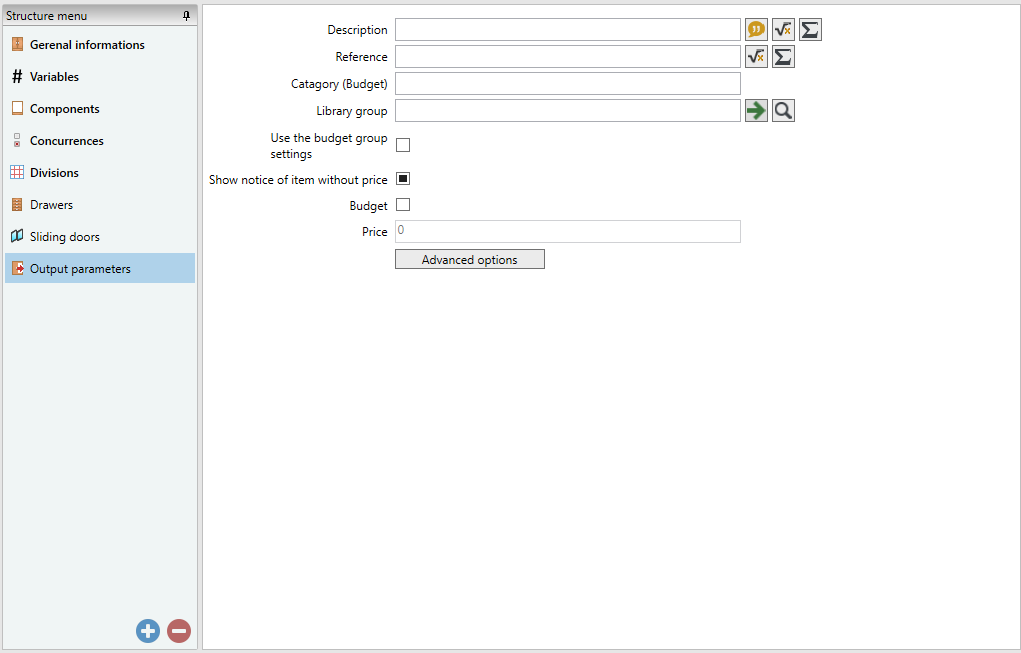
|
Description |
Configures the Item Description displayed in the status bar and in the budget. |
|
Reference |
It allows configuring the structure reference for display in the status and budget bar. |
|
Category (Budget) |
Allows you to configure which budget category the structure belongs to. |
|
Library group |
Selects the library group that the structure should be associated with in the budget. |
|
Use the budget group settings |
By checking the option, the same group budget settings will be applied to the structure. |
| Show notice of item without price | With the option checked, if the structure has no price set, an alert will be displayed when generating the budget. If unchecked, the budget will not display an alert for priceless items. |
|
Budget |
With the checkbox checked, the price field is enabled to configure the price that will be displayed in the budget. |
|
Price |
Allows you to configure the total price of the structure. |
|
Advanced options |
When you click on Advanced Options, a window appears with a few options: a) Budget dimensions: allows you to configure the fixed dimensions that should be displayed in the budget; b) References: it allows configuring the structure's references; c) Attributes: allows you to apply attributes to the structure. |
11. After completing the structure settings, click the Refresh icon to apply the changes.
Register the components of the structure
The components of a structure consist of the initial basic components of a given structure. Example: For a closet without baseboards, the components of the structure consist of two sides, a lower base and an upper base.
No exemplo, iremos cadastrar uma base inferior de uma caixa com as laterais externas.
IMPORTANT: The Closets tool is available from version 5.2.5.0 (2014) of the Catalog.
To register the components of a structure:
1. Access the Registry - Closets - Structures menu.
2. Select the structure you want to edit and click Edit Structure or create a new structure;
3. Access the Components tab.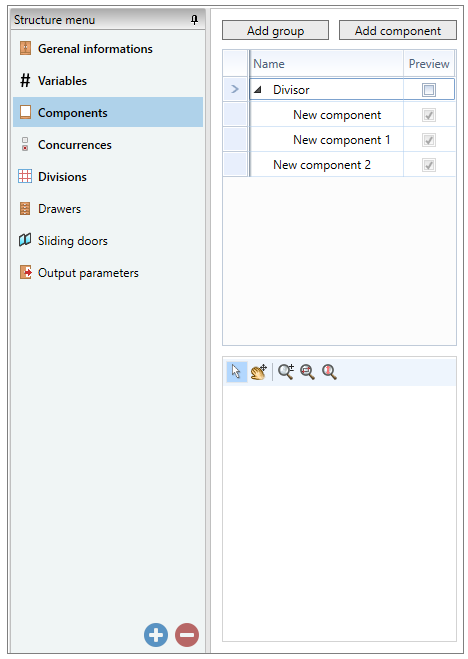
4. To add a component click on Add Component.
5. A new component will be added. Rename the ID and Name, according to the item being registered.
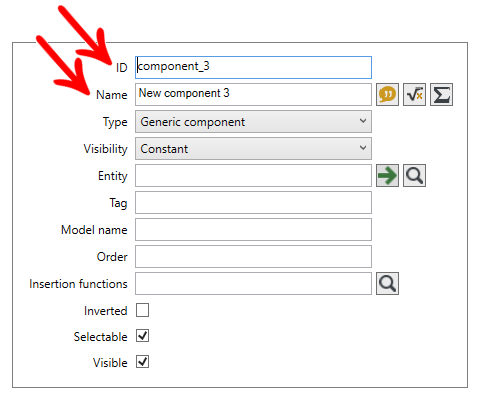
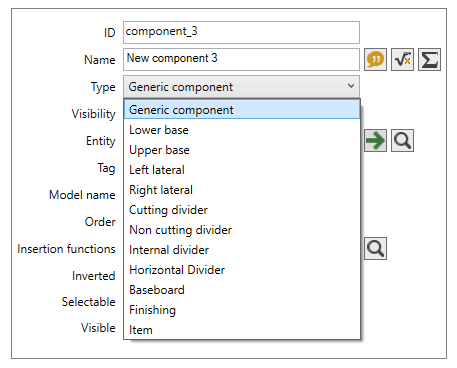
6. Change the Type field and choose the corresponding option.
7. In Entity, click the Magnifier icon to find the library entity that will be associated with the component. After choosing the entity, click Select.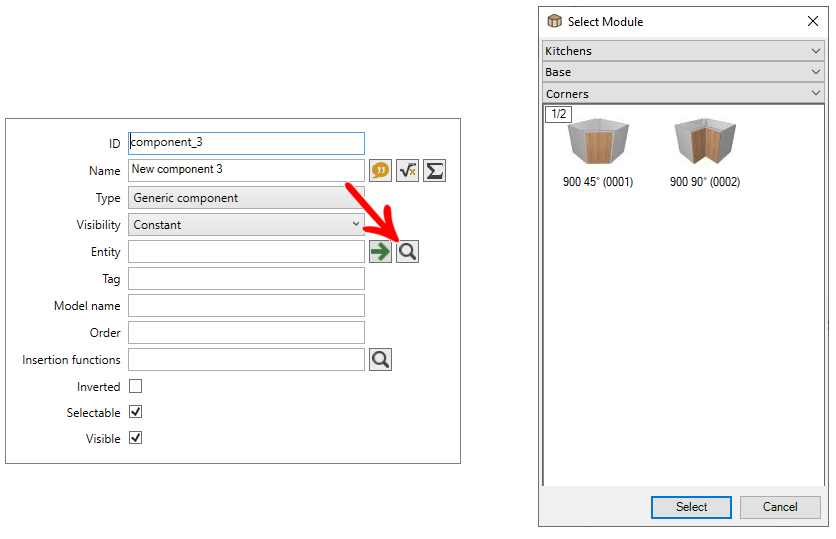
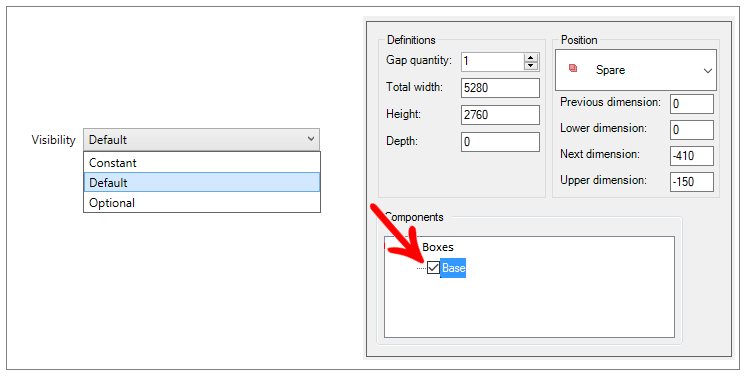
8. In Visibility choose between:
- Constant - always visible in the initial structure and does not allow deletion.
- Default - always visible in the initial structure and allows to delete.
- Optional - it is not visible in the initial structure but allows to mark.
IMPORTANT: When visibility is Default or Optional, the option of visibility of the part or not will be available in Promob's closet builder:
9. If the component is inverted, check the Inverted checkbox.
10. In Dimensions and Positioning, fill in the information for each structure. If they are variable values, use the variables.
11. In Visibility Conditions, register the component's visibility conditions, if any. To do this, click on Register Conditions.

12. If the component is composed of other components, you can edit its composition in Edit Components. Example: A bifold door, consisting of two doors.
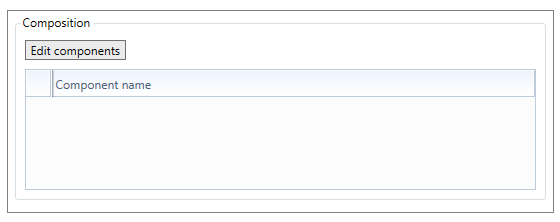
13. Finally, in Advanced Options, you can configure: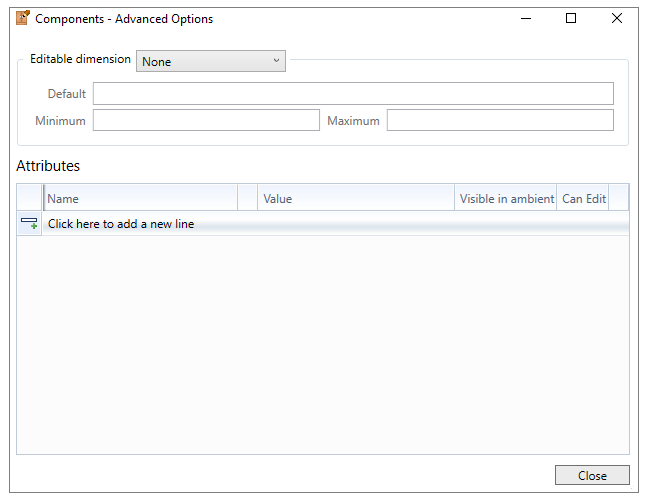
Editable dimension: select Width, Height or Depth to define whether any component dimensions will be editable by the Promob Closet Builder. When selecting any of the options, it is necessary to fill in the Default editable dimension field;
IMPORTANT: The Editable Dimension option only applies in the Constructor when the Visibility of the component is Default or Optional.
Default editable dimension: When selecting one of the options in Editable dimension, fill in the default value for the editable dimension. If this field remains empty, the default value will be 0.
Below, an example of a component with an editable width with a default value of 370mm.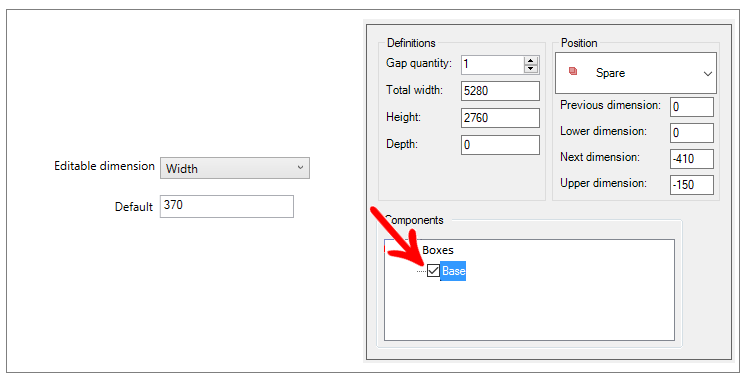
Attributes: apply the attributes to the component as desired. Learn more about attributes.
14. After finishing the settings, click on the Refresh icon to apply the changes.
Types of structure components
In the registration of structures, when performing the registration of Components, it is necessary to configure the Type of the Component being created.
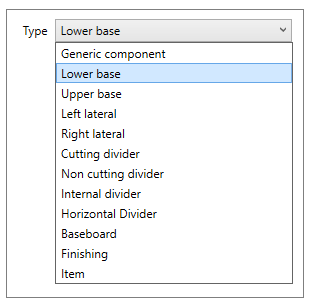
Below are guidelines for each type of component:
|
Generic component |
This type of component does not discount its thickness from the span of the structure, as with the sides and bases. Components of this type do not have any specific behavior, so it is recommended that it be used only when it does not fit any of the other components. |
|
Lower and Upper Base |
It can be used to register the lower and upper base components of a structure. These types of components discount their thickness from the span of the structure. |
|
Left and Right lateral |
It can be used to register the left and right side components of a structure. These types of components discount their thickness from the span of the structure. |
|
Cutting divider |
This partition is not displayed in the component preview, regardless of its visibility, as it is only inserted in the creation of new gaps, to separate the gaps. This type of cutting partition cuts the upper and lower bases and the skirting of the structure, regardless of its size. |
|
Non cutting divider |
This partition is not displayed in the component preview, regardless of its visibility, as it is only inserted in the creation of new gaps, to separate the gaps. This type of non-cutting partition does not cut the upper and lower bases of the structure. |
|
Internal divider |
This partition is shown in the component preview and behaves like a normal partition, but it is not only inserted when creating new gaps, but when it is inserted, it creates new gaps at the time of insertion. |
|
Horizontal divider |
This partition is not displayed in the component preview, regardless of its visibility, as it is only inserted in the creation of new gaps, to separate the gaps. This type of partition does not cut the bottom. |
|
Baseboard |
It can be used for the registration of baseboard components. This type of component does not have its dimensions discounted from the gaps. |
|
Finishing |
It can be used to register components of views, closings, etc. This type of component allows its dimensions to exceed the gap size (example: views exceed the gap size as they need to cover all existing gaps). In addition, this type does not have its dimensions discounted from the gaps. |
|
Item |
Used to create items that are not part of the composition, such as an item that needs to be included in the budget but should not appear in the assembly, an assembly cost is a good example. |
Register conditions
Conditions can be used when it is necessary to condition the visibility of a component, item, division or alternative.
To register conditions:
1. Access the Registry - Closets menu.
2. Select the option you want: Structures, Items or Divisions.
3. Select the item for which you want to register visibility conditions.
4. On the respective tab, click Register Conditions.
5. The Conditions window will appear.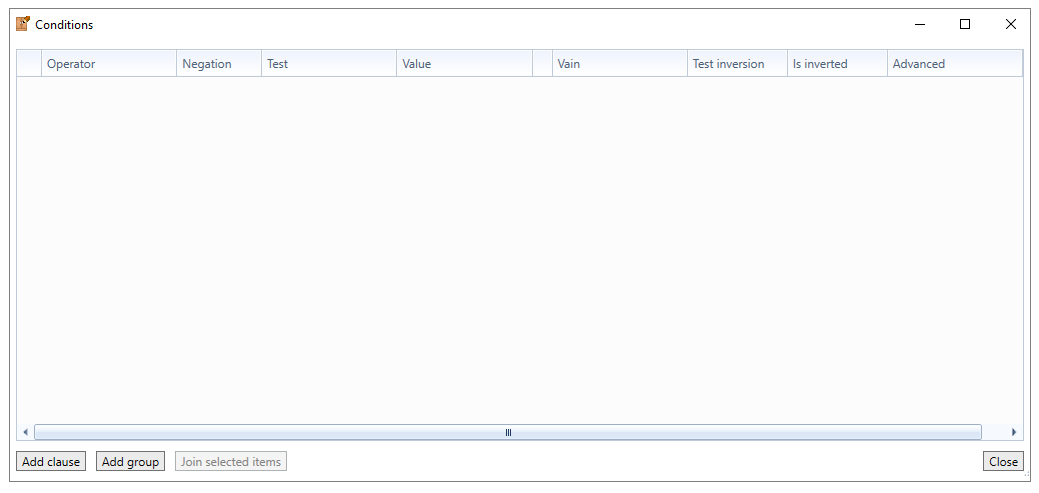
6. Click Add Condition to add a condition, or Add Group to create a condition group
Add Group
The group serves to give precedence to the conditions that are within a grouping. Having more than one group, the result of the conditions of the first group will be added to the result of the conditions of the second group, with its respective operator (E, Or, Or Exclusive), and so on.
When you click Add group, two lines will be added. The first line is the grouping. When the group is the first in the list, it does not contain an operator since there is no predecessor line to apply the operation;
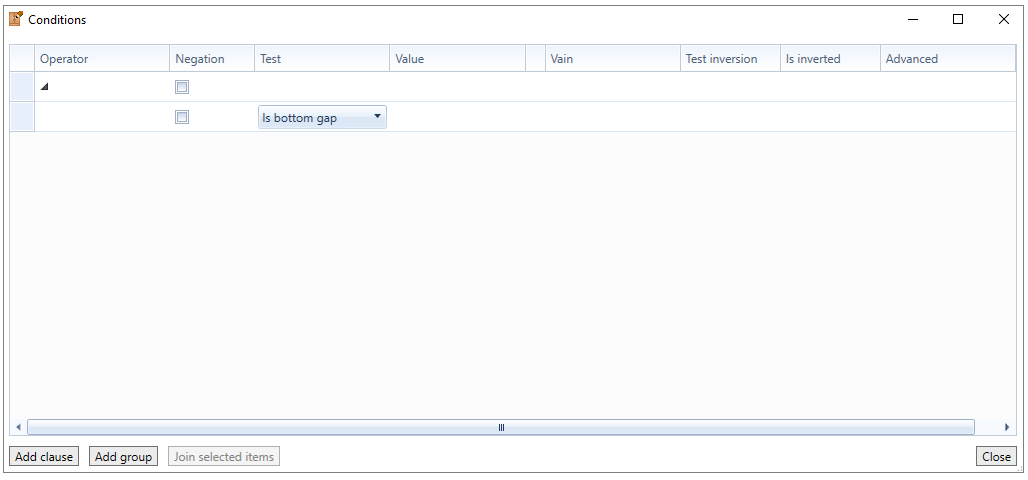
On the second line, configure the condition.
Then, if you want to add more conditions to the group, click Add Condition.
If you want to transfer the condition to another group, you must move it by drag.
Add condition:
Configure the condition:
In the Operator column, choose the operation that should be applied in relation to the row above. If the condition added is the first on the list, there will be no option for operator registration.
- Operator "And": adds the condition in question to the previous condition.
- Operator "Or": creates an alternating relationship with the previous condition.
- Operator "Or Exclusive": defines that one, and only one, of the conditions involved in this operator will make the condition valid.
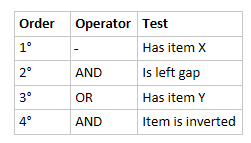
IMPORTANT: The “And” condition takes precedence over the “Or” condition. In this way, regardless of the order of the registered conditions, the conditions with operator "And" are processed before the conditions with operator "Or". See examples:
Example 1: In this example, the sum of conditions And to condition 2 (2 + 3 + 4) will be calculated, and from this result, condition 1 + 2 (1 OR 2 + 3 + 4) will be calculated.
Example 2: In this example, the sum of conditions 1 and 2 will be calculated, then 3 and 4, then only the result of 1 + 2 OR 3 + 4.
Next, check the Negation checkbox if the condition must be a negation.
Example: If the item's visibility condition is "it must not be in the left span to be visible", it is necessary to check the Negation checkbox and in the Test field, select the option "It is left span".
In Test, choose from the options:
IMPORTANT: Some options may vary according to the editor from which the condition editor (Structures, Items or Divisions) is being accessed.
- Is left gap: Tests whether the item on which the condition is being applied is in the left gap.
- Is right gap: Tests whether the item on which the condition is being applied is in the right gap.
- Is bottom gap: Tests whether the item on which the condition is being applied is in the lower gap.
- Is upper gap: Tests whether the item on which the condition is being applied is in the upper gap.
- Is inverted item: Tests whether the item on which the condition is being applied is inverted.
- Has item: Tests whether the item on which the condition is being applied has the item ID that should be added in the Value field, in addition to other settings.
If this is the selected option, then it is necessary to choose the item for the condition using the Magnifier button, then configure in Vain which of the gaps should be validated. Finally, you must configure the options:
- Test inversion: Checked, test the “Is inverted” checkbox. Unchecked, the result of the “Is inverted” checkbox is irrelevant.
- Is inverted: Tests whether the item selected in the magnifying glass is inverted in the Promob constructor, in its insertion in the structure.
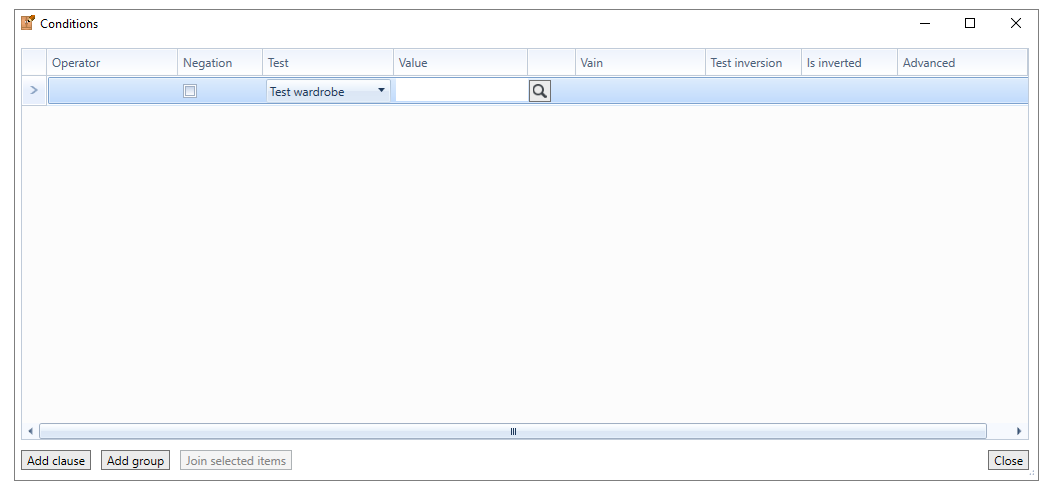
- Test expression: Tests the expression filled in the Value field.
- Test wardrobe: It allows a structure to be selected from among those registered from which the condition will be defined, together with the information filled in the Value field.
If this is the selected option, then it is necessary to choose the structure for the test using the Magnifier button.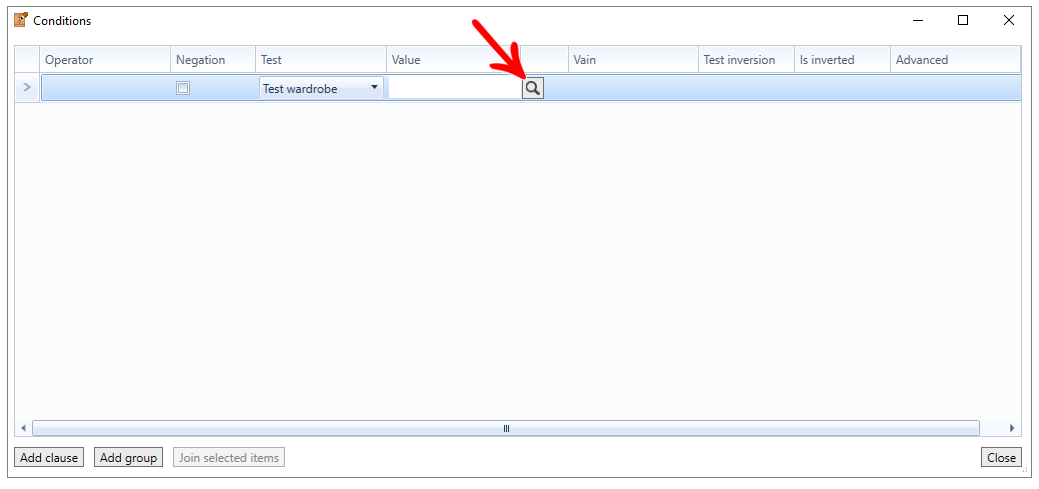
- Is external left gap: Tests whether the gap in which the item is being inserted is the outer (more outward) gap on the left.
- Is external right gap: Tests whether the gap in which the item is being inserted is the outer (more outward) gap on the right.
- Has type item: Allows you to choose between the Internal, Front, Bottom or Drawer types, and tests whether the item is being inserted into the gap, it has an item of the chosen type.
- Has neighbor item: Test only available for conditions of the Division editor, which tests whether the item for which the condition is being added will have a neighbor (in vain chosen later) of specific ID (item selected by the Magnifying Glass icon).
- has a neighboring type item: Test only available for conditions of the Division editor, which tests whether the item to which the condition is being added will have a neighbor (in vain chosen later) of a certain type (internal, front, bottom or drawer).
- Is module from library: Tests whether the module being edited by the builder is a library module, inserted into the design by the modulation bar.
7. After configuring the conditions and / or condition groups, click Close and then the Update button to apply the changes.