The divisions created by the Closet register of the Promob Catalog are equivalent to the divisions that are available for insertion in the Closet builder of Promob. Vertical divisions (dividers) and horizontal divisions (shelves) can be created.

Below are the procedures related to the registration of divisions:
- Create Division Category
- Create a Division
- Set up a Division
- Configure the division alternatives
- Configure item registration by tags
- Register Conditions
Create Division Category
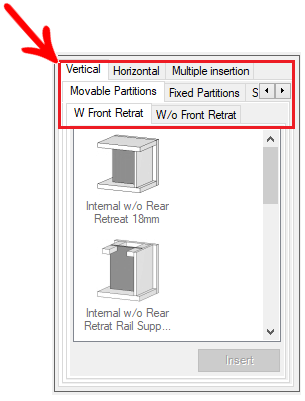
The Division Categories are used to separate the types of divisions into fixed and mobile, for example, in Promob's Closet Builder, by clicking on the Divisions button, as shown in the image below:
To create a category of divisions by the closet register:
1. Access the Registry - Closets - Divisions menu.
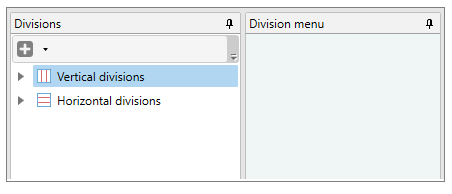
2. Click on the division group option in which you want to create the category: Vertical divisions or Horizontal divisions.
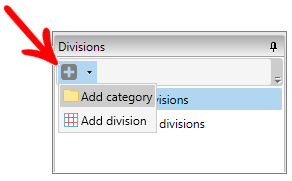
3. Click Add Category.
4. Rename the created category and press Ok.

5. After creating the new category, you can create new divisions.
Create a Division
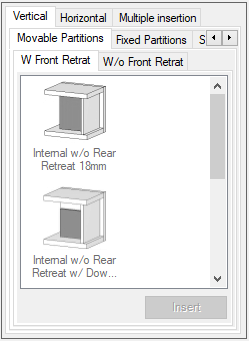
Divisions are created to be made available by clicking on the Divisions button in Promob's Closet Builder and after selecting the division category:
To create divisions by registering closets:
1. Access the Registry - Closets - Divisions menu.
2. Select the category where you want to create the division.
3. Click Add Division.
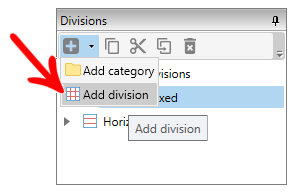
4. In the window that appears, fill in the Name and File Name fields.
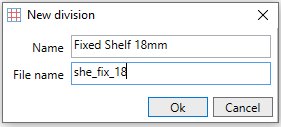
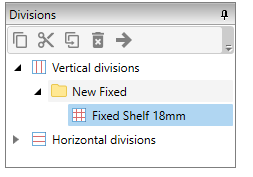
5. Click Ok. The division will be created within the previously selected category.
Set up a Division
To set up a division by the Catalog Closet Builder:
1. Access the Registry - Closets - Divisions menu.
2. Select the division you want to edit.

3. In General Informations.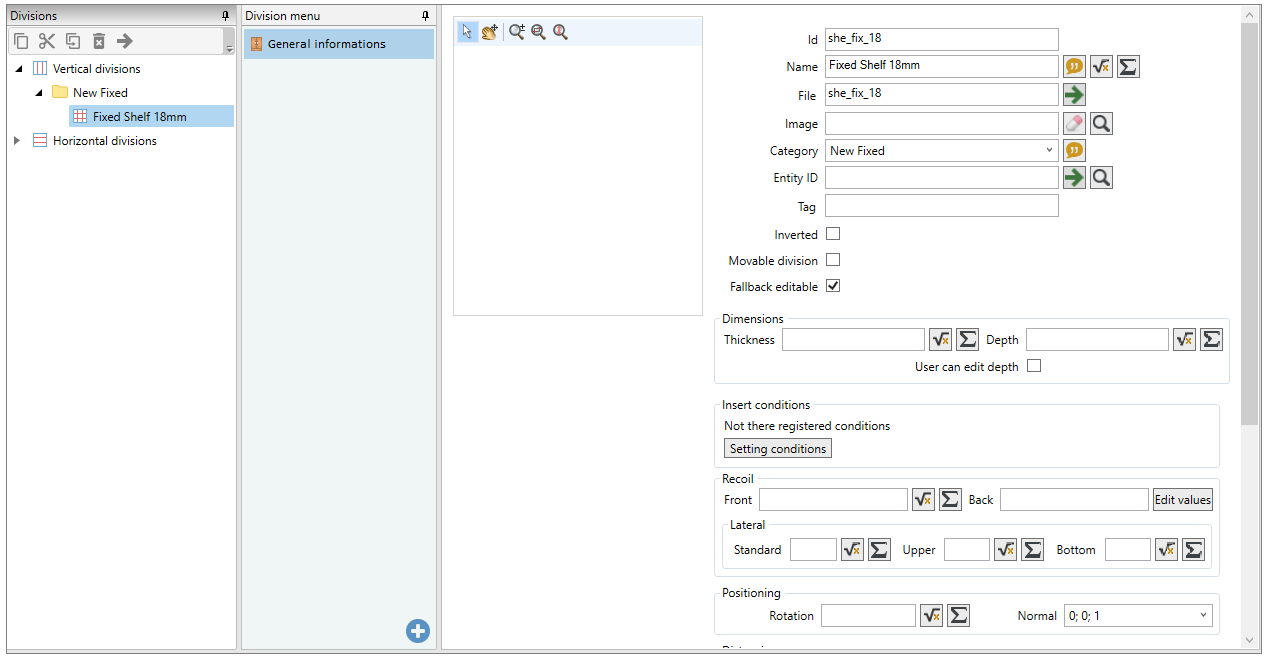

|
ID |
ID that should be created for the item. |
|
Name |
The field is already filled with the name filled in the division's register. |
|
File |
Name of the folder where the files will be saved in Promob. |
| Image | Allows you to choose the preview image that will be displayed in the closet builder. |
|
Category |
Allows you to change the category to which the division belongs. |
|
Entity ID |
Click on the Magnifier icon to find the entity that will correspond to the division in the module register. |
|
Tag |
When inserting a tag in the field, in the Promob's Closet Builder, several items will be created with the settings made by the Item Register with the module IDs that contain this same tag registered in the Module Register, on the Tags tab. |
|
Inverted |
By checking this checkbox, the division will be inserted inverted in the structure. |
|
Movable division |
Check or uncheck this option according to the desired configuration. If the division is a fixed shelf, for example, it should remain unchecked. If it is mobile, the checkbox must be checked. |
|
Fallback editable |
Defines whether the division indentation can be editable in the design |
| Dimensions | It allows filling in the thickness and depth of the division if it is different from the registration of the associated module in the Entity ID field. |
| Insert conditions | It allows to create conditions for the insertion of partitions. Example: Allow the partition to be inserted only when a certain measure is reached. |
|
Recoil |
Configure the division recoil on the front, rear and side of the structure. In the Lateral recoil it is possible to apply a value to both sides, in the Lateral field, or you can apply specific values to each side, in the Left and Right fields. In the Rear recoil, you can add Conditions. |
|
Positioning |
Configure the rotation and the normal of the division in the structure. |
|
Distancing |
Set up the division's distancing in the upper and lower gap.
|
|
Messages |
Allows you to define information related to the division that will be shown in the closet builder, on the Divisions tab when the division is selected. |
|
Advanced options |
Allows you to configure: - Visible: the checkbox is checked by default. When deselecting, the divider will not be displayed as an option among the divisions, but will be visible in the structure; - Use division as separator: checkbox unchecked by default. When you mark it, the partition will be treated as a gap separator. - Attributes: It allows to configure the attributes of the division. |
4. In Alternatives, it is possible to configure the alternatives of the divisions.
5. After making the desired settings, click the Refresh icon to apply the changes.
Configure the Division Alternatives
Alternatives can be created when, under certain conditions, it is desired to provide a particular alternative that is more different from the standard division options.
Example: If the selected gap is the upper gap, then in Shelves another shelf option will be available.
To configure alternatives in the item register of the closet editor:
1. Access the Registry - Closets - Divisions menu.
2. Select the division to which you want to add the alternative.

3. Go to the Alternatives tab and click Add Alternative.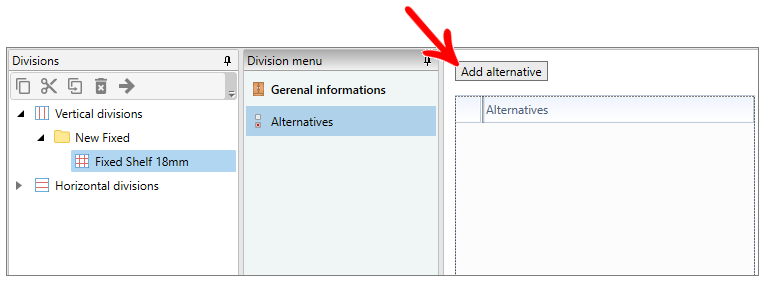
4. Rename the alternative ID.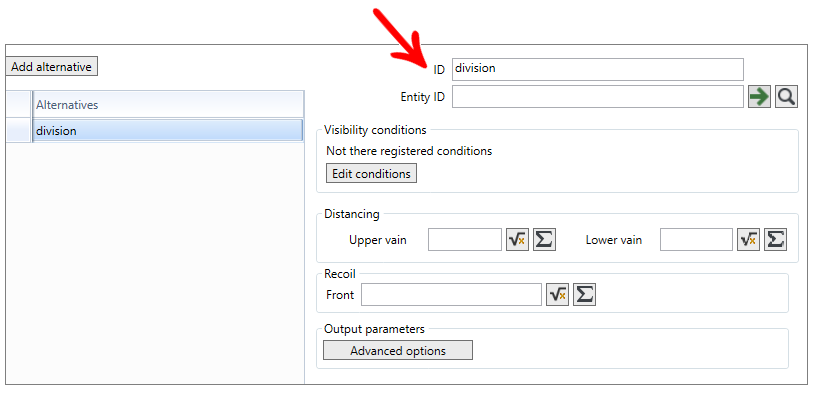
5. Then, configure the alternative. Click on the Magnifier icon to find the item in the library that will be an alternative to the division.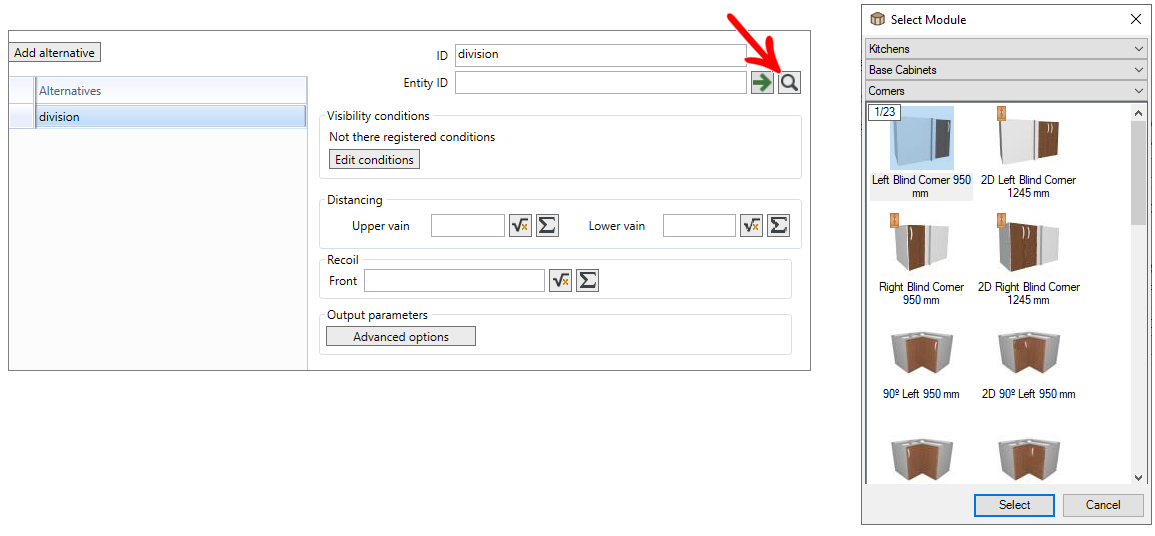
6. Click Select after finding the alternative item.
7. Then, click Edit Conditions to add the condition that the alternative must comply with in order to be displayed.

8. Edit the conditions as desired and click Close.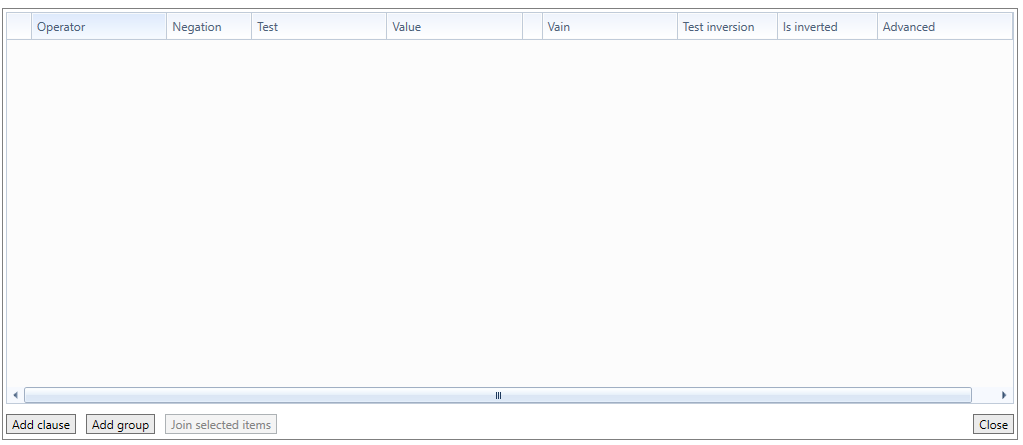
9. In Distancing, configure the distance between the entity of the upper gap and the lower gap.
10. After completing the configuration of the alternatives, click on the Refresh icon to apply the changes.
Register Conditions
Conditions can be used when it is necessary to condition the visibility of a component, item, division or alternative.
To register conditions:
1. Access the Registry - Closets menu.
2. Select the option you want: Structures, Items or Divisions.
3. Select the item for which you want to register visibility conditions.
4. On the respective tab, click Edit Conditions.
5. The Conditions window will appear.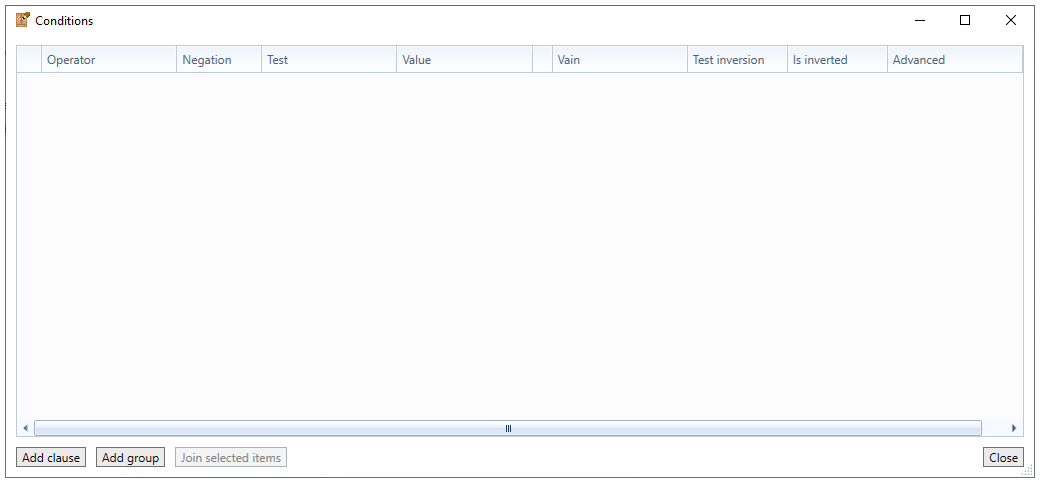
6. Click Add Condition to add a condition, or Add Group to create a condition group.
Add Group:
The group serves to give precedence to the conditions that are within a grouping. Having more than one group, the result of the conditions of the first group will be added to the result of the conditions of the second group, with its respective operator (E, Or, Or Exclusive), and so on.
When you click Add group, two lines will be added. The first line is the grouping. When the group is first in the list, it does not contain an operator since there is no predecessor line to apply the operation.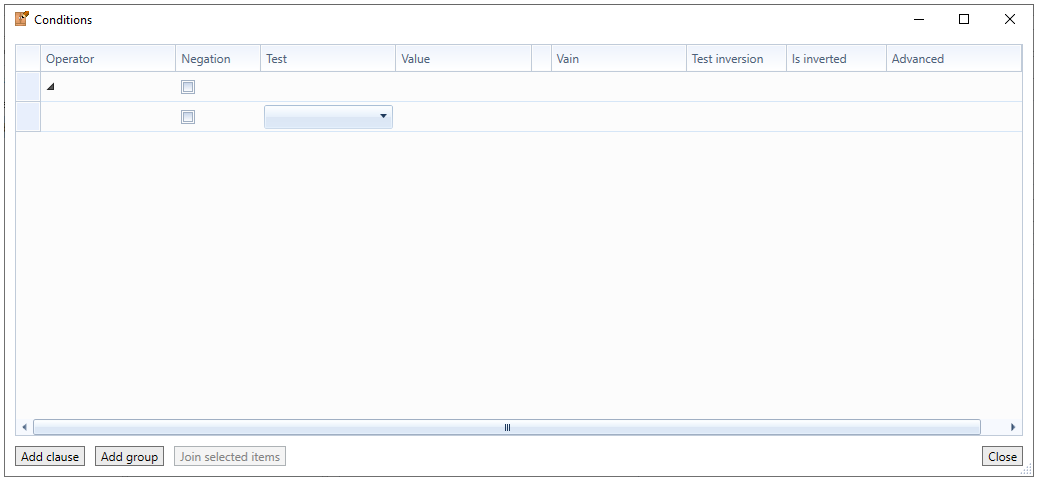
On the second line, configure the condition.
Then, if you want to add more conditions to the group, click Add Condition.
If you want to transfer the condition to another group, you must move it by drag.
Add condition:
Configure the condition:
In the Operator column, choose the operation that should be applied in relation to the row above. If the condition added is the first on the list, there will be no option for operator registration:
- Operator "And": adds the condition in question to the previous condition.
- Operator "Or": creates an alternating relationship with the previous condition.
- Operator "Or Exclusive": defines that one, and only one, of the conditions involved in this operator will make the condition valid.
IMPORTANT: The “And” condition takes precedence over the “Or” condition. In this way, regardless of the order of the registered conditions, the conditions with operator "And" are processed before the conditions with operator "Or". See examples:
Example 1: In this example, the sum of conditions And to condition 2 (2 + 3 + 4) will be calculated, and from this result, condition 1 + 2 (1 OR 2 + 3 + 4) will be calculated.
Example 2: In this example, the sum of conditions 1 and 2 will be calculated, then 3 and 4, then only the result of 1 + 2 OR 3 + 4.

Next, check the Negation checkbox if the condition must be a negation.
Example: If the item's visibility condition is "it must not be in the left gap to be visible", it is necessary to check the Negation checkbox and in the Test field, select the option "It is left gap".
In Test, choose from the options:
IMPORTANT: Some options may vary according to the editor from which the condition editor (Structures, Items or Divisions) is being accessed.
- Is left vain: Tests whether the item on which the condition is being applied is in the left vain.
- Is right vain: Tests whether the item on which the condition is being applied is in the right vain.
- Is bottom vain:: Tests whether the item on which the condition is being applied is in the bottom vain.
- Is top vain:: Tests whether the item on which the condition is being applied is in the top vain.
- Item is inverted: Tests whether the item on which the condition is being applied is inverted.
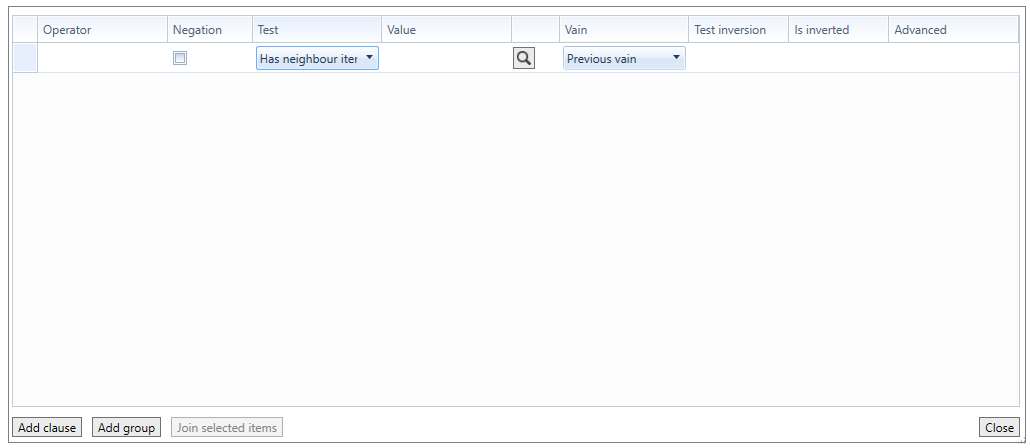
- Has neighbour item: Tests whether the item on which the condition is being applied has the item ID that should be added in the Value field, in addition to other settings.
If this is the selected option, then it is necessary to choose the item for the condition using the Magnifier button, then configure in Vain which of the gaps should be validated. Finally, you must configure the options:
- Test inversion: Checked, test the “Is inverted” checkbox. Unchecked, the result of the “Is inverted” checkbox is irrelevant.
- Is inverted: Tests whether the item selected in the magnifying glass is inverted in the Promob constructor, in its insertion in the structure.
- Test expression: Tests the expression filled in the Value field.
- Test cabinet: Allows a structure to be selected from those registered from which the condition will be defined, together with the information filled in the Value field.
If this is the selected option, then it is necessary to choose the structure for the test using the Magnifier button.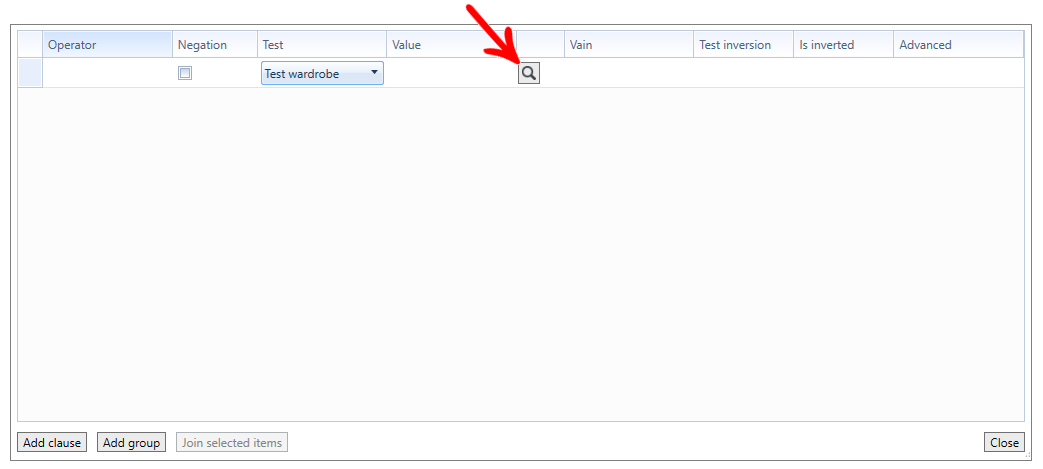
- It is left external vain: Tests if the gap in which the item is being inserted is the external gap (more outward) on the left.
- It is the right external vain: It tests whether the gap in which the item is being inserted is the external gap (more outward) on the right.
- Has item type: Allows you to choose between the Internal, Front, Bottom or Drawer types, and tests whether in the gap in which the item is being inserted, has an item of the chosen type.
- It has a neighboring item: Test only available for conditions of the Division editor, which tests whether the item to which the condition is being added will have a neighbor (in vain chosen later) with a specific ID (item selected by the Magnifying Glass icon).
- It has a neighboring item of type: Test only available for conditions of the Division editor, which tests if the item to which the condition is being added will have a neighbor (in vain chosen later) of a certain type (internal, front, bottom or drawer) .
- Is module from the library: Tests if the module being edited by the builder is a module from the library, inserted into the design by the modulation bar.
7. After configuring the conditions and / or condition groups, click Close and then the Refresh button to apply the changes.