The Guided Design tool is a solution to create designs in a quick and practical way!
Through this solution, it is possible to have the first contact with the design and idealize the main characteristics of the layout, in order to guarantee the functionality of the designed space, such as the layout of the walls, the position of the openings, the area where the furniture will be inserted and the position of each piece of furniture.
In an interactive way, it is easier to adjust these main ideas, as the tool allows you to go back through the steps whenever you want to redo them.
After finishing the design creation through the Guided Design, you can continue to make the necessary adjustments in the design, returning to the main space creation screen (Planner), through the Return button.
Check out how to use the tool according to each step:
Walls
The first step is to define the wall design, that is, the floor layout.
Walls Menu
1. Keep the Wall menu selected; 
2. Select one of the wall styles shown at the bottom.
- The selected wall will be delimited by an orange marking, symbolizing that your
the current space is according to the selected wall.

Measures Menu
1. Keep the Measures menu selected and set different measurements to the selected wall style. 
2. Enter the values in the lower fields for the respective wall. When selecting the text field, the wall will be highlighted.
IMPORTANT:
- Values must not exceed the minimum and maximum limits of each of the walls
- An alert will be displayed when the threshold is exceeded.

Openings
1. In the Openings menu, define the number of openings in the space; 
2. Inform in the fields Doors and Windows the value of the amount of each opening that will be inserted.
- It is possible to insert from 0 to 10 doors or windows. It is not possible to enter negative values or greater than 10.
3. After informing the number of openings, it will enable the field to define the width and height of the opening.

Appliances
1. In the Appliances menu, define the furniture models that will be inserted in the space. 
2. Click on the furniture;
- It is possible to change the predefined furniture by other furniture, as long as it is in the same category.
- In the image below, the insertion of a single-door refrigerator has been changed by a two-door refrigerator:

Layout
After the walls are selected with their respective measurements, the number of openings defined and the furniture chosen, it is necessary to delimit an area where the furniture will be inserted, so as not to harm the other modules in the space. For this:
1. On the Layout menu, choose one of the layout templates displayed at the bottom. 
2. If necessary, adjust the size of the area using the red arrows.

Position
1. Using the Position menu, define the position of the furniture within the space. 
2. Check the legend of the colors used for each piece of furniture;
3. Choose one of the displayed position templates;
4. Use the red arrows to reposition the furniture;
- It is not possible to overlap one piece of furniture with another.

Finalization
1. After completing the previous steps, click Apply. 
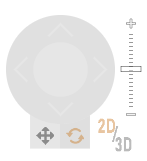
To view the designed space in 3D mode, click the 2D/3D button (bottom right corner) 
Or click the Return button, to return to the Planner and make other changes if necessary. 
To back again to the Guided Design screen, click on the Guided Design option. 
