The rulers displayed on the design walls serve as guides for the insertion, positioning, and movement of the modules on the walls. Through the creation of “rules”, it will be possible to fix items at specific and precise points on a given wall.
There are two ways to create rules, in the first one, the rule will be registered only for the design in question. The other option, allows the registration of rules for the system, thus, when starting a new design, the rules registered in the system will always be displayed.
Directly select your question below, according to each type of rule registration:
- Ruler registration by design
- Rule group registration by system
Activate the rules in a new design
Ruler registration by design
To register a ruler:
1. Select one of the design walls;
2. In the information screen, click Edit rules;
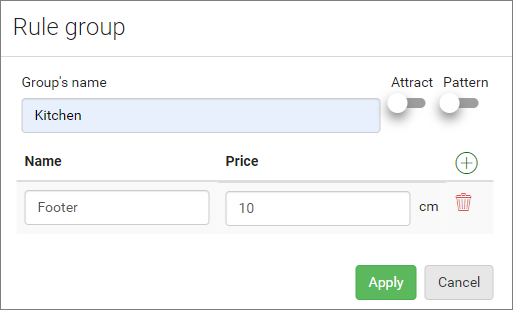
3. On the open screen, we have the following information:
4. Define the name of the rule group and enter it through the Group's name field; 
- Example: kitchen, bedroom, etc.
5. To always attract items when inserted into the wall, check the Attract option; 
- The items will be attracted by the lines of the rules and this will facilitate their positioning;
6. Set the name of the ruler in the Name field ; 
- Example: baseboard, bottom counter;
7. Enter the height of the ruler in relation to the floor, in the Price field; 
-The reported measure should be the unit of measurement used in the system (mm, cm, m, ft ou in);
8. To add a new ruler, click on Add; 
9. To delete the created rule, click Delete; 
10. After filling in the information and inserting all the desired rules, click on Apply. 
- The rules will be inserted into the space.
IMPORTANT:
- Remember that when you register on this screen, the rules will only be available for this design;
- If you want this group of rules to be available for all designs, you will need to register the group in the system.
- By selecting an item on this wall, it will be possible to view the registered rules (dotted lines).
- If the Attract option has been selected, when it comes close to the ruler, the item will be attracted to the same height as the ruler. Thus facilitating the positioning of the item;
- Clicking on the ruler line, the Ruler Editor screen will open. Here you can make the necessary edits.
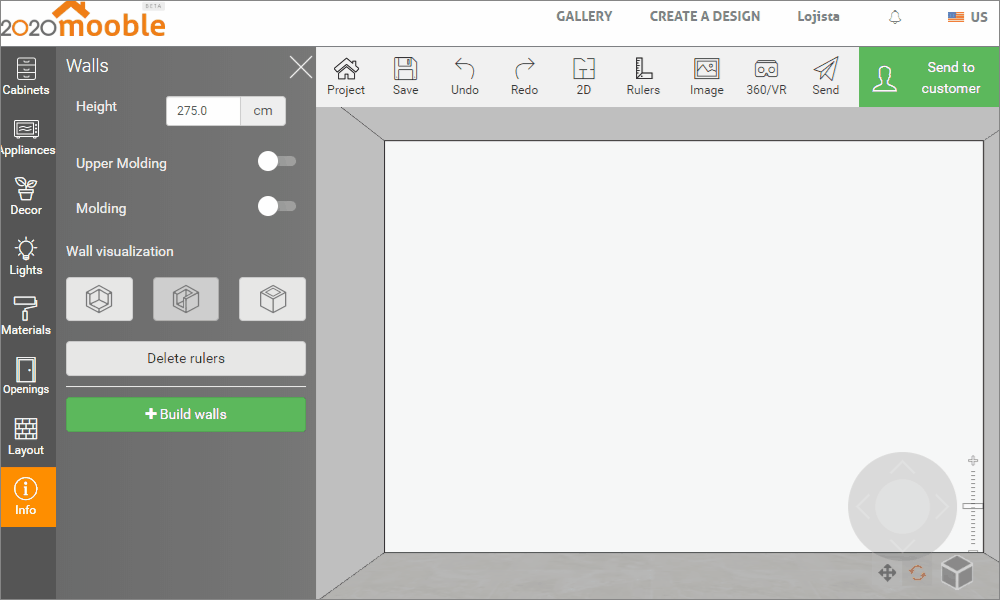
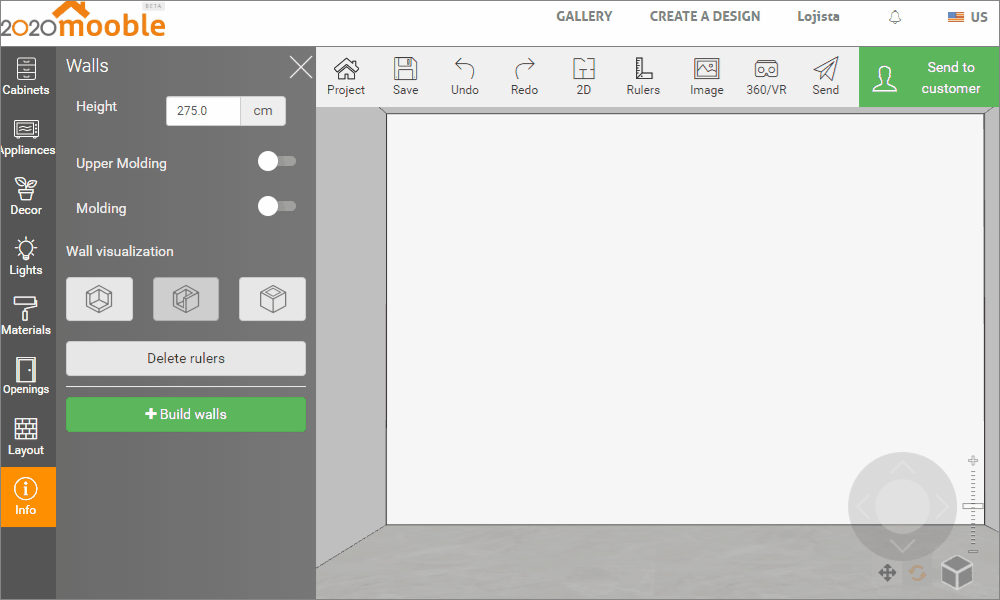
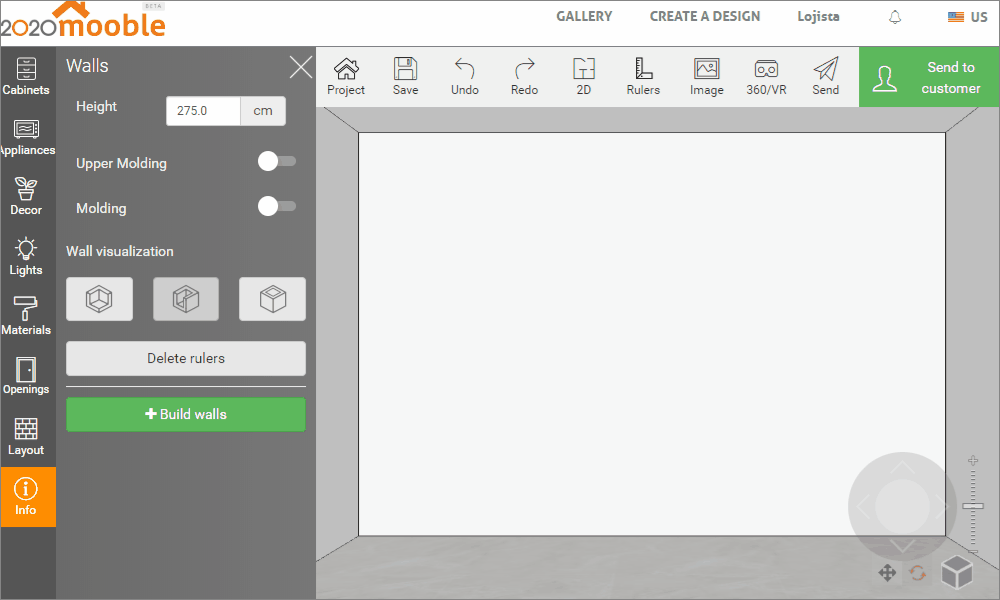
Remove rulers
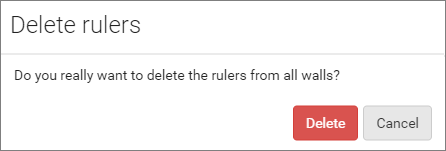
To remove rulers from a single wall:
1. With the wall selected, on the left side, click on Delete Rulers;
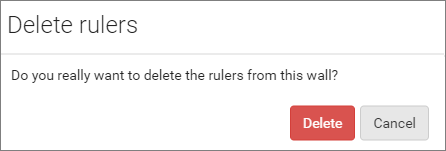
2. In the displayed screen, when you click Delete, the rules of the selected wall will be removed.
To remove strips from all walls:
1. Without selecting the walls, on the left side, click directly on Delete Rulers;
2. On the screen that appears, when you click Delete, all the rules for all the walls will be removed.
Rule group registration by system
To create a group of rulers that can be used in any design, follow the procedures below:
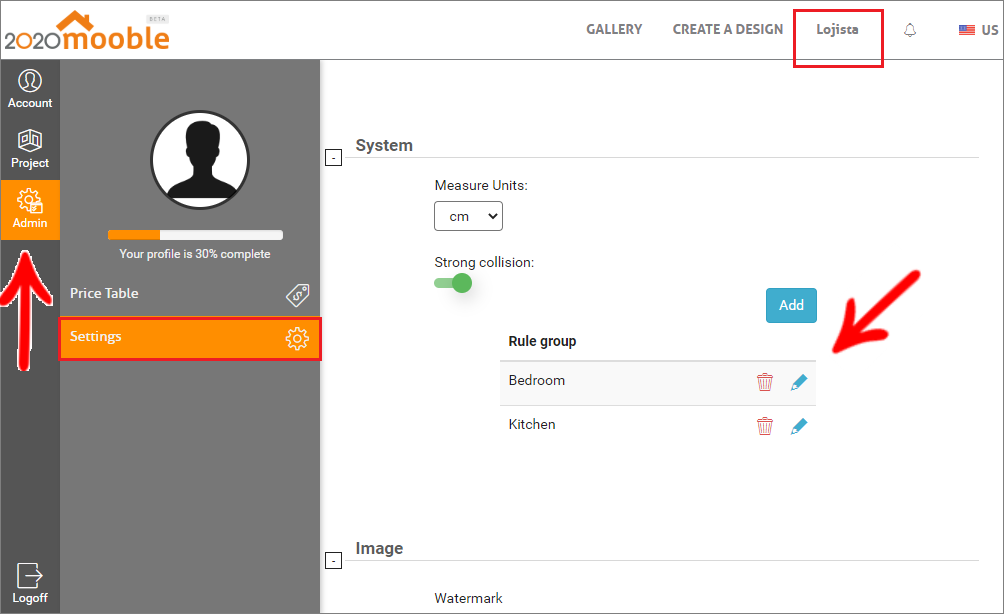
1. Click on the account;
- The settings screen will be displayed;
2. On the left side, click on the Admin menu;
3. On this screen, click on Settings;
4. In the Ruler group field, click Add;

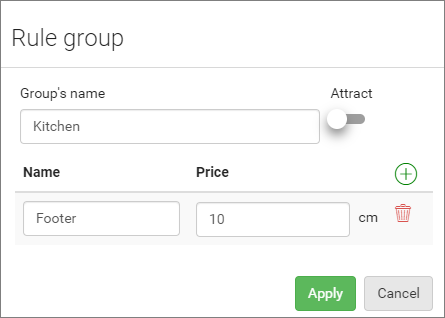
5. On the open screen, we have the following information:
6. Define the name of the rules group and enter it through the Group's name field ;
- Example: kitchen, bedroom, etc.
7. To always attract items when inserted into the wall, check the Attract option;
- The items will be attracted by the lines of the rules and this will facilitate their positioning;
8. To keep the group available as a default, check the Pattern option; 
- Every time a new design is started, the ruler information will already be inserted in the space;
- Remembering that it is only possible to select only one group of rules as a standard.
9. Set the name of the ruler in the Name field ;
- Example: baseboard, bottom counter;
10. Enter the height of the ruler in relation to the floor, in the Price field;
-The reported measure should be the unit of measurement used in the system (mm, cm, m, ft ou in);
11. To add a new ruler, click on Add;
12. To delete the created rule, click Delete;
13. After filling in the information and inserting all the desired rules, click on Apply.
14. Click on Save, so that the new group of rules will be available to the system. 
TIP: On this screen, you can create more than one type of ruler.
Activate the rules in a new design
To activate the rules in a new design:
1. In the 3D space, select the Rulers option; 
2. Choose the desired group of rules and click Change. 
- The rules will be inserted into the design.
Remove and edit Rules
1. Click on the account;
- The settings screen will be displayed;
2. On the left side, click on the Admin menu;
3. On this screen, click on Settings;
4. In the Rule group identify the group of rules you want to edit  or remove
5. Click Save;