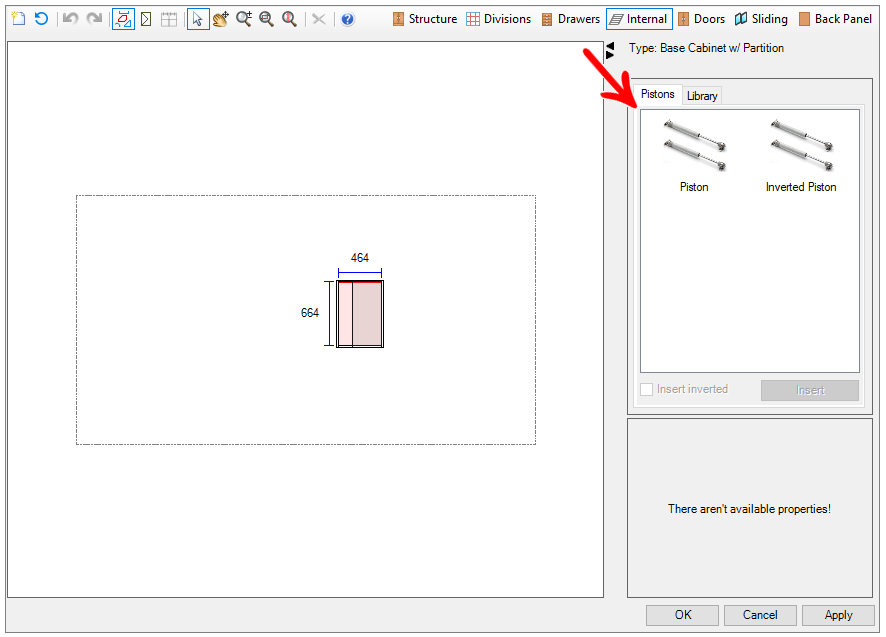
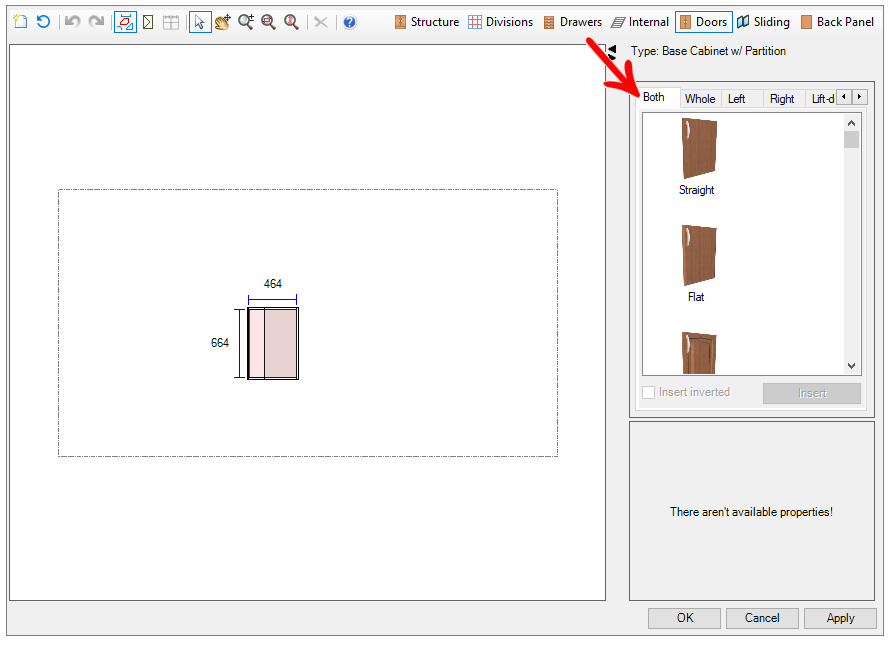
The items created by the Promob Catalog closet register can be doors, fronts, drawers, internals and backgrounds. When creating items, they will be visible in Promob's closet builder for the user in the upper right corner, in the Drawers, Internals, Doors and Backgrounds buttons, as shown in the image below.
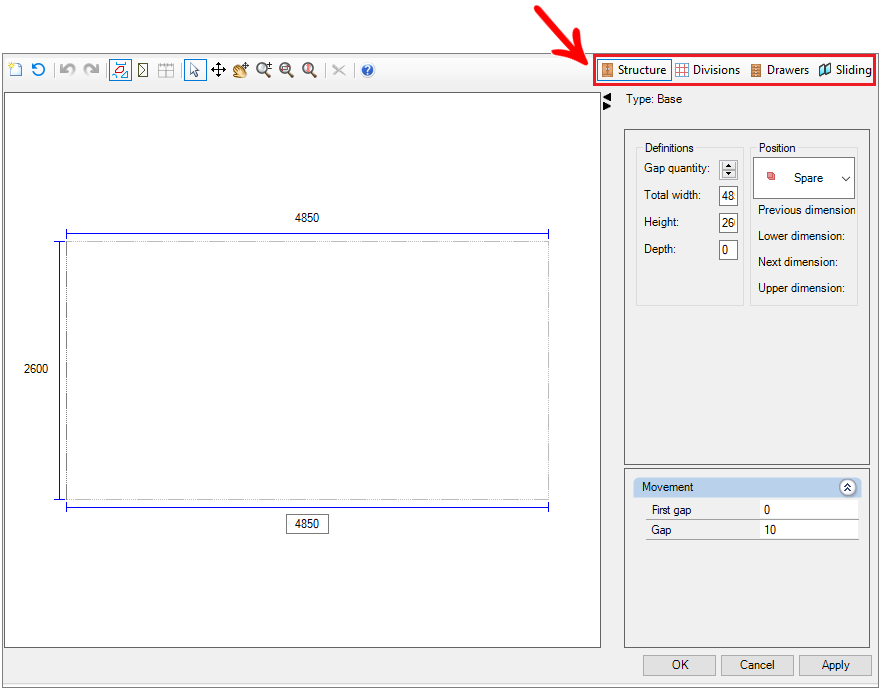
Below are procedures related to item registration:
- Create category of items
- Create an item
- Create a composite item
- Create an item of type Library Item
- Configure an item
- Configure item alternatives
- Set up drawers
- Configure item registration by tags
- Register conditions
- To match left and right door widths in closets with two or more openings
- To correct the zero offset of an item from the closet builder
- To make shelves and dividers not share the bottom
Create category of items
The Categories of items are used to separate the items created within the groups Internal, Doors, Drawers or Backgrounds, as shown in the image below:
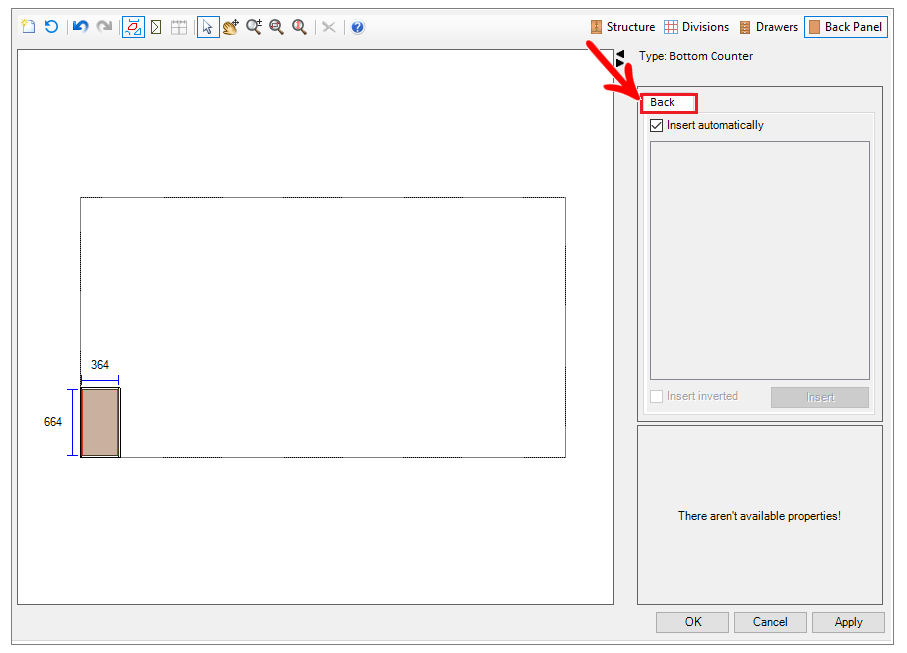
IMPORTANT: The Closets tool is available from version 5.2.5.0 (2014) of the Catalog. For more information, click here.
To create categories of items by the closet register:
1. Access the Registry - Closets - Items or Divisions menu.
2. Click on the group where you want to create the category.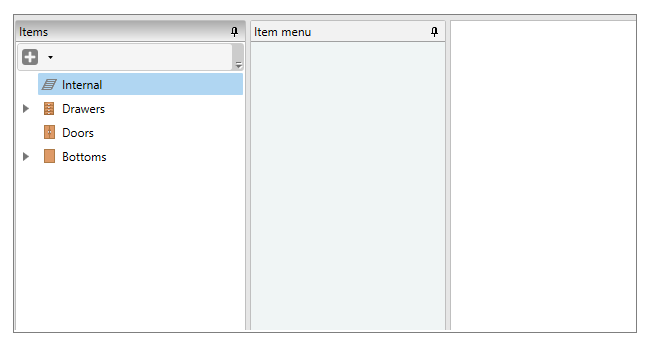
3. When selecting the group, click Add Category.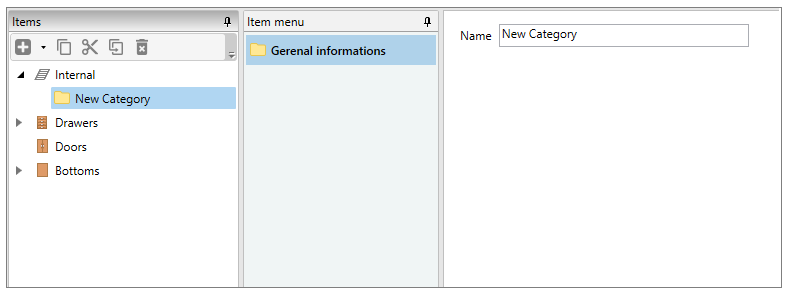
4. The category will be added with the name New Category. Click on the name to change.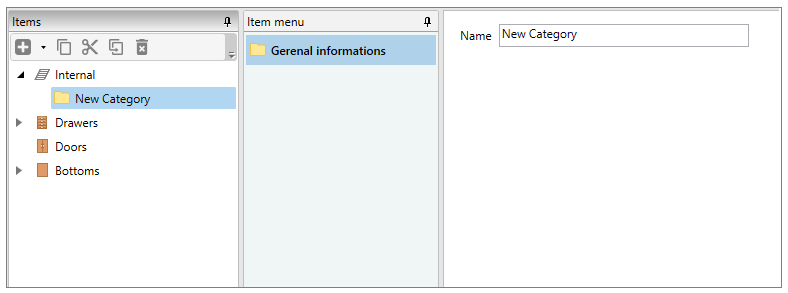
5. After creating the item category, you can create an item.
Create an item
Items are created to be made available for insertion into the structure, by the Promob Closet Builder:
IMPORTANT: The Closets tool is available from version 5.2.5.0 (2014) of the Catalog.
To create an item through the Catalog Closet register:
1. Access the Registry - Closets - Items menu.
2. In the window that appears, select the category to which you want to add a structure.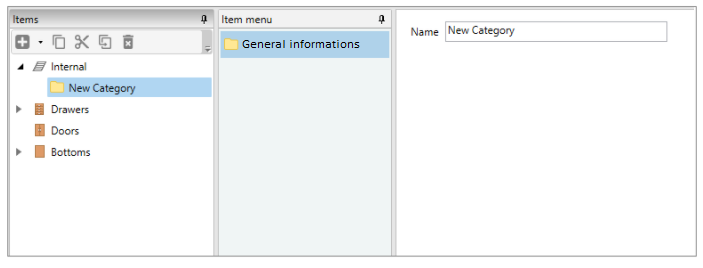
3. Click on Add Item.

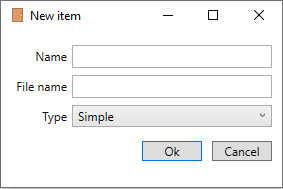
4. Fill in the Name and File Name fields, and select the Item Type.
|
Type |
Function |
|
Simple |
Creates a simple item, such as a wire, shoe rack, shoe rack, coat rack, etc. |
|
Composed |
Creates an item consisting of more than one item. Example: Corner door, consisting of two doors. Shoe rack consisting of two shoe racks. |
|
Library Item |
Creates a tab in the Promob cabinet builder that allows you to select an item straight from the library. |
5. After selecting the type, click Ok. If the selected type is Simple, the Item Registration will be opened.
Create a composite item
The creation of a composite item is useful when you want to make it possible for the structure to insert more than one item simultaneously. Example: insert right and left door simultaneously.
To create an item composed by the Catalog Closets register:
1. Access the Registry - Closets - Items menu.
2. In the displayed window, select the category to which you want to add a structure and click Add item.
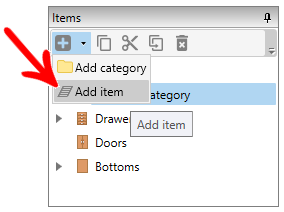
3. In the window that will appear, select the Composite Type.
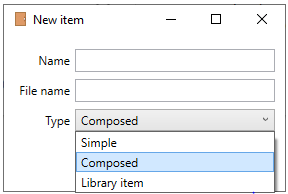
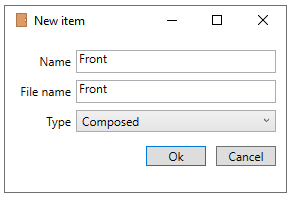
4. Fill in the Name, File Name and Type fields.
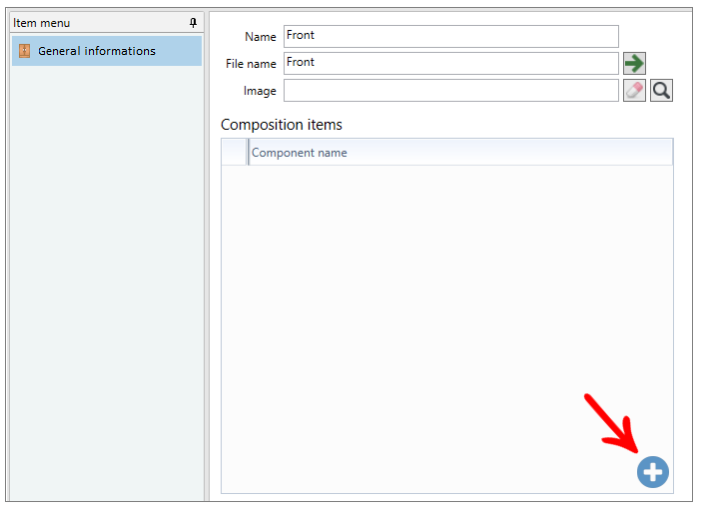
5. Still in the registration of the New Item, click ![]() .
.
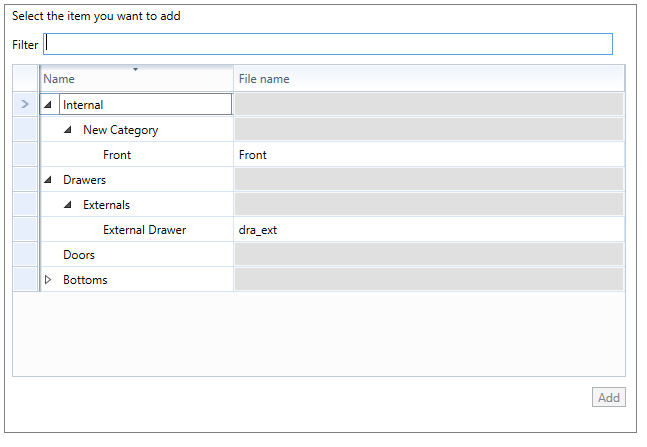
6. The window with the available items already registered will open. Select from the items already registered, the items that will make up the composite item. If you want to select more than one item simultaneously, hold down the Ctrl key.
7. Click Add.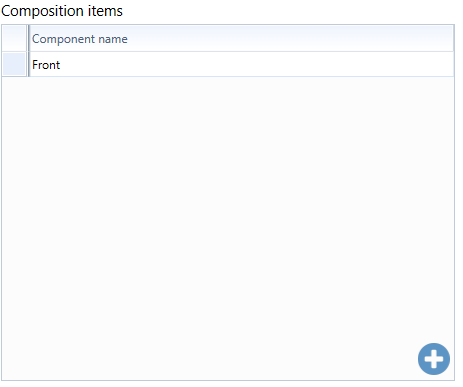
8. The registration of the composite item consists only of configuring the items that comprise it. The item registration for editing is not opened since the registration of the settings has already been made for each item that comprises it.
Create an item of type Library Item
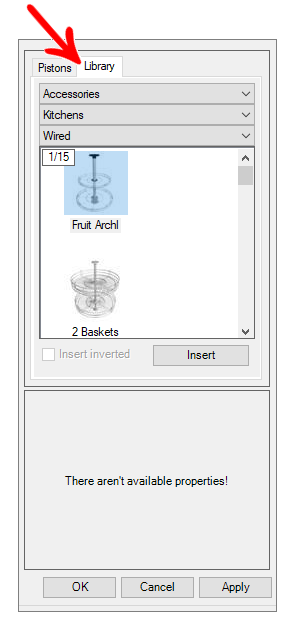
The library item can be added when you want to make any item in the library available for insertion into the structure by the Promob Closet Builder, as shown in the image below:
To create an item of type Library Item by the Catalog Closets register:
1. Access the Registry - Closets - Items menu.
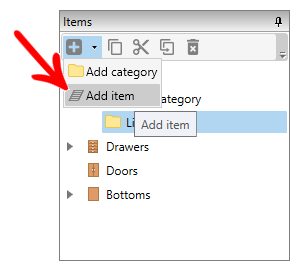
2. In the window that appears, select the category to which you want to add a library item and click Add item.
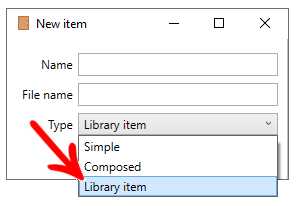
3. In the window that appears, select the Library Item Type.
4. Fill in the Name, File Name fields.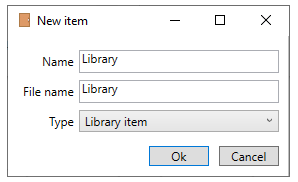
IMPORTANT: Category name is equivalent to the tab that will be created in Promob's closet builder.
5. In the Default Group field, click on the Magnifying Glass icon to select the group that should be the default in the closet builder. In the example in the image above, the default group selected was Accessories.
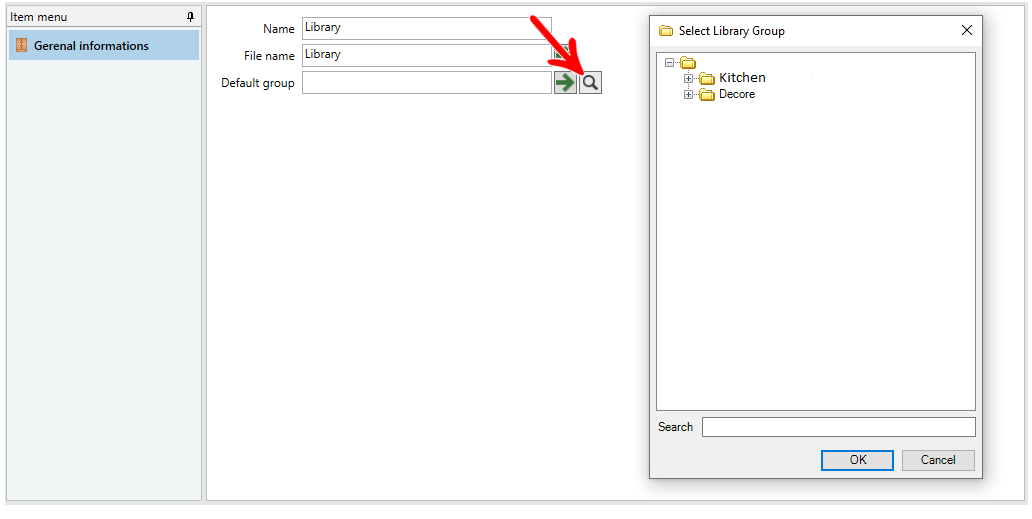
6. The registration of the library item consists only of configuring the name of the tab and the default group that will be displayed in the Promob closet builder. For this reason, the item registration window for editing is not opened.
Configure an item
To configure an item:
1. Access the Registry - Closets - Items menu.
2. Select the item you want to configure.
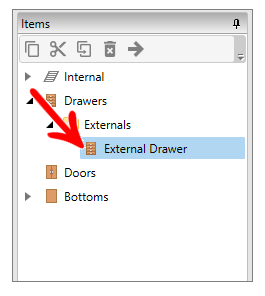
3. In General Information, configure.
|
ID |
Fill in the created item ID. Remembering that the IDs in the Promob Catalog do not accept the use of special characters, such as accents, punctuation, etc. |
|
Name |
The name of the item will be displayed in the status bar, when selecting it in the design. |
|
File |
Name of the folder where the files will be created inside the Promob folders. |
| Image | Allows you to associate a preview image of the item by the closet builder. |
| Entity ID | Library item that will be used in the item. |
| Category | You can change the category to which the item belongs. |
| Tag | It allows that, when inserting a tag in the field, in Promob's Closet Builder, several items will be created with the settings made by the Item Register with the module Ids that contain this same tag registered in the Module Register, on the Tags tab. |
|
Model Name |
This field is valid when TAGs are used, and its value will determine the name of the Format Model that will be displayed, just as it works in the Module Editor. In this way, it is possible to have a name in the item register, but in its display in the Closet Builder, show another description. |
|
Order |
This field is valid when TAGs are used, and its value will determine the display order of this Model Format, just as it works in the Module Editor. In this way, it is possible to limit the item's position in the list of all available models. |
|
Type |
The type of the item, configured during its creation. It is not possible to change it in the item register because the Compound and Library Item types have no settings in the editor. |
|
Visible |
The visible checkbox is checked by default. When deselecting the option, the item will be listed in the structure listing but will not be visible. |
|
Selectable |
It allows whether or not the item can be selected in the design. |
|
Advanced Options |
Allows you to associate attributes and correct the zero offset of the item. |
4. In Insertion, configure: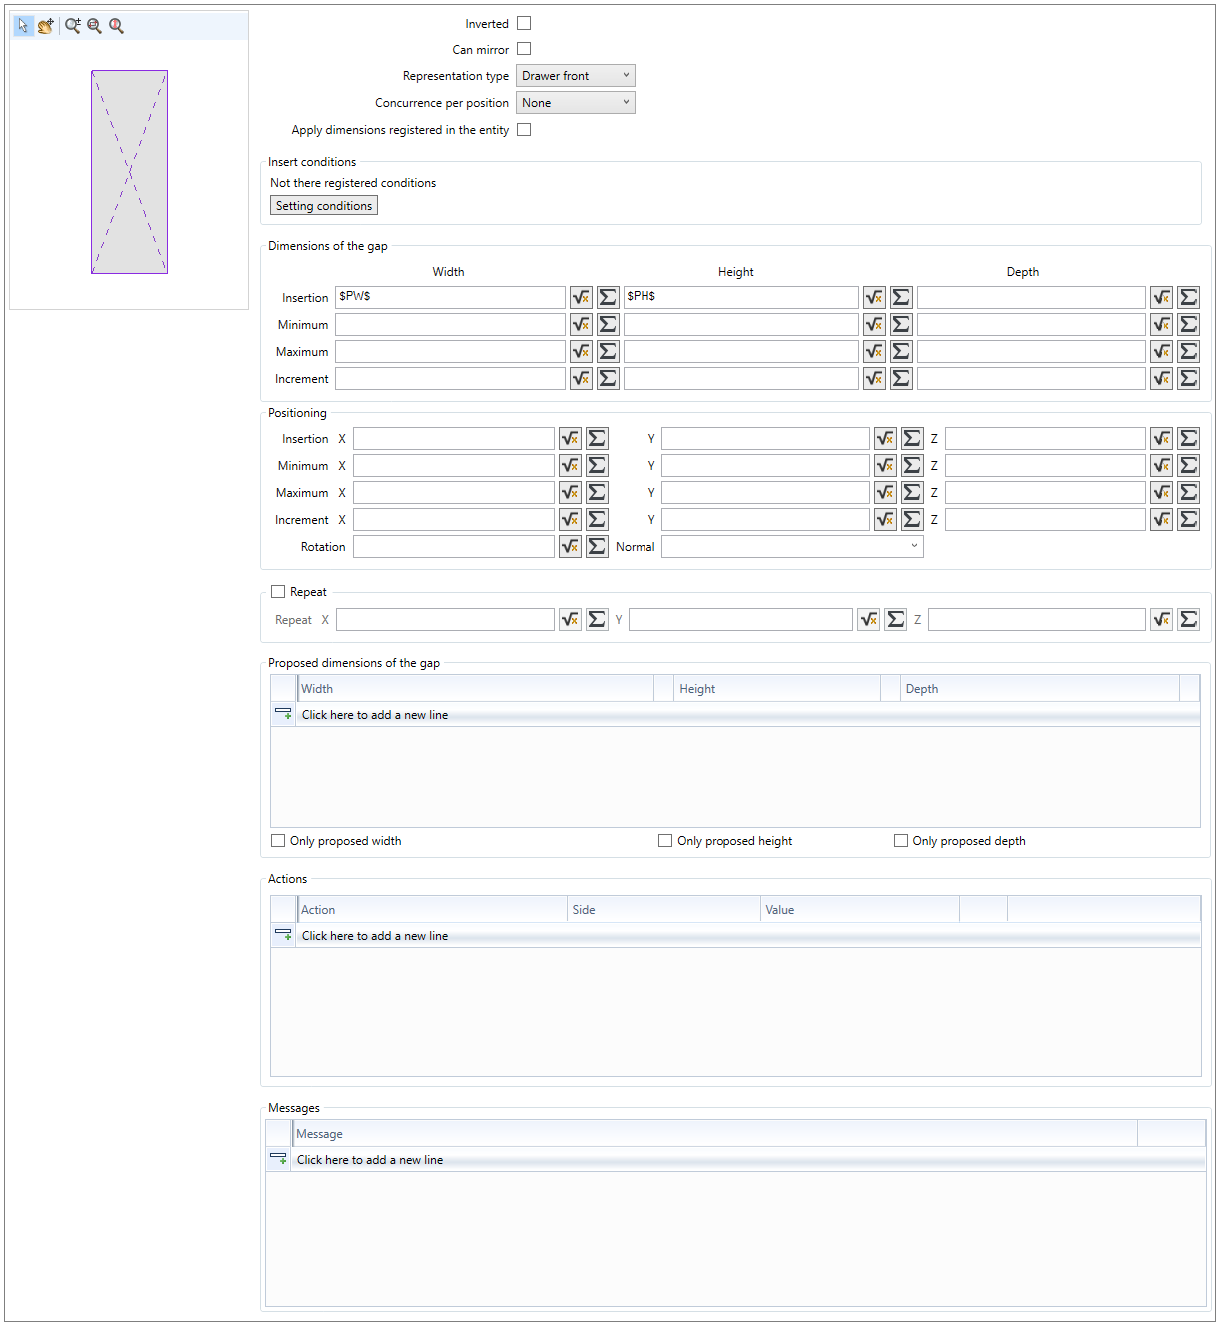
|
Preview |
Displays the preview of the item in relation to the structure. |
|
Inverted |
With the option checked, the item will be inserted in an inverted position in the structure. |
|
Can mirror |
With the option checked, it is possible for the user to mirror the item in the structure. |
|
Representation type |
Most used function in Doors, to represent the door with dotted lines at an angle to represent the opening. Example: For a right door, the option Front Right must be selected. |
|
Concurrence per position |
Choose from ‘None’, ‘Same type’, and ‘All types’. |
| Apply dimensions registered in the entity | Defines whether the dimensions of the item being registered will be based on the entity's registration through the module registry. |
| Insert conditions | Allows you to create rules for inserting the item. |
|
Dimensions |
Configure the Insert dimensions of the item. If desired, you can configure the minimum and maximum dimensions and the increment. |
|
Positioning |
Set the item's default position to X, Y, and Z on the frame. If desired, you can configure the minimum and maximum positioning and the increment on each axis. |
|
Repeat |
With the option checked, repetition of the item will be possible by Promob's Closet Builder. When checking the option, it is necessary to configure the fields in Distance. |
|
Repetition Distance |
If the Repeat checkbox is checked, set the distance of the repeated items to X, Y and Z. |
|
Proposed dimensions of the gap |
It allows configuring if the item will have proposed dimension values. |
|
Actions |
It allows configuring actions (resize or move) that must be performed when the item is inserted in the structure. |
|
Messages |
Allows you to define item-related information that will be shown in the closet builder, on its respective tab, when the item is selected. |
5. In Alternatives, configure the alternative items for each condition.
6. In Drawers, make settings for a single or composite drawer.
IMPORTANT: The Drawers tab is only available if the item being edited is from the Drawers group.
7. In Automatic Function, configure:
|
Insertion Functions |
It allows associating the automatic functions for automatic insertion of the item in the design. The option is only enabled for marking when the checkbox above is checked. |
| Enabled as default | This checkbox causes the item to be inserted by default with the automatic function enabled. The option is only enabled for marking when the checkbox above is checked. |
|
Add group |
Creates groups where tabs can be added and create conditions for those groups. |
|
Add division |
It is necessary to add dividers in the list to apply the automatic function of a fund, for example, where the divider to be listed must be one that should not be considered as a fund divider. Adding a shelf, for example, when the bottom is inserted in a gap that has this shelf below, the bottom will be inserted in the gap below the shelf as well, not being cut by the added partition. |
8. After making the settings, click the Refresh icon to apply the changes.
How to configure item alternatives?
Alternatives can be created when, under certain conditions, it is desired to provide a particular alternative that is more different from the standard item options. Example: In case the selected gap is the upper gap, then in Racks, another rack option will be available.
To configure alternatives in the item register of the closet editor:
1. Access the Registry - Closets - Items menu.
2. Select the item for which you want to add the alternative.
3. Go to the Alternatives tab and click Add Alternative.

4. Rename the alternative ID.
5. Then, configure the alternative. Click the Magnifier icon to find the item in the library that will be an alternative to the item.
6. Click Select after finding the alternative item.
7. Then click on Setting Conditions to add the condition that the alternative must respect to be displayed.
8. Set the conditions as desired and click Close.
9. Fill in the Dimensions of the gap, Positioning and Repeat information as desired.
10. Below, if desired, configure the Proposed dimensions of the gap and Attributes.
11. Click the Refresh icon to apply the changes.
How to set up drawers?
To set up drawers in the item master:
1. Access the Registry - Closets - Items menu.
2. Select the drawer register.

3. After making the item master settings (drawer) in the General Information and Insertion tabs, access the Drawers tab.

4. Check the Simple drawer checkbox if the registered drawer is simple, that is, it is not composed of retractors and other components. If the drawer register consists of components for amounts, then it is necessary to keep the checkbox unchecked.
5. In Name, fill in a name for the amount. This name will be displayed in the cabinet builder when selecting the amount.
6. Fill in Default drawers quantity with the default quantity that will be displayed in the constructor.
7. In Clearances, set the drawer distances on the left, right, top, bottom and between drawers. The Top and Bottom spacing apply to the first and last amount drawers, respectively. It is possible to view changes in the distance fields by preview.
IMPORTANT: Clearances consider the distance from the drawer to the next item. Example: If the amount has retractors registered, the removals will be considered up to the retractors.

8. In Components it is possible to register the components of the amount. Example: upright sides and retractors. Click Edit Components.
9. In the window that will open, click on Add Component to create a new component and register the items that make up the amount.
10. After registering the other components of the amount, it will be possible to identify the preview of the amount by preview.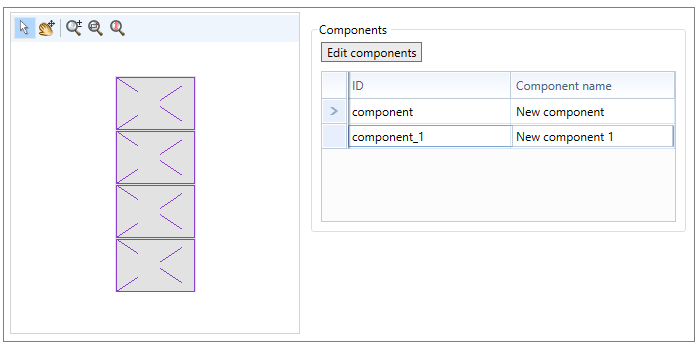
11. Sign the front for the drawer if it has one. Click on Add Front and register the front for the drawer.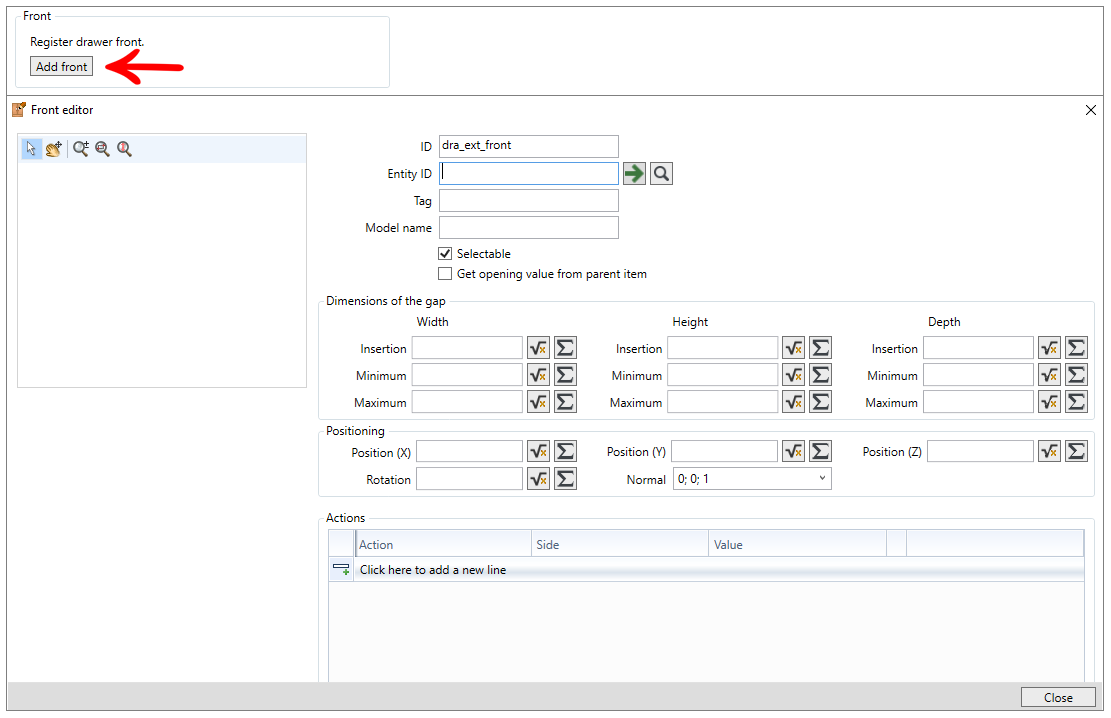
12. After the front registration, click Close.
13. After completing the registration and configuration of the drawers, click on the Refresh icon to apply the changes.
How to configure item registration by tags?
Registering by tags allows multiple items to be created with the settings made by the Item Register from the modules that contain this same tag registered by the Register of Modules, on the Tags tab.
This procedure also applies to the registration of divisions.
To configure item registration by tags:
1. Access the Registry - Closets - Items menu.
2. Access the desired item register.
3. In the item register, in General Information, register the tag you want. The tag can be any keyword.
Example: builder_fronts_basc for the tilting fronts that will be used in the constructor.
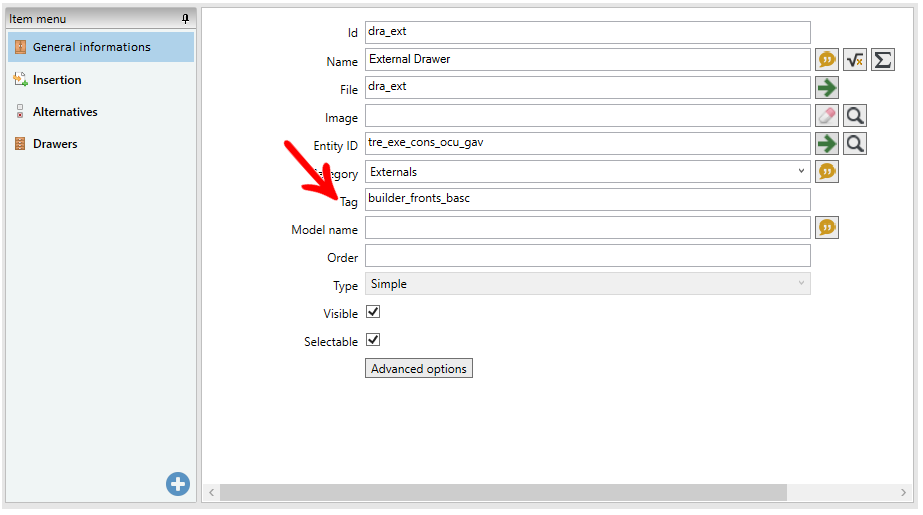
4. Click the Refresh icon in the upper right corner to apply the change.
5. Access the Registry - Modules menu and access the registration of the group of fronts that you want to associate with the registration of the item.
6. On the Main tab, activate Advanced mode and access the Tags tab.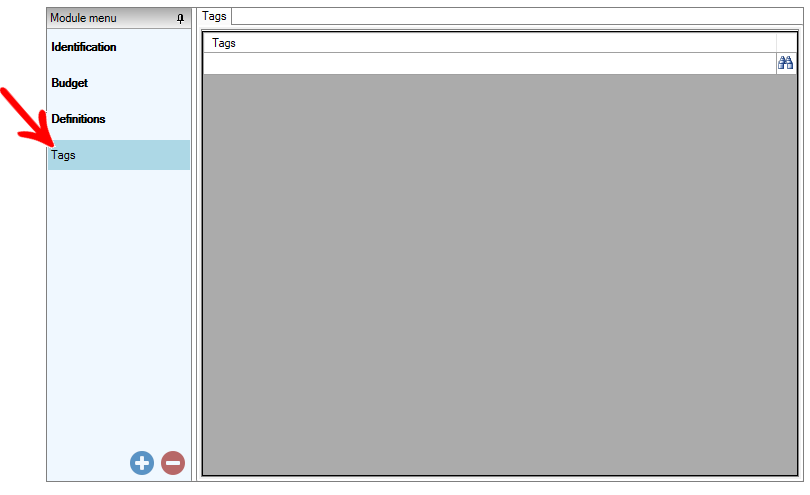
7. Enter the tag corresponding to the item's registration.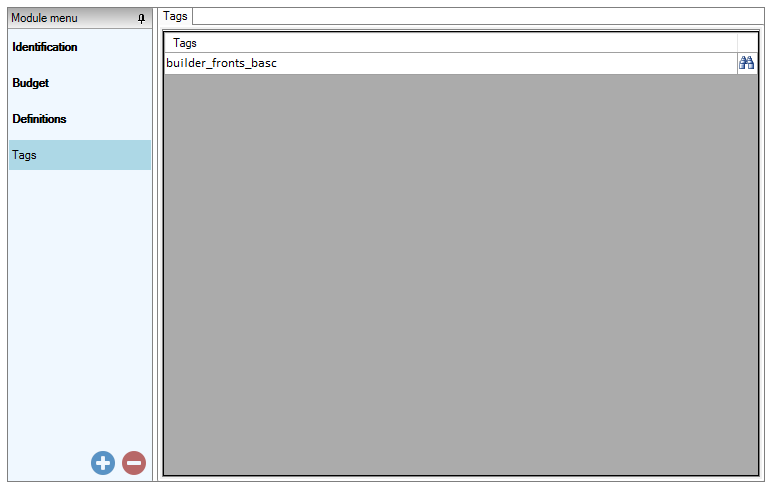
8. Repeat the procedure for all items or groups you wish to add to the item register, then click the Refresh icon to apply the changes.
9. Then, access the Registry - Closets - Structures menu.
10. Access the registration of the structure to which you want to add the tag module group.
11. In the corresponding tab (Drawers, Internals, Doors or Funds) add the registered item. In this way, after updating the registration, in the Promob cabinet builder, all the tilting fronts associated with the registered Tag will be searched.
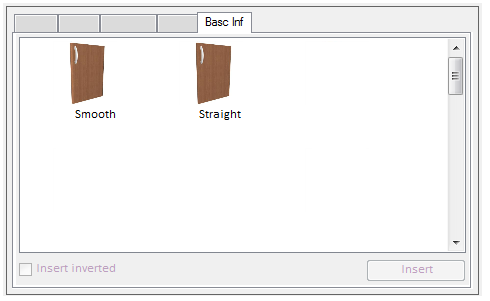
12. After completing the changes, click the Refresh icon to apply the changes.
How to make the shelves and dividers not share the bottom?
To configure the closet in such a way that dividers and shelves do not cut the bottom or the rear vertical sleepers, it is necessary to add dividers in the bottom register.
For that:
1. Access the Registry - Closets - Items menu.
2. Locate and access the registration of the structure's fund. If you are unable to locate it, you can first access the register of the structure that has the fund and, through the Funds tab, access the fund of the structure with double click.
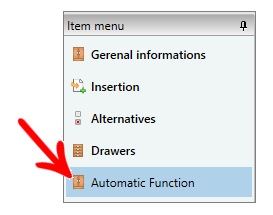
3. Click on the Automatic Function tab.
4. Then, click Add division.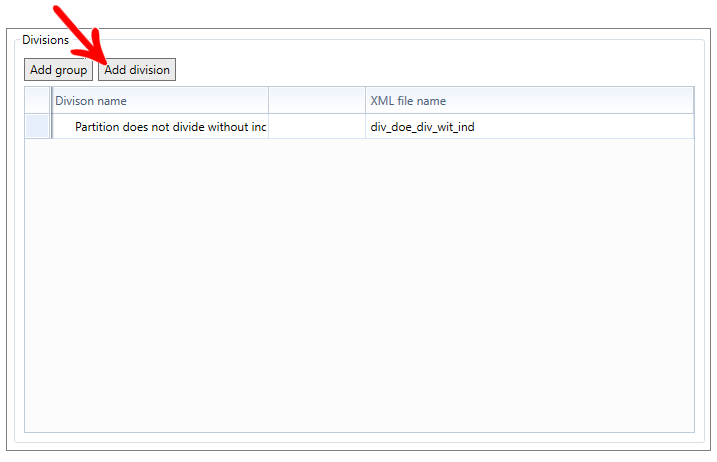
5. Add from the list of dividers which horizontal shelves and vertical dividers should not cut the bottom.
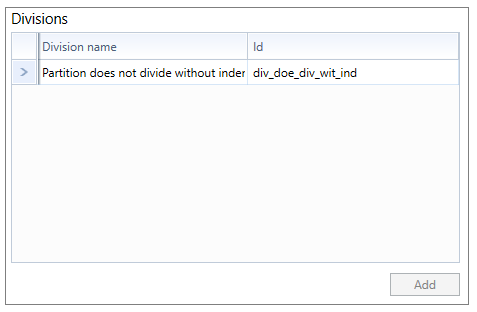
6. After adding the desired dividers, click on the Refresh icon to apply the changes.