For the system's library to be translated, it is necessary to register the translations. To do this, the translations must first be exported, and after the translations are registered, the file must be imported into Promob.
In this article, the following sections are covered:
- How to register translations manually?
- How to export the translation list from the system?
- How to import translations?
- Import Coding
See also the content regarding language selection.
How to register translations manually?
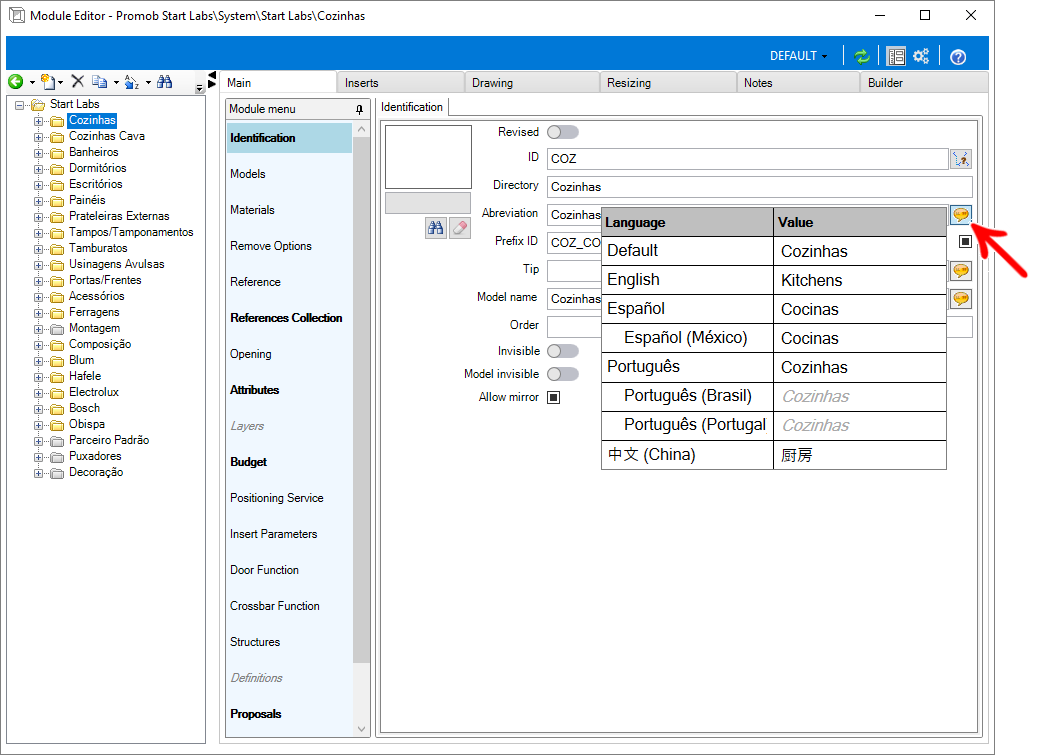
1. Select the registration of an item within the Catalog and locate the Translation icon; 
2. A small table divided into Language and Value is displayed;
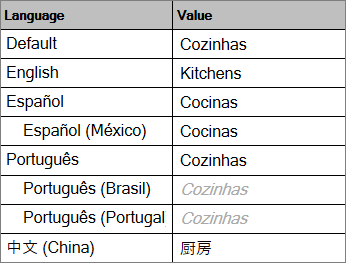
3. In the desired language, enter the translation by double-clicking on the field in the Value column;
4. The information in gray italics are the translations that are inheriting from the Default language, default language loaded when opening the Catalog, in Portuguese;
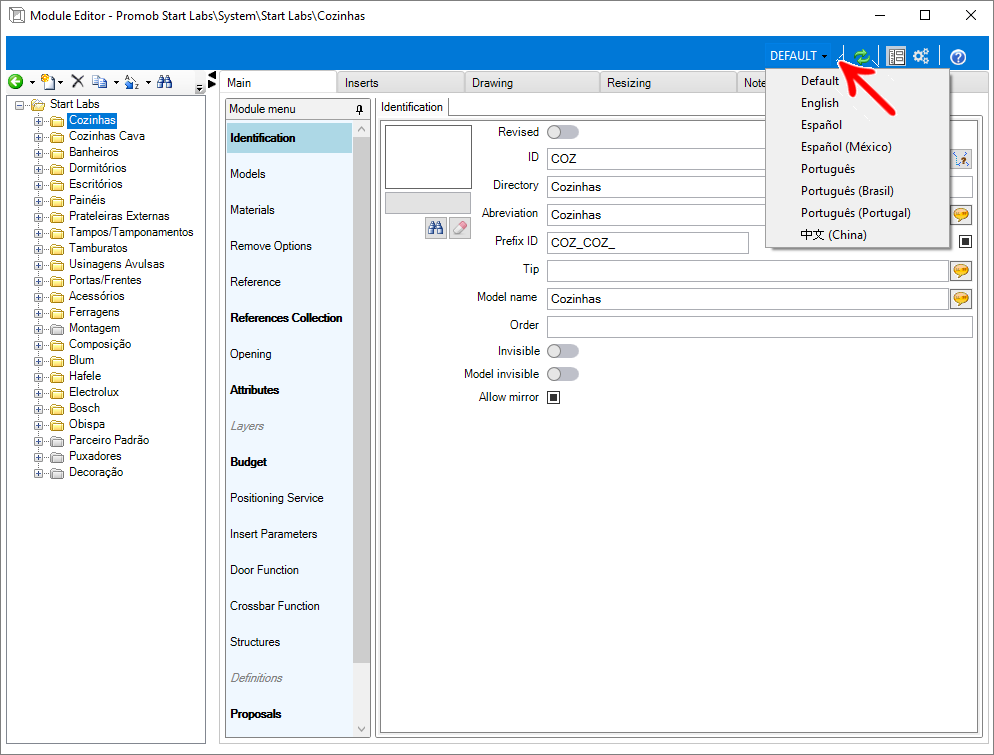
5. After registering the translations, change the language through the Default option, in the upper right corner, and select the desired language;
6. When filling in the translations, it is possible to export and import them to be reused in other systems through a *.csv file.
NOTES: the registered translations are saved in files with the extension *.resources.
How to export the translation list from the system?
Exporting the translations will create a file containing the information of the selected items and their translations in the selected languages. To export the list of translations from the system:
1. Access the Register - Exports - Translations menu.
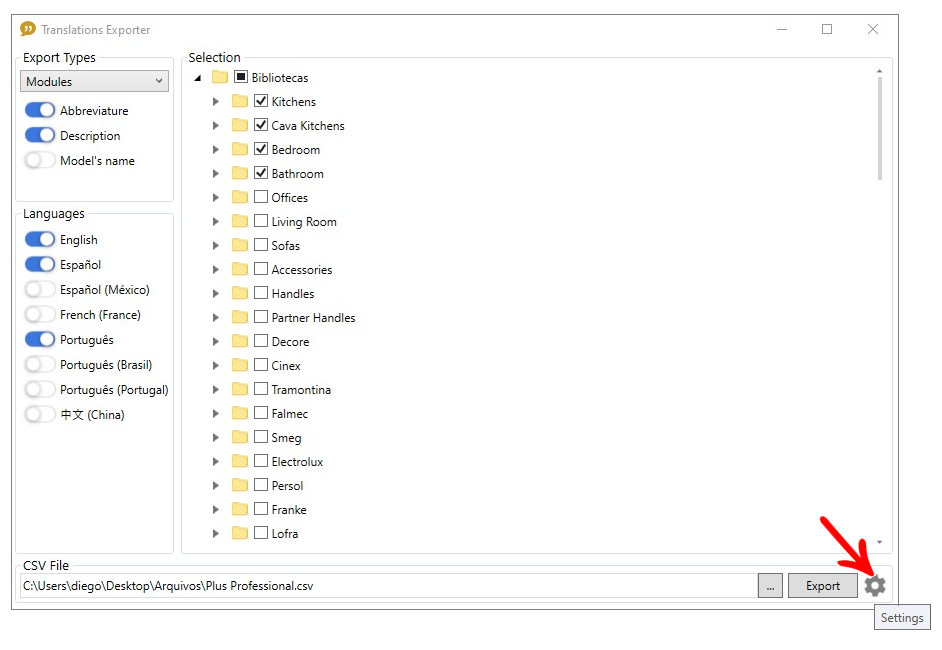
2. In the following screen, under Export Type select the export type along with its properties, under Languages check the desired languages, under Selection select the items to be exported, and under File name choose the desired file by clicking the flagged icon. Click Export to start the export.
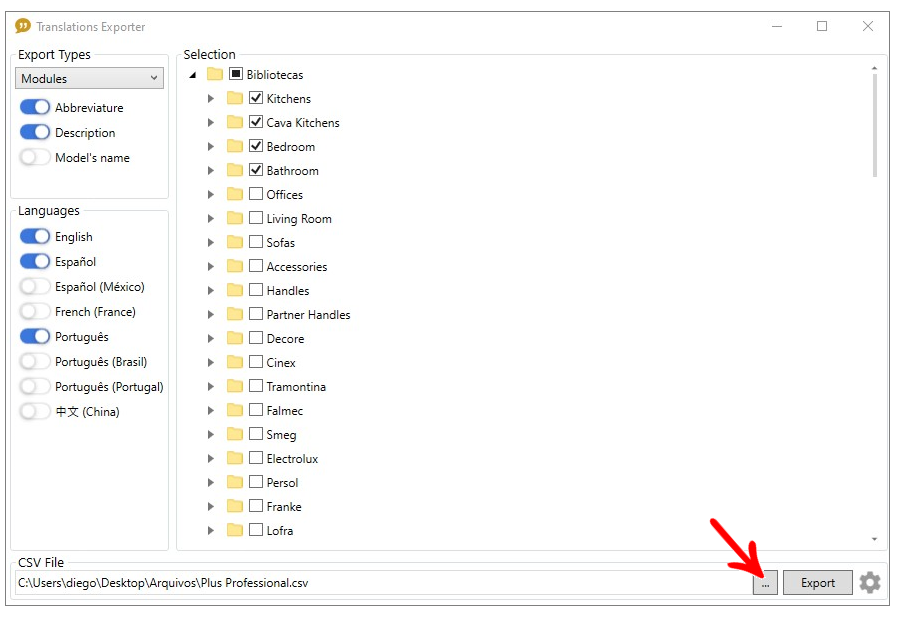
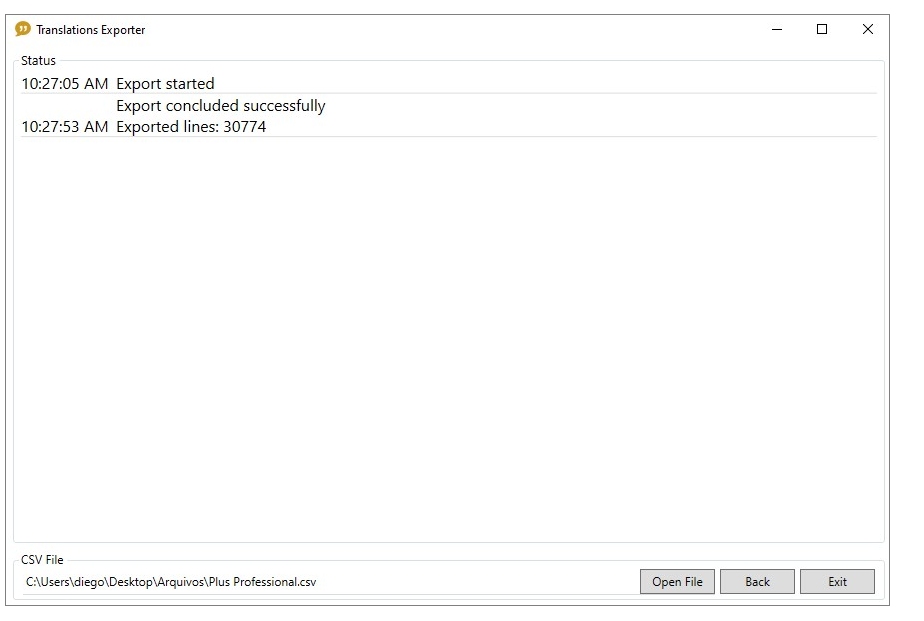
3. Wait for the export to complete.
4. If you want to change the type of separator used in the file, or the encoding, access the Settings menu.
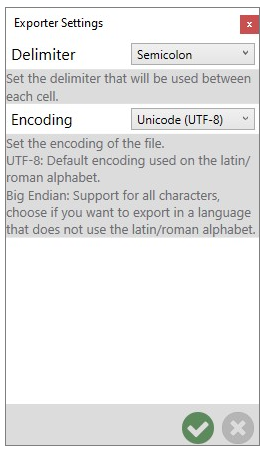
5. In Separator, define the separator option that will be used in the file. Depending on the version of Excel the default tab may vary, changing the tab will cause the file to be loaded in columns in Excel.
In Encoding, you can change the encoding of the file.
IMPORTANT: the default for the Latin / Roman alphabet is UTF8, if you want to export or register translations in languages with different alphabets such as Chinese, Arabic, etc., select the Big-Endian option.
How to import translations?
1. Go to the menu Register - Imports - Translations.
2. In the window that appears, click the icon with the 3 dots and select the * .csv file that contains the translations.
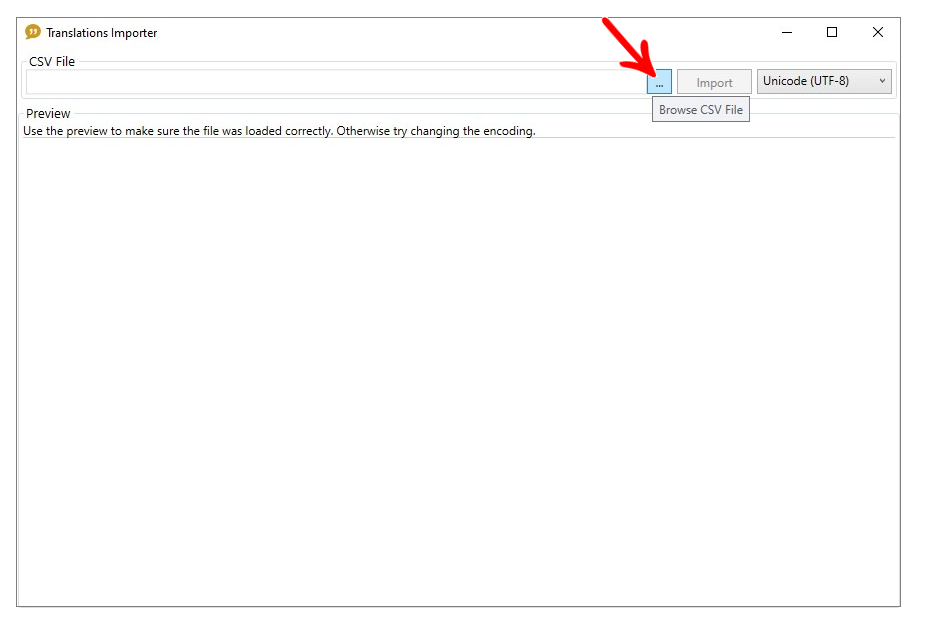
3. After the file is loaded, a preview will appear, make sure the file was loaded correctly before starting the import.
IMPORTANT: If the file is not correct, change the encoding.
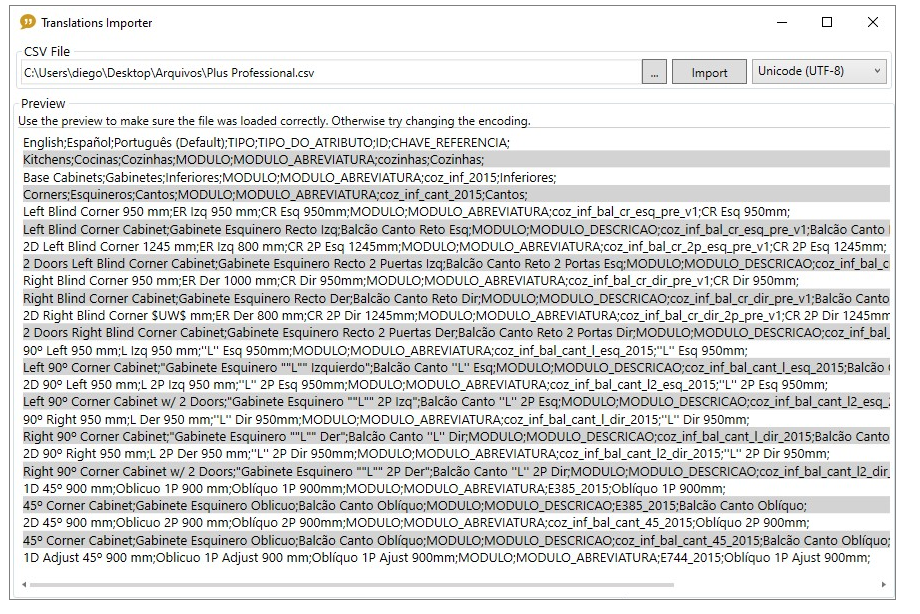
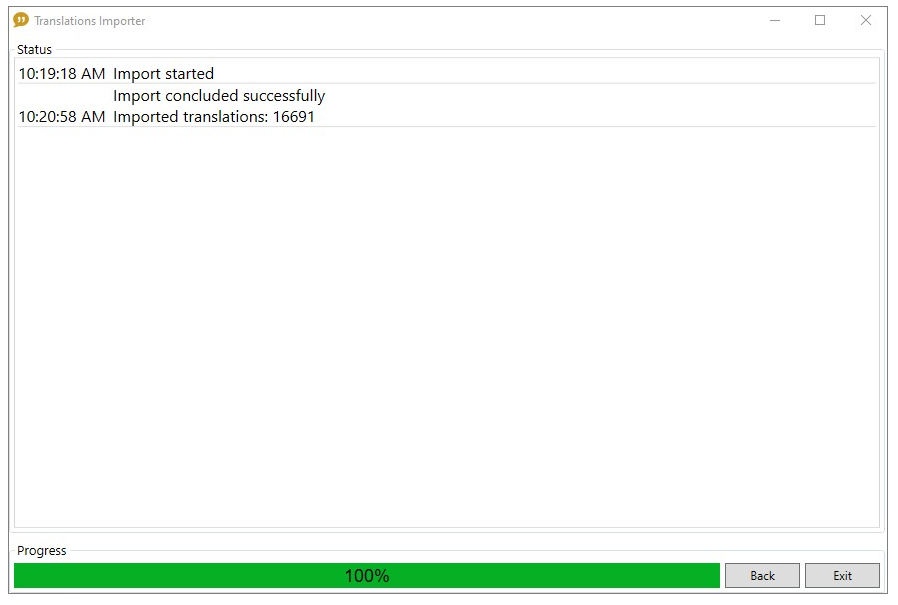
4. Click Import and wait until the import is complete. Any inconsistencies will be displayed in the Status section.
Import Coding
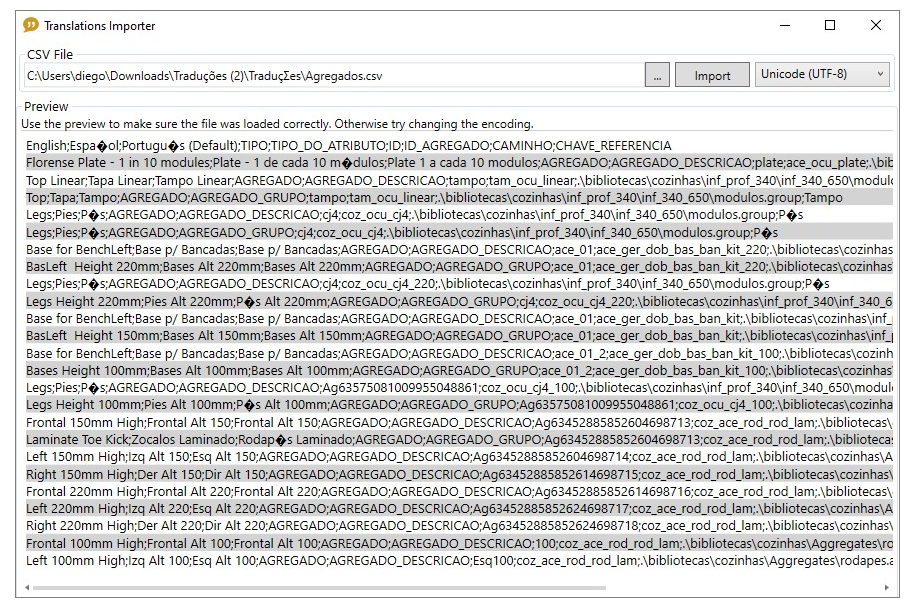
1. If the file was not loaded correctly, it can occur if the CSV file was exported using a Catalog 5.38 as is the case of the image below:
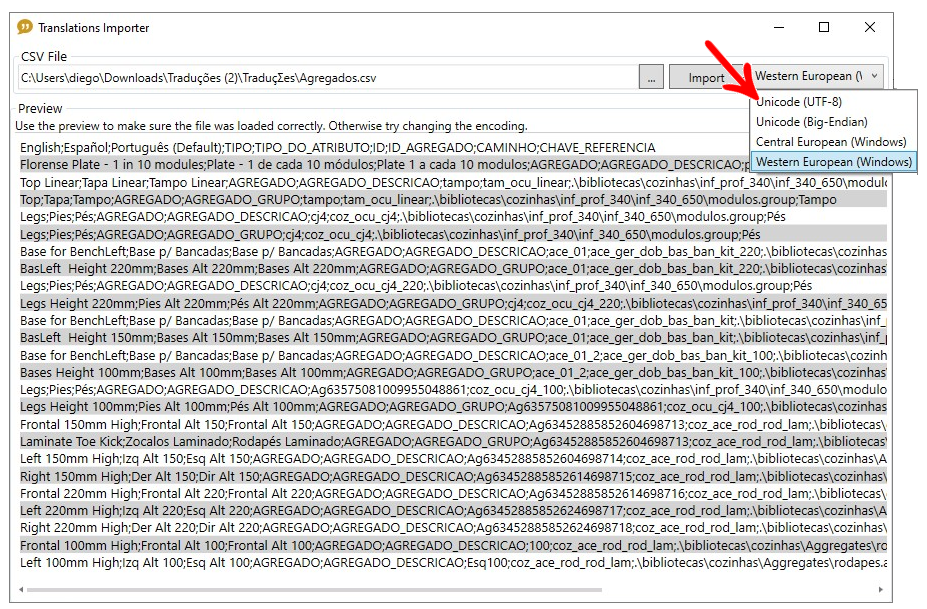
2. Change the encoding by selecting the options next to the Import button, until the file is displayed correctly:
3. Import normally as shown above.