Below are procedures related to Automatic Functions:
- Create Automatic Functions
- Configure Automatic Functions
- Define an Automatic Function in the Aggregate Register
- Insert Aggregates with Automatic Function
- Register Footers with Automatic Functions
- Register Tops with Automatic Function
Create Automatic Functions
Through the Automatic Functions option, it is possible to add aggregates, automatically in the 3D environment and simultaneously in several modules, each respecting its limitations, as restricted in the aggregate.
To create an automatic function:
1. Access the Registry - Functions - Auto Insertion menu.

2. If you already have a role group, click on the group and click New - Add new function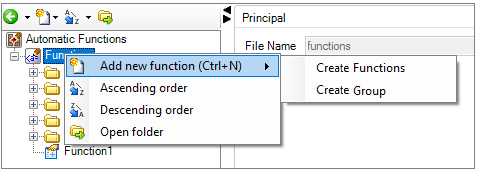
IMPORTANT: the Group (Grouping option), in the automatic functions is used to separate the registered functions into categories. Usually, the categories used are the same as the registered modulation lines.
3. Fill in the ID field with a unique identification for the function (something that expresses your group and its functionality) following the pattern of ID registration, without special characters, and fill in the Description field with the name of the function, as shown in the Environment 3D.

4. The registered information will be displayed in the highlighted fields.
5. Select the function tray created and make the necessary settings.
Configure Automatic Functions
By registering automatic functions, it is possible to configure the function so that, when selecting the function in the 3D Environment, the related aggregates are automatically inserted in all modules that have the item and the function.
To set up automatic functions:
1. After creating the automatic function, access the automatic function editor through the Registry - Functions - Auto Insertion menu.


2. On the Function tab, configure:
Modulation Path: Click on the Search icon, on the right side of the field, and select the modulation line in which this function will be used. Example: Kitchens, Bedrooms, Bathrooms, etc.
Execution: Configures the method for inserting aggregates using the function:

- Both: The aggregates will be inserted together with the module, at the moment of insertion in the 3D Environment.
- While Insertion: The aggregates will be inserted together with the module, at the moment of insertion in the 3D Environment.
- Environment items: The aggregates will be inserted in all modules that are already in the environment, at once.
Default state: It has the same function as the Default option of the aggregates, the function will be considered standard.
IMPORTANT: When the Default status option during Insertion is active, the function will be executed automatically during the insertion of the item. When it is deactivated, it will be available to be executed in the automatic functions tab.
IMPORTANT: This option is valid only for the option During the insertion of the Execution field.
Process Lateral: By checking this option, when two aggregates are inserted laterally, one left and one right, both will be removed. This option is usually used in baseboards, where those that are internal are removed.
Visible: To check information click here
Process Linear: When checking this option, when two equal aggregates are inserted, linearly, both will be joined and will form an item, of total size, respecting the limits of the piece.
3. In the Attributes tab, specific attributes for the aggregates can be inserted, to generate some behavior or adjust information necessary for the correct functioning.
4. On the Competitions Functions tab, it is possible to add competition between two or more functions, so that they cannot be inserted in the same module.
5. After making the desired changes, click the Refresh icon in the header. 
Define an Automatic Function in the Aggregate Register
To define an automatic function in the module register:
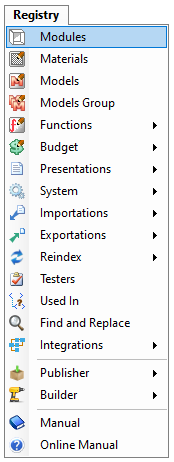
1. Access the Registry- Modules menu.
2. In the Navigation Tree, on the left in the Module Editor window, find the item that should have aggregates inserted by function.
3. Access the Inserts tab.
4. In the list of Inserts, find those that should be inserted using an automatic function.
5. In the household register access the Automatic Function option.
6. In the Function field, click the Search icon, on the right side of the field.
7. Mark the desired function and click OK.

8. After making changes, click the Refresh icon in the header. 
Insert Aggregates with Automatic Function
After registering the automatic function, configuring it according to what is desired, and applying it in the aggregate, it is possible to quickly insert equal aggregates in more than one module, simultaneously through the 3D Environment. To do this, do the following:
IMPORTANT: If it is your first function created, you will need to close Promob and open it again.
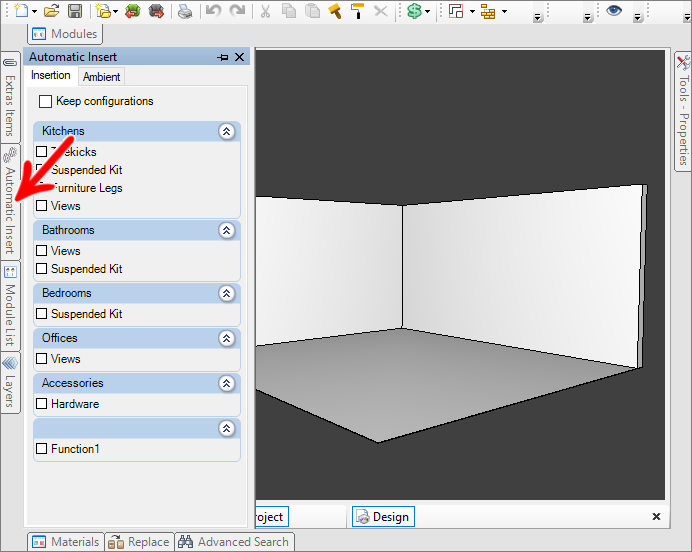
This tab lists all automatic functions created using the Automatic Function Editor, separated into two options: Insert and Environment.
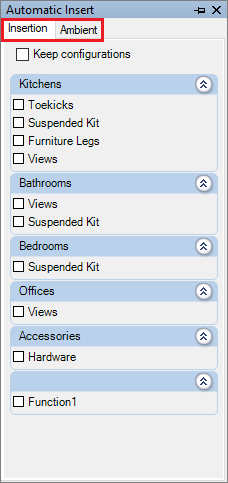
Insertion: Lists all automatic functions that were created with Execution = During insertion. To insert aggregates during insertion:
- Open the hidden Auto Insert tab.
- On the Insert tab, check the automatic function you want to use.
- After checking, insert the aggregates that have this function applied in the environment.
- When inserting, the module must appear and, next to it, the aggregate with function.
Environment: Lists all automatic functions that were created with Execution = In Environment items.
- Insert into the 3D Environment modules that have aggregates with automatic function.
- After inserting and positioning them, open the hidden Auto Insert tab.
- Select the Environment tab and check the function you want to use.
- Click the Insert option.
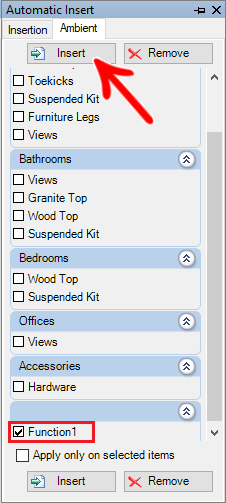
- In the 3D Environment, in all modules that have aggregates with the function, the aggregate must be inserted.
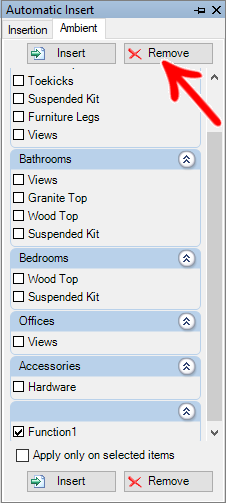
- To remove, open the Auto Insert tab again, access the Environment tab, check the desired function, and click Remove.
Register Footers with Automatic Function
To create an automatic function for inserting footers, do the following:
1. Access the option Registry - Functions - Auto Insertion.

2. Create a new function called Toe-kick.
3. Configure the function as follows: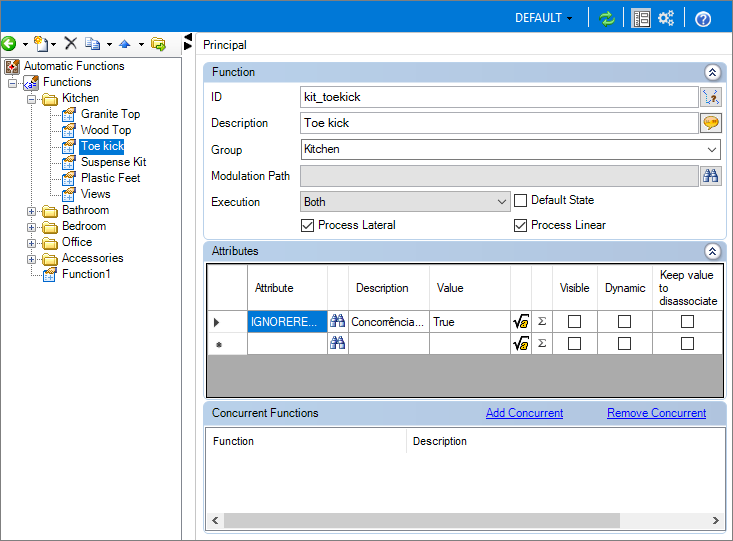
IMPORTANT: The Group and Path Modulation fields were filled with Kitchen because the toe kick created here is added to Kitchen items. If you want to create in another group, modify these fields for the desired library.
4. Click the Refresh button on the top menu of the Auto Insert Editor screen. 
5. Access the option Registry - Modules.

6. Locate, through the Navigation Tree, the item that should have the aggregated toe kick.
7. Add all the necessary skirting boards in the module, placing them in the desired location. For straight modules, for example, add three baseboards: left, right, and front.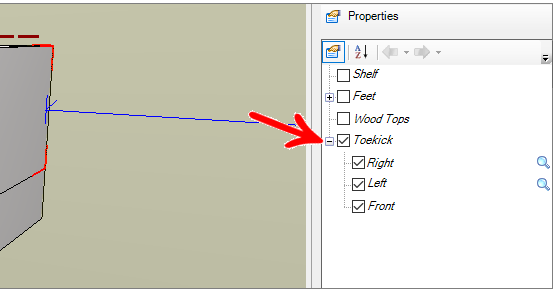
8. Open the Module Editor again and access the newly added toe kick again.
9. In all toe kick aggregates, add the Automatic Function option, filling the Function field with the newly created automatic function.
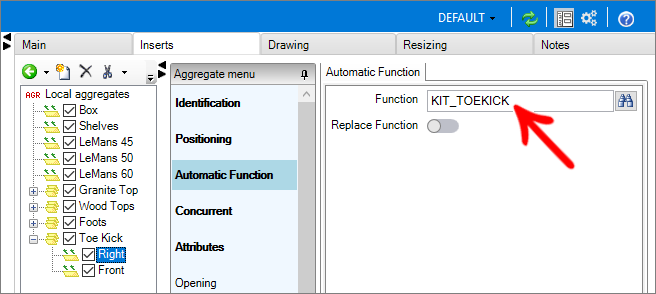
10. Now, on the side skirting boards, that is, those that are below the side of the furniture, should have an added attribute, so add the Attributes option.
11. The left footer must have the MODULETYPE attribute with a LeftLateral value, identifying that it is the left side.
12. The right footer must have the MODULETYPE attribute with the value RightLateral, identifying that it is a right side.
13. Now, click on the Refresh option in the top menu.
14. Insert the module into the environment and locate the Automatic Insert tab on the left side.
15. Select the Environment option, check the Footers function and click Insert.
16. Check that the skirting boards have all been inserted into the environment and are positioned correctly.

17. Now insert another module just like it, with the sides glued together.
18. Open the hidden Auto Insert tab, select the Footers option and click Insert.
19. The footers must be inserted in the two modules, and between the two modules, where there would be two footers, they must have been removed, keeping only the external ones.

Register Tops with Automatic Function
To create an automatic function for inserting footers, do the following:
1. Access the option Registry - Functions - Auto Insertion.

2. Create a new function called Tops.
3. Configure the function as follows:
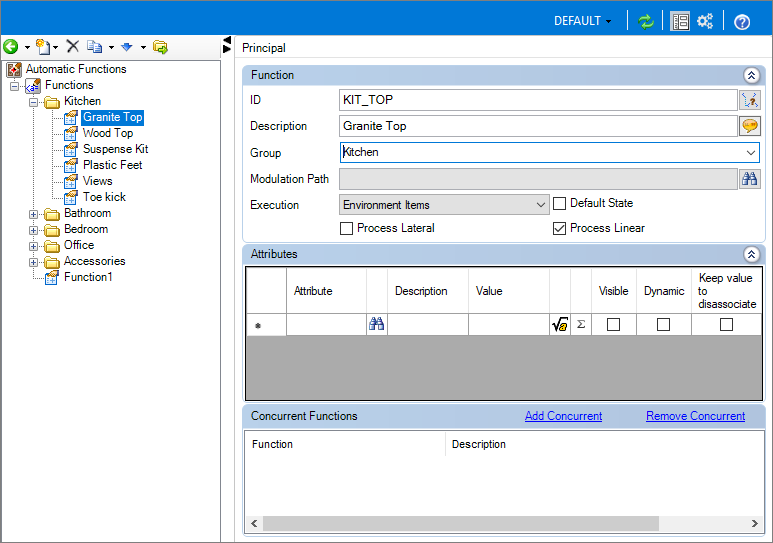
IMPORTANT: The Group and Path Modulation fields were filled with Kitchen because the footers created here are added to Kitchen items. If you want to create in another group, modify these fields for the desired library.
4. Click the Refresh button on the top menu of the Auto Insert Editor screen.
5. Access the option Registry - Modules.

6. Locate, through the Navigation Tree, the item that should have the aggregated top.
7. Add the top to the module, positioning them in the desired location.
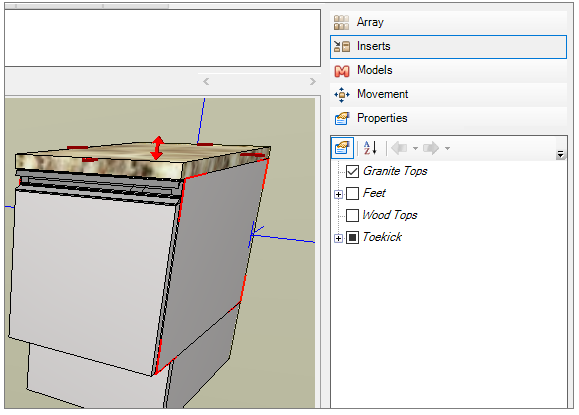
8. Open the Module Editor again and access the newly added worktop again.
9. Add the Automatic Function option, filling the Function field with the newly created automatic function.
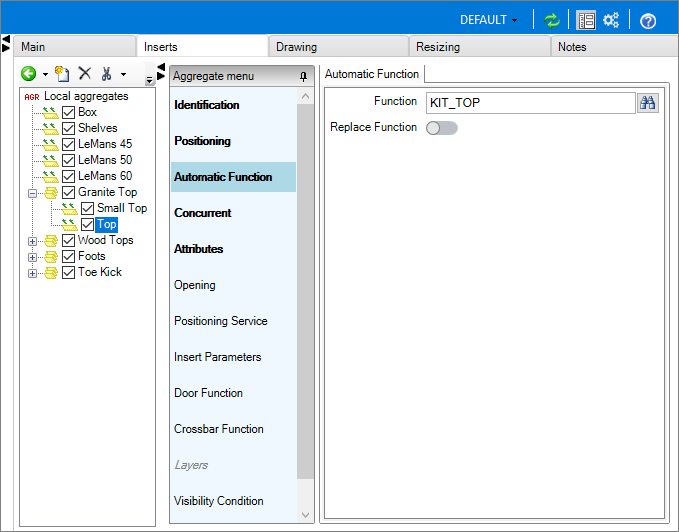
10. Now, click on the Refresh option in the top menu.
11. Insert the module into the environment and locate the Automatic Insert tab on the left side.
12. Select the Environment option, check the Worktops function and click Insert.
13. Check that the worktop has been inserted into the environment and is positioned correctly.

14. Now insert another module just like it, with the sides glued together.
15. Open the hidden Auto Insert tab, select the Table option and click Insert.
16. A worktop must have been inserted, with the total size of the sum of the two separate worktops.
