To provide a good result of rendered images, it is essential to perform the correct configuration of the lights inserted in the design. Remembering that lighting effects can only be viewed after rendering the design.
From the Light Editor you can change the properties of the lights inserted in the design or add new light points.
Promob Plus Professional has 3 different types of lights. They are ambient, spot and linear light.
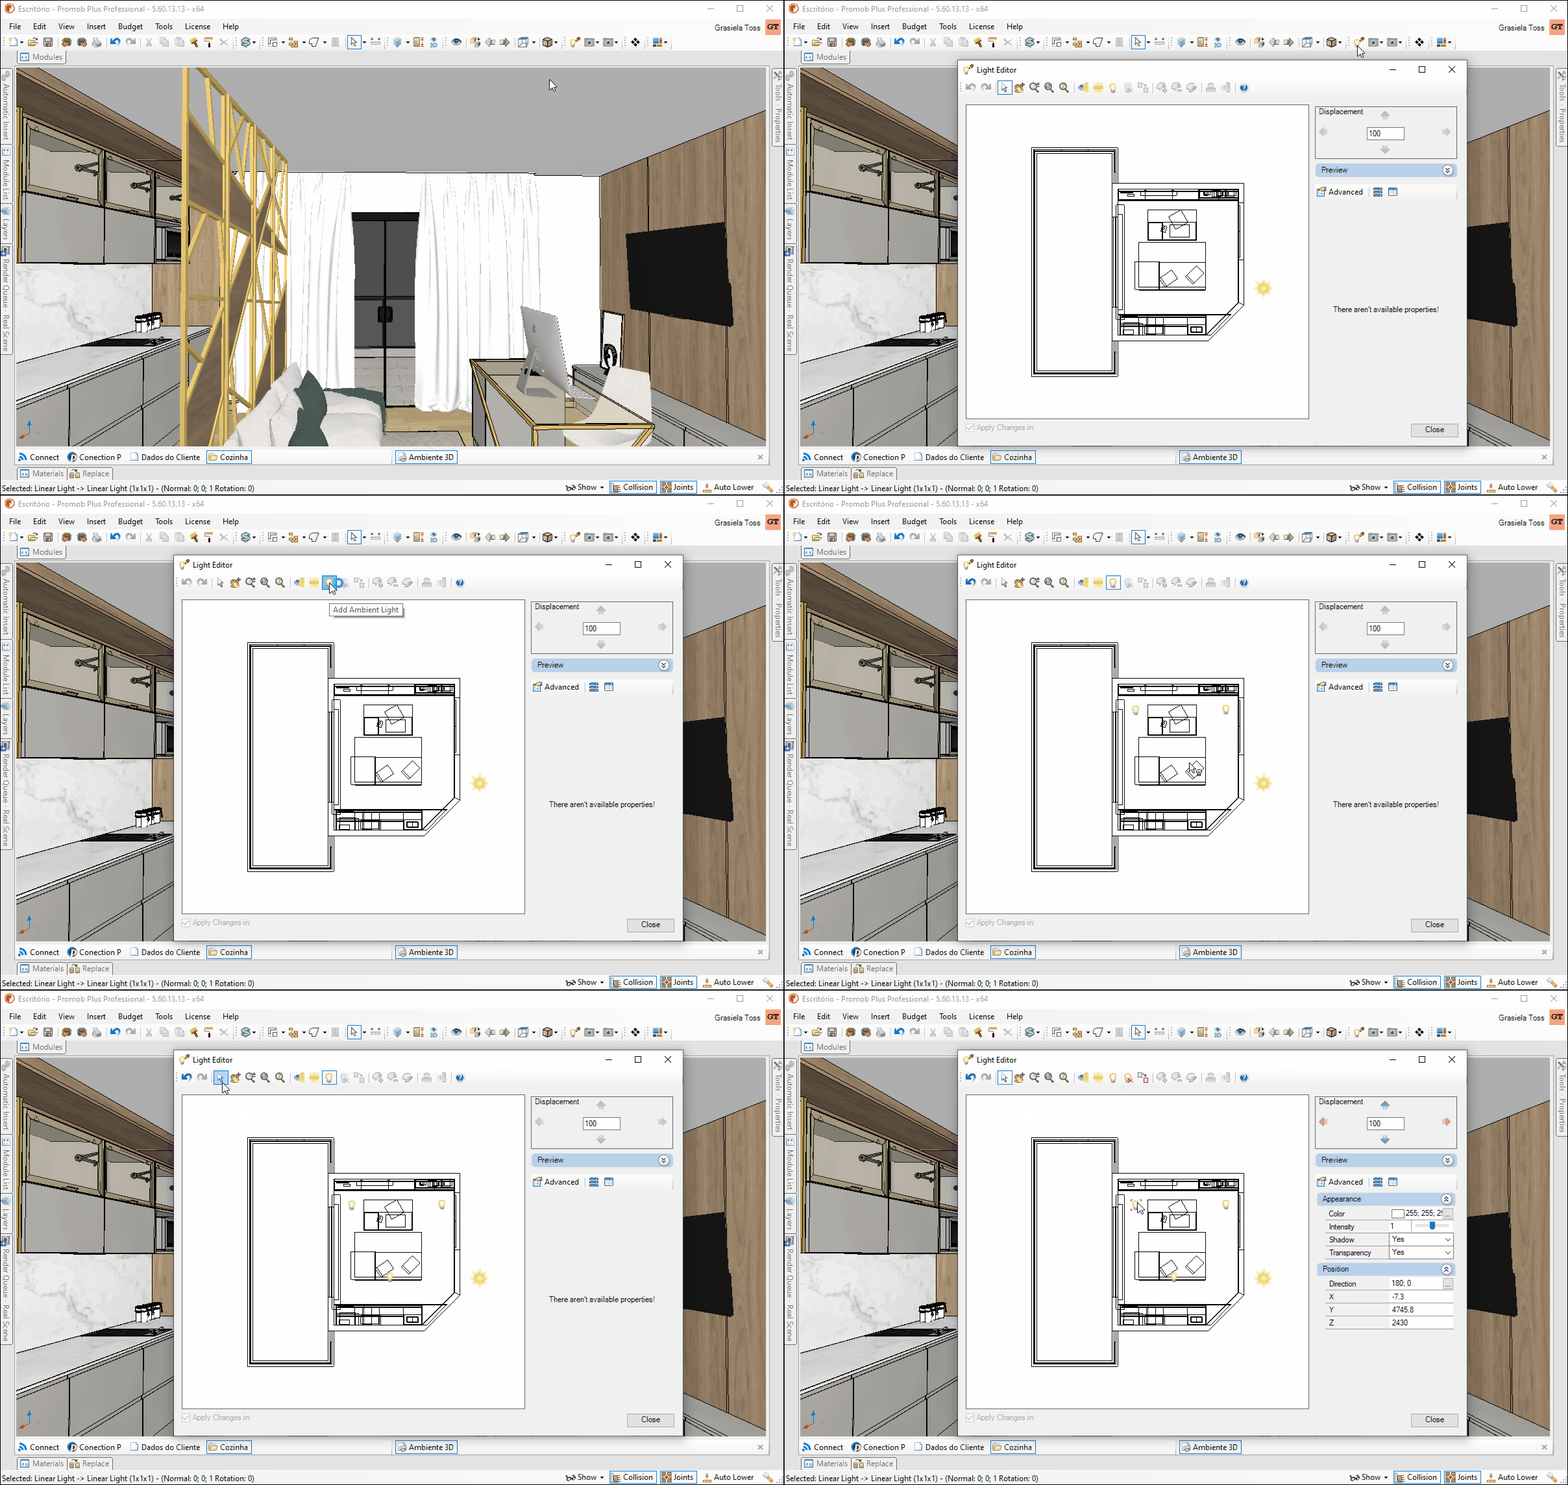
Ambient
Ambient light provide overall illumination of the space. This light also comes with some items from the Decore luminaire library.
To insert the ambient light, select the lamp and then click on the design preview. To disable light insertion, click the Select / Move button.

To edit the ambient light information, selecting the light the light setting screen will be enabled. In this screen we have the following settings:
Color: allows you to change the color of light in the space manually or through RGB information.

Intensity: allows you to change the light intensity from 0 to 2. The higher the intensity, the brighter the space.
Shadow: Determines whether or not the objects will have shadow during rendering.
Transparency: Determines whether light will design on transparent items.
Position: Light position relative to the design in X, Y and Z.
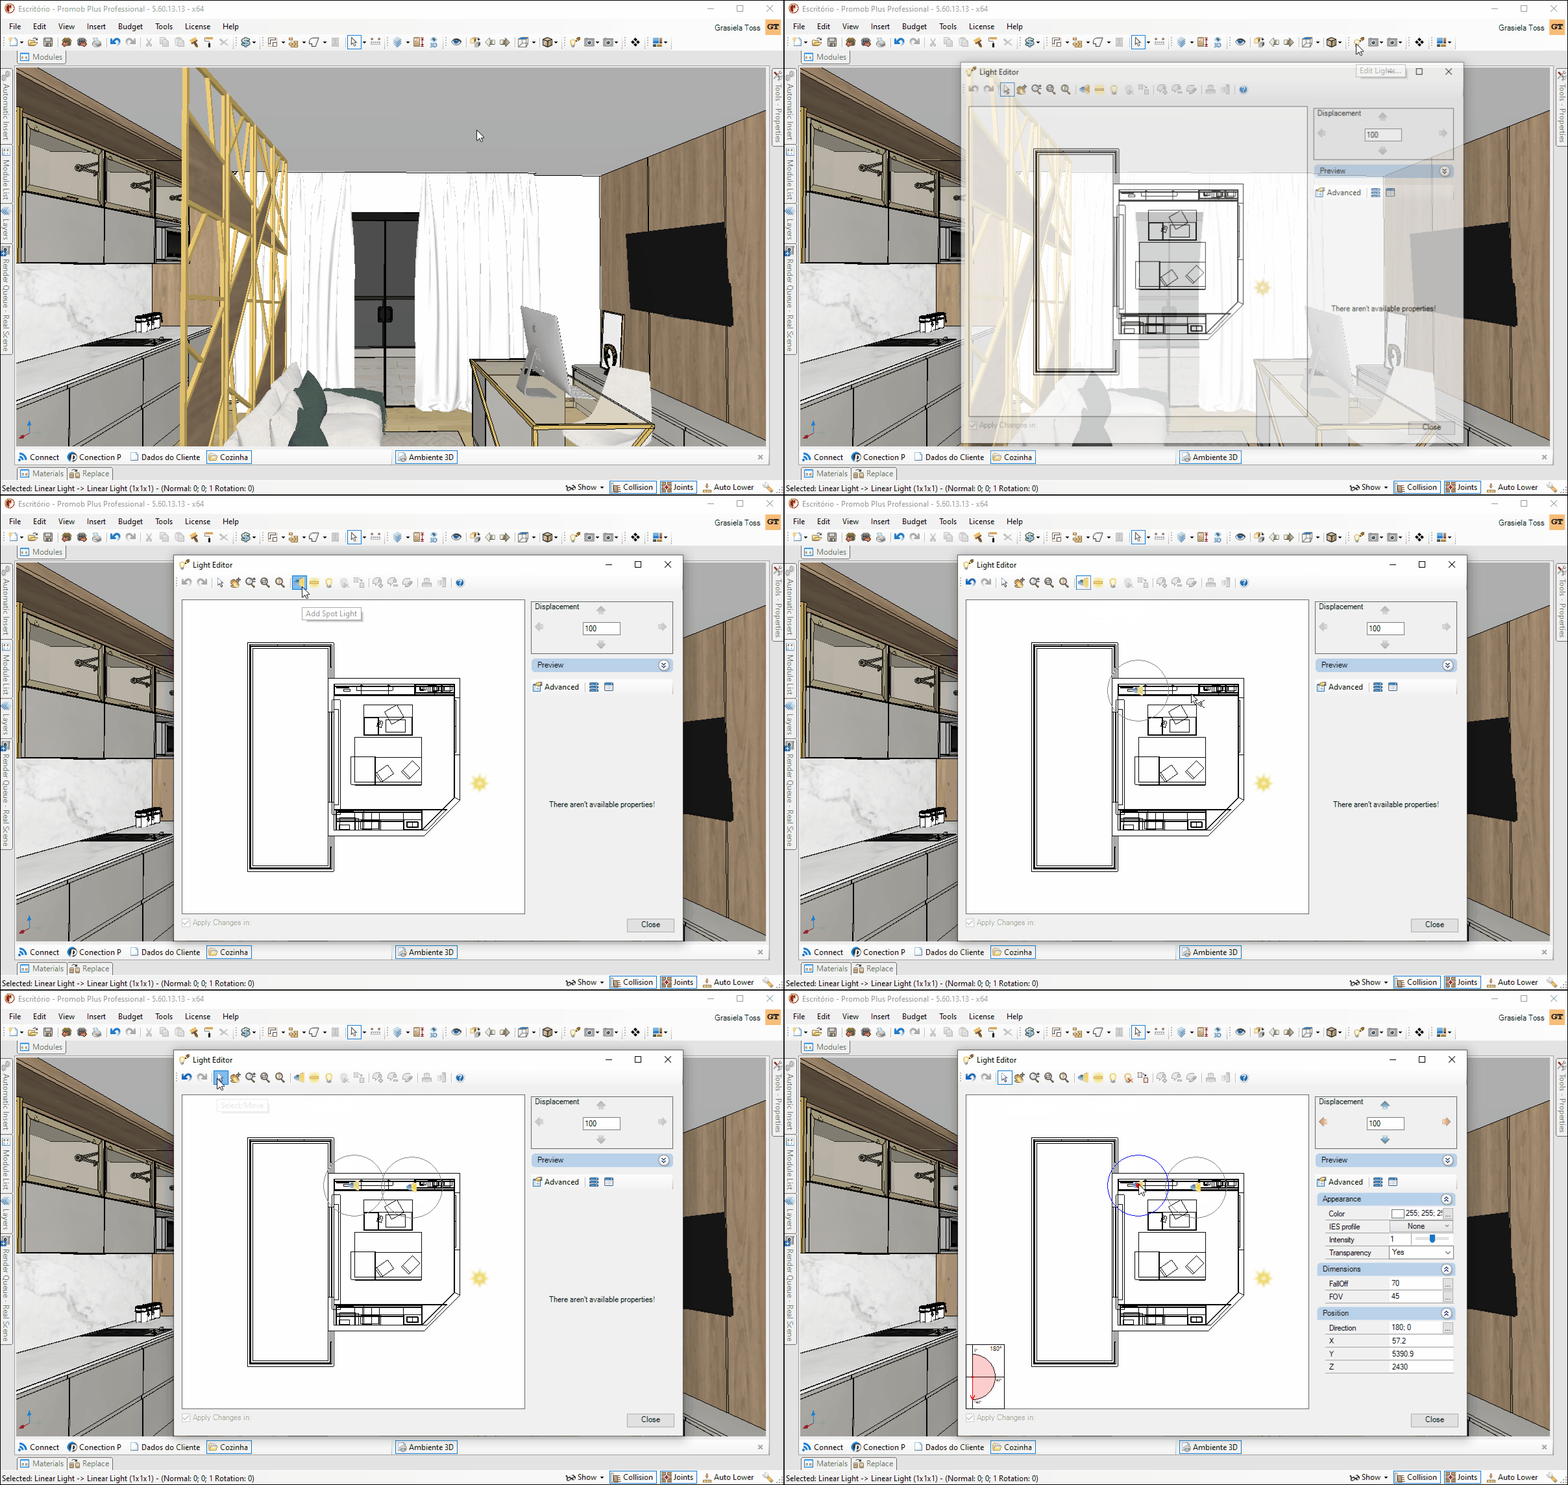
Spot
Spot light works as directional light points that can be pointed to highlight in any part of the home's decor. This light also comes with the spotlights from the Decore luminaire library.
To insert the spotlight, select the spot and then click on the design preview. To disable light insertion, click the Select / Move button.

To edit the spot light information, selecting the light setting screen will be enabled. In this screen we have the following settings:
Color: allows you to change the color of light in the space manually or through RGB information.

Intensity: allows you to change the light intensity from 0 to 2. The higher the intensity, the brighter the space.
IES Profile: Enables you to choose the light profile that will be displayed in the render.

Transparency: Determines whether light will design on transparent items.
Opening: determines the radius of light point coverage in the space 3D. The light distribution of a spot designs a cone beam into the desing. Opening can also be set by moving the blue lines that are displayed when selecting the spotlight. A small angle produces a narrow beam of light. The higher the angle set for this property, the wider the light will be.
Falloff: determines how far light will scatter. The farther this value is from the aperture value, the softer the light effect will be.
In the image below, we can better understand the opening and falloff of spotlight.

Position: Light position relative to the design in X, Y and Z. By selecting the property, two options will be enabled. The tilt field defines the tilt of the light focus. This property alters the place of incidence of light and not the place where the luminaire is inserted into the space 3D. The Plane field defines the location that will receive light spot illumination.

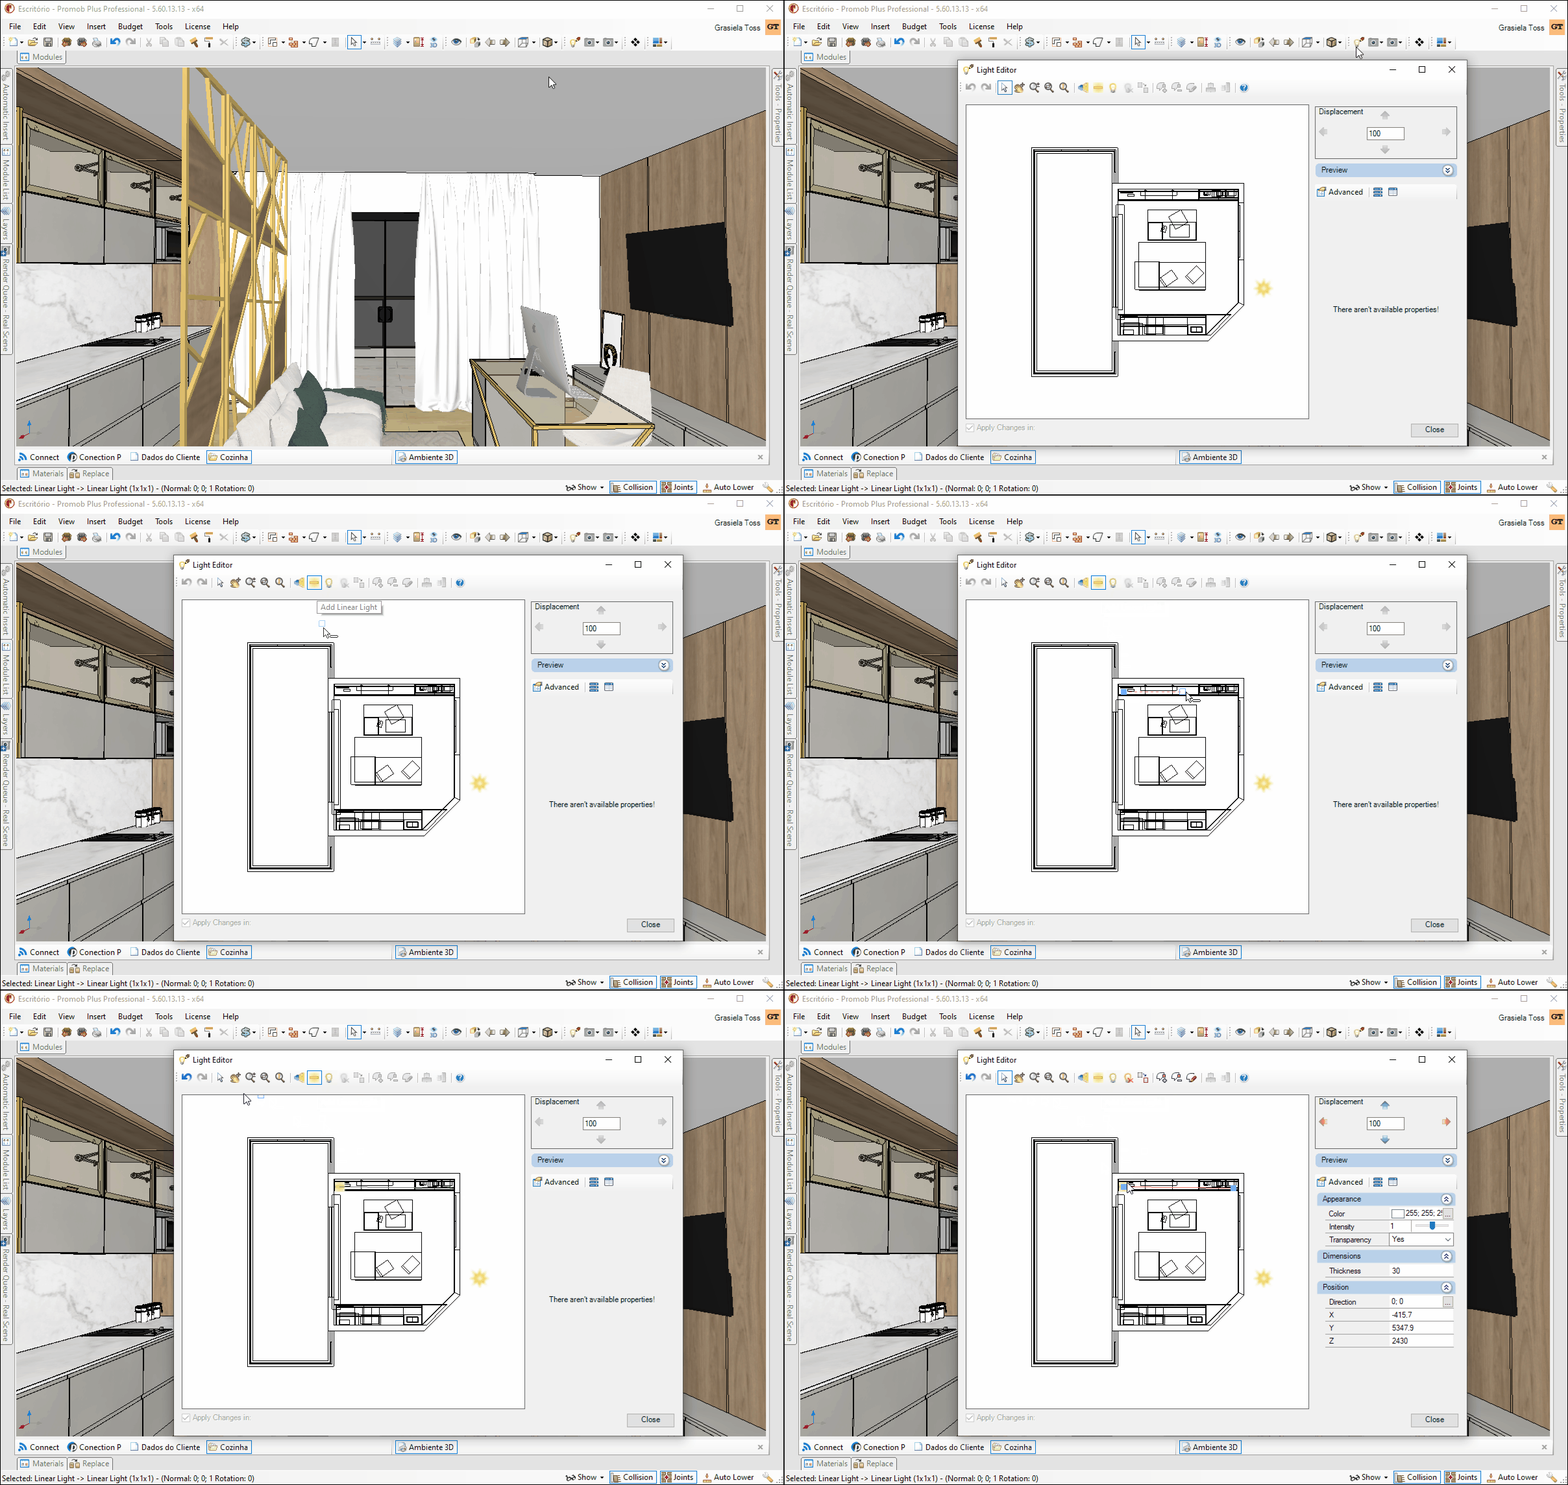
Linear
Linear light has the function of both illuminating and decorating a space. It works as a led strip and can be applied to crown molding, mirrors, furniture, among others.
To insert the linear light, select the light and the previw of the design and, by mouse clicks, insert in the desired location. Right-click to finish. To disable light insertion, click the Select / Move button.

To edit the linear light information, select it and the light setting screen will be enabled. In this screen we have the following settings:
Color: allows you to change the color of light in the space manually or through RGB information.

Intensity: allows you to change the light intensity from 0 to 2. The higher the intensity, the brighter the space.
Transparency: Determines whether light will design on transparent items.
Thickness: defines the thickness of light.
Position: Light position relative to the design in X, Y and Z.
Using the Add Vertex or Edit Shape tools you can change the shape or length of linear light.