The application of finishes in the materials inserted in the design is extremely important to give more realism to the rendered images.
All items available on Promob already have a finish applied. However, you can verify if the finish applied to the item matches the desired effect on the render.
To exemplify the concept of finishes, look at the simulation below:
In this case, the default material of the items is colorless glass.
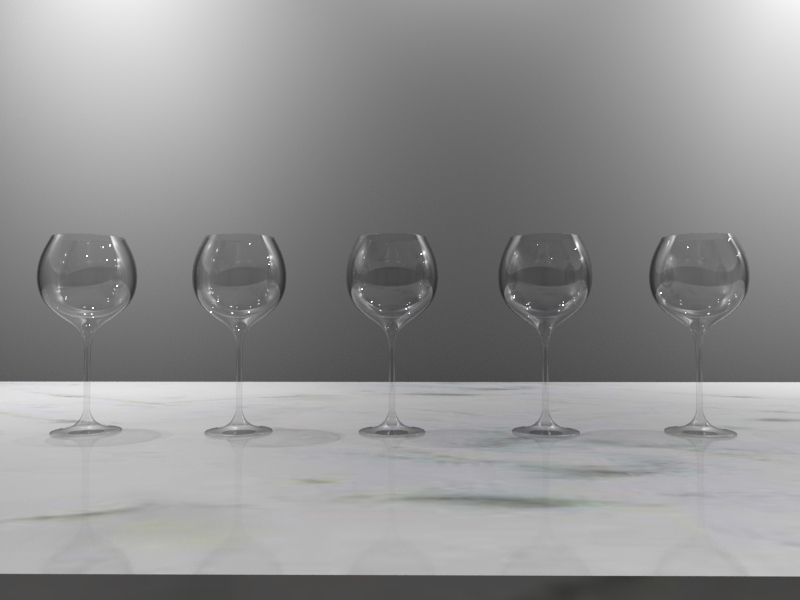
We apply different finishes to each of the cups. Rendering, this is the result we get.
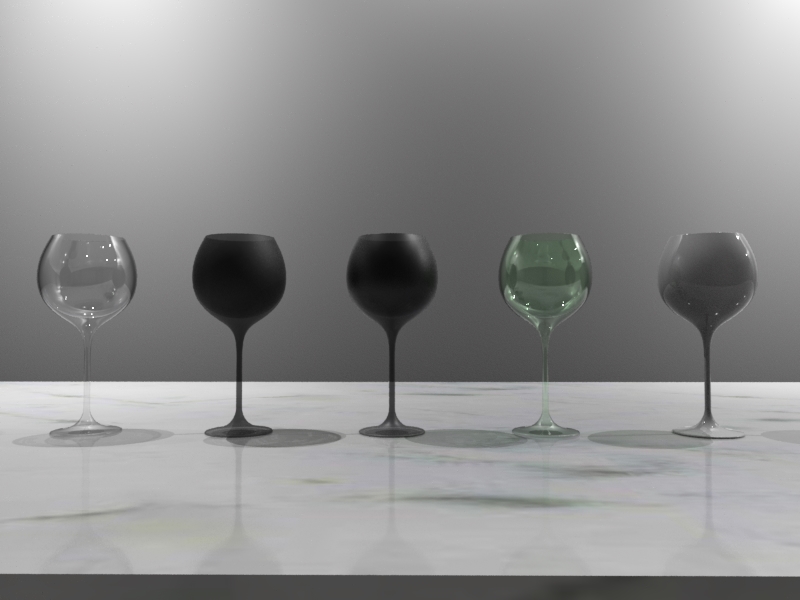
Through the Tools - Properties panel, on the Materials tab, you can change the finish of the item.
Items can have one or more components. Before applying the finish to the item, it is important to check which component is selected to receive the new finish.
Promob Plus Professional has two finishing options, MCodes finishes and Customized finishes.
This article covers the following sections:
MCodes finishes
MCodes are configured finishes that we can apply to items. When MCodes is selected, custom finishing is disregarded.
The MCodes are separated by:
GROUP: Materials category.
TYPE: Sub-category of materials.
FINALIZATION: The finishing refers to the roughness of the material, and as in real life, the less rough the material, the more it reflects, the more defined is the Shine Shape (Specular) that is perceived on the surface close to the light, and the greater the Intensity of this "burst of light”.
COATING: Selecting the Finishing of your material, you determine its roughness, and consequently a first level of reflection. You can think of the Covering as a layer of Varnish, which added to the finishing can intensify, or make your finish more opaque. Covering is an additional layer of Reflection.
The covering ranges from the opaque to the brightest and most reflective.
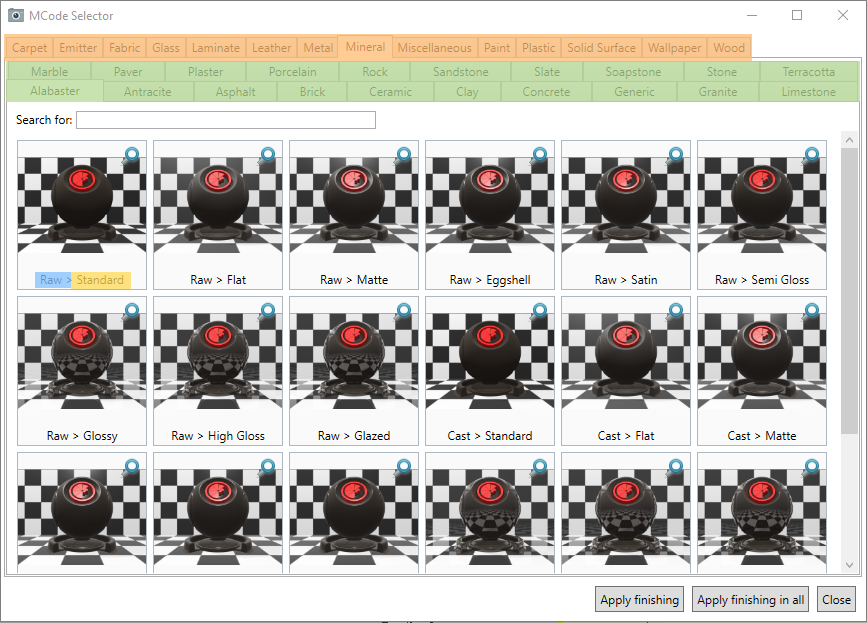
To choose the ideal finish for the item, we must ask 3 questions: What is the finish of my module? What do you look like? And how does it behave in the light?
To choose Mcode it is important to take into account the finish of your module. The last finishing layer is the one you want to reproduce in the render, e.g. polished, matte, glossy, etc.
It is worth remembering that the Standard Polish of the Glass group is different from the Standard Polish of the Wood group. Below is a list of suggested MCodes:
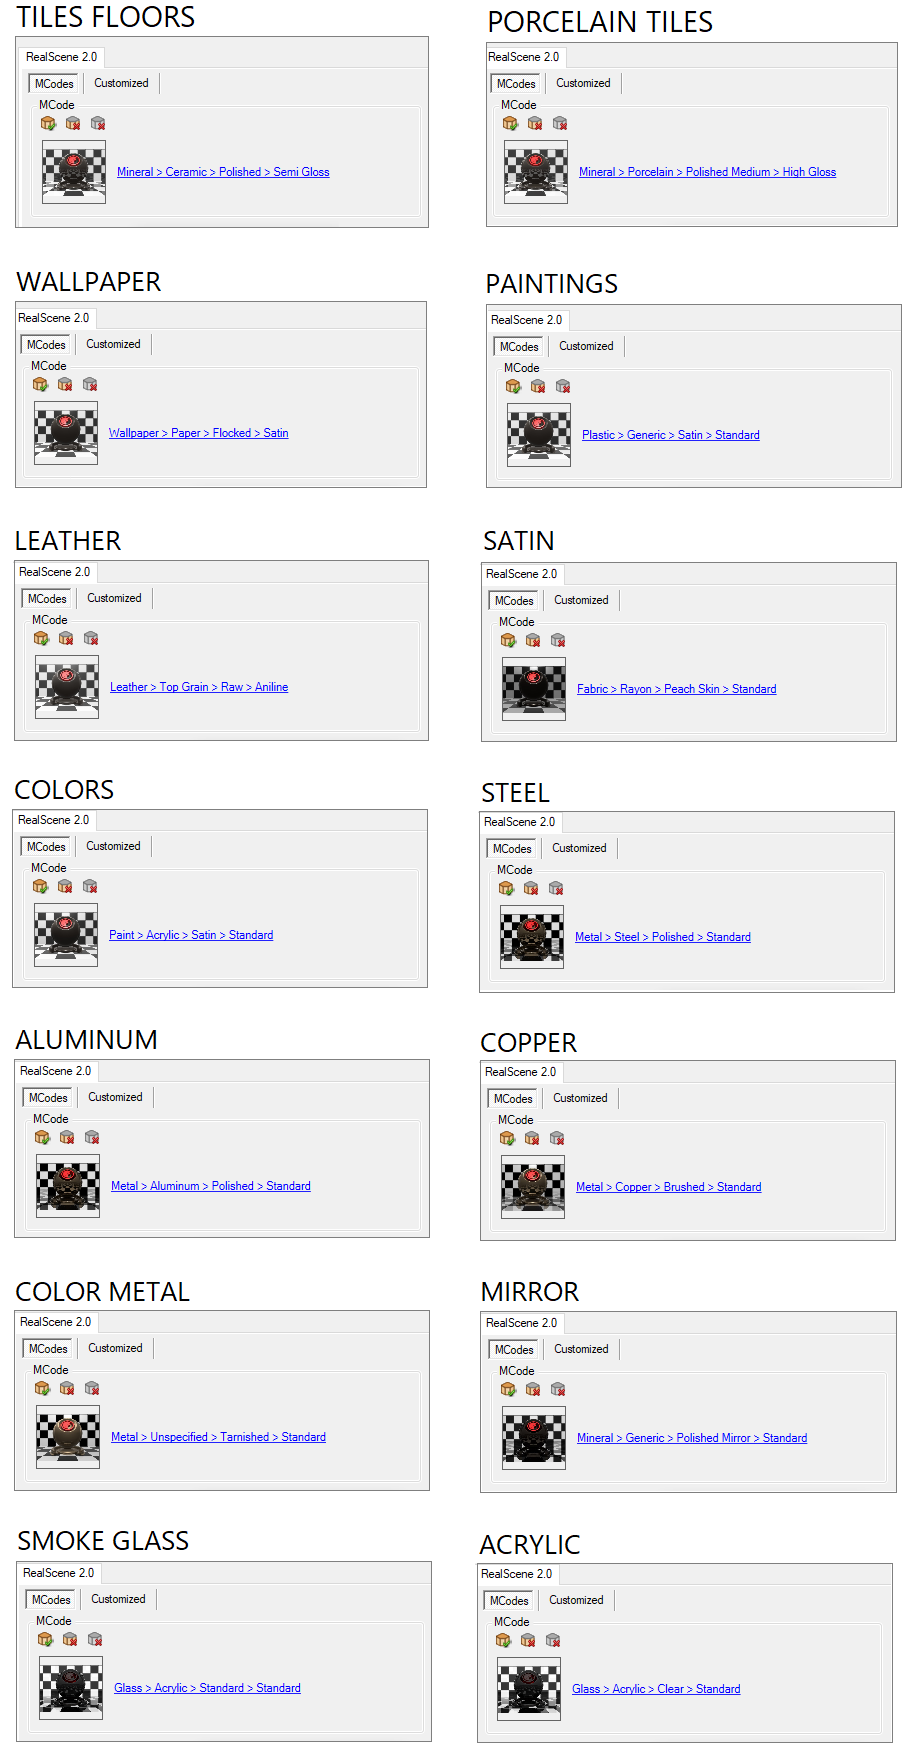
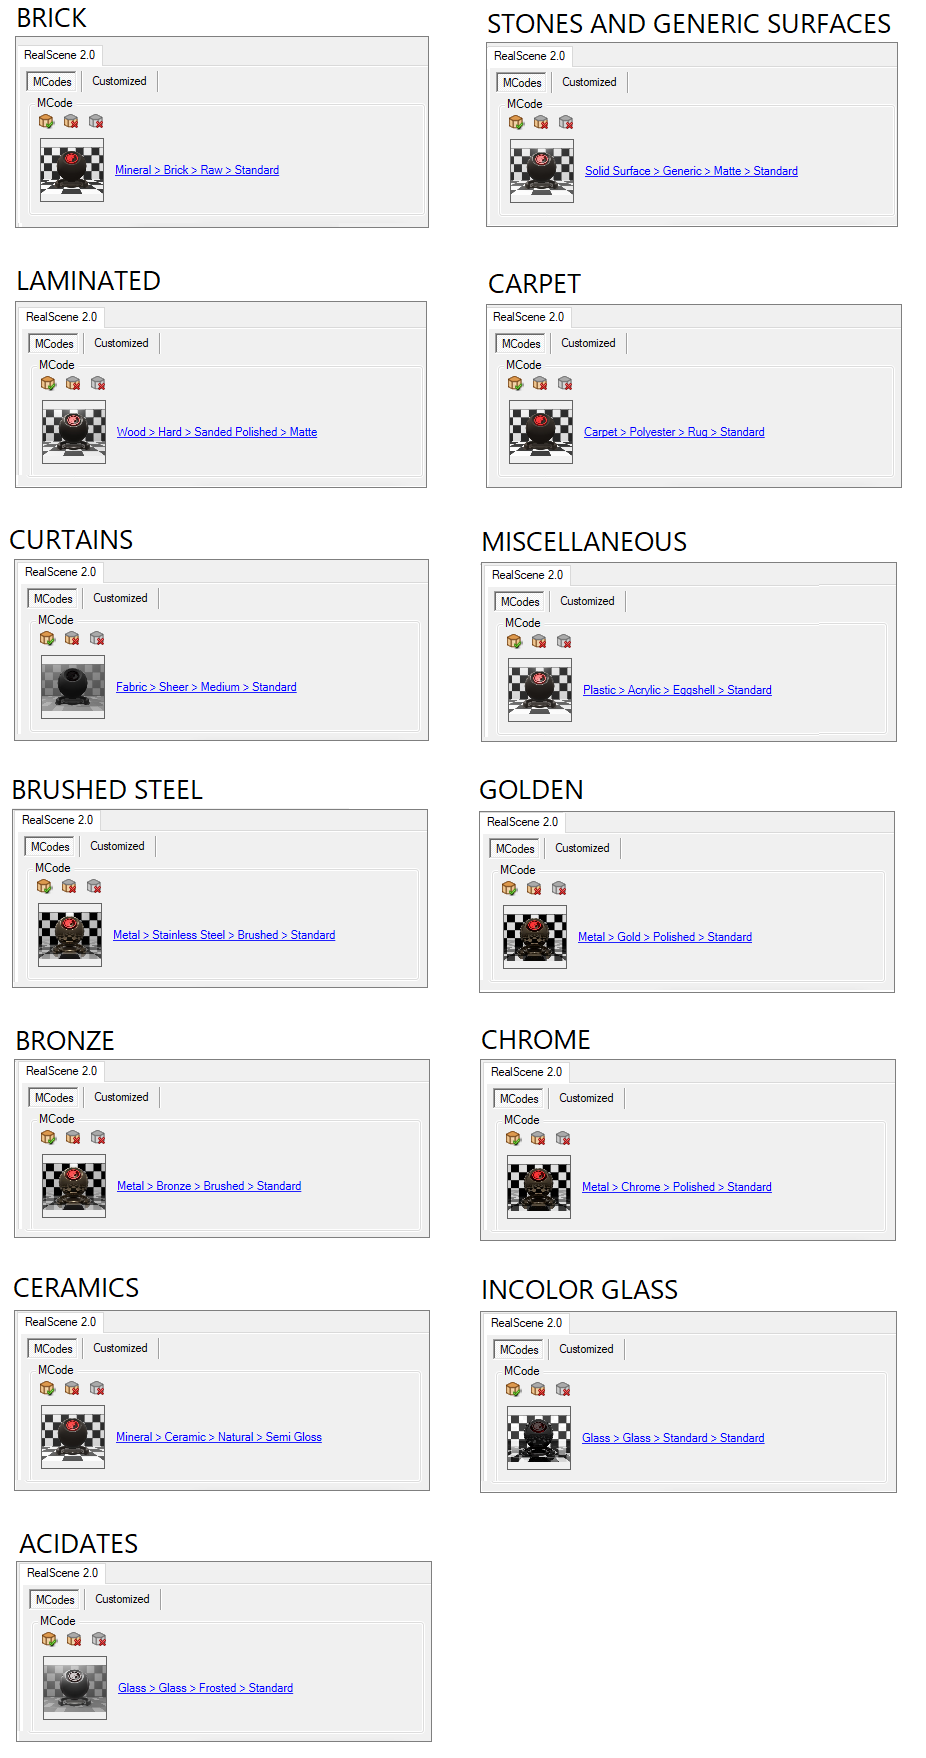
To apply the finish:
1. Select the item to be configured and on the Tool - Properties tab, click on the materials tab;
2. Make sure the component you want to change is selected;
3. In the Real Scene 2.0 tab, click on the MCode preview;
4. On the open screen, locate the finish that most closely matches the expected result. After selecting the finish, click apply;
TIP: When you check Apply finish to all, all components of the selected item will have the same finish.
Favorite MCodes finishes
To optimize the application of finishes in other projects, it is possible to set the finishes as Favorites. Thus, it facilitates and speeds up the application of the most used finishes in your projects.
To favorite a finish:
1. In the chosen finish, click on Add Favorite;
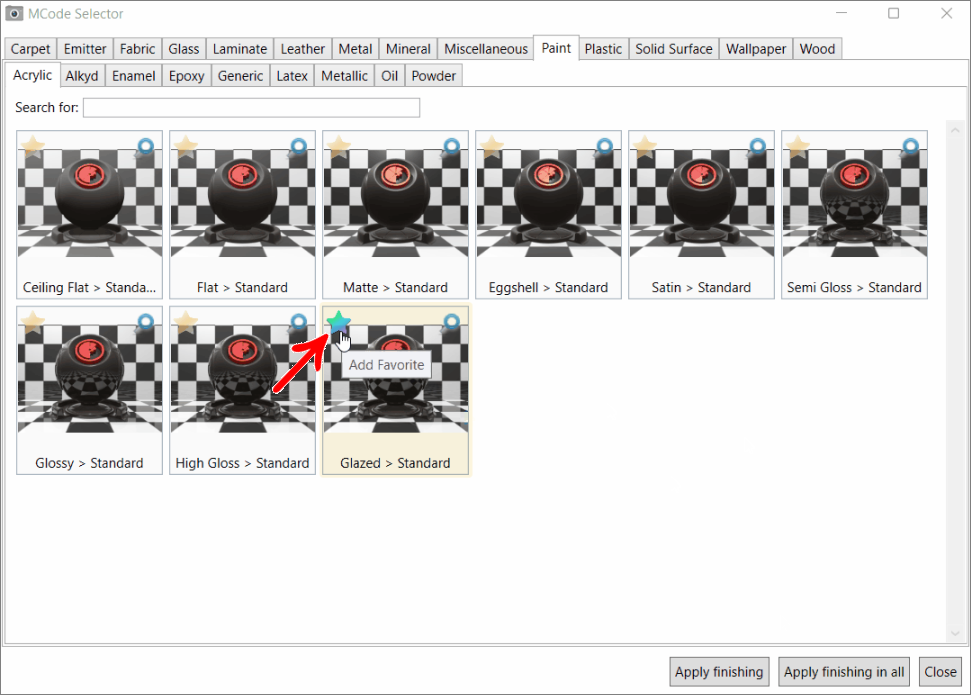
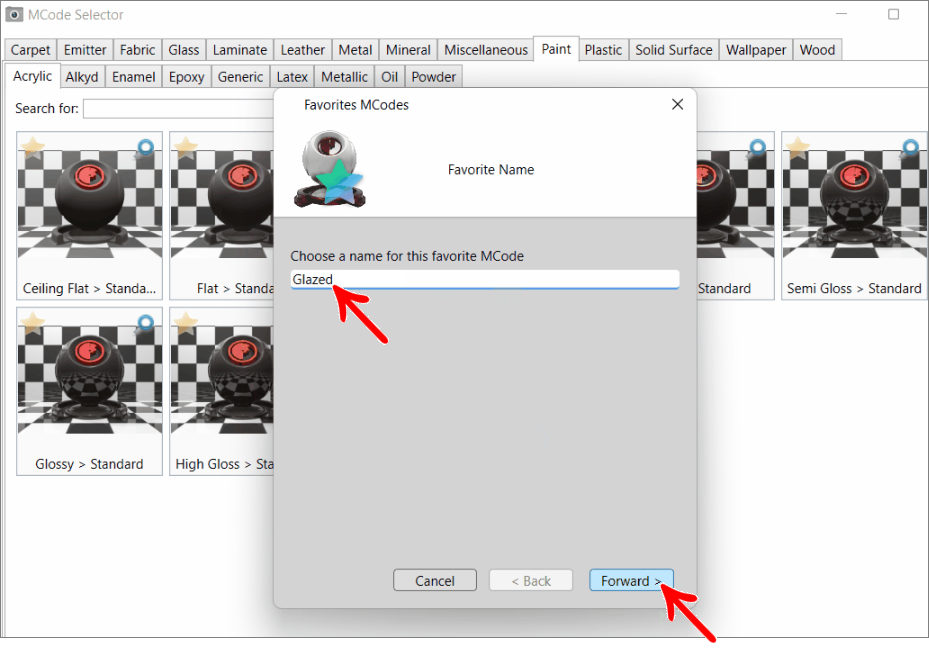
2. In the window that appears, define a name for the finish and click Forward;
3. Select the Favorite MCodes folder and click Create;
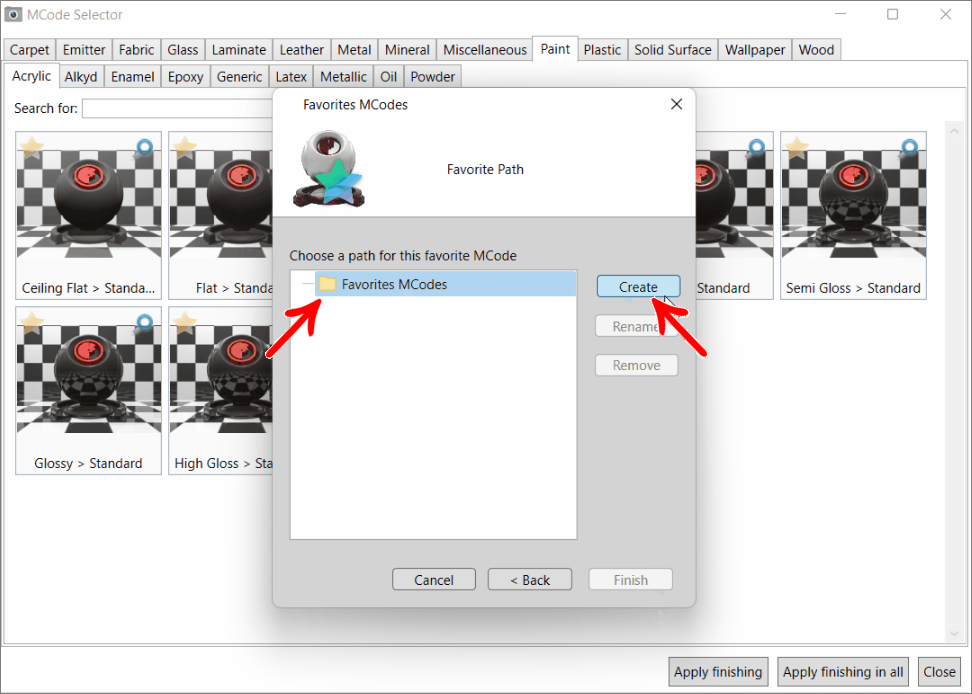
4. Define a name for the category to which the finish refers and click Finish;
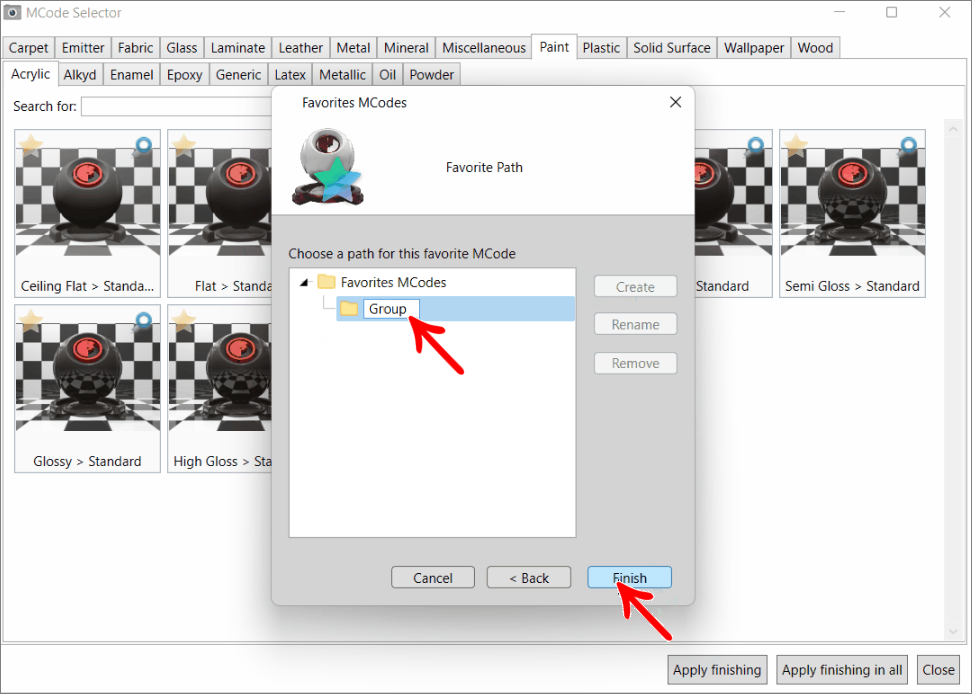
5. The finishes are displayed in their respective tab, named with the name of the created category;
6. To remove a favorite finish in a category, you must click Remove Favorite;
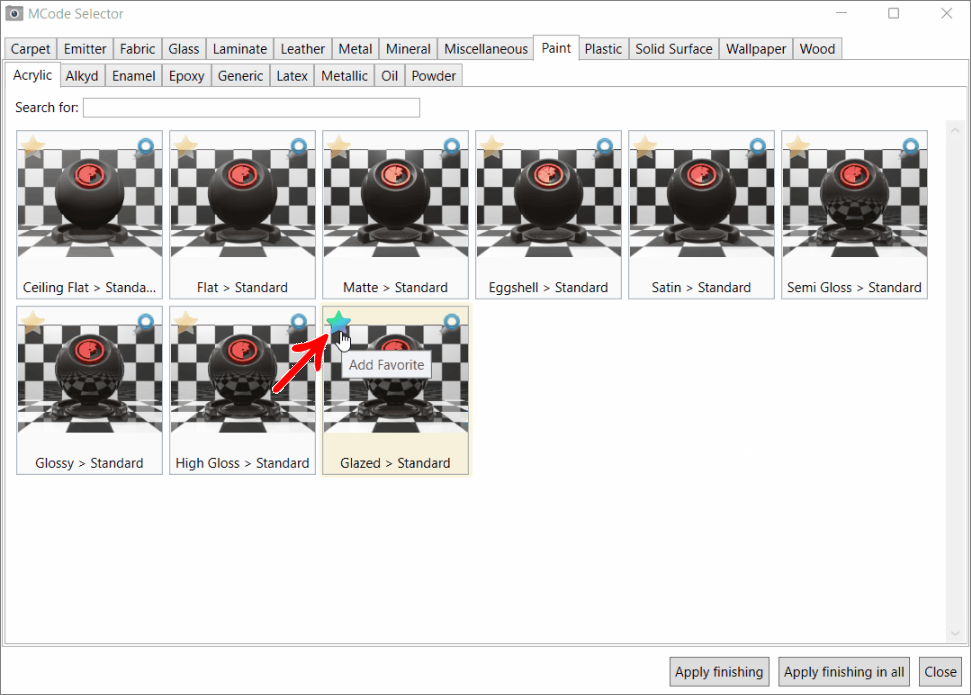
NOTES:
- The item is only considered as a favorite after clicking on the Finish option;
- It is not possible to favorite a finish in the Favorite MCodes folder, it is only possible to create categories within it;
- In the Favorite MCodes folder, you can create as many categories as you need;
- Within each category created, it is possible to add as many finishes as needed;

Customized finishes
When an MCodes finish does not reproduce the desired effect, you can set a custom finish by setting its properties. When the custom option is used, the finish selected in MCodes is disregarded.
To apply the finish:
1. Select the item to be configured and on the Tool - Properties tab, click on the materials tab;
2. Make sure the component you want to change is selected.
3. In the Real Scene 2.0 tab, click on Custom;
4. Some settings will be enabled for editing:
Crand: defines the relief of the material applied to the item
Metallic: defines the item metallic effect. The brightness of the item is modified by its surface color and not just the light source color.
Maximum reflection: controls the intensity of the reflection of objects inserted in the design.
Minimum reflection: controls the intensity of the reflection of the lights inserted in the design.
Roughness: defines the roughness of the item in the render.
Transparency: Applies the transparency effect of the material applied to the object. The effect of this property can be observed in both the space 3D and the rendered image.
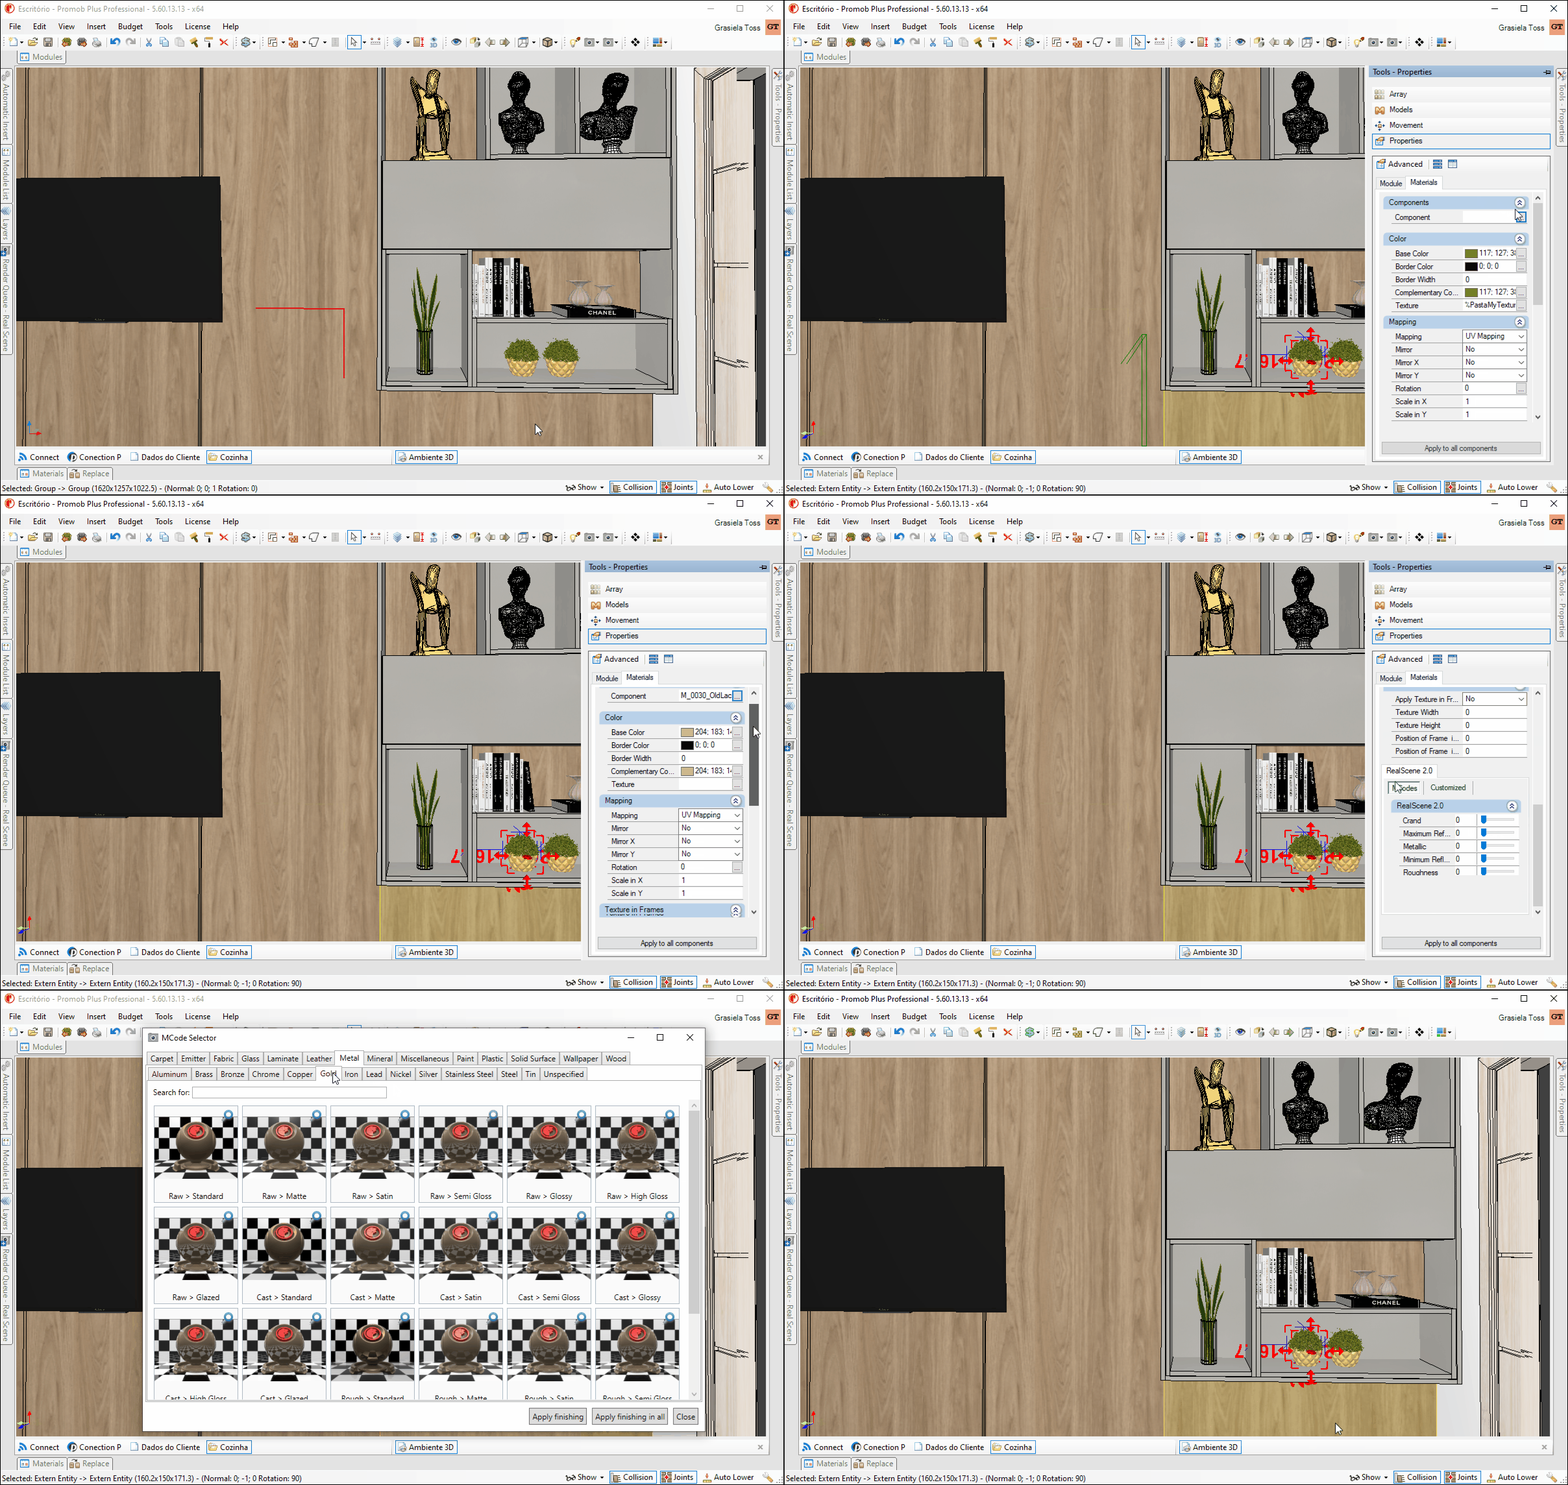
Tip: When you check Apply finish to all, all components of the selected item will have the same finish.