NOTES: Real Scene 2.0 uses cloud features, so internet connection is a minimum requirement for rendering to occur. Otherwise, rendering is not completed.
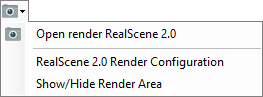
To access Real Scene 2.0 settings, click on the camera icon and then click on Render Real Scene 2.0 Render Configuration.
The screen with quality configuration, background image, dimensions, use sun and sky and use watermark will be enabled for editing. Now let's understand how each of the settings works:
Render Quality
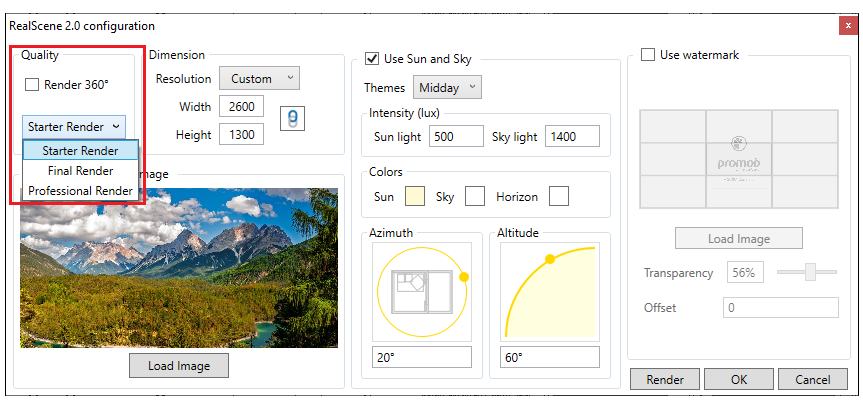
In Real Scene 2.0 you can choose from 3 render quality settings:
Starter Render: use this render option to view and evaluate the result of the initial lighting settings. This option prioritizes rendering time and generates a lower quality image.
Final Render: after adjusting materials, finishes, and lights, use this render option to increase quality and generate a more realistic image.
Professional Render: this rendering option generates images comparable to photographs, where you can see details that bring objects closer to reality. With this option selected, rendering time can be longer.

Started Final Professional
But remember that rendering time depends on various design factors, such as the lighting, design size, finish applied, among others.
Background image
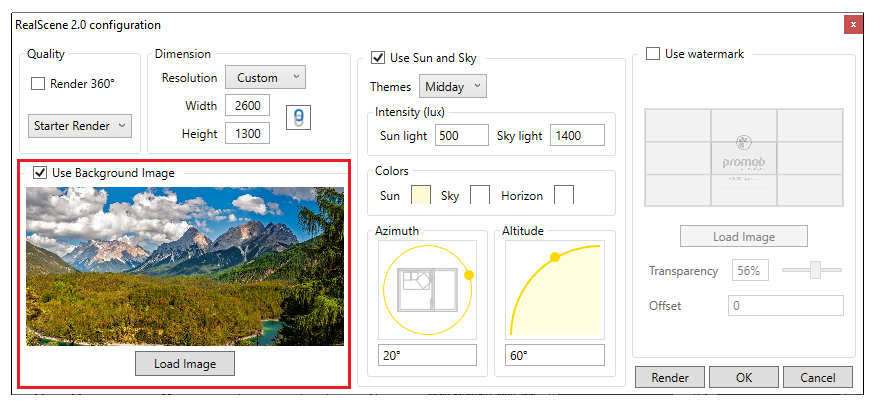
In Real Scene 2.0 it is possible to set a background image, so it will be displayed in the windows.
With the image saved on your computer, check the Use background image option and after clicking on Load Image, select the desired file.
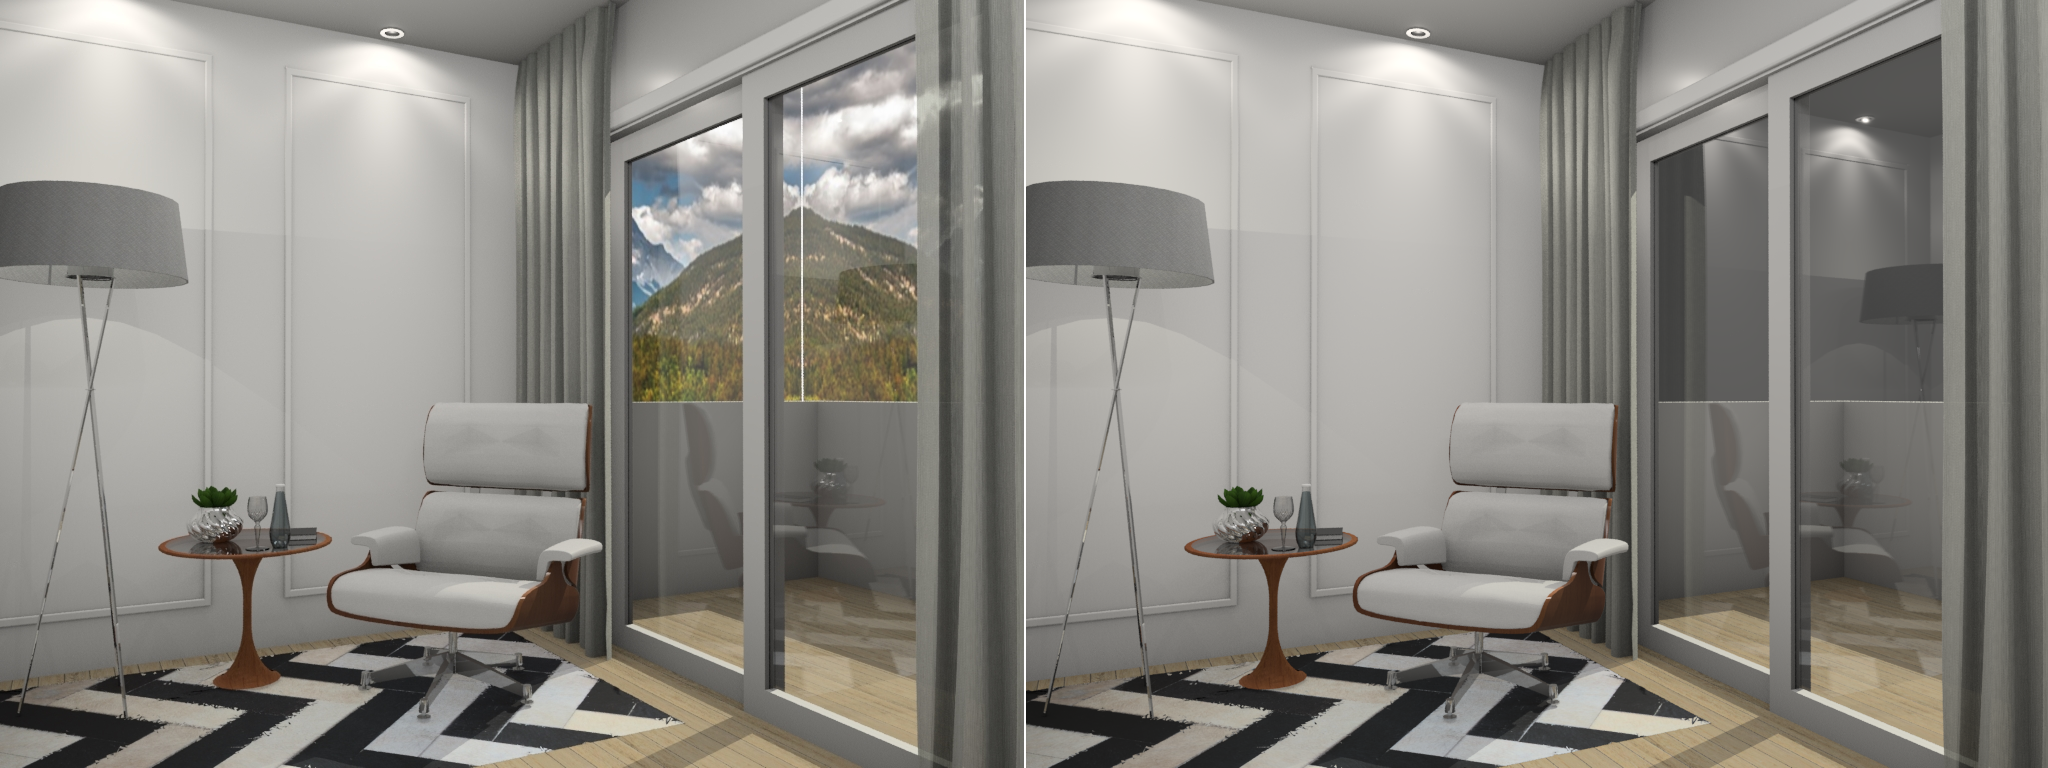
With background image Without background image
The image preview will be displayed on the render settings screen. When you uncheck Use background image, the image will still be available but will not be displayed in the render.
Dimension
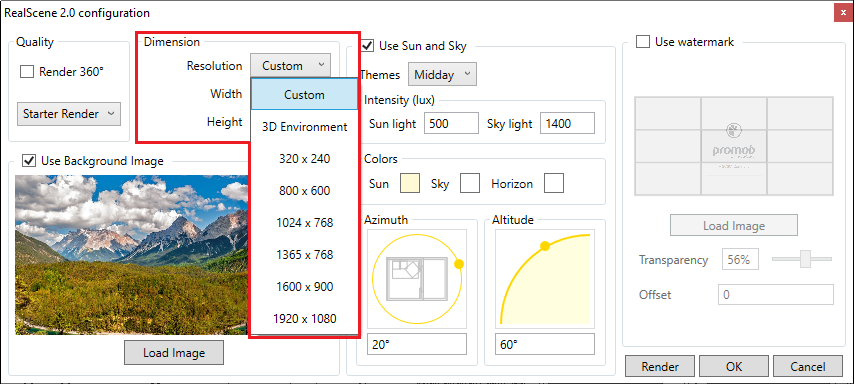
In Real Scene 2.0 we can define how big the image will be rendered. By default, there are 3 different resolutions:
Custom: Allows you to set a resolution different from the options displayed in the list, through the Width and Height properties.
3D Environment: displays the width and height of the design image displayed in the space 3D.
Default Sizes: displays a list with the default render sizes.
Keep Aspect Ratio
With this feature Keep aspect ratio enabled the resolution will have the proportion maintained. So when the height is manually changed, the width will automatically be displayed according to its proportion and backwards too.
Use Sun and Sky
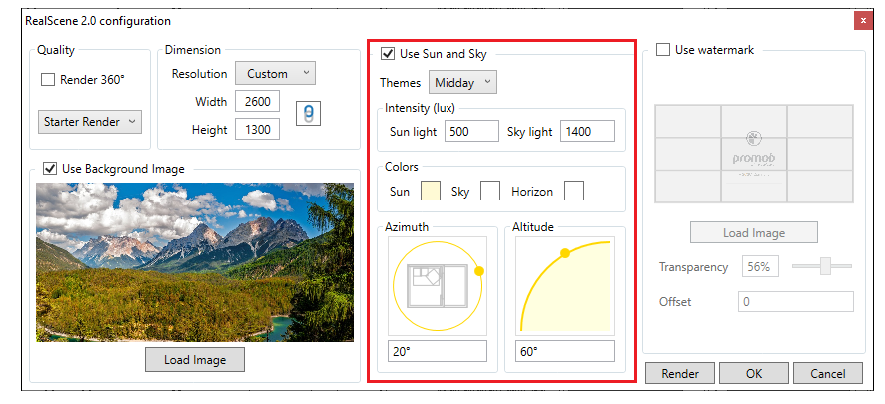
By checking Use sun and sky, natural lighting effects are enabled. This tool helps the scene lighting process as it defines whether the light from the outside will illuminate the scene. In this case, the higher the intensity of sunlight and sky, the brighter the design renders.
In Real Scene 2.0 it is possible to generate a render using just this setting, without the need to insert lights through the light editor or insert luminaires. As we can see in the images below:
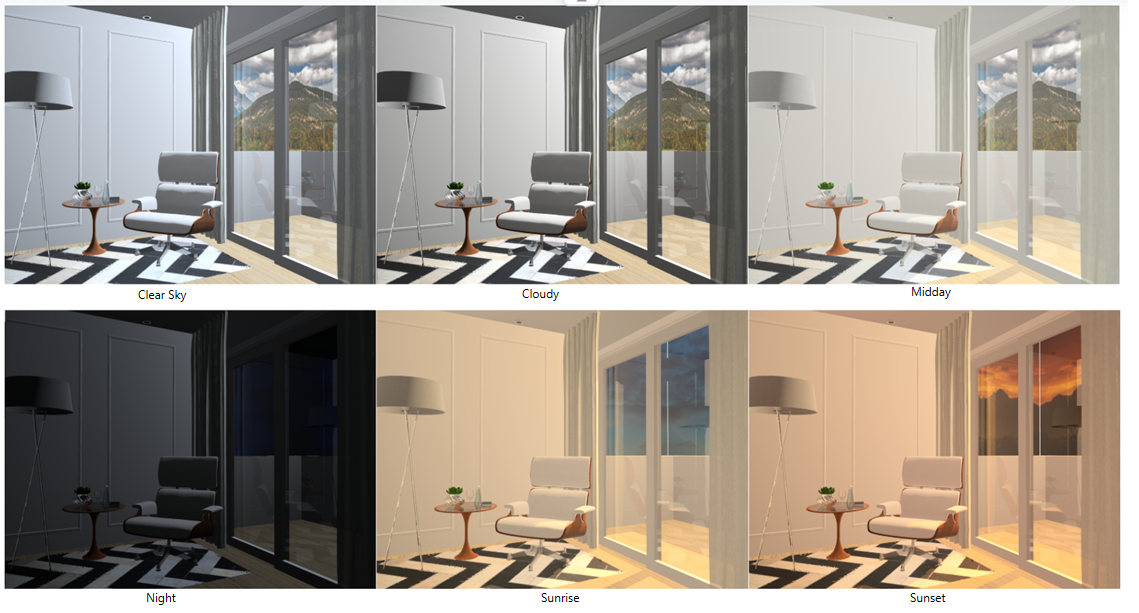
The Sun and Sky tool already have some themes configured, such as clear, cloudy, noon, night, sunrise, and sunset. Note that when changing themes, the information of sunlight and sky intensity changes, as the colors of the sun, sky, and horizon.
But nothing prevents this information from being changed. We can change the intensity of light or the colors of the sun, sky, and horizon.
It is important to know that in order for the sun to be marked on the floor, the sunlight option must have some value.
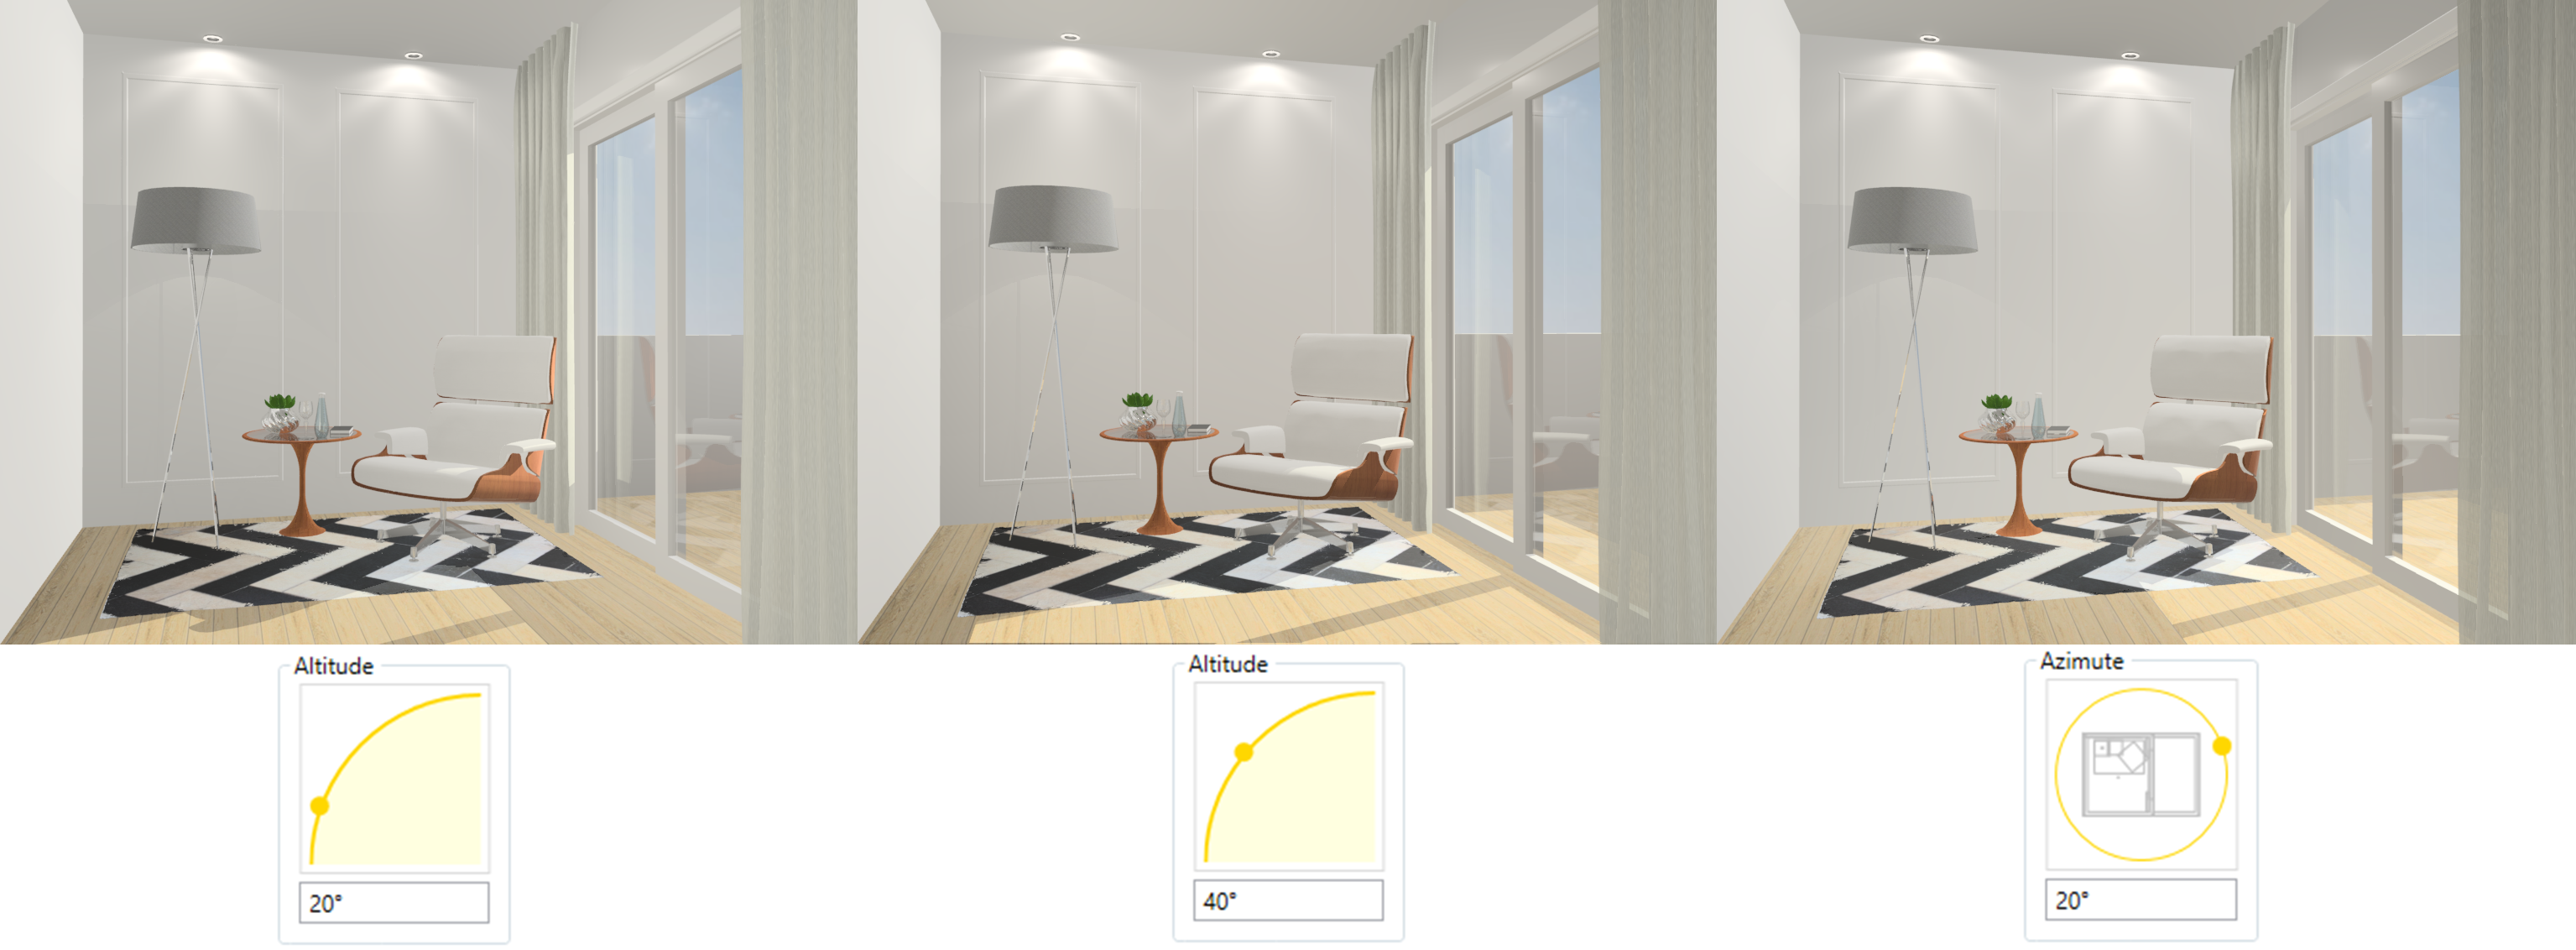
In addition to these features, in Real Scene 2.0 we can direct sunlight to a certain part of the space design 3D through the Azimuth and Altitude tools.
Azimuth: is the horizontal position of the sun.

Altitude: is the vertical position of the sun.
Use watermark
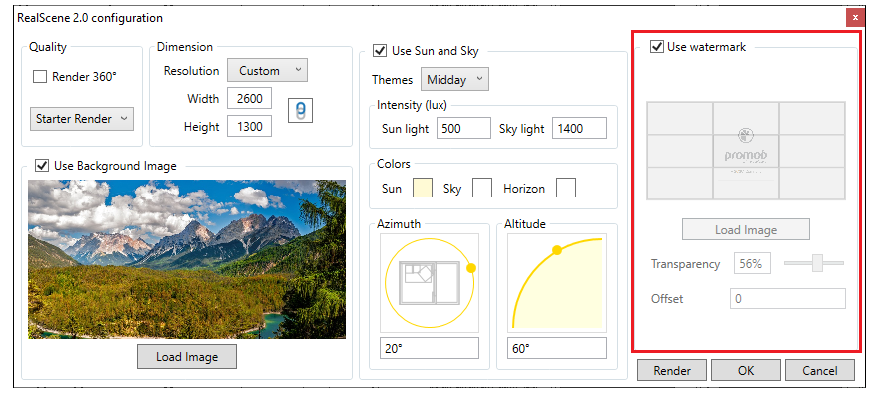
To insert a watermark over the rendered image, check the Use watermark option. Some tools will be enabled:
Choose image: locate the image that will be used as a watermark.
Position: Set the position of the watermark by clicking on the image preview.
Transparency: set the value of watermark transparency. The higher the value, the less visible the brand will be.
Edge Offset: sets the image's pixel offset from the edge of the render page. The offset is calculated according to the selected position.