Promob has some fields by default to enter customer or company information. These fields are standard for all systems and distributions, however, through the Catalog, it is possible to create fields according to your need, which we call Custom Fields.
They have a classification of Project Details fields, fields required in each new design. And the rep_ fields, fields with information that are saved and remain filled in each new design.
The following sections are covered in this article:
Behavior of Project Details fields in Promob
Storage location for Project Details fields
Validation of mandatory fields
Project Details Fields
The fields on the Project Details tab are fields related to customer information and data, requested when starting a design. By default they are divided into:
- Identification data (name, email)
- Address data (address, city, etc.)
- Document data (Personal ID, Company Registration ID)
Behavior of Project Details fields in Promob
Custom fields are displayed on the Project Details tab, on Additional Information, and have the characteristic of being unique for each project, that is, when creating a project, the information must be re-entered.
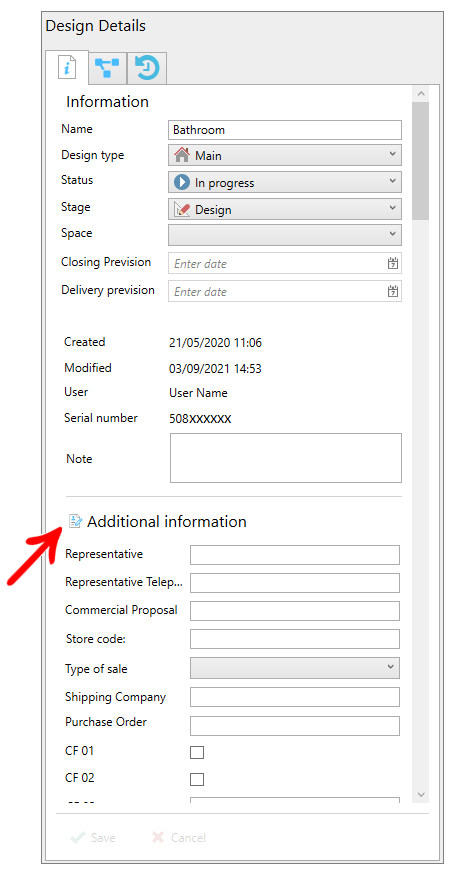
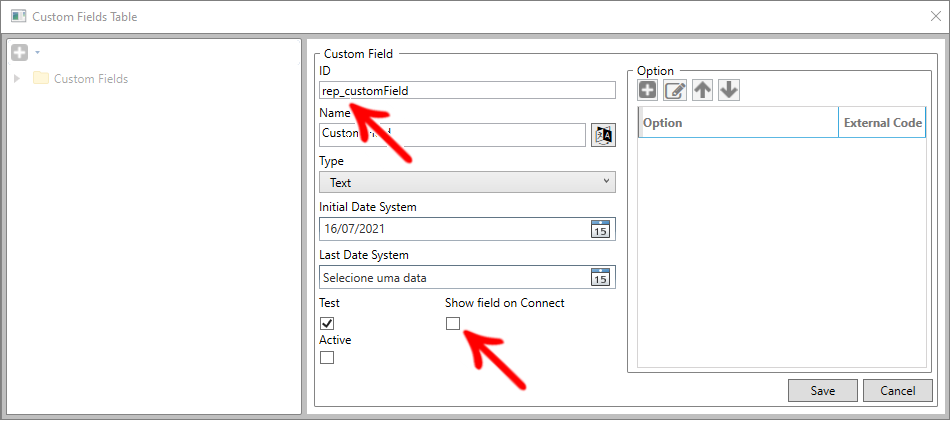
When a custom field is created, it is displayed on the Project Details screen. The exception occurs with a field of type rep_, which, in order to be displayed on the Project Details tab, it is necessary to mark the Show field on Connect option as true.
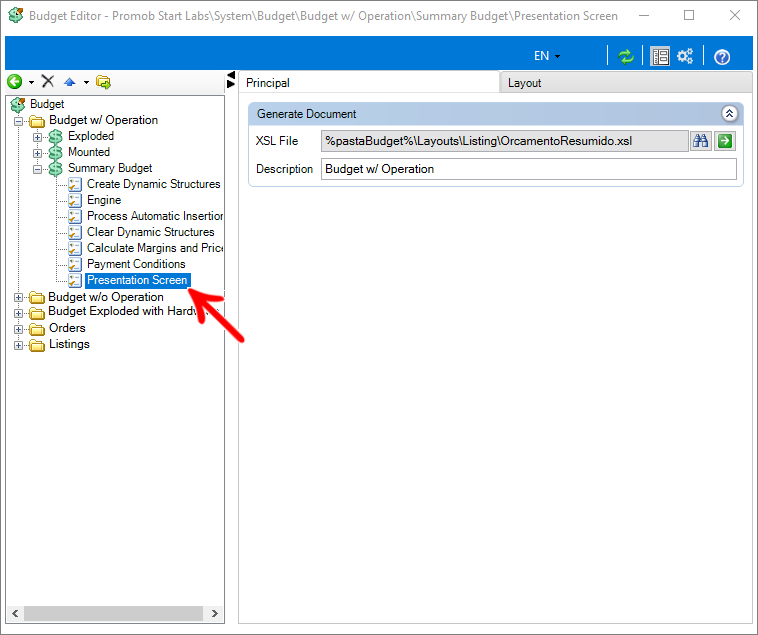
When generating a budget, the data from the Project Details fields can be displayed in the budget, as long as its ID is informed in the XSL file, generated when customizing the Presentation Screen of the budgets, in the Record - Budget - Budgets tab in the Catalog.
The XSL file is stored in the Disk C:\Program Files\Promob\Promob (Promob Name)\System\budget\Layouts\Listing path.
Storage location for Project Details fields
When creating a new custom field from the Project Details screen, the information ias saved in the database, in the CustomFields collection.
CustomFields are created by systemId, that is, applied to all systems without distinction of account. That is, it is not necessary to republish the system, and/or include accounts in the media for users to be able to view the changes. When the fields are created, edited and saved, the change is automatically forwarded to all Promob subscriptions with the same library (System).
Applied IDs are also displayed in the budget XML file.
Rep_ fields
The rep_ fields are known this way, because their ID starts with rep_ and has the characteristic of informing data that usually do not change and that do not relate to the customer, such as, for example, the company's zip code, or the number of the company registration.
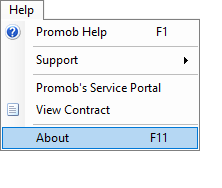
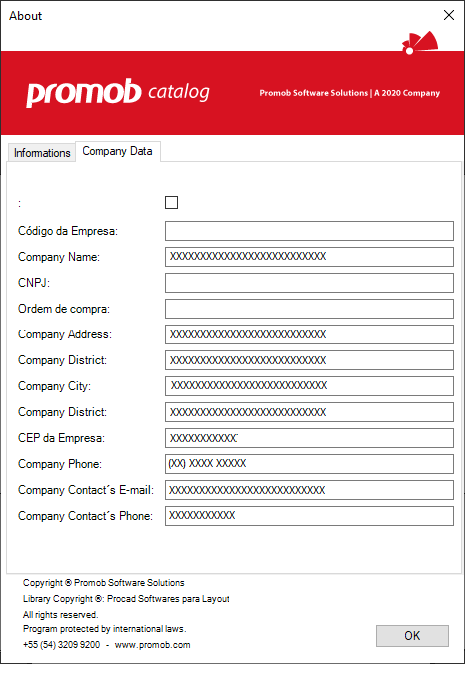
The data for the rep_ field is located in the Help -About menu:
Rep_ field behavior in Promob
The fields displayed on this screen have the characteristic of being filled in once and regardless of the design, when reopening Promob, it remains filled.
The fields that appear on this screen are of type rep_ and are not marked as true in the Show field on Connect option.

When generating a budget, data from the rep_ fields can be displayed in the budget, as long as its ID is informed in the XSL file, generated when customizing the Presentation Screen of the budgets, on the Registry- Budget - Budgets tab in the Catalog.

The XSL file is stored in the Disk C:\Program Files\Promob\Promob (Promob Name)\System\budget\Layouts\Listing path.
Rep_ fields storage location
The information is saved in the user's local folder, and no information is saved in the System database.
The custom fields are saved in Promob's local folder (Program Data/Procad/System Folder/Repository/CustomFields.sys), so if this file is removed, the data will also be lost and must be filled in again.
Applied IDs are also displayed in the budget XML file.
Create a custom field
To register custom fields:
1. Go to Registry - Custom Fields;

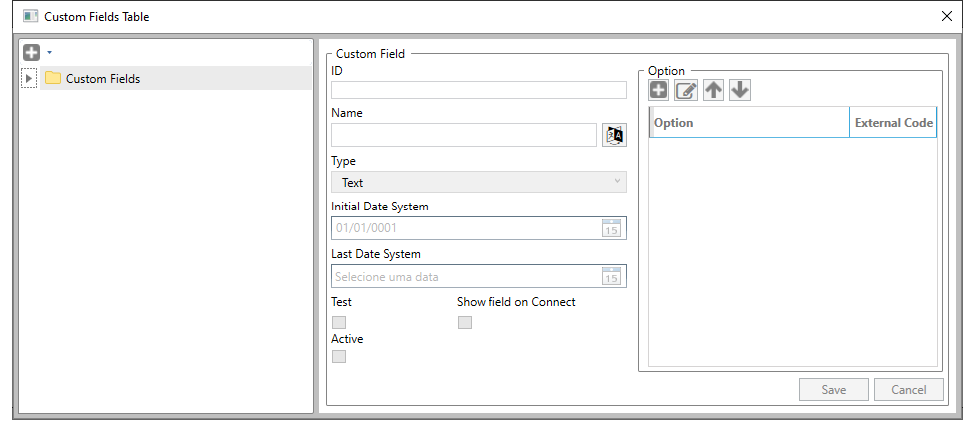
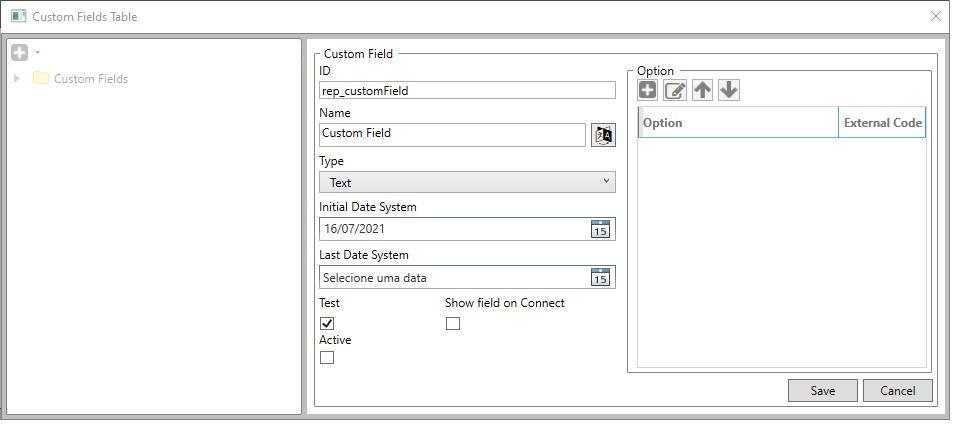
2. The Custom Fields Table are displayed:
3. Click New Field Creation to create a new custom field;
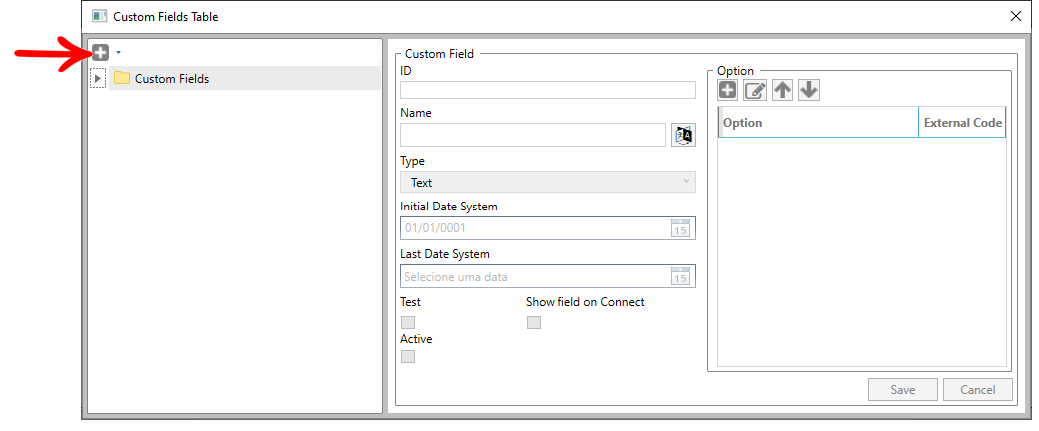
4. Enter the required data:
ID: ID of the custom field.
- If the field starts with rep_, it will be displayed in the Help-About screen.


- For the other cases, it will be displayed in the project details.
- For situations where you want to transfer a rep_ field from the Help - About menu to the Project Details tab, just check the Show field on Connect option. This way, the field is only displayed on the Project Details screen and no longer in the Help - About menu.
Name: Name of the field that will be displayed to the customer.
- The field can be translated;
- The Name field does not accept blank values after starting the field registration.
Type: define the field type.
IMAGEM
- Text: Free text field.
- Checkbox: True or False;
- Date: Date
- Combo Box: Multiple options field.
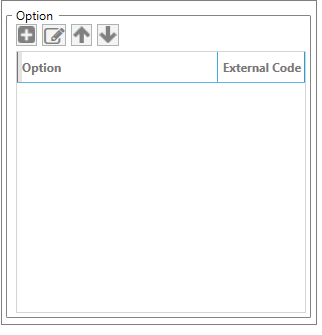
- To create the options, you must fill in the Option and External Code columns.
- Option is the information displayed for the user to select where to receive translation;
- External Code is the data displayed and sent to the XML that does not receive translation.
- Default Value: In this field, select a default value from the options added in the Combo box.
-
- Check box: True or false;
- Date: Date
- Numeric alpha: Numbers and letters only.
- Numeric: Only numbers.
Initial Date System and Last Date System: Period that the field will be displayed;
Active: check this option to enable visibility or not of the field.
Show field in Connect:Option available only for rep_ fields. If checked, the field rep_ is displayed on the Project Details screen and is not displayed on the Help - About screen;
IMPORTANT: For the field to be displayed in the Help - About menu, its ID must begin with rep_, for example, rep_cnpj. In addition, the Show field on Connect checkbox must not be enabled, so that it is displayed in the Help - About menu.

3. When you have finished your registration, click Save.
Edit a custom field
To edit a field, on the left side, select a saved field and edit the desired data. Afterwards, click on Save.
Translate custom fields
To translate a custom field, locate the translation icon,  and select the desired language to add the translation. Click Save.

Updating the default HTML
Currently, for custom fields, standard HTML is used. When a system has a custom field, regardless of whether it is a Project Details field or Rep_ Fields, it is dynamically added to the standard HTML, so that it can be displayed in Promob. This file is saved in the program/documents/data.html folder and is in the Connect repository.
Validation of required fields
Some systems guide the shopkeepers to fill in some standard or custom field to be able to generate the budget.
Therefore, before starting the budget generation process, Connect is responsible for creating this validation. If a mandatory field is not filled, a message is displayed to the user informing that the specific field was not filled, and the budget is not generated.
For more information on including data required to generate the quote, click here.
Budget Usage
When generating a budget, these values are populated in the budget's XML base, and a mask is later applied via an XSL file, used to customize the budget presentation screen, in Registry - Budget - Budgets.
For this, it is extremely important to make sure that the IDs of the custom fields are correctly informed in the XSL file, otherwise, when generating the budget, the fields are left with empty information, blank.

The XSL file is stored in the Disk C:\Program Files\Promob\Promob (Promob Name)\System\budget\Layouts\Listing path.