Which Cut Pro configuration do you use?
Select the configuration used below and directly access the ideal content to help you.
Cut Pro Complete configuration.
Cut Pro Simplified configuration.
Review Cut Pro's Complete configuration and Simplified configuration here.
Apply edge band in Complete mode
- If edge bands are not available, registration is required. To do this click here and find out how to register edge band.

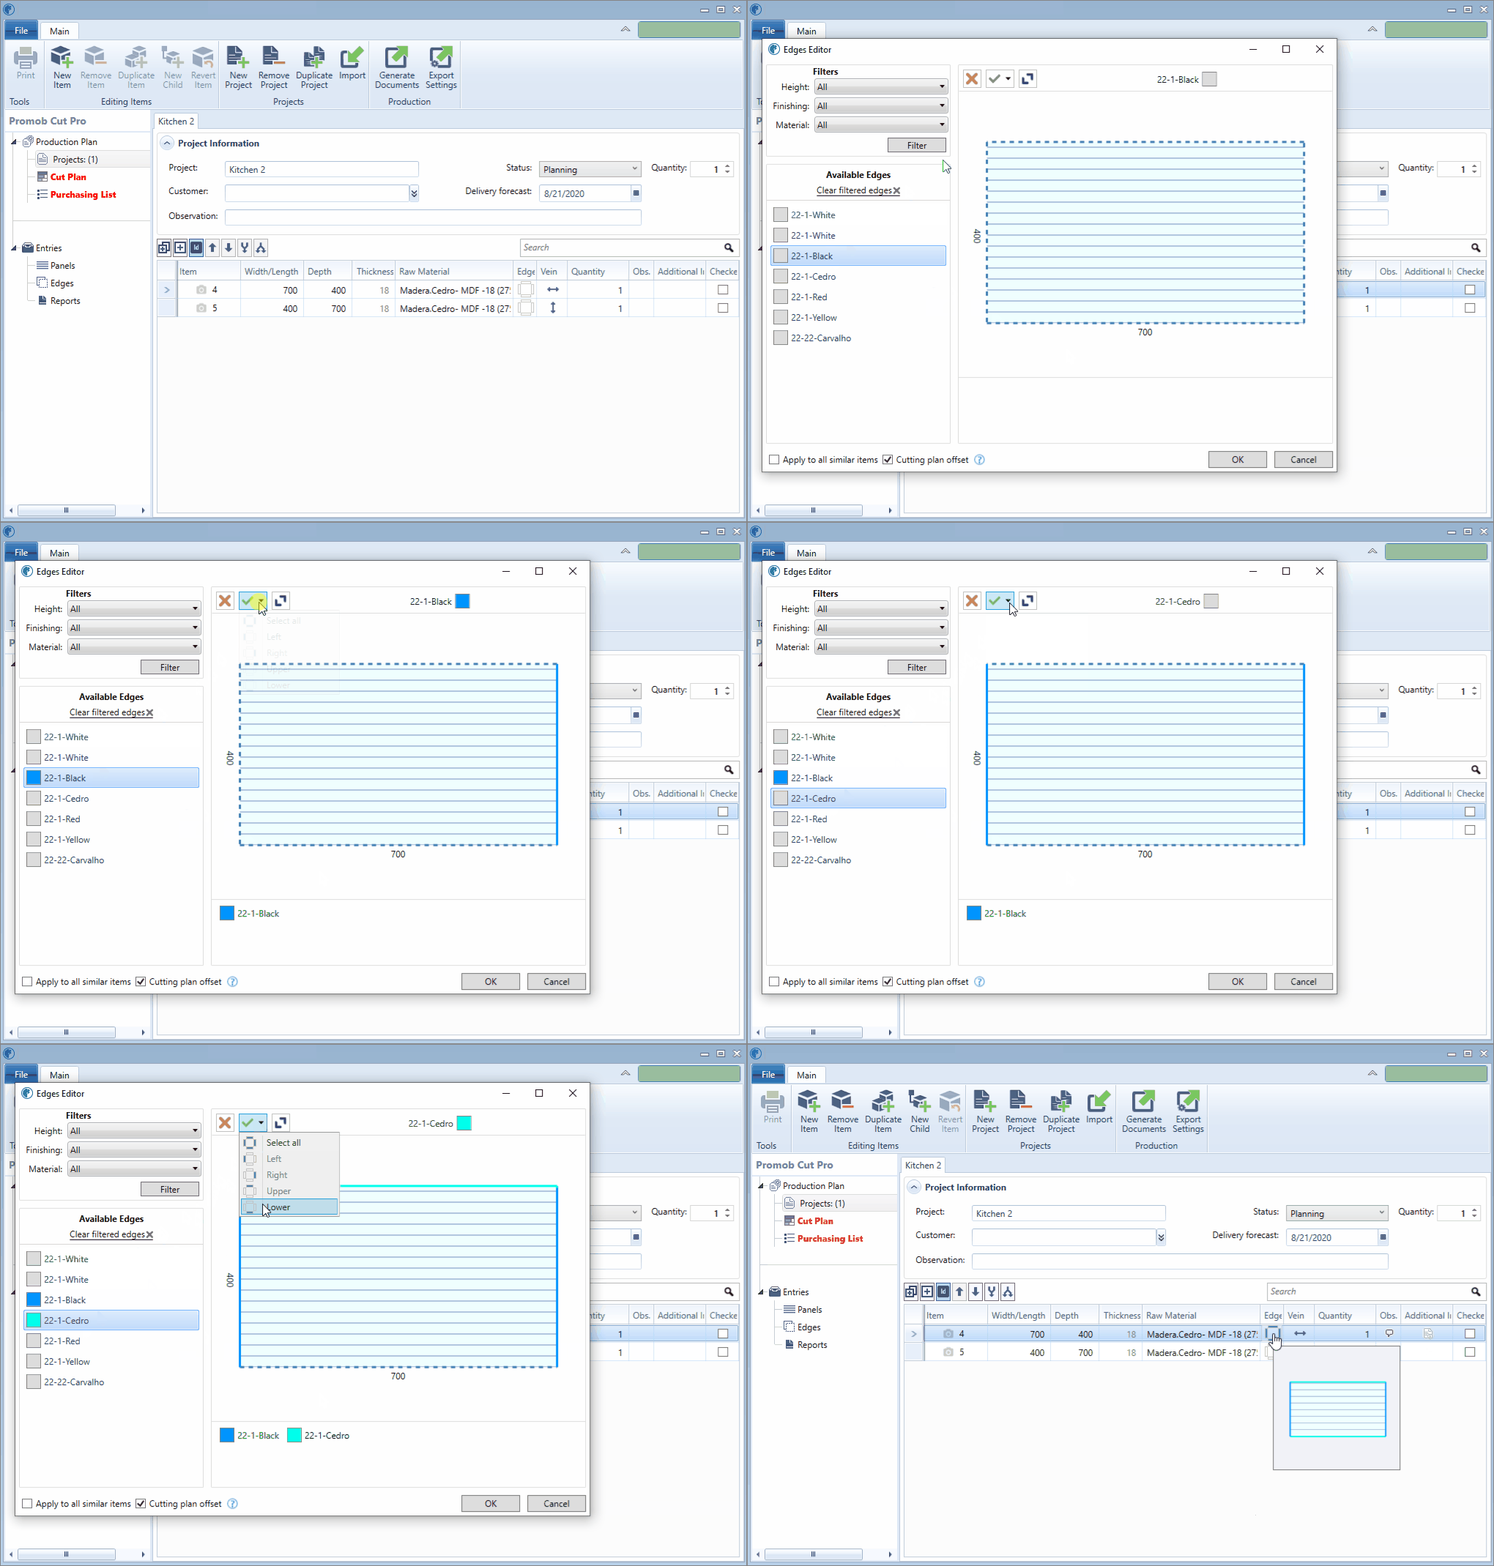
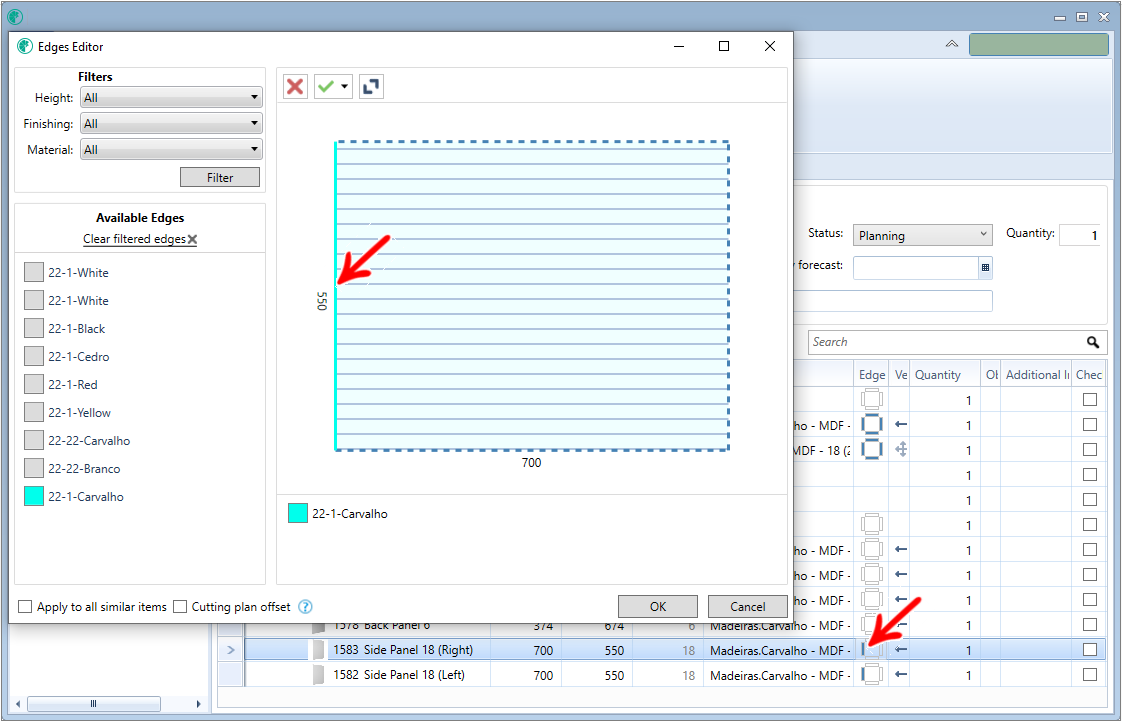
3. After selecting the edge band you want, select the side of the part where you want to apply the edge band;
- You will define which edge models will be applied if they will all be the same for all the sides of the pieces, or if each side will receive a different edge band and so on as needed;
4. Use the Selection tool to speed up the application on the sides of the part; 
- In this option, you can check the Select All option, apply border on all sides of the pieces, or select one of the other positions, Lower, Upper, Right, and Left;
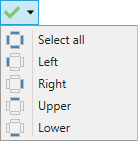
5. If you want to unload all the applications, click on Clear Selection; 
6. If there are similar pieces that are the same as the edited item, and that have the same associated raw material, and that will need to receive the same edge application, check the option Apply to all similar items, for better optimization of your work

7. To consider overcutting the parts, if you want to discount the overcut on the sides that have edge band applied, check the Cutting plan offset option;
- Click here for more information about Overcut.


Use the Filters tool to assist in finding a specific edge band model. It is possible to filter using the Edge band Height, Finishing, Material and Thickness information;

- Use the legends referring to the edge bands models, when clicking on the desired model, the information is visible in the header, and in the footer the legend with the models inserted in the piece;

- For better visualization of the sides and application of the border, use the zoom, using the Scroll Mouse. To return to the original view, click Reset


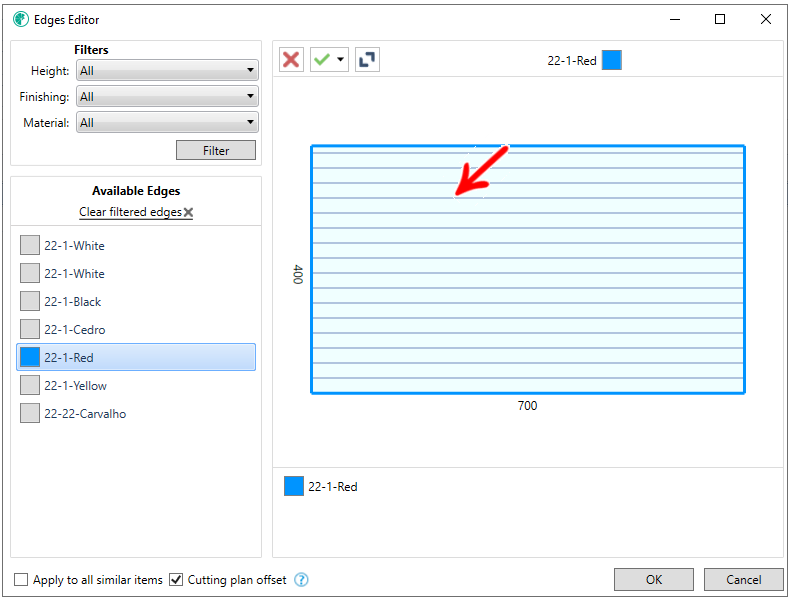
- If the piece is composed of raw material that has a vein direction, there will be horizontal or vertical stripes in the drawing of the representation of the piece, in the example below the piece has vein direction, so it does have stripes.
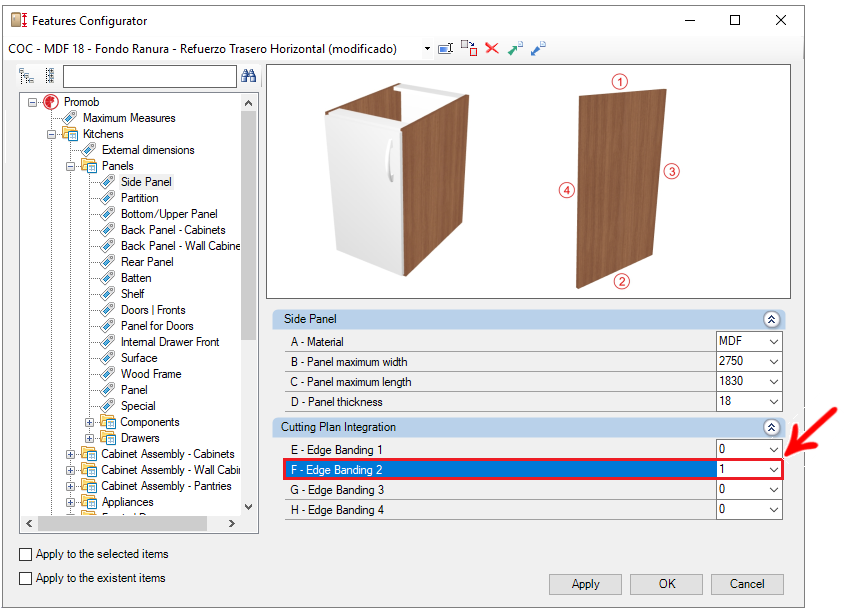
- When the item's edge bands are configured through the Features Configurator inside Promob, they are imported together with the project to Cut Pro.
Apply edge band in Simplified mode
To apply edge band in Simplified mode:
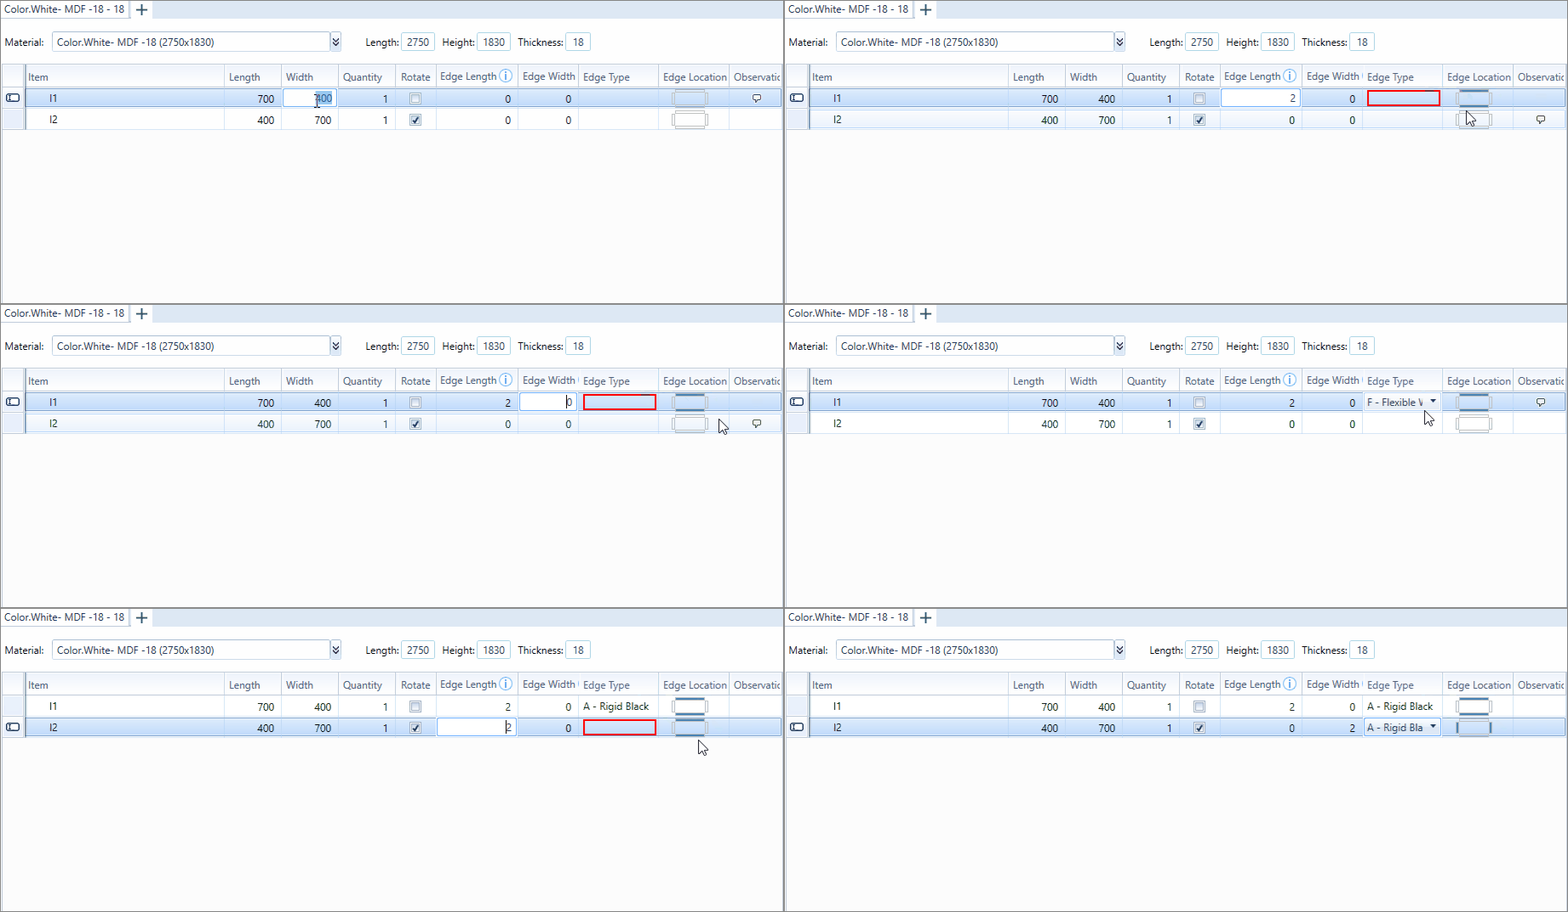
1. In the Edge Width and Edge Length columns, press the Space key on your keyboard, or enter the values, 0,1 or 2.
- 0 refers to none of the sides of the piece, 1 just one side of the piece and 2 to both sides of the piece;

2. View in the Edge Location column a preview of the position of the edges;
- The Edge width and Edge length columns, respectively, refer to the Width and Length dimensions registered on the part.
3. In the Edge Type column, press the Space on your keyboard to select the type of border already registered.
- Review here, how to register edge bands.
