The Port Function is a tool for editing and configuring ports, which allows the user to make settings in the module according to his/her needs. These settings, in turn, will be respected when inserting the item in the environment.
Below are links to information about the Port Functions:
- Introduction to Door Functions
- Create and Configure Door Functions
- Configure Sliding Door Hotpoints
- Register Condition with Variable in the Door Editor
- Setting Variables in the Sliding Door Insertion Wizard
Introduction to Door Function
The Door Function is a tool for editing and configuring ports, which allows the user to make settings in the module according to his/her needs. These settings, in turn, will be respected when inserting the item in the environment.
Below is an explanation of how to create and configure the Door Function.
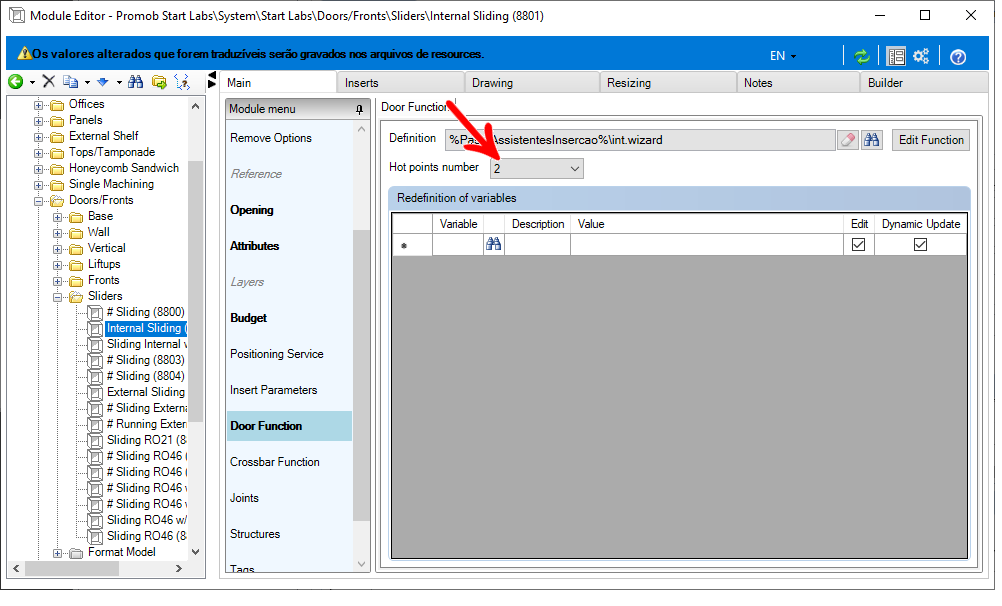
1. Go to the menu Register - Modules.
2. In the Main menu, click on the Door Function option.
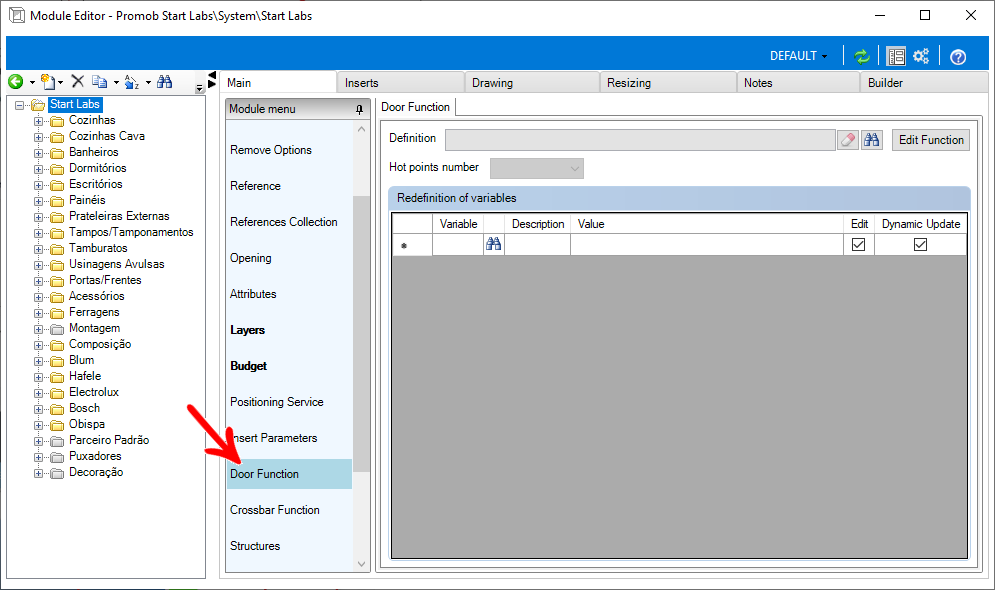
3. The following screen is displayed:
Make the desired settings:
- Hot points number: allows you to configure the number of hot points on sliding ports.
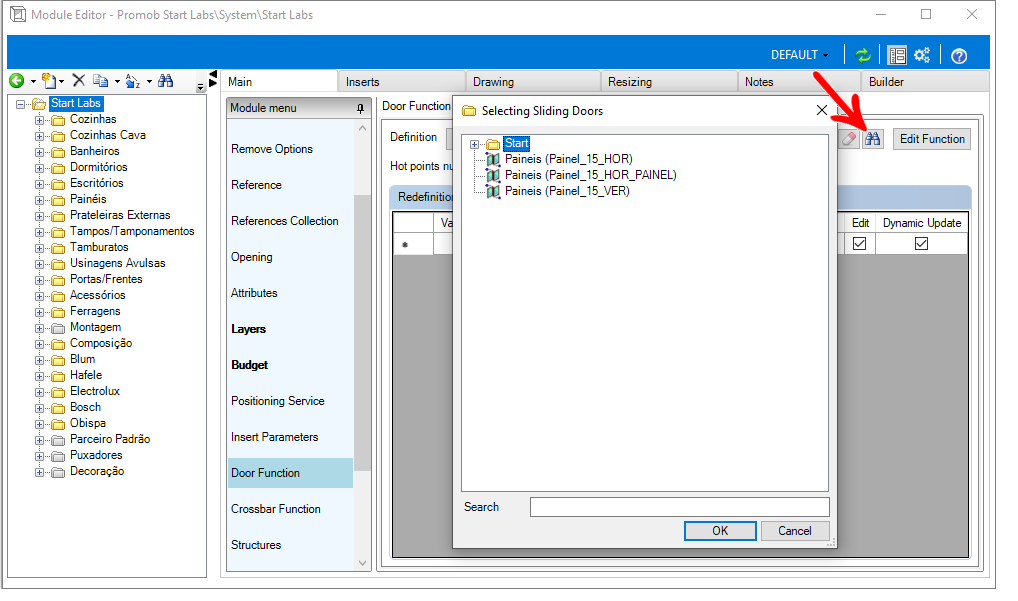
- Definition: Clicking on the Find icon opens a window, in which you can make a selection of Sliding Doors, according to the customer's Library.
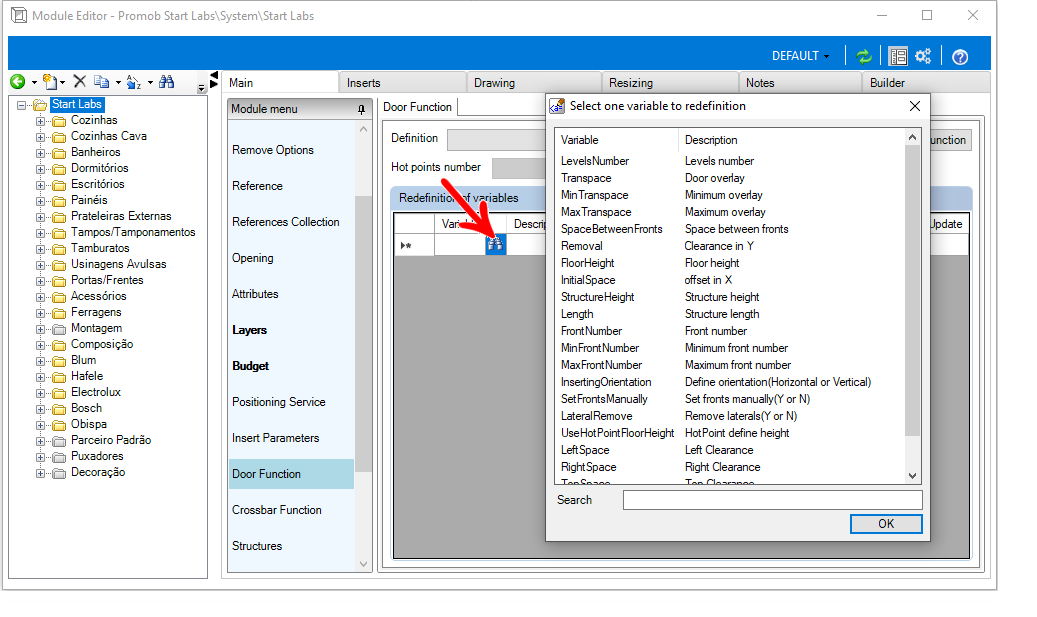
- Edit Function: by clicking on this option, it is possible to edit or create new groups of ports and/or ports belonging to a certain group, as shown in the following images:
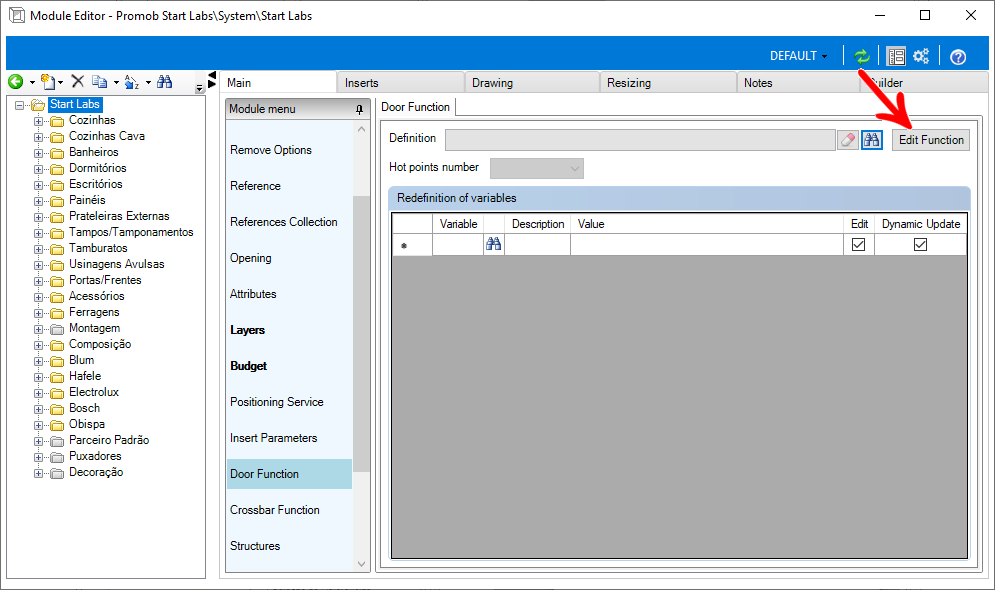
- Redefinition variables: in this option, you can select the variables you want to reset for port editing and enter their respective values.
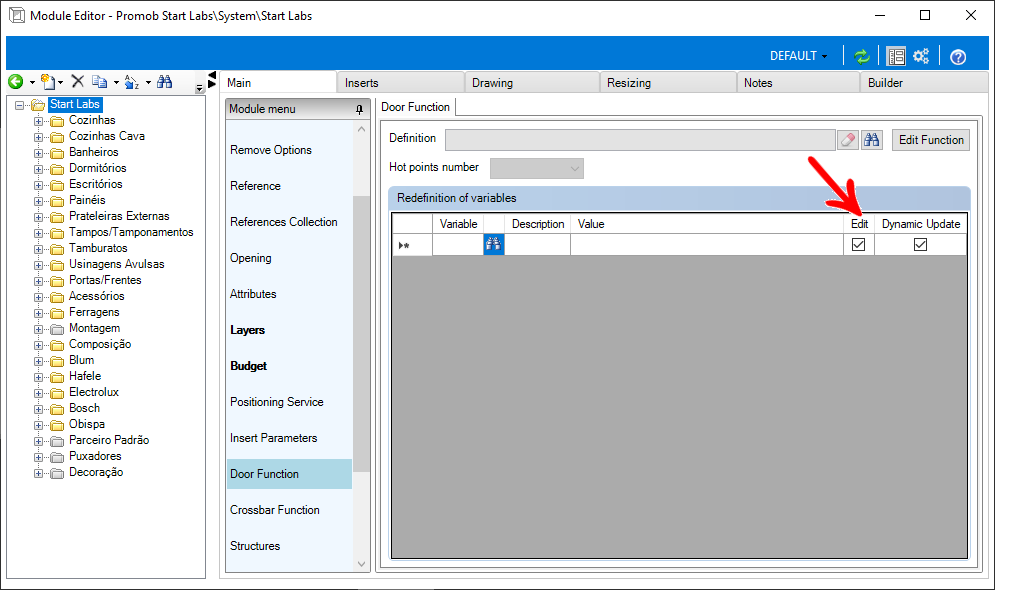
- Edit: This option must be enabled when the user wants to allow editing of the variable next to it in the 3D environment.
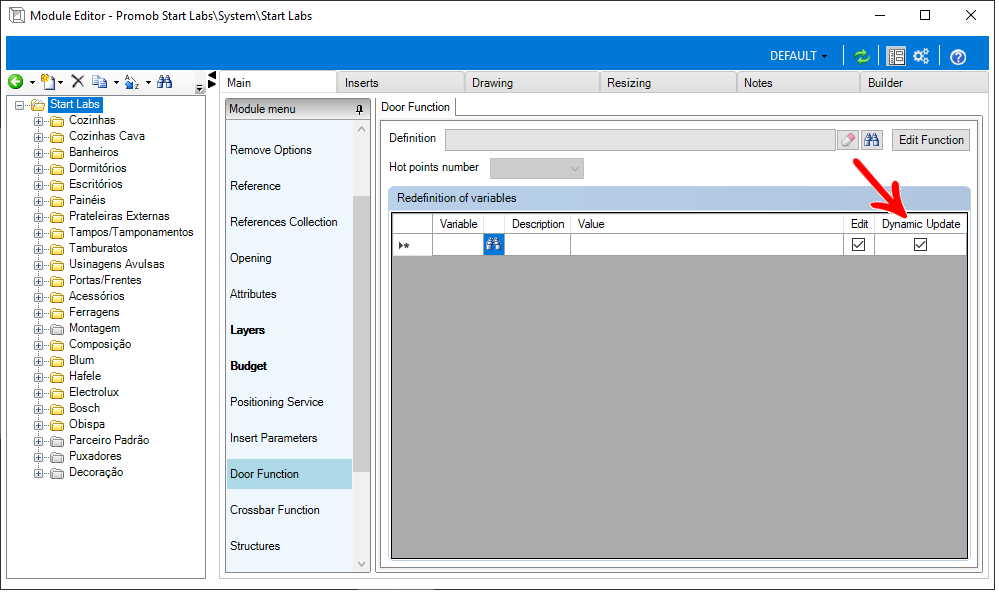
- Dynamic Update: by checking this option, if the attribute has a formula as a value, it will be recalculated when the port has some property changed.
Create and Configure Door Functions
How to create and configure a Door Functions:
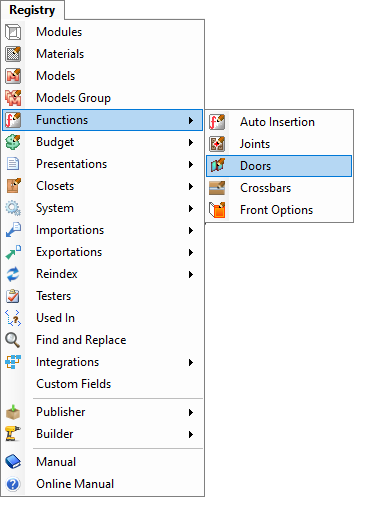
1. Click on Registry - Functions - Door.
2. The following screen is displayed.
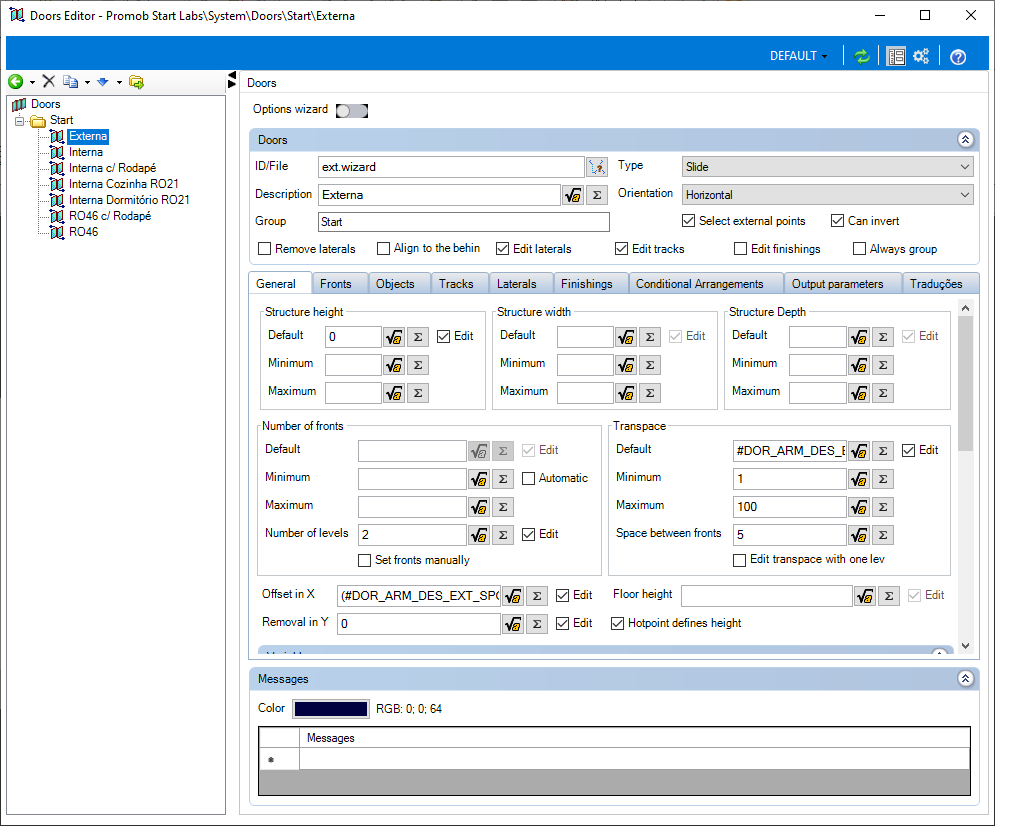
3. In this screen you can edit or create new port groups, or individual doors.
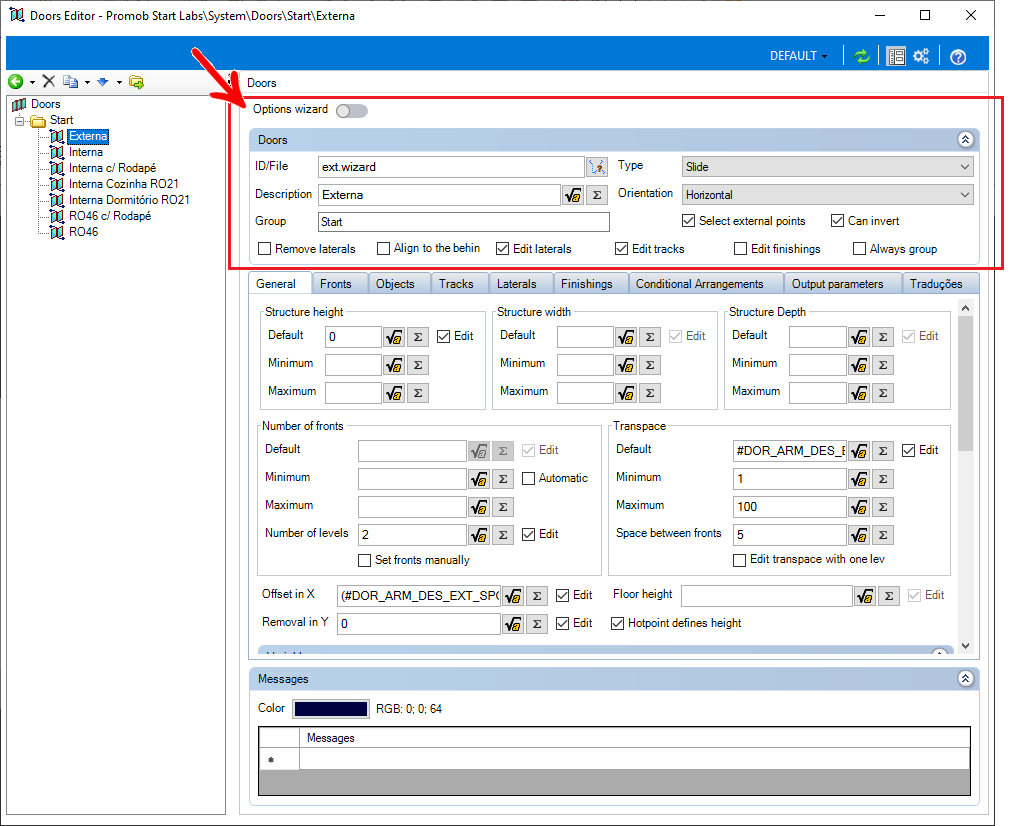
- Options Wizard: by enabling this option, the door will be registered as an options wizard;
- ID/File: Name of the port, which will be displayed in the 3D environment and, name of the file;
- Description: description of the door being registered;
- Group: group to which the door belongs, a new group can be created or an existing one can be chosen;
- Remove Laterals: With this option selected, you can remove the sides of the door in the user's 3D environment;
- Edit Laterals: With this option selected, you can edit the sides of the door in the 3D environment;
- Edit Tracks: With this option enabled, you can edit the door's tracks in the 3D environment;
- Edit finishings: with this option enabled, it is possible to edit the closures in the 3D Environment;
- Always group: with this option enabled, the door is grouped to the environment/wall in the 3D Environment;
- Type: selects what type of door will be, sliding, partition, or opening;
- Orientation: determines whether the door is opened Horizontal or Vertical. IMPORTANT: this option is only available if the door type is Open, otherwise only the Horizontal option is available.
- Select external points: Allows you to select external hotpoints from the module.
- Can Invert: Allows you to invert the function.
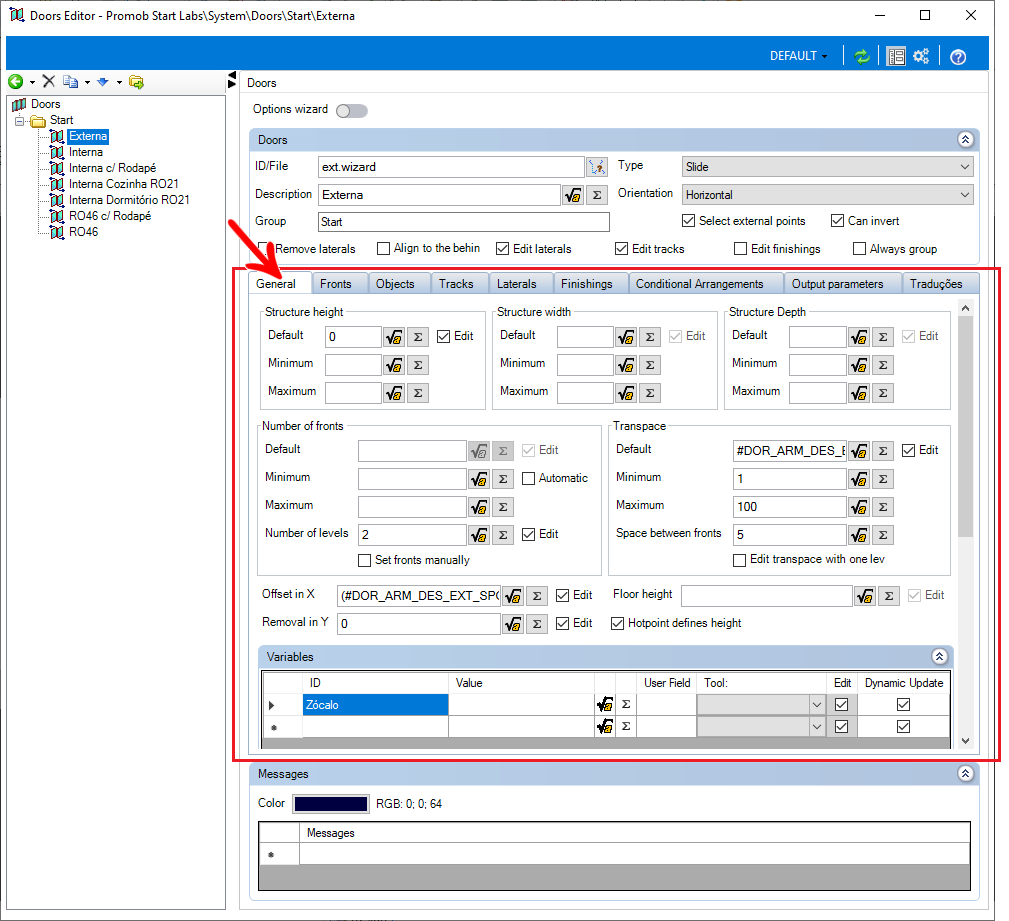
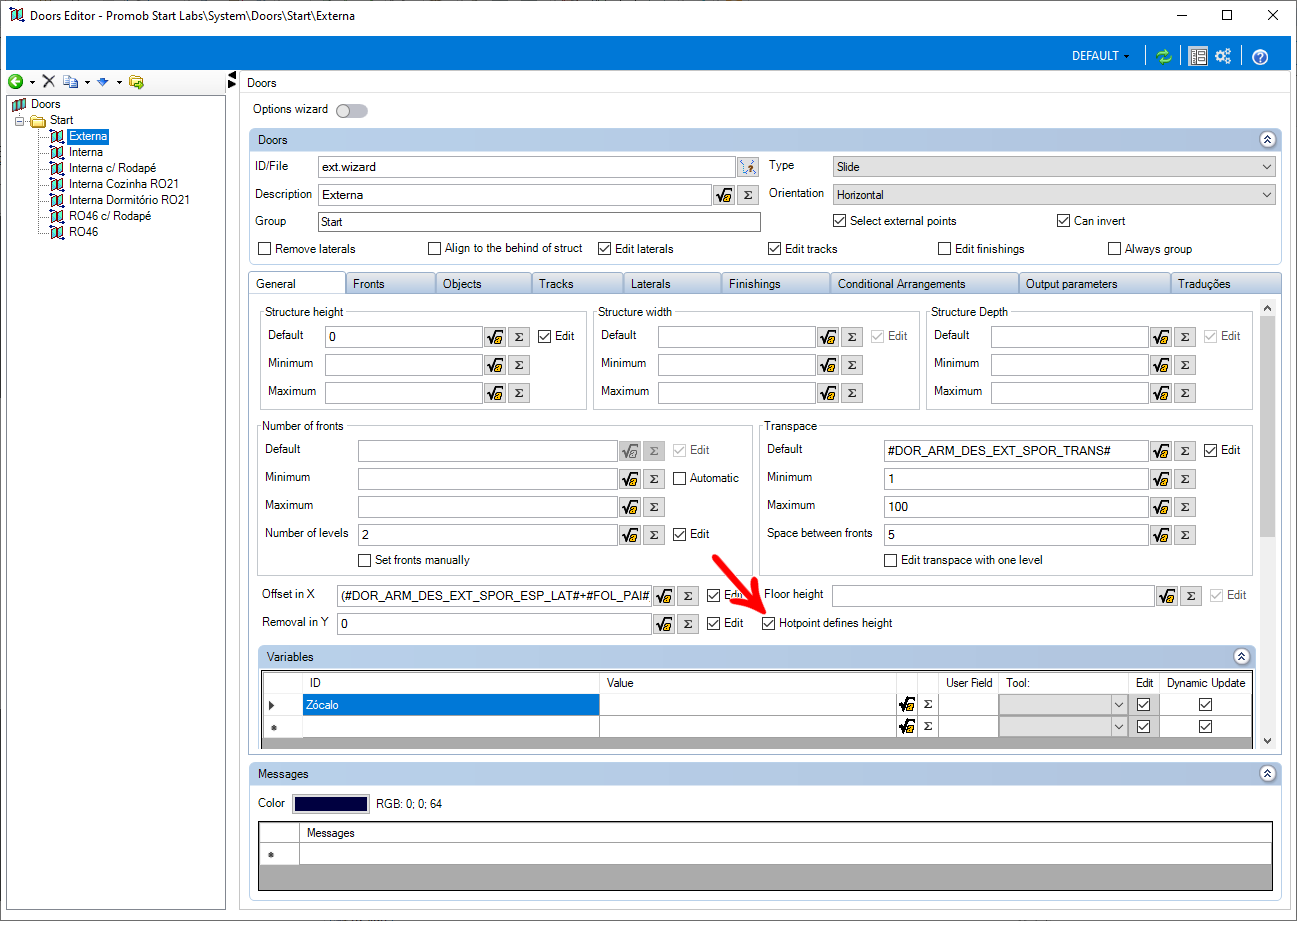
4. Under General, make the general port settings as desired:
IMPORTANT:
- When you enable the Edit options, these will be editable in the 3D Environment.
- By enabling the Auto option in Number of fronts, the fronts will be inserted automatically.
- By enabling the Set Fronts Manually option, under Number of Fronts, the fronts must be entered manually
- By enabling the option Dynamic Update in Variables, the formula will be automatically recalculated when the door has some property changed
- Hotpoint sets height.
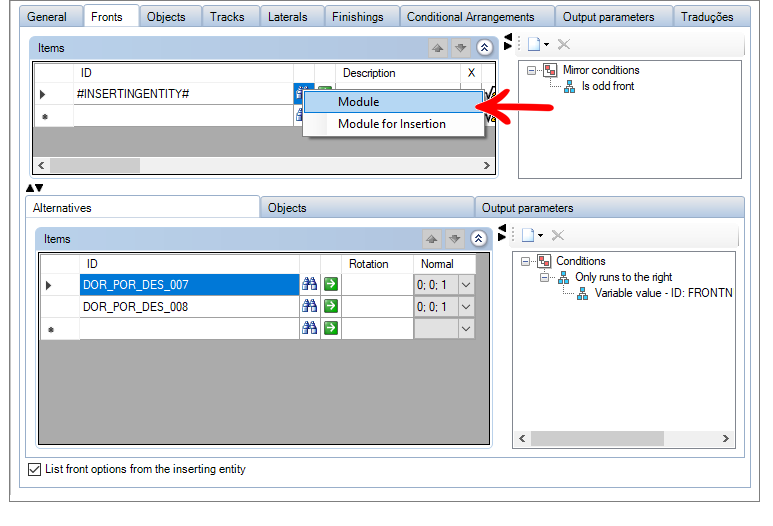
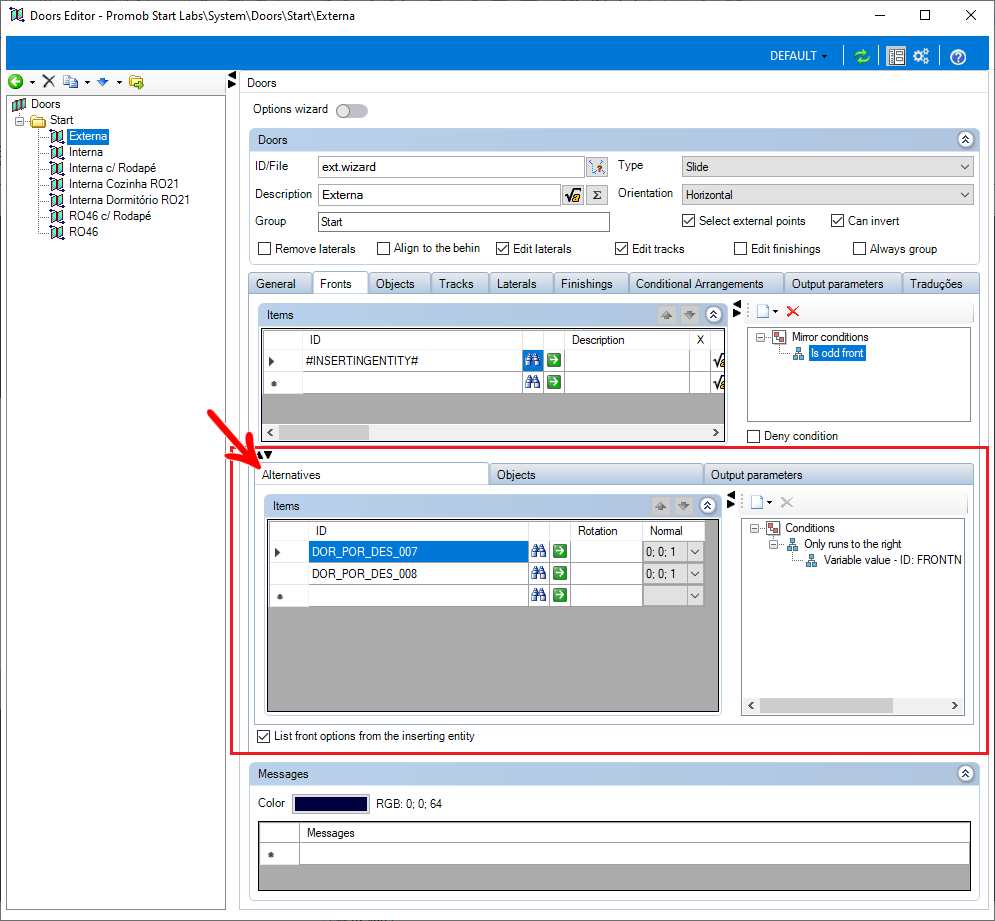
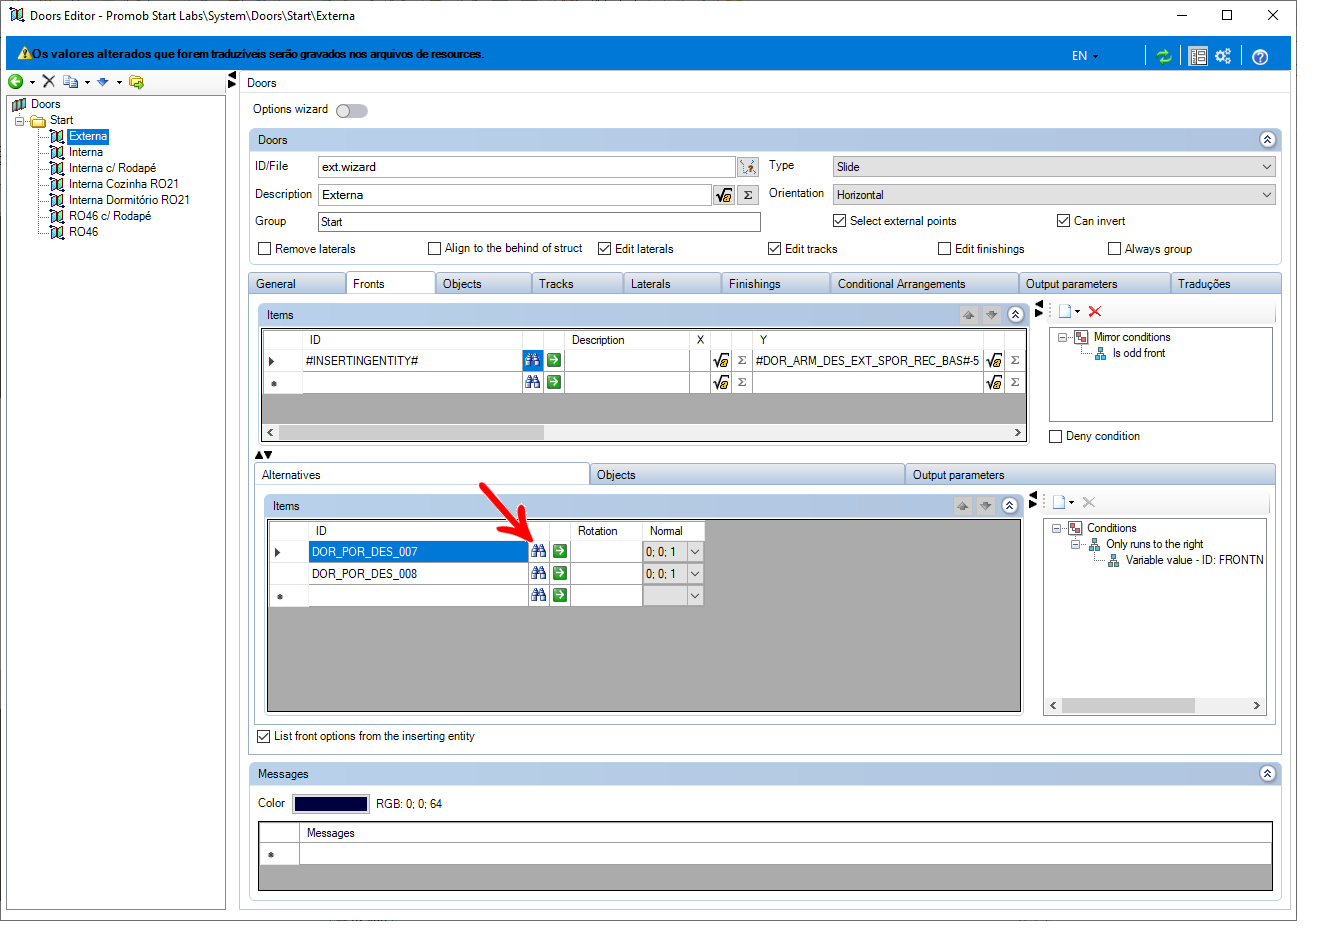
5. In the Fronts tab, determine all the fronts' settings.
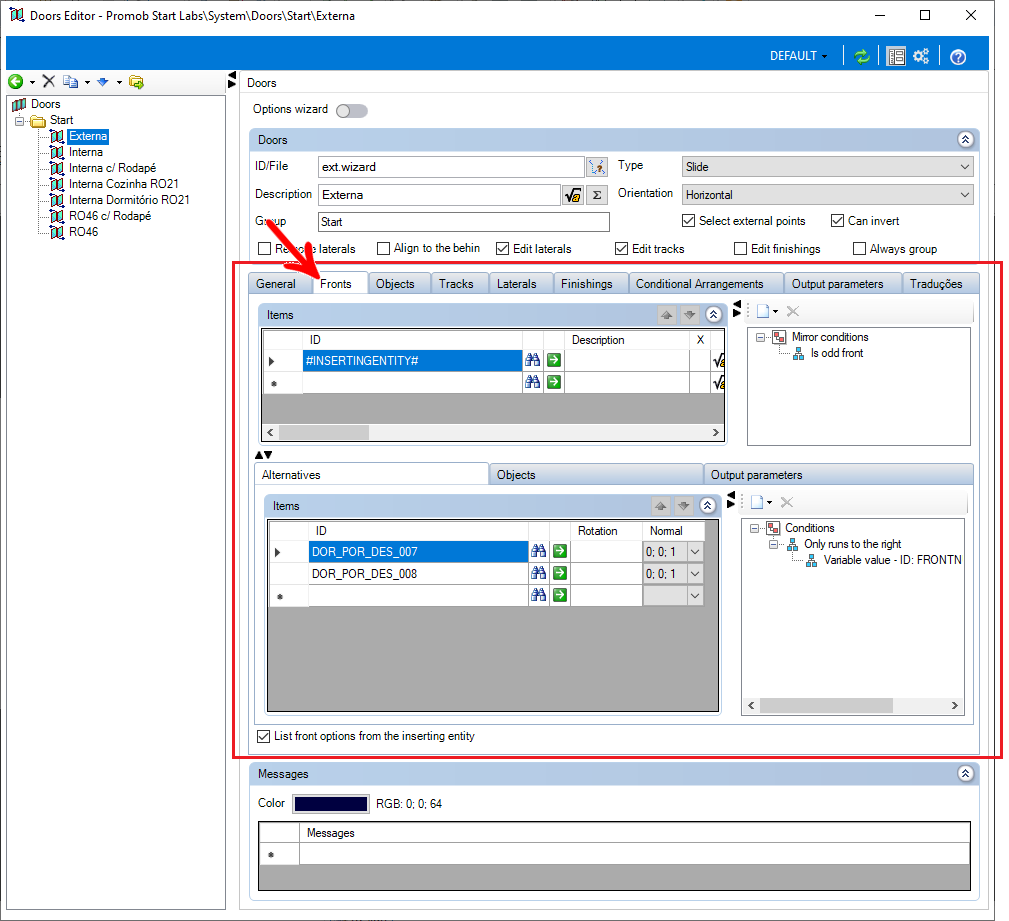
- In the ID field, under the Find icon, you can set the configuration to Module or Insert Module.
- In Mirror Conditions you can edit existing conditions and/or create new ones, which can be of Operations or Variables.

- In Alternatives, configure the items that can be added to the module, according to the user's choice, these are not added to the module when inserted in the environment.
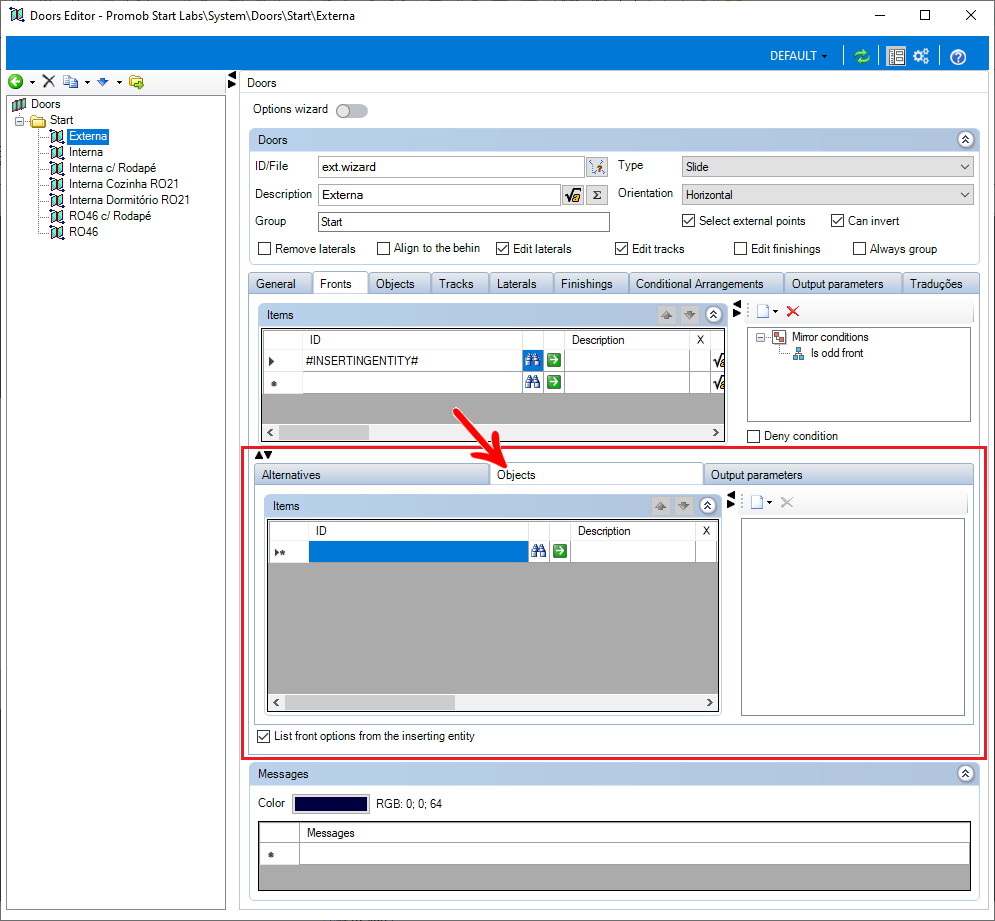
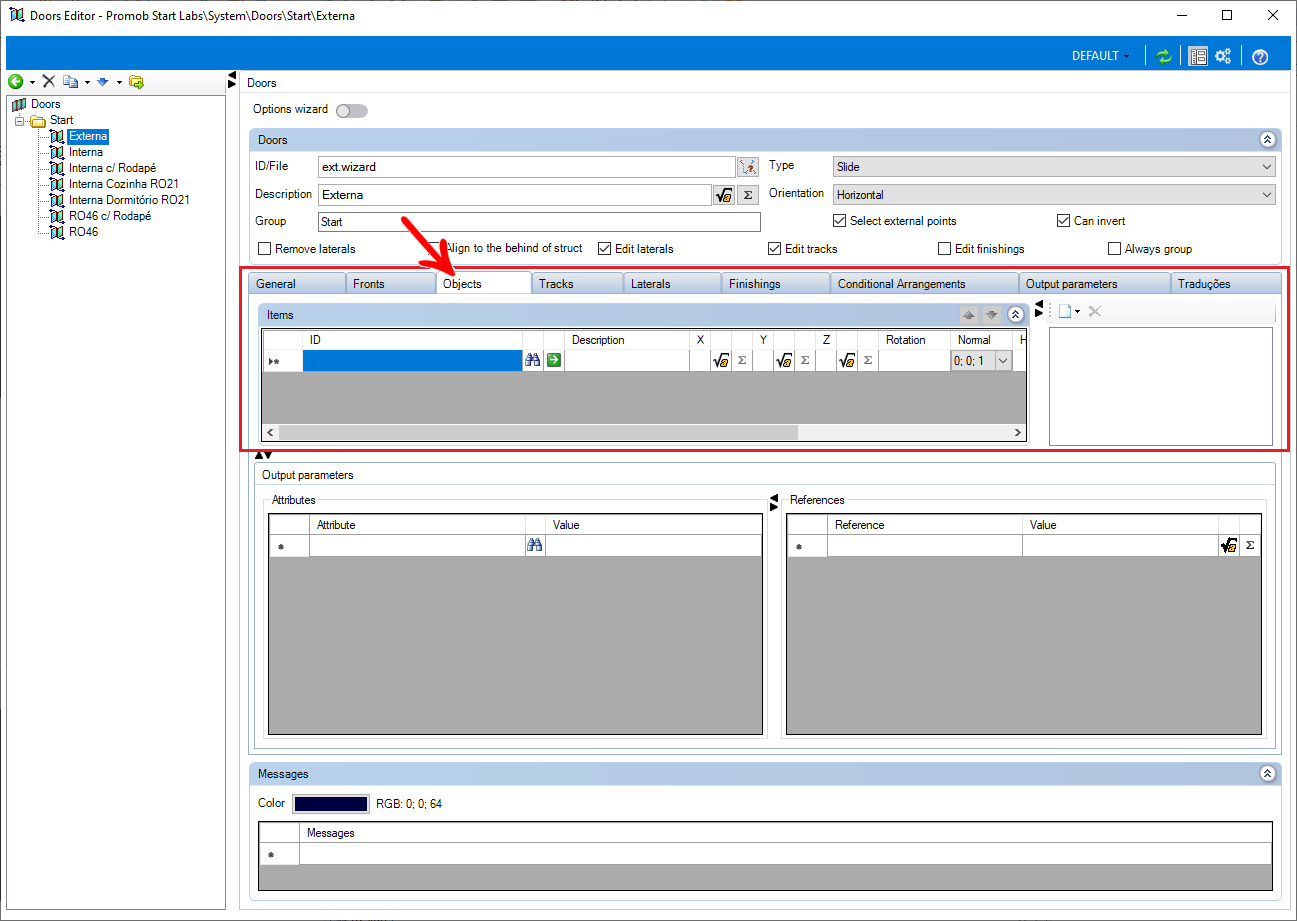
- In the Objects tab, configure the objects that can be added to the front. These can be set manually, or chosen by clicking on the Find icon.
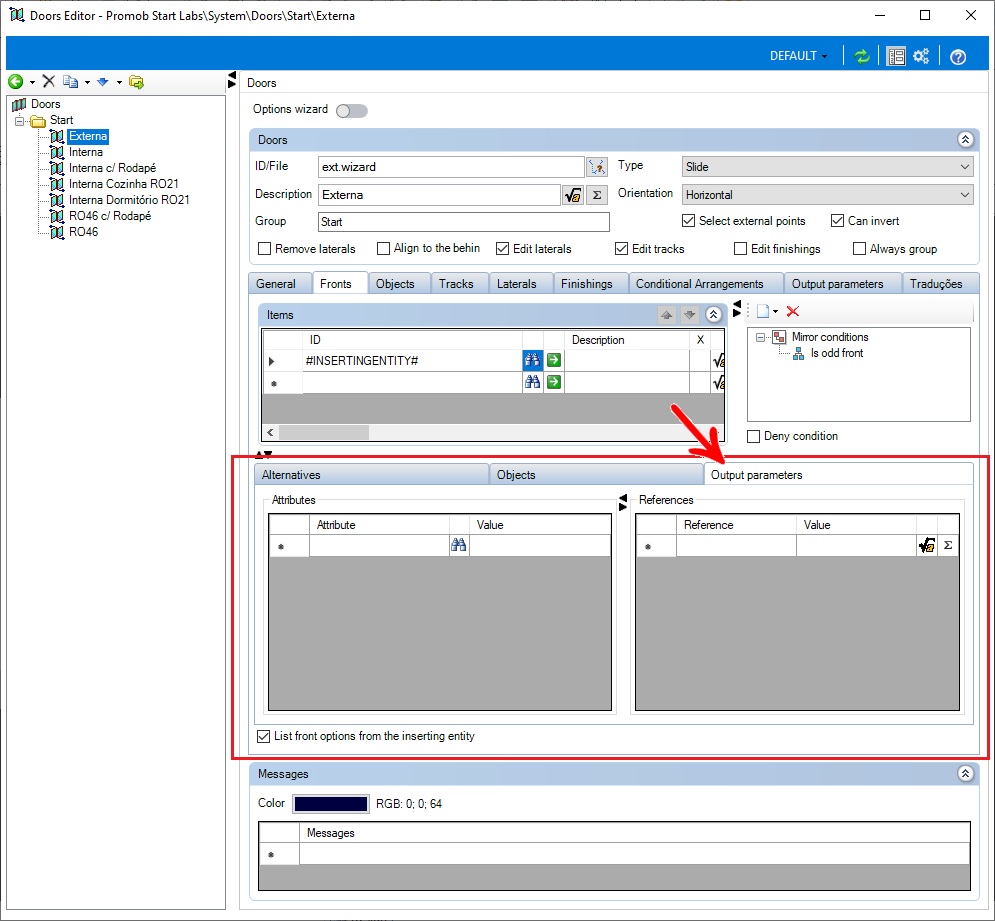
- In the Output Parameters tab, configure the output parameters of the items added to the module.
6. In the Objects tab, in this tab you can configure the objects, also being able to select in ID, through the Find Module or Insert Module icon.
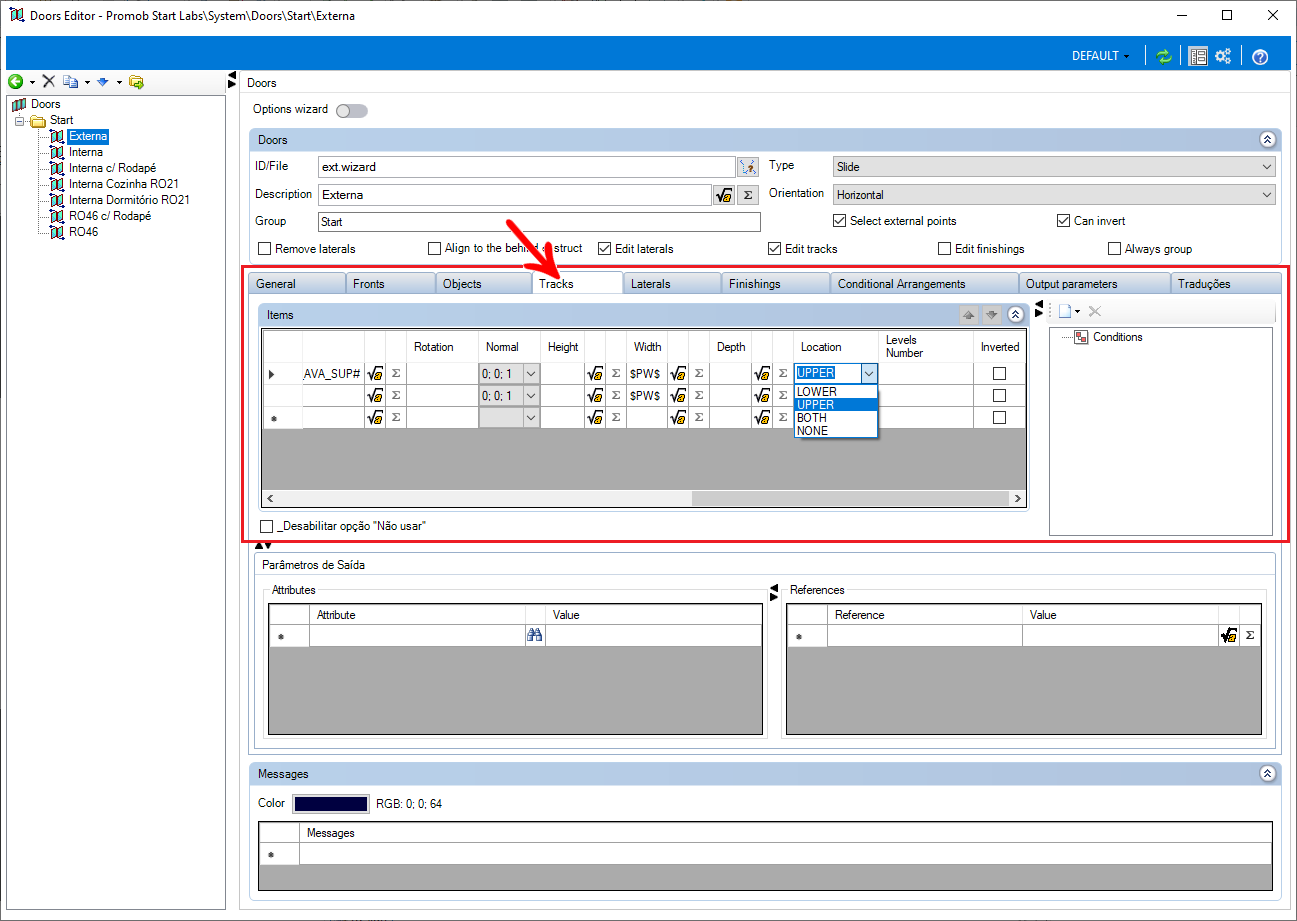
7. On the Tracks tab, the configuration of the tracks follows the same pattern as above, but has two more configurations:
- Location: arrow indicating the location of the rails, which can be Upper, Lower, Both, or None.
- Levels: you set the number of levels manually.
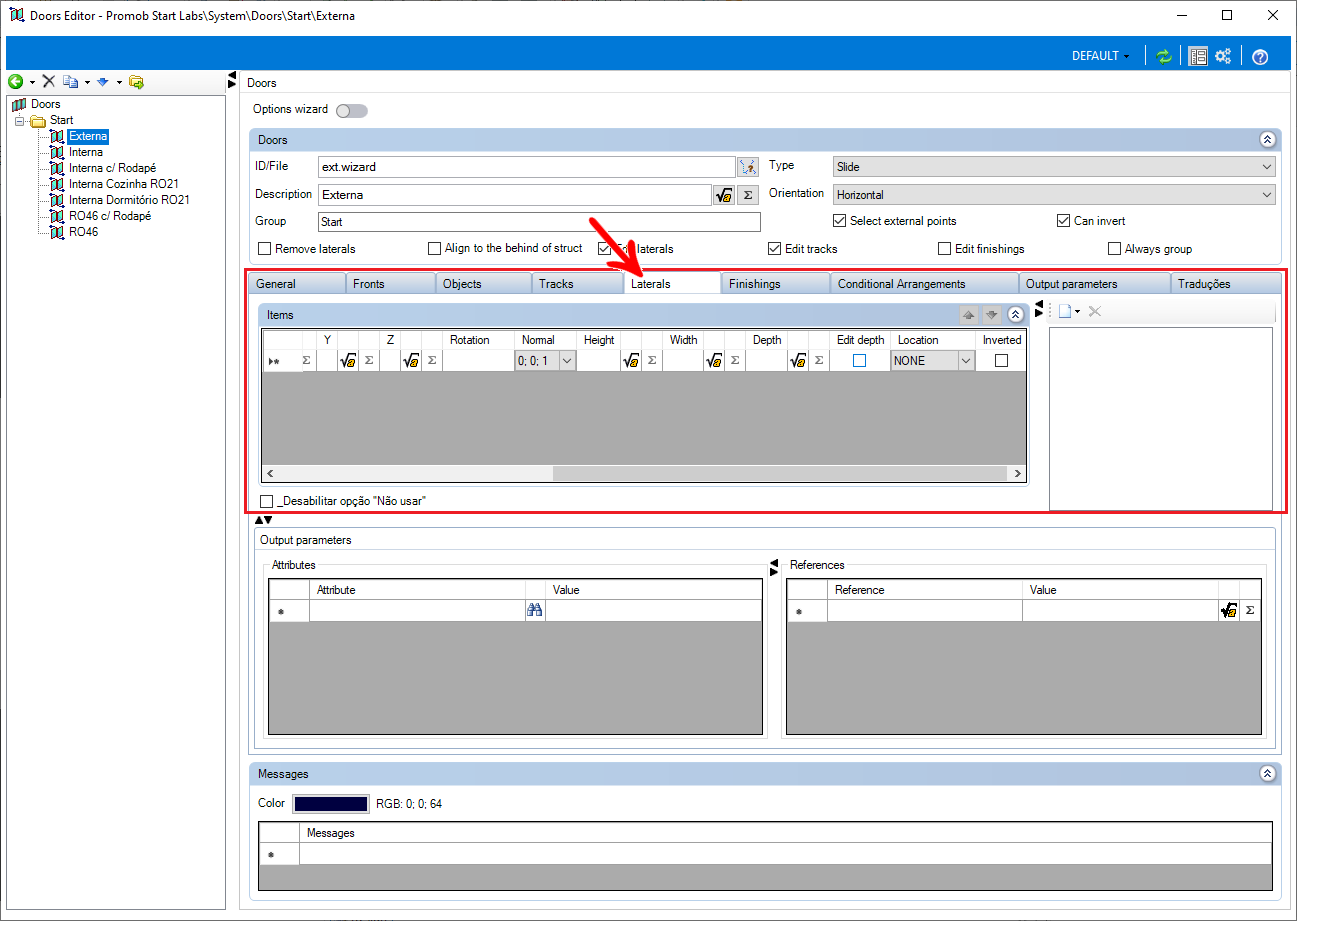
8. In the Laterals tab, it follows the same pattern as the previously mentioned settings, you can set the Editable Depth option.
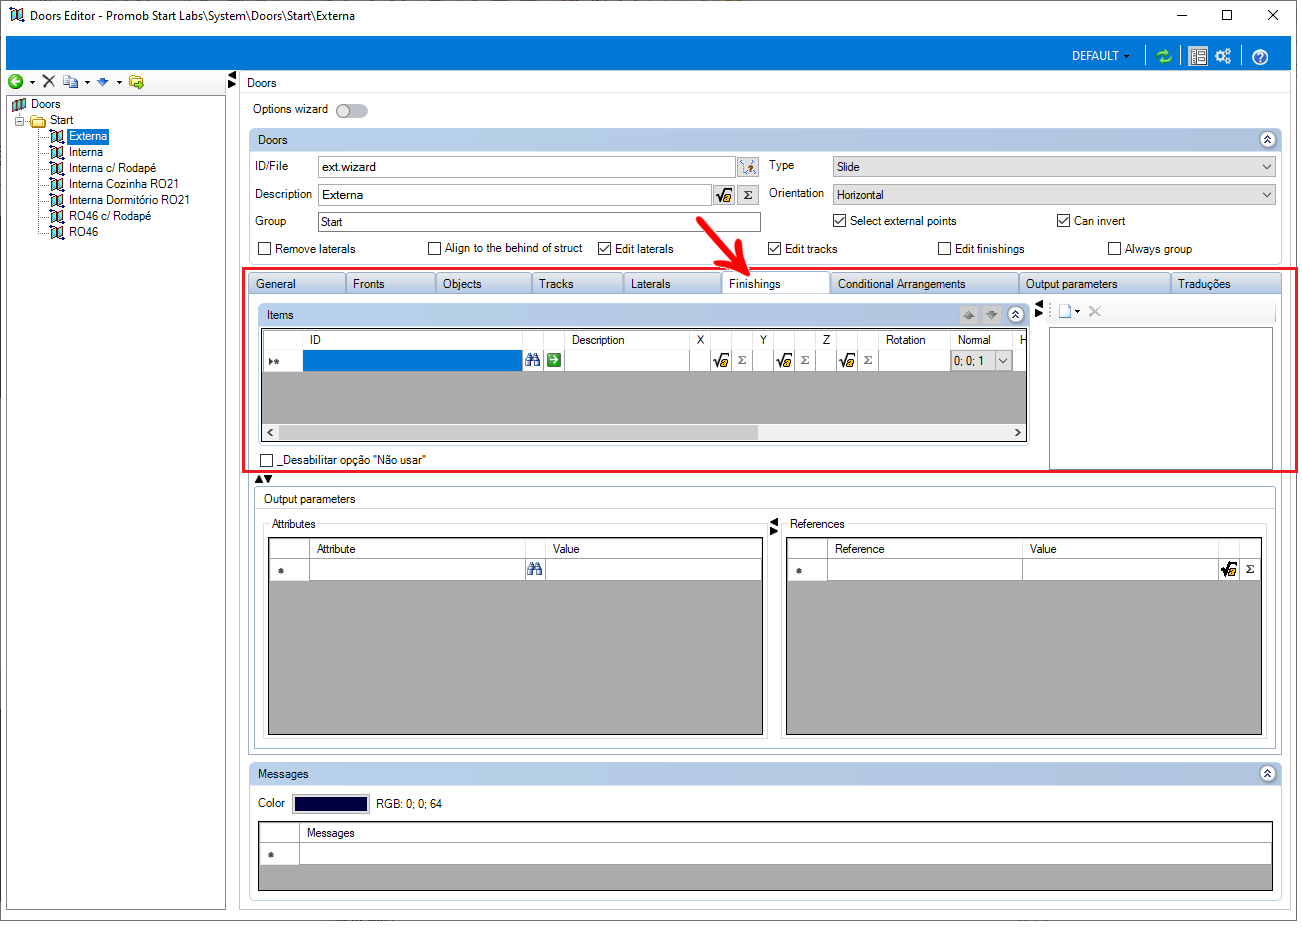
9. In Finishings, the finishings settings follow the same patterns as before.
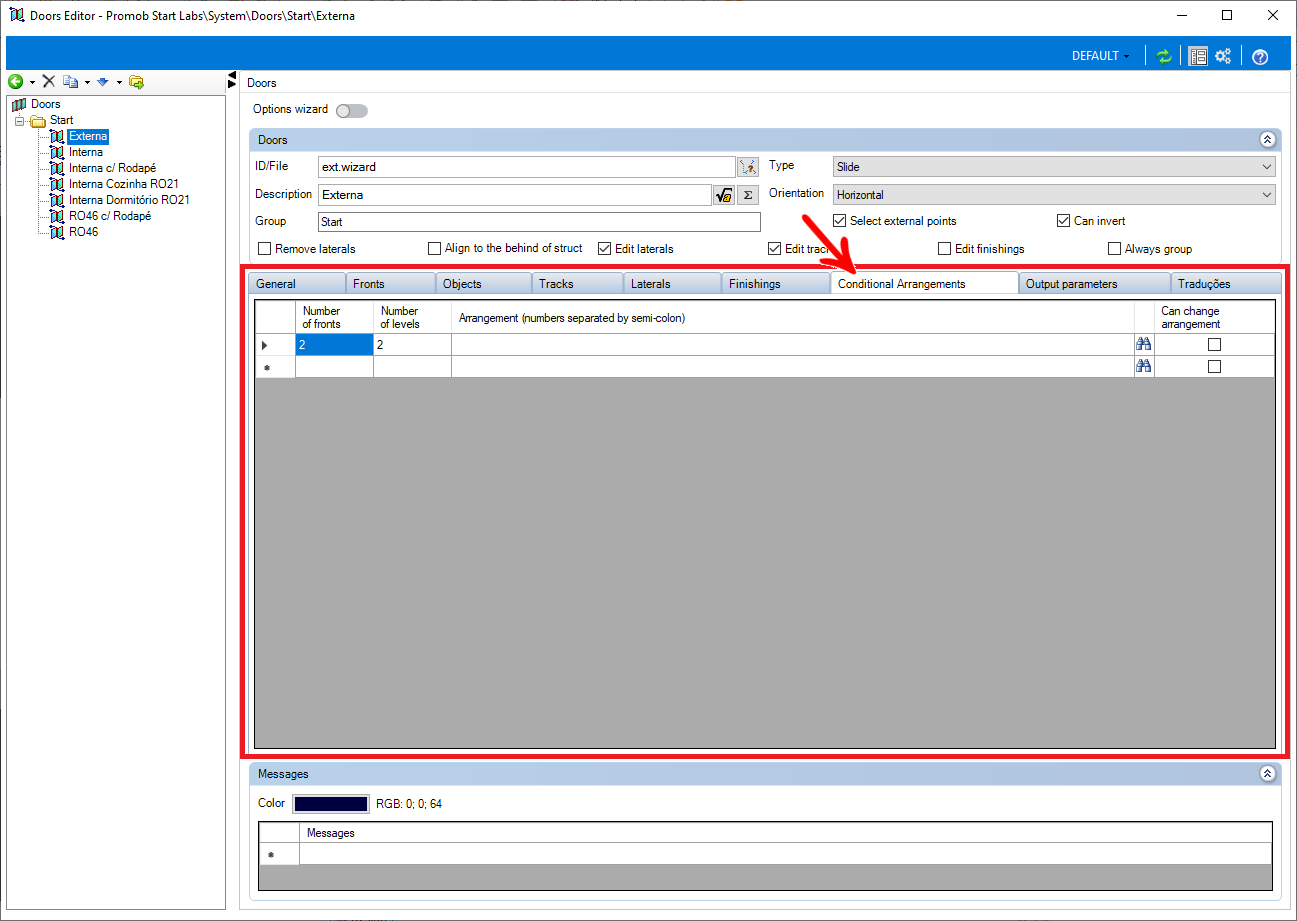
10. In Conditional Arrangements, you can set the Number of fronts and the Number of levels, and view/edit the layout of the fronts by clicking on the Find icon.
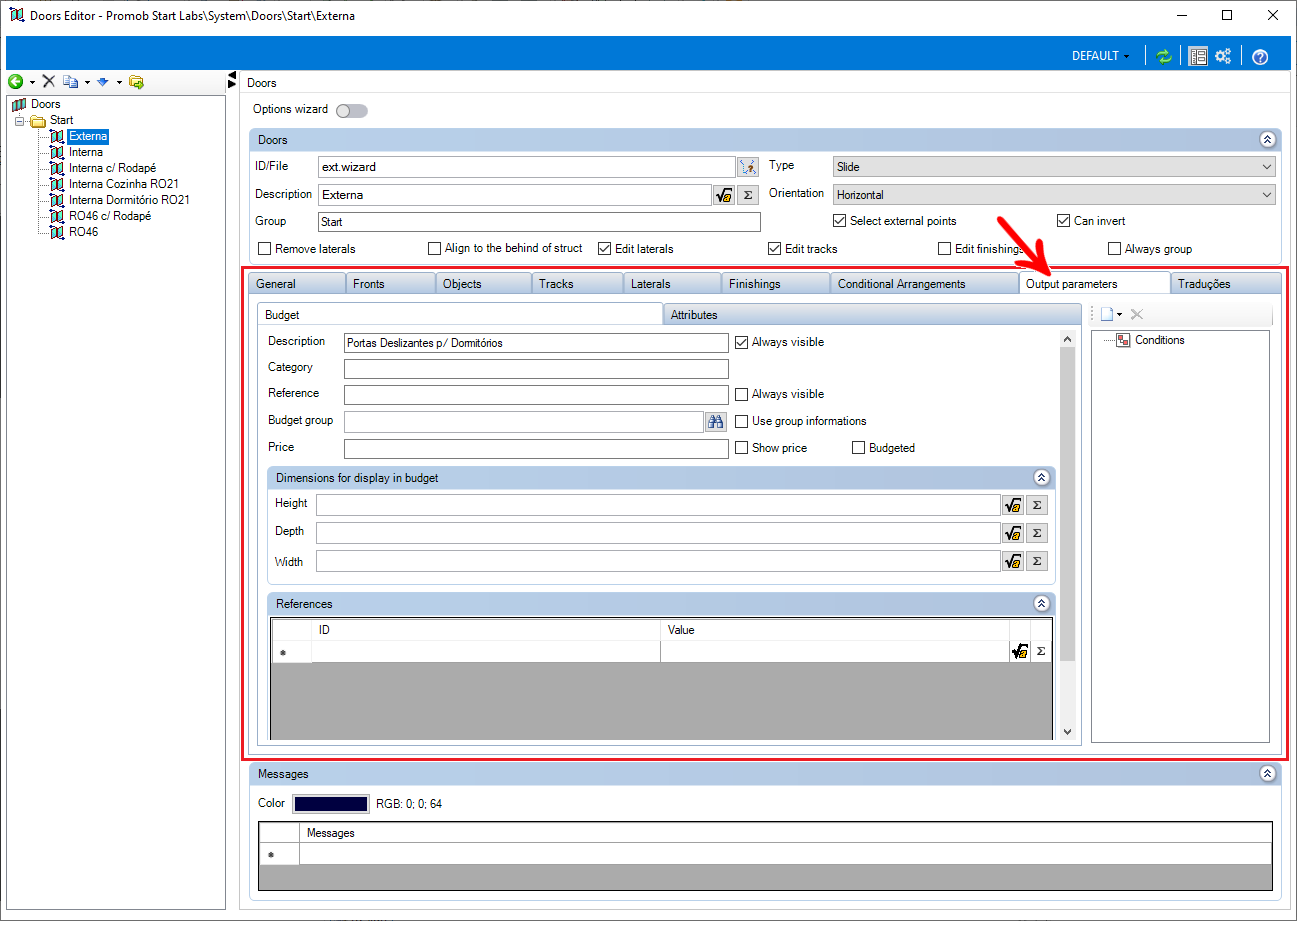
11. In the Output Parameters tab, you make the budget settings by filling in the fields shown below:
- Description: configure the description of the module to be budgeted;
- Always display: By checking this option, the description will always appear in the budget;
- Reference: Set the module reference;
- Always display: By checking this option, the description will always appear in the budget;
- Budget group: can be set up manually, or by selecting a group by clicking on the Find icon;
- Use group information: By checking this option, the information from the selected group will be used in the budget;
- Price: the price of the module is set, and the option Show Price or Budgeted can be set.
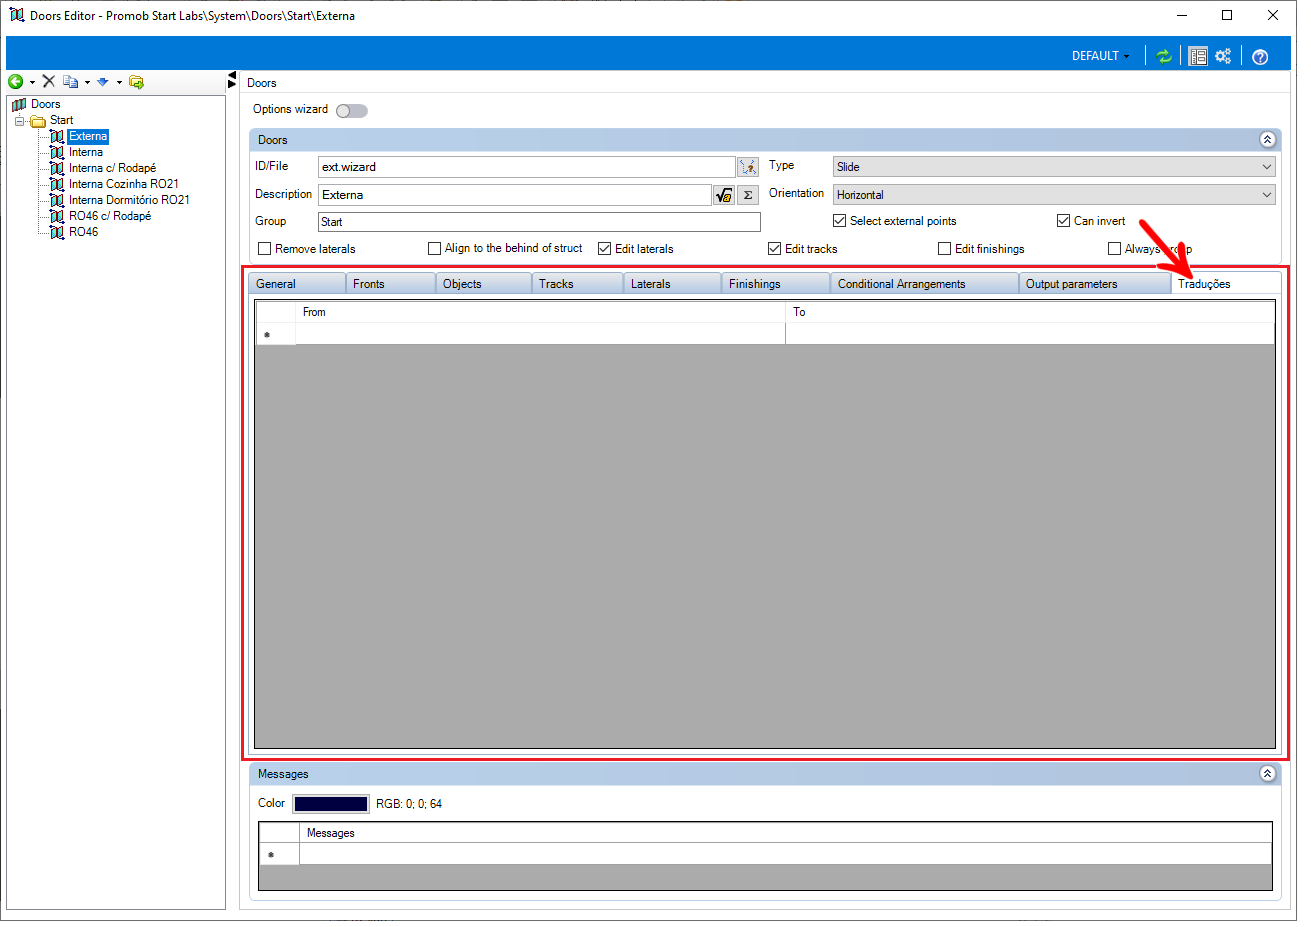
12. Under Translations, you can set languages to perform a translation.
13. In the Messages menu, you can set the color of the messages that can appear to the user, as shown in the image below:

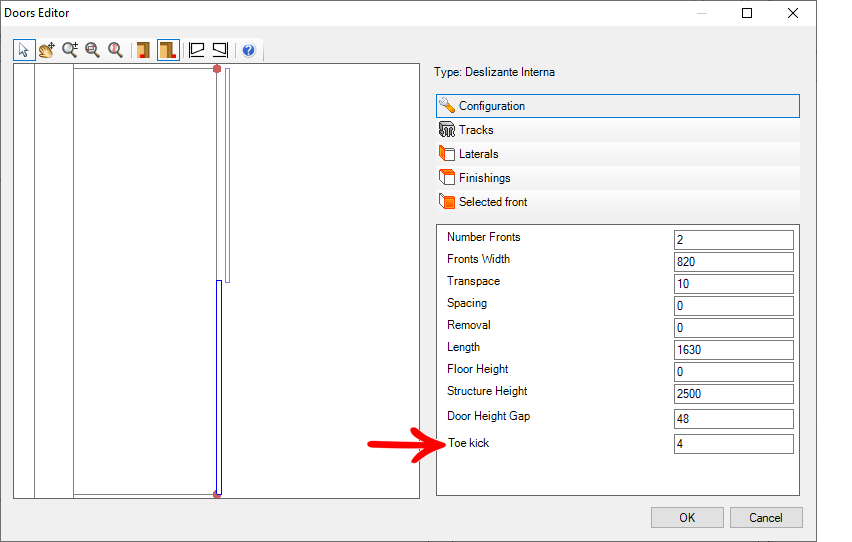
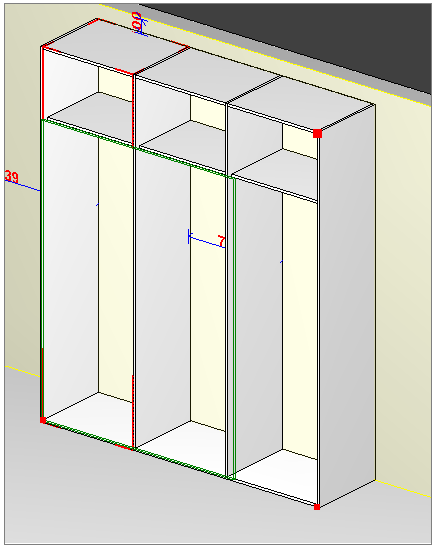
Configure Sliding Door Hotpoints
When inserting sliding doors into the environment, hotpoints need to be displayed in order to have them as a reference for positioning the sliding system. A common application for this functionality is for sliding doors.
There are two ways to register hotpoints, either by registering the function or by registering the port:
By registering the port function
1. Open the function register under Register - Functions - Doors.
2. Select the function and in the General tab, check the Hotpoint sets height option.
IMPORTANT: with the option unchecked, by default there will be only two Hotpoints, with the option checked a third Hotpoint is available.
3. After making changes to your registration, click the Update icon in the header.
Examples
Below is an example of a sliding door at the moment of insertion into the environment:
- With two Hotpoints:

- With three Hotpoints:
By the door register
1. Go to Registry - Modules.
2. Select the port you want to change the number of hotpoints and change the value in the Number of hotpoints option.
Register Condition with Variable in the Door Editor
To enter a condition with a variable:
1. Go to the menu Registry - Functions - Doors.
2. Select the port to which you want to add the condition from the side navigation tree.
3. Go to the Fronts tab of the Door Editor and enable the Advanced Mode for registration.
4. In the ID column of the Fronts - Alternatives tab, click the Find button and select a port option.
5. Then click the New Condition - Variables - Variable Value button.
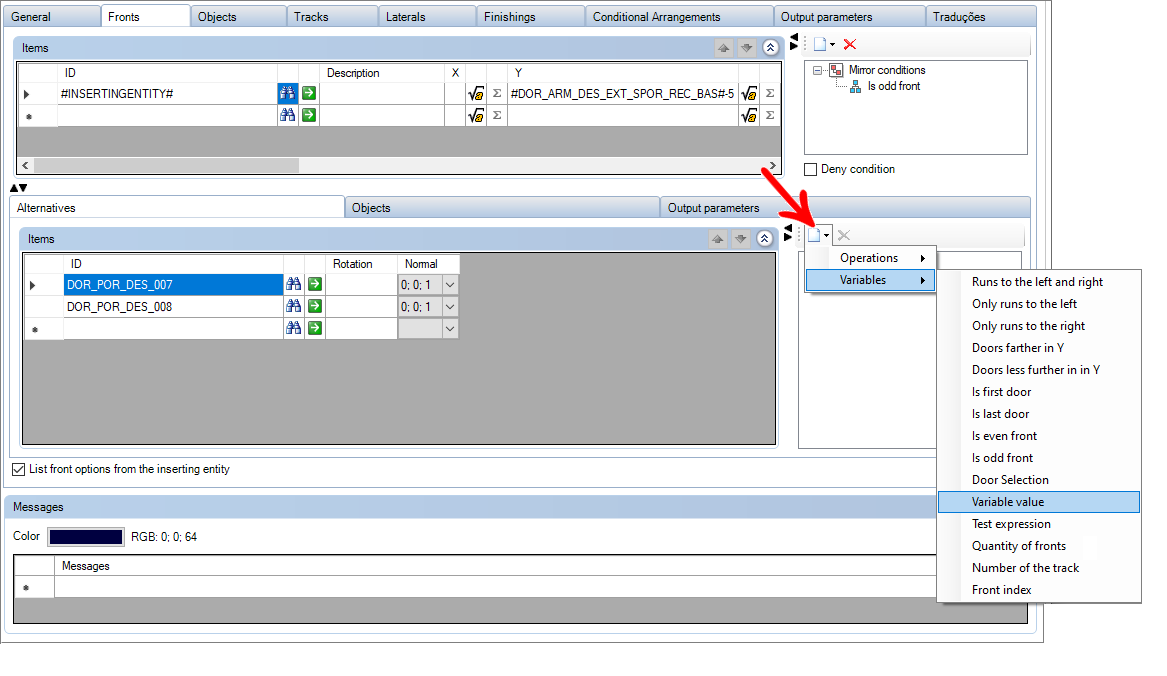
6. Perform the settings:
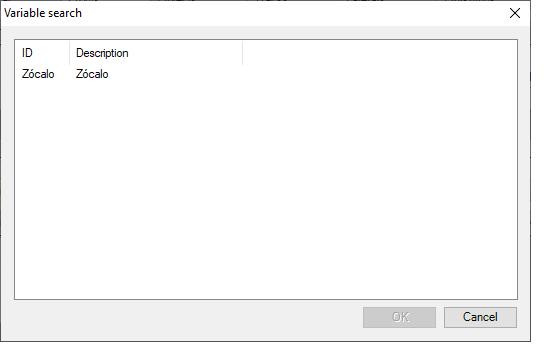
- ID: click the Find button to select the variable.

- Value: Enter the value for the selected variable.
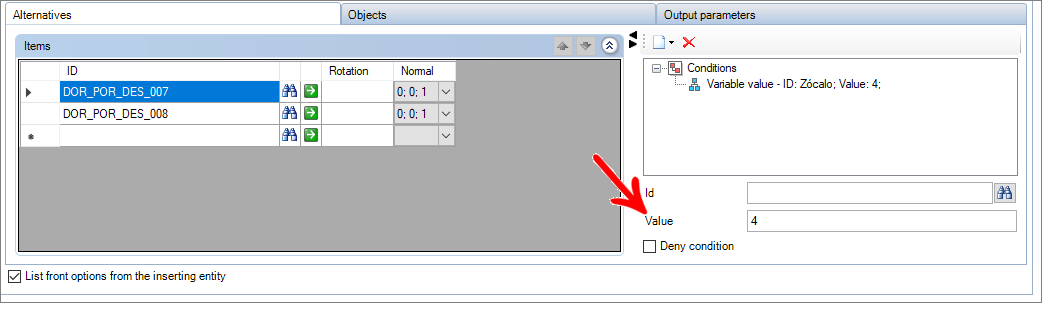
7. After setting the variable as desired, click the Update icon to apply the changes.
Setting Variables in the Sliding Door Insertion Wizard
It makes it possible to create extra variables, such as footers, for example, visible in the sliding door insertion wizard. For this purpose the User field column was created in the Door Editor.
IMPORTANT: The possibility of setting extra variables is available from Catalog version 5.35.3 onwards. To see the version of Catalog click on the Help menu and select the About option.
1. Click on the menu Registry - Functions- Door.
2. Select the door that will have the variable registered. Click on the General tab and in the Variables grouping create the desired variable, enter its value, and in User field enter the name that will be displayed to the user in the sliding door insertion wizard window.
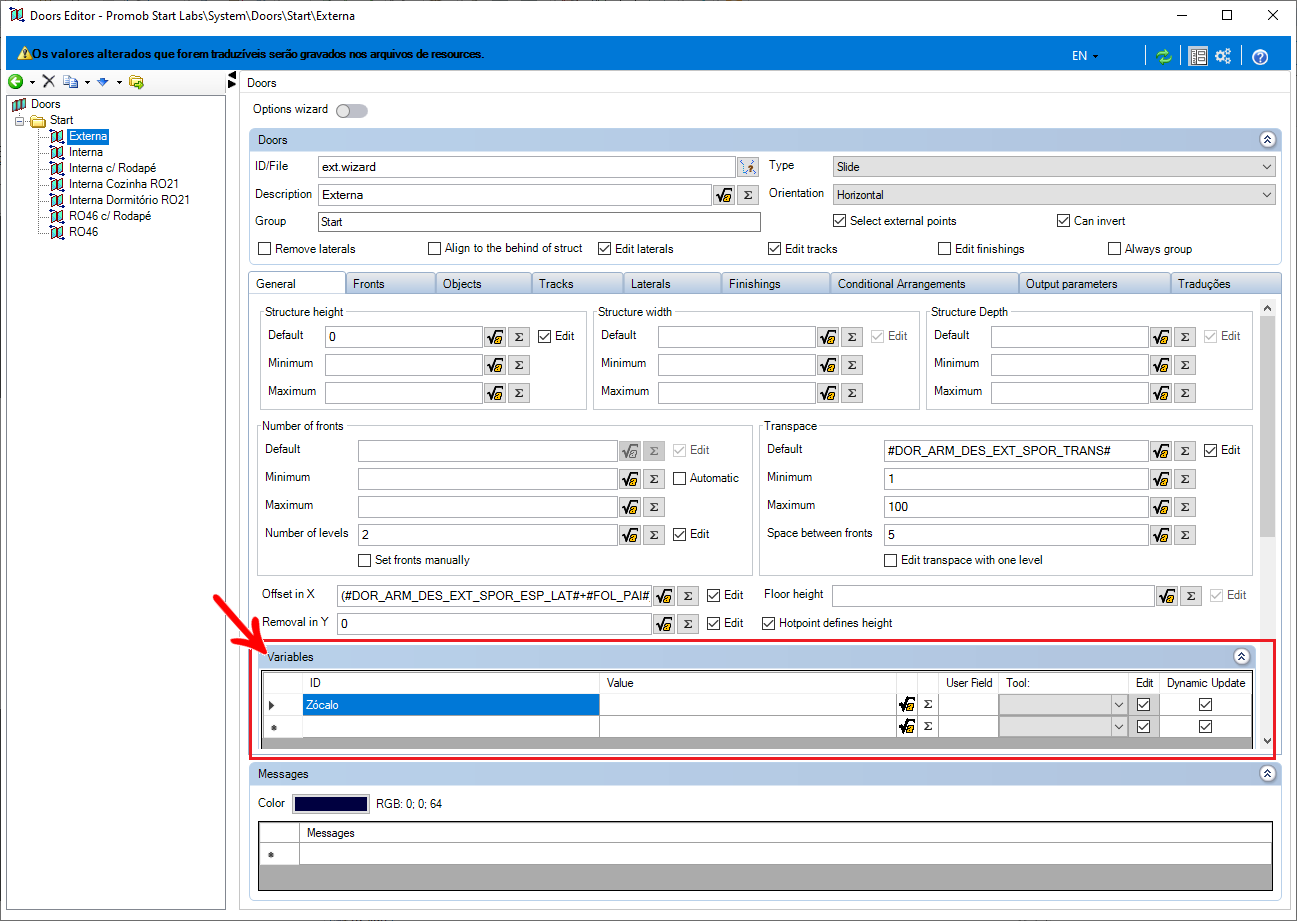
3. If necessary use the variable for creating formulas in other fields in the Editor.
4. Reindex Catalog to load the changes.
5. In the 3D environment insert the sliding door and note the variable created in the properties panel.