Promob Cut Pro allows you to import files, as long as they are saved with extension *.planner, *.csv, .*zip, and * .rar
Which Cut Pro configuration do you use?
Select the configuration used below and directly access the ideal content to help you.
Cut Pro Complete configuration.
Cut Pro Simplified configuration.
Review Cut Pro's Complete configuration and Simplified configuration here.
Also, review the documentation regarding the project changes. Click here.
Complete Configuration
Visualize abaixo, como importar arquivos na configuração Completa do Cut Pro.
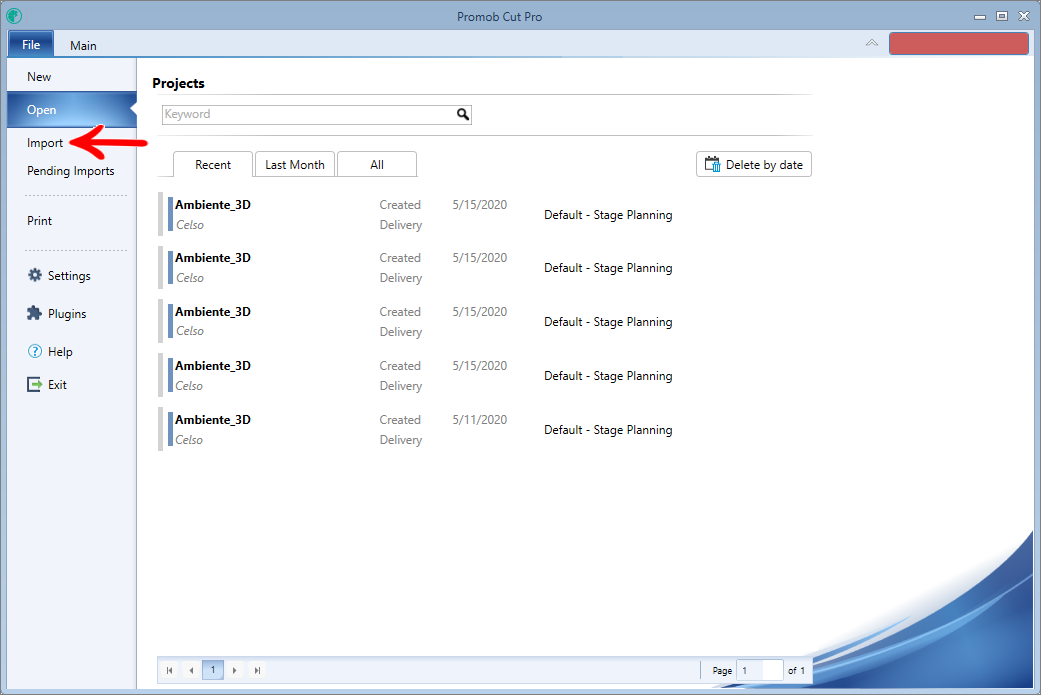
To import files click the File menu and then click the Import button:
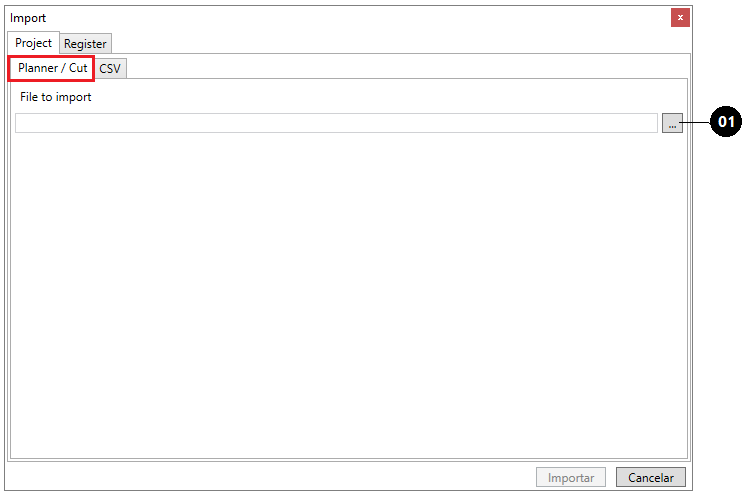
The Import window will be displayed, in which the Project and Register tabs are located.
Project
In the Project tab it is possible to import * .planner, * .cut or * .csv files.
Planner / Cut tab
CSV tab
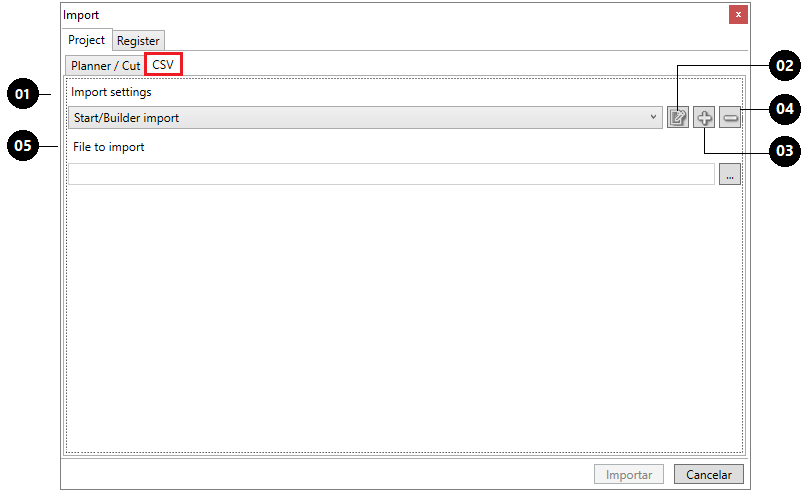
Select the desired import layout. The available import layout options are:
1. Start/Builder Import:
- With this option selected, a file that is generated by Promob Start/Builder must be selected for import.
- Watch the video below, which shows this situation;
IMPORTANT: the Promob Start/Builder import layout can not be edited;
2. Simplified:
- With this option selected, a simplified file must be selected for import.
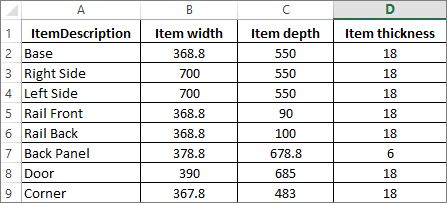
- A simplified file contains only four columns, which are: Item Description, Item Width, Item Depth, and Item Thickness.
EXAMPLE:
3. Simplified with material:
- With this option selected, a simplified with material file must be selected for import.
- A simplified with material file contains these columns: Item description, Item width, Item depth and Item thickness, Item has raw material, Raw material code, Description of raw material, Width of raw material, Height of raw material, Thickness of raw material, material of raw material, finishing of raw material and raw material has vein.
EXAMPLE:

Click here and download an example Simplified with material layout;
OBSERVATIONS:
The Simplified import layout can be modified, that is, if you want to add more informational columns to this import layout, you can. Item 6 of this list explains this subject better;
4 ERP import:
- With this option selected, a file that is generated by Promob ERP must be selected for import.
5 Simplified with material code:
- With this option selected you can import one or more items with linked raw material and border tape, informing only the code. According to the example below:

Click here and download an example Simplified with material code layout;
02 Edit Configuration
- This button allows you to edit layouts.
- Select the layout you want to edit and click on the button Edit configuration;

- The following window will be displayed:
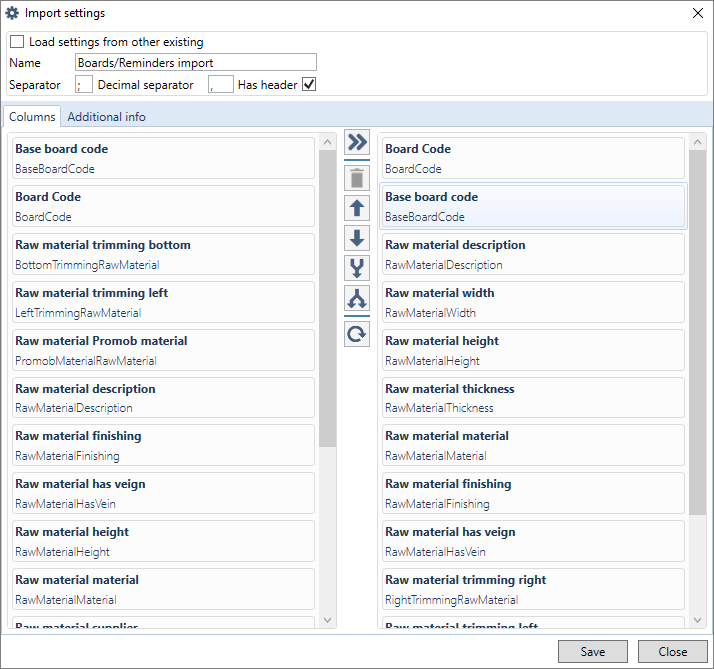
Click here to learn how to edit layouts.
03. Remove setting:
- When you click this button, the layout that is selected will be deleted.
04. New configuration:
- Clicking this button, a custom import layout can be created;
- Click here and see detailed documentation on how to create a custom import layout.
IMPORTANT:
- To the columns who need a yes or no answer, you have to consider 1 for yes and 0 for no.
- To define the direction of the vein in materials that have a model with the vein, you must insert the column AlinhamentoVeioItem in the column of import.
- To indicate the direction of the vein, use vertical, horizontal, or none if there is no vein.
- If the AlinhamentoVeioItem column was not inserted in the import, the direction of the vein will be considered the LarguraItem (item width) as dimension.
- To import projects you can only set panel or edge tapes code. If the code is correct, the material will be linked directly to the item being imported.
05 File to import:
- In this option, a *.csv, *.zip or *.rar file should be selected;
Register
On the Register tab, you can import only *.csv files. You can select the import of panels or edge tapes.

01. Panel
1. Panel Import
The importation of panels includes leftovers, has a standardized layout for the importation of panels and leftovers, where a code of the original panel can be defined, to indicate that the panel is a leftover.

IMPORTANT: If a panel is set to spare, it will always inherit the description information, thickness, material, finish, and spindle from the original sheet.
Click here and download an example panel register;
2. Edge Import
This option provides a standardized layout for importing edge tapes, where code, description, height, thickness, slack, edge trim, and edge tape finish can be set.

Click here and download an example edge tape register;
Simplified Configuration
As of version 1.2.4.6, the import functionality for the simplified mode, was made available.
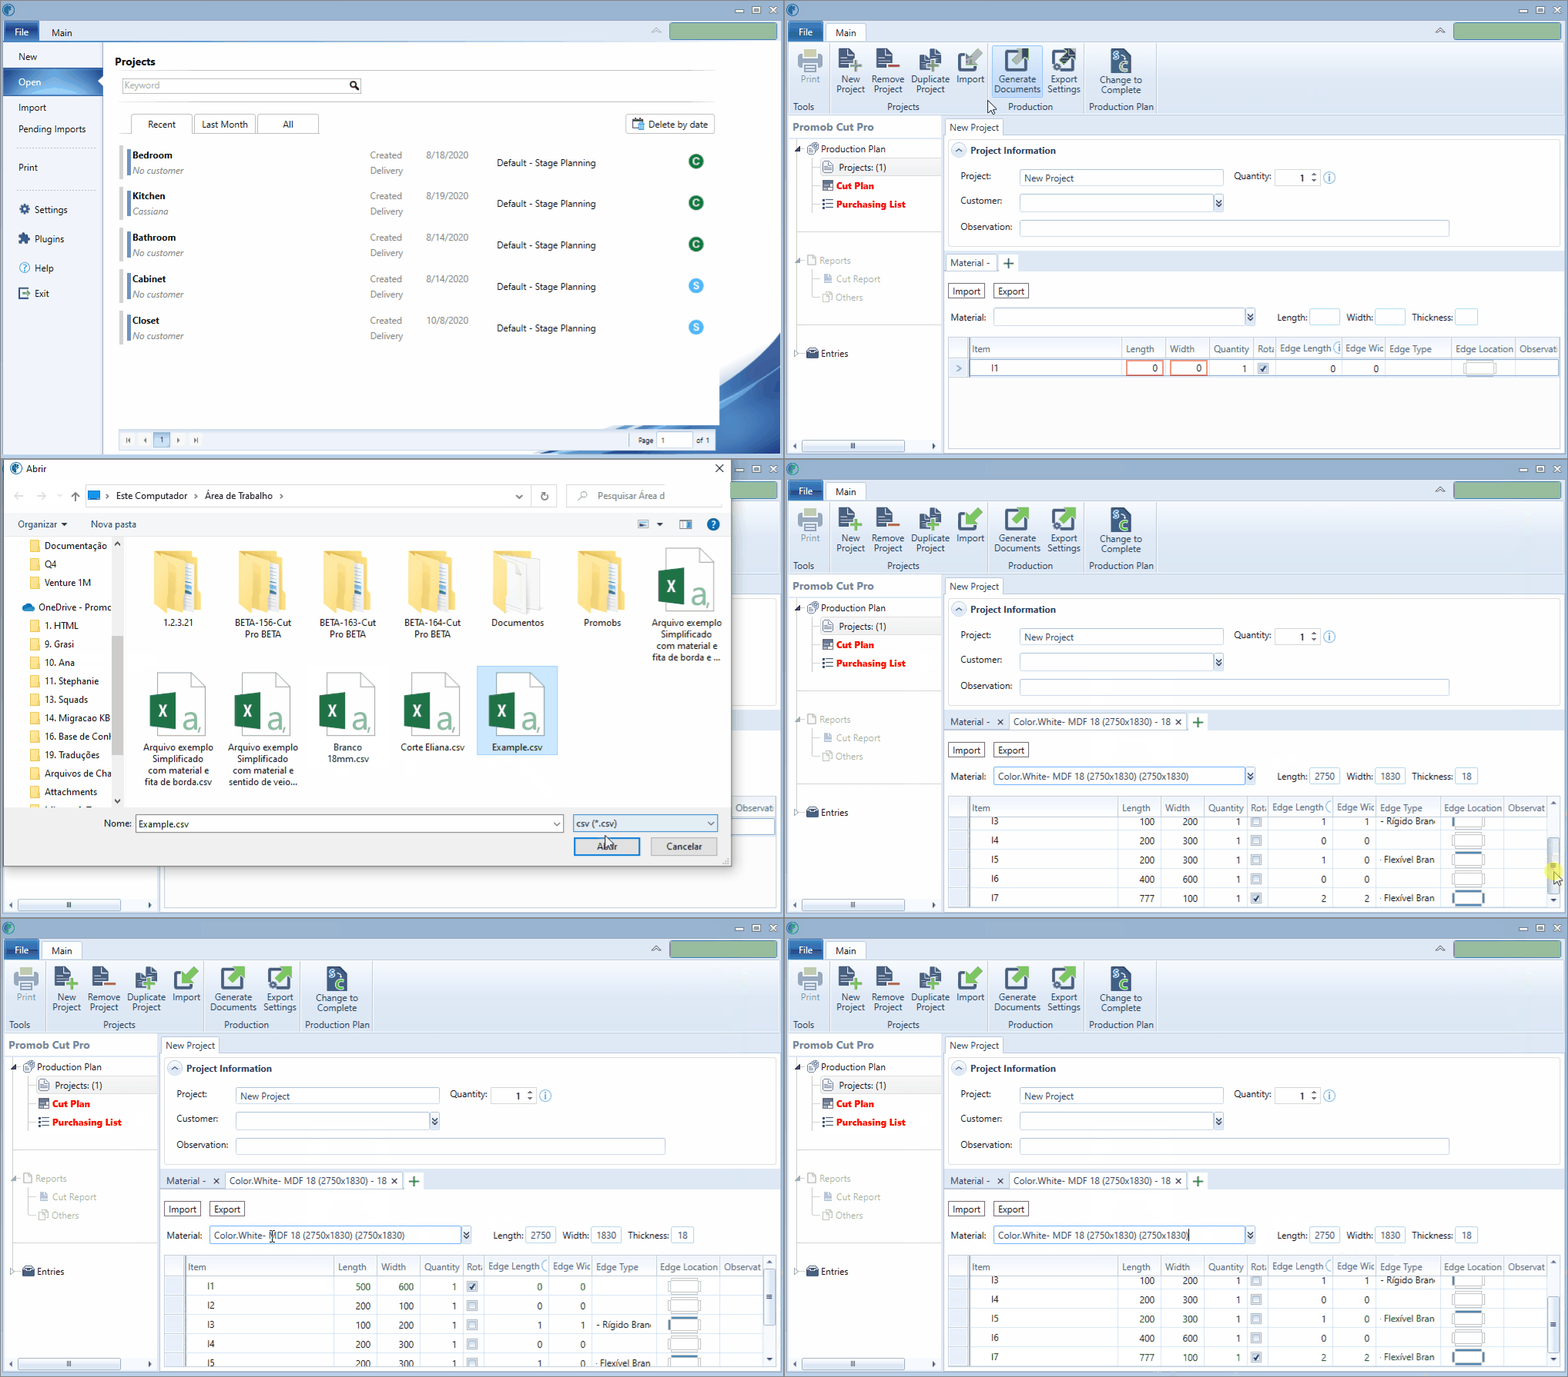
To use the import feature:
1. In the Main menu, access the Projects tab;
2. On the material tab, in the Unit of Measure option, select the unit of measure for the file to be imported;

3. On the material tab, click the Import button;


4. In the displayed window, look for the file saved on your computer, which should be imported;
- The import will only be performed if the file is configured with the same standard that is exported.

Import requirements
- For the panel field, description, height, width and thickness are mandatory;

- For item fields, length and width are mandatory;

- When the optional fields are not informed, default values are registered.
Default values
When the fields do not have registered information, the following default values will be automatically filled:
- Item: nothing
- Quantity: 1
- Rotate: 1
- Edge Length: 0
- Edge Width: 0
- Edge Code: nothing
- Observation: nothing
IMPORTANT:
-
When importing an item that has an edge band, but in Cut Pro, it does not have any edge band with the same code shown in *.csv, the import will NOT be performed;
- When importing a *.csv with a panel with the same characteristics as another plate that already exists in one of the tabs in Cut Pro, the existing plate will have all of its items replaced by the items that are in the imported *.csv file. Otherwise, a new tab will be created for the new plate described in the file, with its respective items.
- In *.csv, the decimal separator is the period ( . ) And the column separator is the semicolon ( ; ).
Click here to download an example of *.csv for import.