The insertion of modules in the design always occurs in a certain plan. Any item present in the design such as walls, floors, modules, geometries can be considered an insertion plan.
Before inserting a module in the design it is important to define what your insertion plan will be. The insertion of modules in incorrect plans can cause design errors since the module inserted in a plan becomes dependent on it and some actions such as movement and exclusion, for example, carried out in the insertion plan can interfere in the inserted module. The insertion planes are identified by yellow shading in the 3D space. Check on the insertion plans by clicking here.
Click directly above the subject you want to know:
- How to insert the module with mouse drag
- How to insert the module by double-clicking the mouse
- Module insertion position
- Differentiated insertion indicator
- Insertion direction
- Insertion orientation
- Inserting tops and shelves
- Most used modules
Insert the module with mouse drag
1. Access the modulation bar and select the item you want to insert:
2. Drag the module to the desired insertion plane, it can be the floor, walls, or geometries;
3.Keep the left mouse button pressed and wait for the insertion position (green outline box) to be displayed to position the module in the desired location. Release the mouse to insert the module.
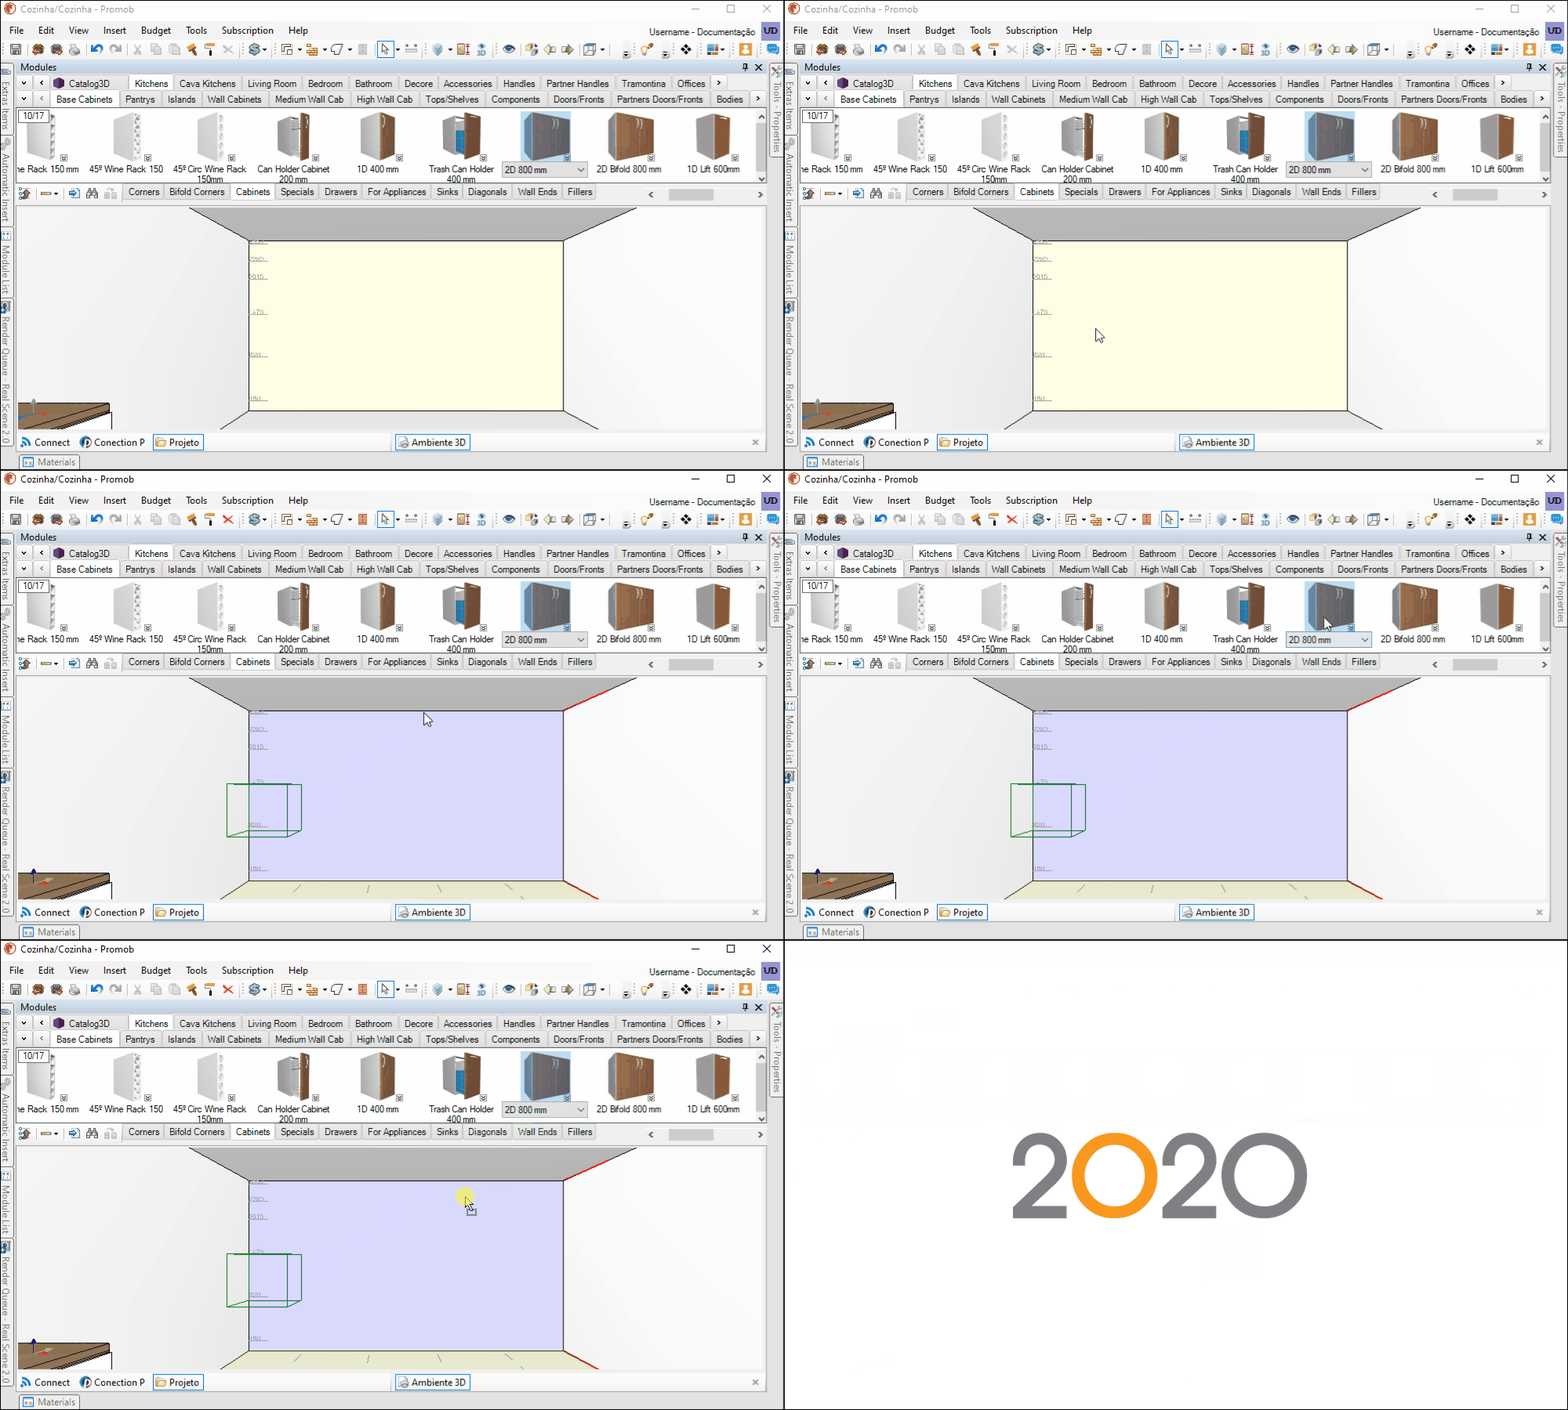
IMPORTANT: the insertion plane that the module was inserted in, will be displayed in yellow color.

Insert the module by double-clicking the mouse
IMPORTANT: the insertion of items by double-clicking is only possible if, when clicking on a certain plane, the insertion position, represented by a contour box with green lines, is displayed.
1. In the modulation bar double-click on the module to be inserted:
2. The module is inserted in the 3D space.
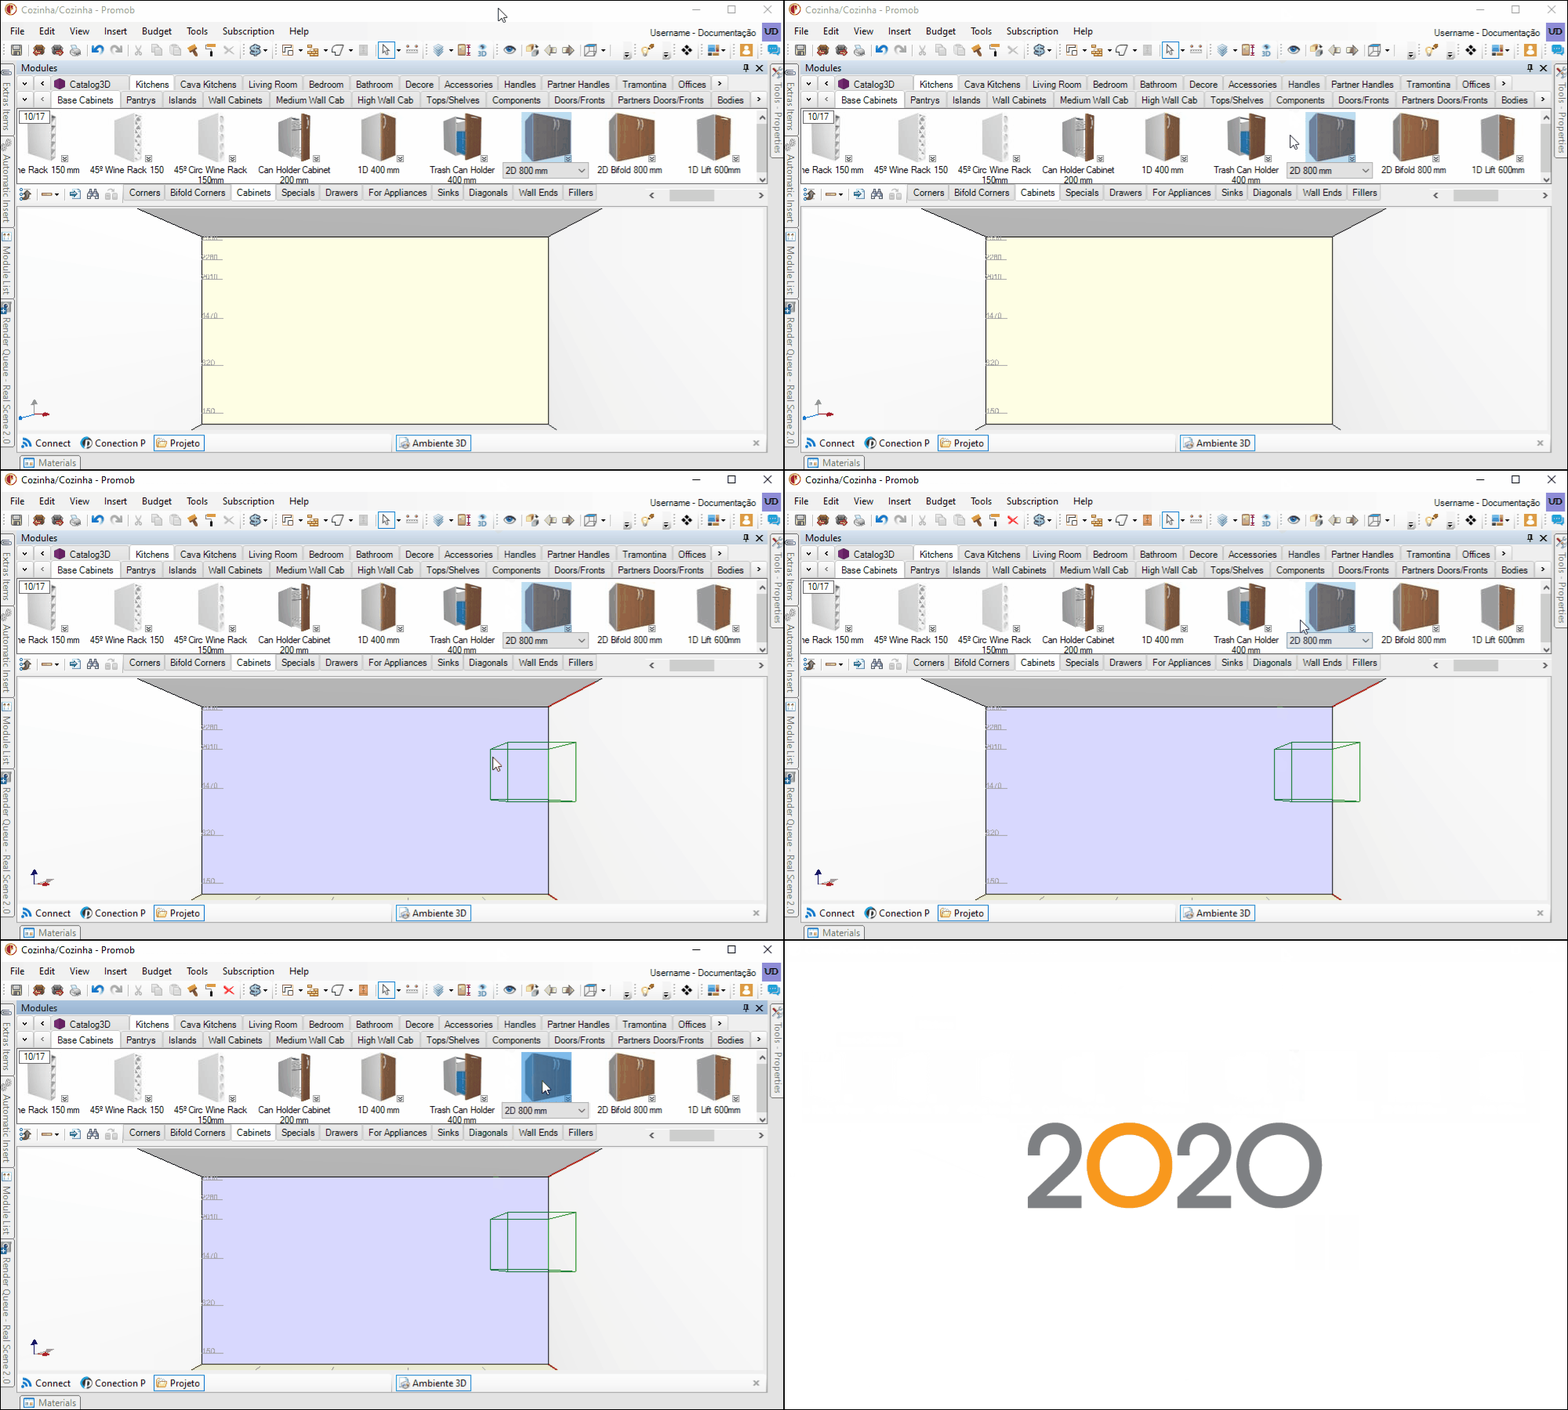
Module insertion position
The position of insertion of an item in the 3D space is represented by a green outline box and aims to assist in positioning the module in the desired location. To hide or show an item's position outline, do the following:
1. Click the Show button in the status bar and click on the Insert Position option.

Differentiated insertion indicator
The differentiated insertion indicator indicates the items that have particularities of insertion in the space. To view, the differentiated insertion indicator, access the modulation bar.
1. The sliding doors have the indicator for different insertion because their form of insertion is different from the other items of Promob;

2. The modules that can be edited through the Build Closet are identified by the icon highlighted in the image below.

Insertion direction
To set the insertion direction for items:
1. Select the item whose position will serve as the basis for the insertion of the other item.

2. In the modulation bar, locate and click on the item to be inserted.

3. Click on the Insert - Insert Direction menu. Select the desired insertion option:
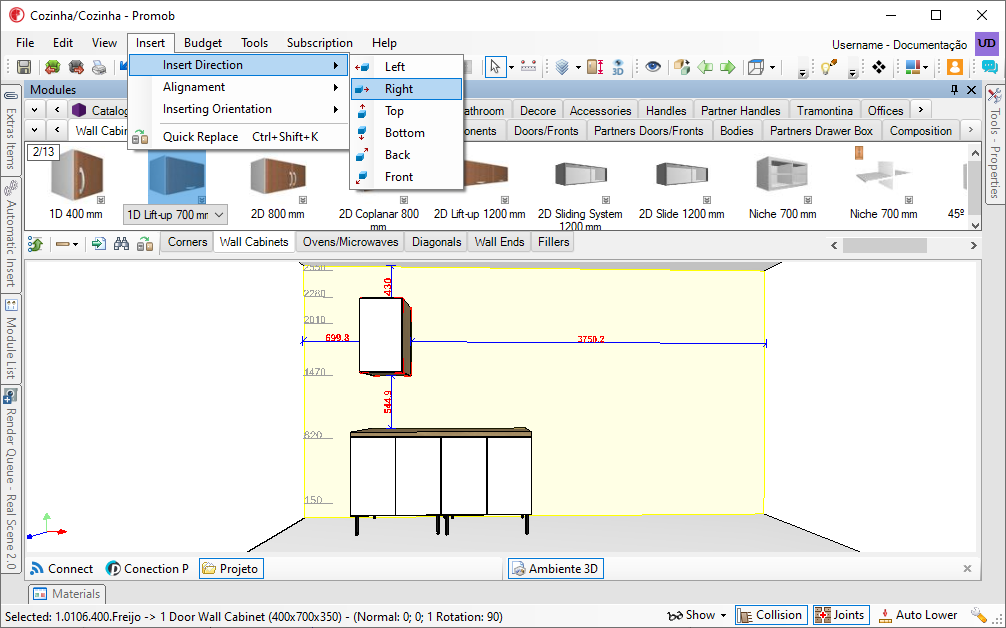
4. Note that the preview of the module is displayed in green in the space. To insert the module above or below the preview click on the desired location.

5. In the modulation bar, double-click on the item to be inserted.

Insertion orientation
1. Select the plan where you want to insert the item;
2. In the modulation bar, locate and click on the item to be inserted;

3. Click on the Insert - Inserting Orientation menu. Select one of the options:
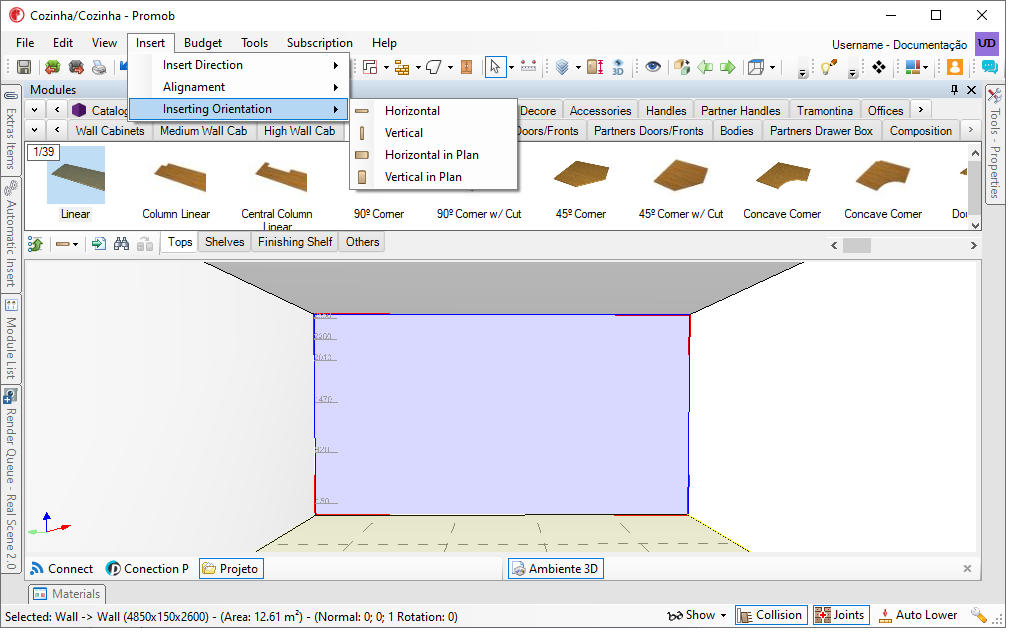
4. Observe the preview in green lines in the selected plane.

5. The guidance options are:
- Horizontal

- Vertical

- Horizontal in plan

- Vertical in plan

6. Insert the selected item in the modulation bar.
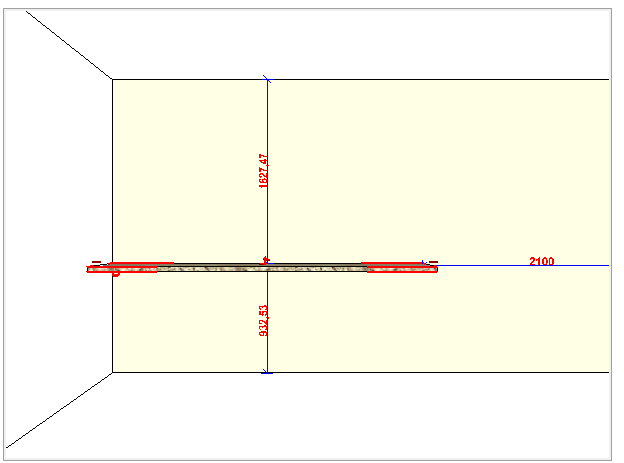
Inserting tops and shelves
1. Position the design in order to visualize the module that will receive the linear item;
2. Locate the linear item on the module bar and drag it to space, pointing directly at the module.
3. Observe the green preview of the position of the linear item. To insert the item in more than one module, move the mouse over them.
4. Release the mouse. If the dimension of the module (s) has exceeded the maximum dimension of the linear item, the message below is displayed. Click Yes to adjust the item's measurements in relation to the modules.
5. The linear item is inserted.
Most inserted modules
To access the 30 most used modules when creating spaces, perform the following procedure:
1. On the modulation bar, click on the Most Inserted tab.
