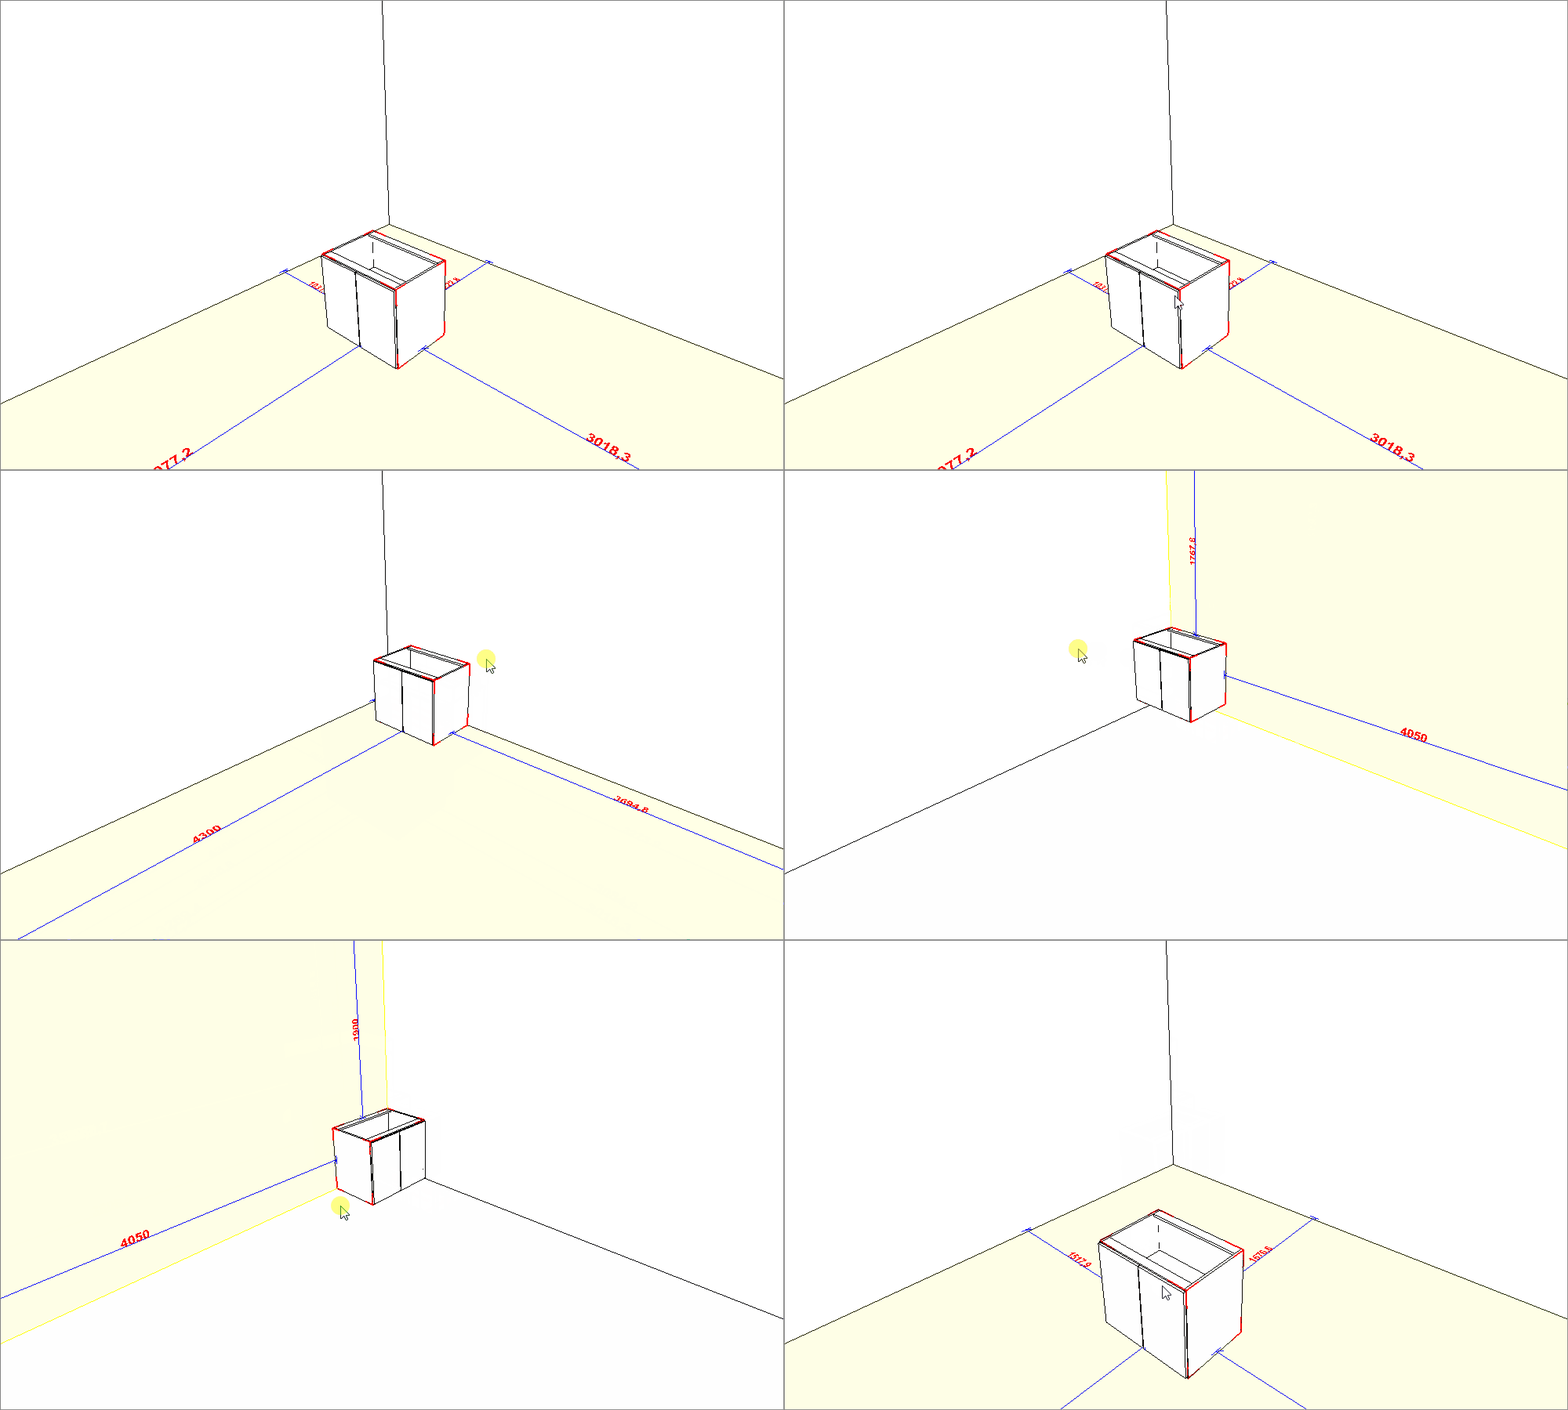
The insertion of items in the design always occurs in a specific plan, a yellow shading can identify the item insertion plan.
This article will cover the following contents:
How to disassociate the insertion plan item
How to change the insertion plan
Insertion plan definition
Any item inside the design, for example, the walls, the floor, the modules, the geometries can be considered as an insertion plan. Perform the following procedures to define the insertion plan:
1. Insert the item over the desired plan.
- Wall plan

- Floor plan

- Module plan

- Geometry plan

Insertion plan identification
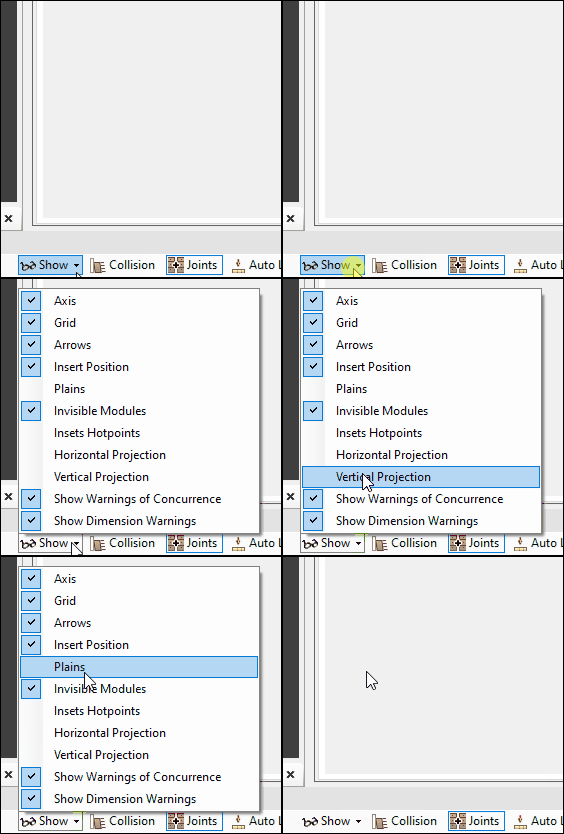
You can enable or disable insertion plan identification. For this:
1. Access the Show menu.
2. Check or uncheck Plans, so you will set display of the insertion plan:

Change the insertion plan of an item:
Switching plans can be used, for example, to exchange a wall module, or to remove a module from the wall and place it on the floor.
To change the insertion plan:
1. Click on the item with the left mouse button and holf the button.
2. Drag the item to the other insertion plane and before releasing the mouse button, right click the new insertion plan after releasing the mouse button.

How to disassociate the insertion plan item?
To disassociate the module from a plan making the floor the standards positioning:
1. Right-click on the item to be unliked and select the Unassociate option.

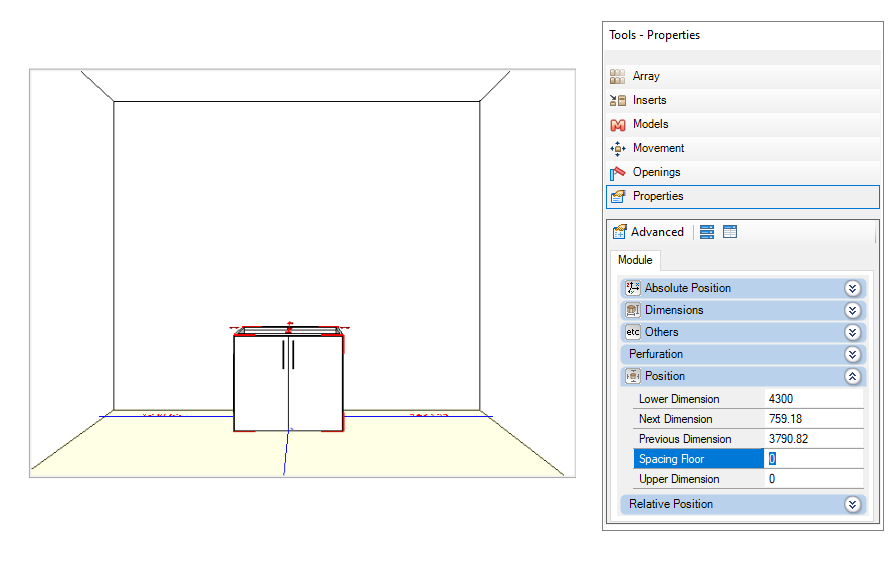
2. The item plan becomes the floor, if necessary, change the item spacing from the floor using the Tool - Properties.

IMPORTANT: The disassociation process cannot be performed by selecting more than one design item. If you need to unlink more than one item, select one item at a time and repeat the procedure.
How to change the insertion plan?
To visualize the insertion plane, place the module in the space and observe which plane is colored yellow. This plane will be where the module will be inserted.
To choose a specific insertion plane, drag the module with the left button and click simultaneously with the right button on the desired plane.
