The items that have the possibility to be enabled or disabled from Promob Maker, are located in the module tab and in the build closet. In this article, we will learn how to enable and disable these items.
Module Tab
When accessing Promob, with the Content Configurator plugin active, all items made available by Promob will be displayed in the modulation tab.
To enable or disable an item, follow the procedures below:
1. Locate the item to be enabled/disabled.
2. Right-clicking on the item, select one of the Enable or Disable options.
NOTES: These options are available to select in each item and also in the modulation group, where you enable or disable all items within the selected group.
At this point, the icon  will be displayed next to the module. This indicator marks the synchronization status when enabling one item. The icon will be replaced by
  when status synchronization is complete.
When the icon for the Enabled status  is displayed, this item will be visible to the shopkeeper.
To disable, right-click the item again and click the Enable/Disable option. At this point, the icon  will be displayed next to the item. This icon marks the synchronization status when disabling an item. The icon will be replaced by
 ![]() when the status synchronization is complete.
when the status synchronization is complete.
When the icon for the Disabled status ![]() is displayed, this item will be visible to the merchant.
is displayed, this item will be visible to the merchant.
Status manager for Library modules
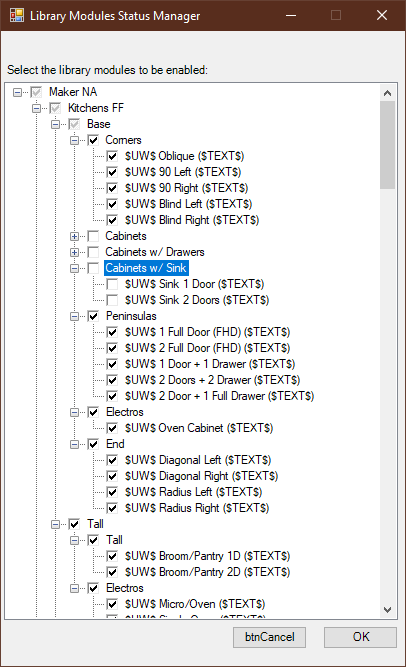
To change the status of library modules more quickly:
1. Click on the icon and access the Enable / Disable library modules menu

- All modules of the library will be displayed in the group hierarchy.
2. Select the modules or groups that are to be enabled or disabled.

3. Click OK to save the information.
Build closet
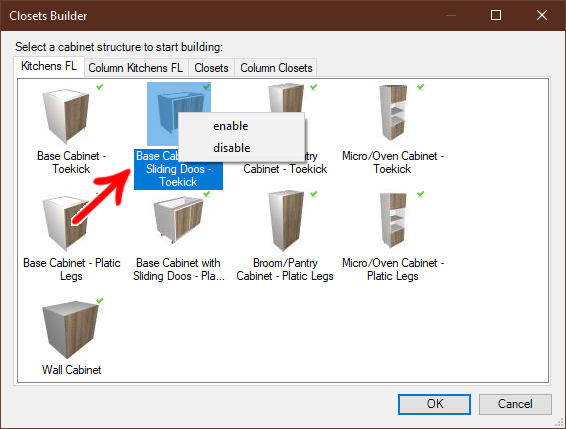
To change the visibility of a cabinet builder module:
1. Access the Build closet tool.
2. Locate the item to be enabled/disabled.
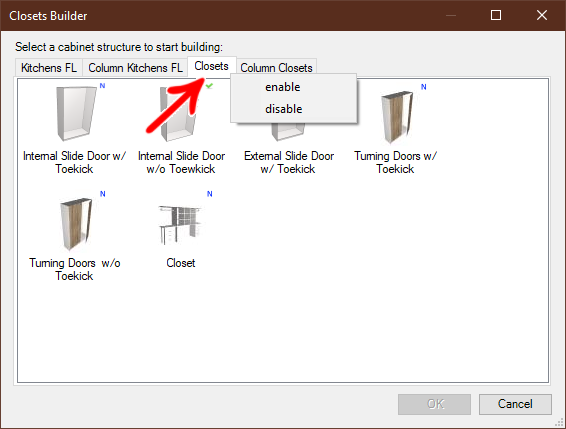
3. Right-clicking on the item, select one of the Enable or Disable options.
NOTES: These options are available to select in each item and also in the modulation group, where you enable or disable all items within the selected group.


At this point, the icon  will be displayed next to the module. This indicator marks the synchronization status when enabling one item. The icon will be replaced by
  when status synchronization is complete.
When the icon for the Enabled status  is displayed, this item will be visible to the shopkeeper.
To disable, right-click the item again and click the Enable/Disable option. At this point, the icon  will be displayed next to the item. This icon marks the synchronization status when disabling an item. The icon will be replaced by
 ![]() when the status synchronization is complete.
when the status synchronization is complete.
When the icon for the Disabled status ![]() is not displayed, this item will be visible to the merchant.
is not displayed, this item will be visible to the merchant.