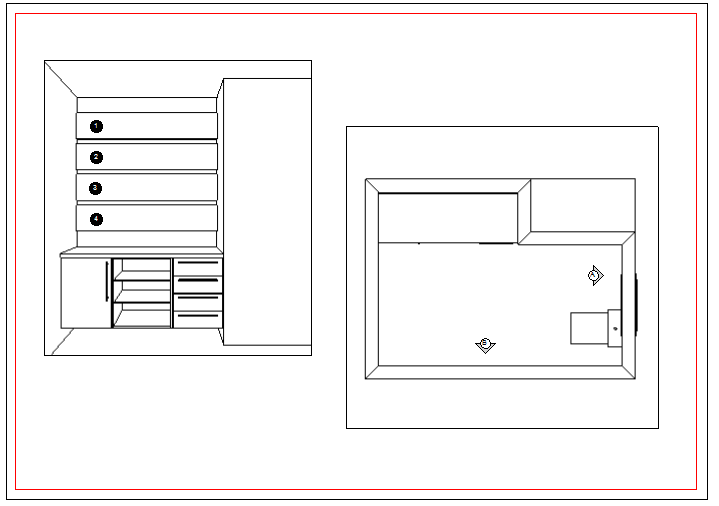
There are three types of indicators. Each with a different goal:
- The view indicator aims to locate the different impressions of the design;
- The numeric indicator aims to facilitate the counting of items in the space;
- The arrow indicator is intended to point out the items to be highlighted in the design.
To insert indicators, click on the options:
1. Insert indicator
2. Properties of the indicator
1. How to insert indicator
To insert indicator:
1. Click on the Indicator button on the side frame bar and select one of the options;


2. Notice that the mouse cursor is altered. Click with the mouse on or local to the printing page that you want to insert or indicator.

2. How to define the properties of the indicator
To define the properties of the indicator:
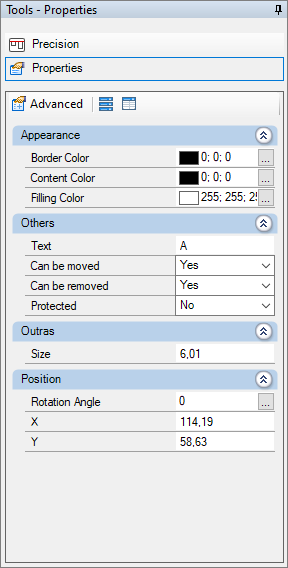
1. Select or indicator and access or Tool Panel - Properties;
2. In the Appearance category, define:
- Content string: defines the indicator string or content;
- Contour color: defines according to the contour of the indicator;
- Color of the filling: defines the indicator's color fill;
3. In Others category define:
- Text: define the text of the indicator;
- Move Power: defines whether or not the indicator can be moved to the print page;
- Removal Power: defines whether or not the indicator can be removed from the print page;
- Protected: defines whether or not the indicator is protected against alterations;
4. In the Position category define:
- Rotation angle: defines the angle of rotation of the indicator;
- X: defines the position of the indicator not in the X of the impression 3D space;
- Y: defines the position of the indicator, not the Y of the impressing 3D space.
