After completing the construction of the walls, insert and position the openings in the 3D space.
Check below the procedures regarding the Openings:
Insert Openings
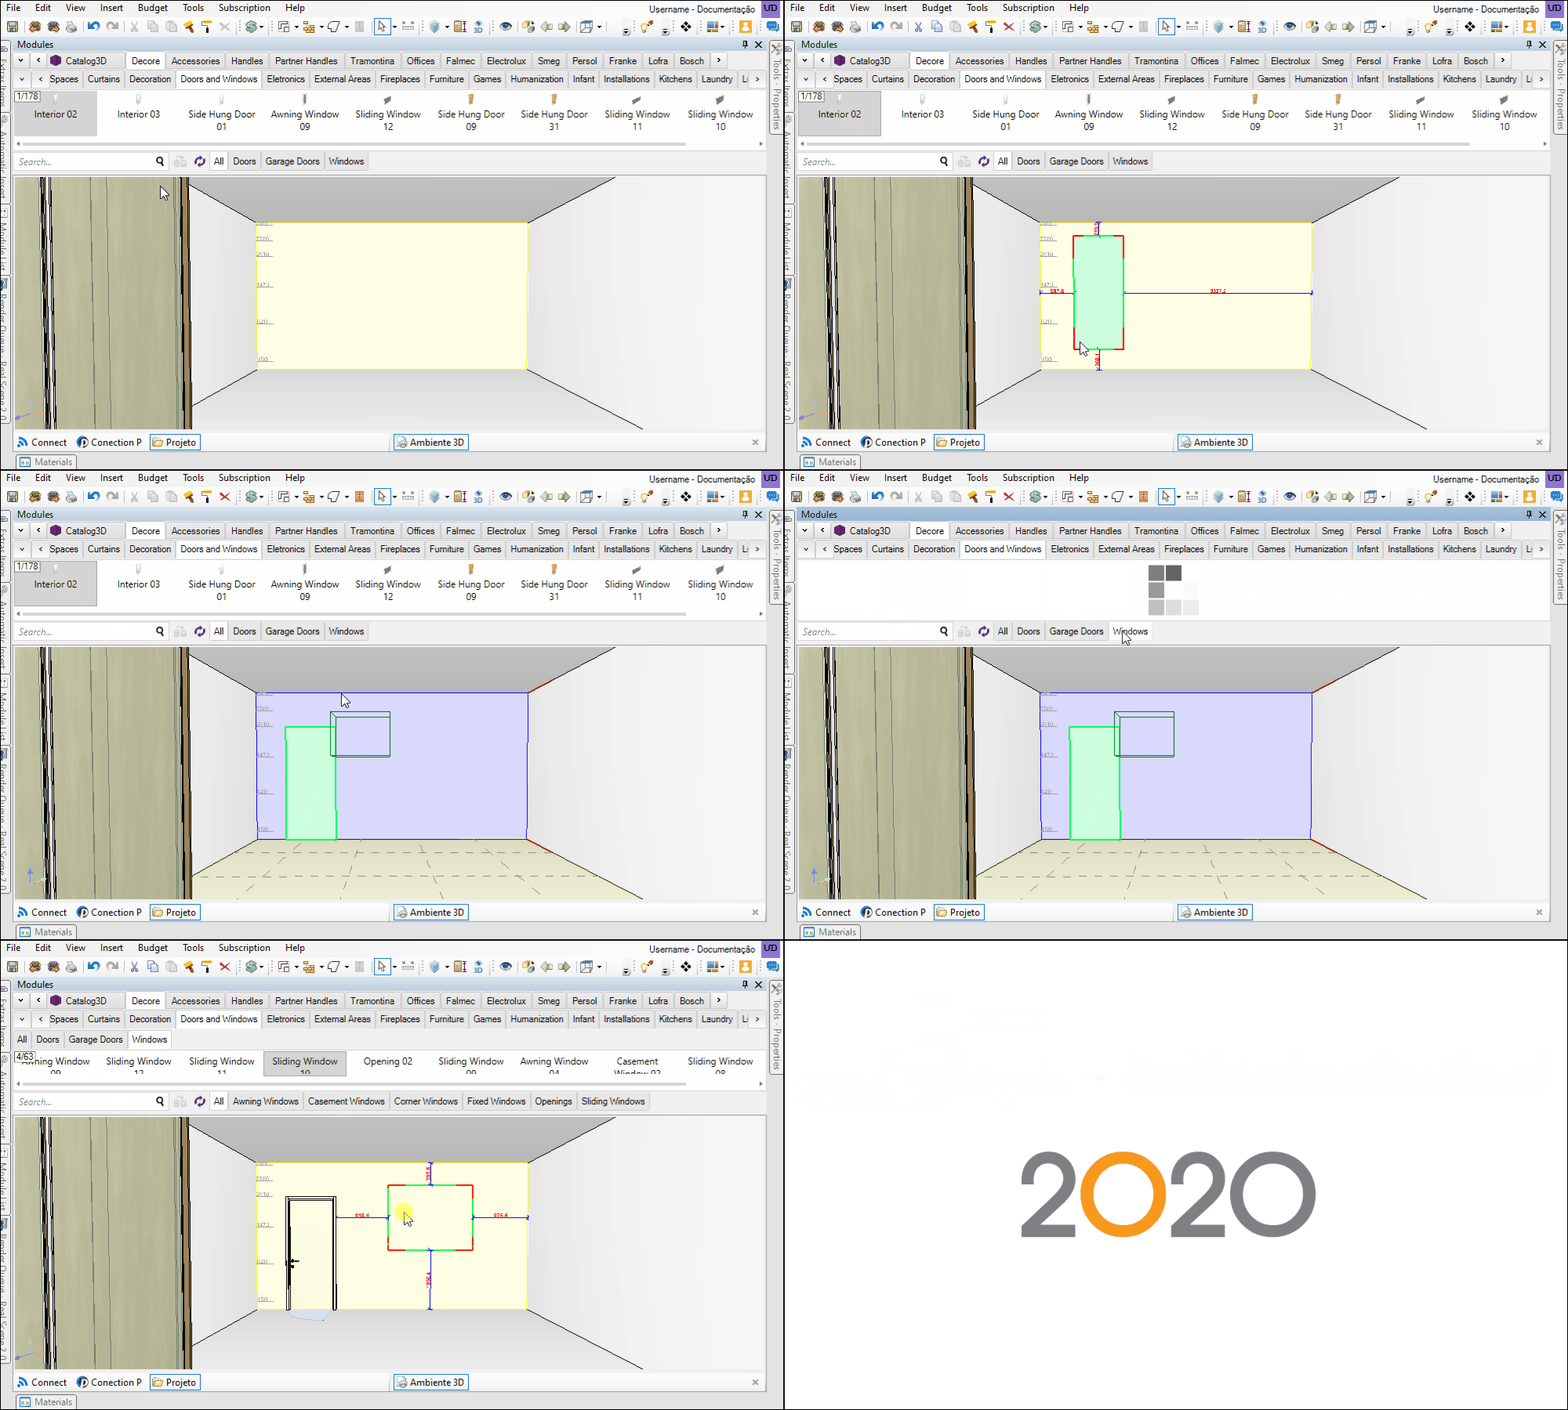
To insert doors and windows into the project:
1. Position the wall where you want to insert the opening in front view. If necessary use the Lower tool for a better view of the wall;
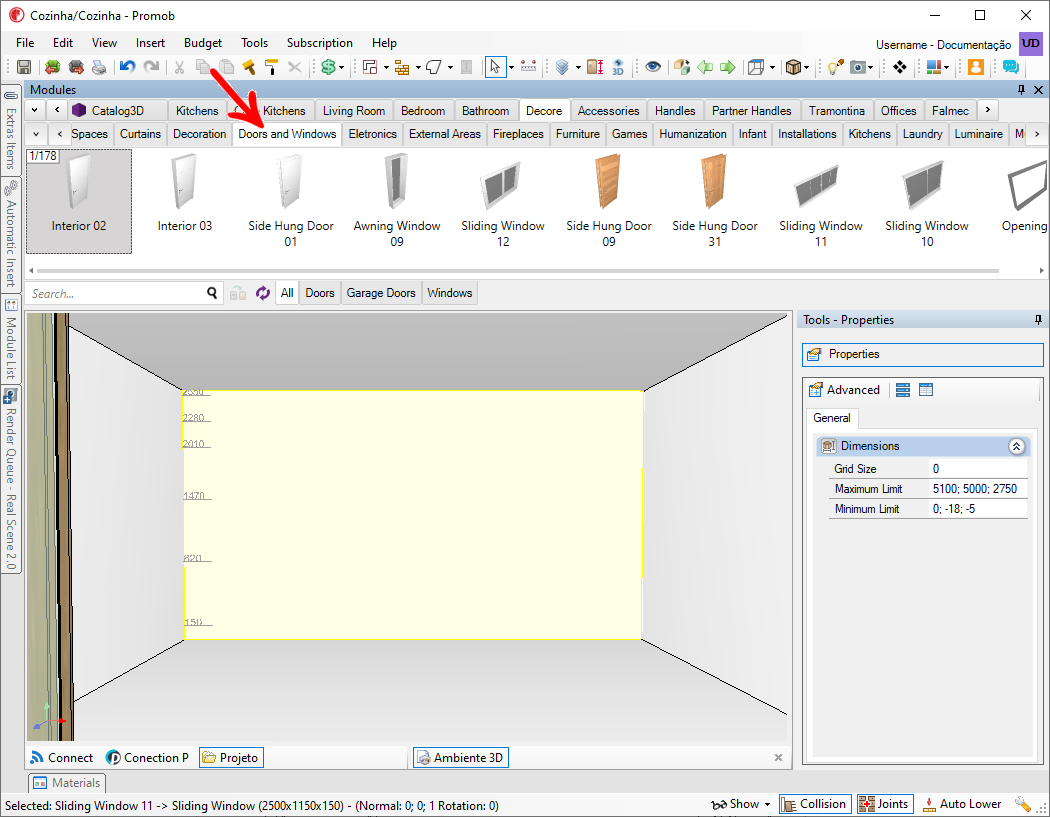
2. In the modulation bar, go to Decore - Doors and Windows, the Windows, Doors, and Garage Doors libraries are available.
3. Select the opening and drag it onto the wall of the room. Hold the mouse down until a green box appears, representing the position of the opening in the project. When the green box appears, release the mouse;
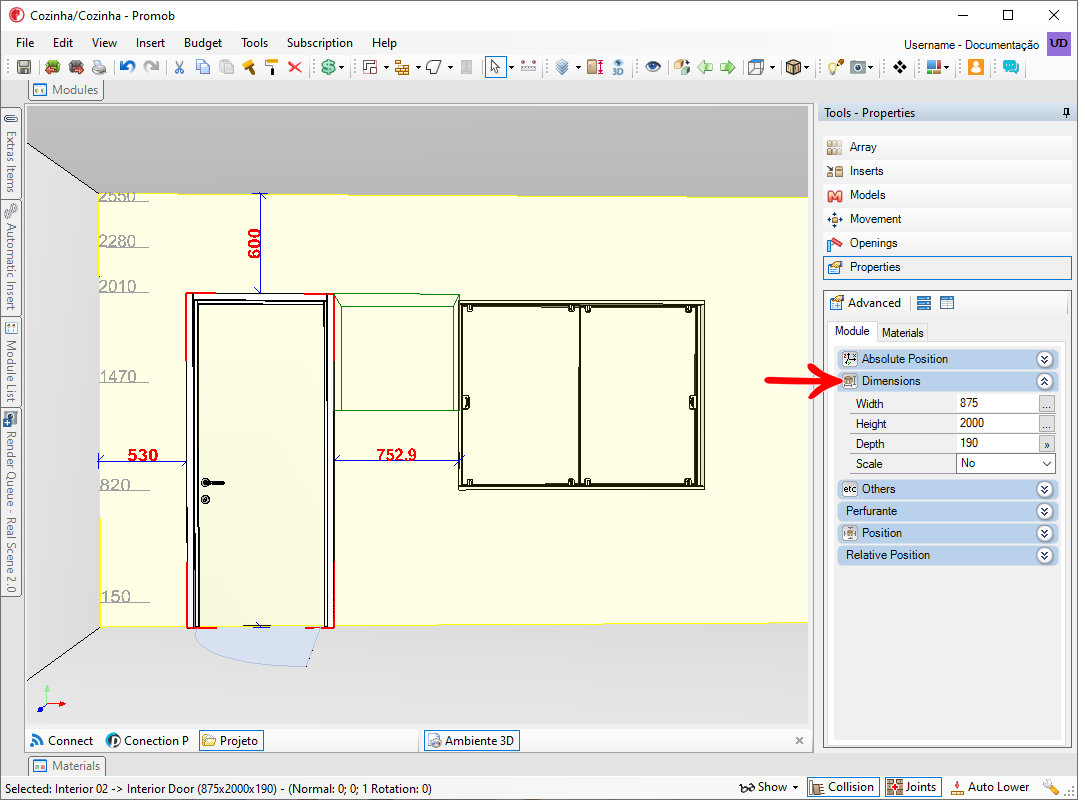
4. To edit the measurements of the opening, select the desired opening and go to the Tools Panel - Properties - Dimensions and set the measurements.
Apply Material to Openings
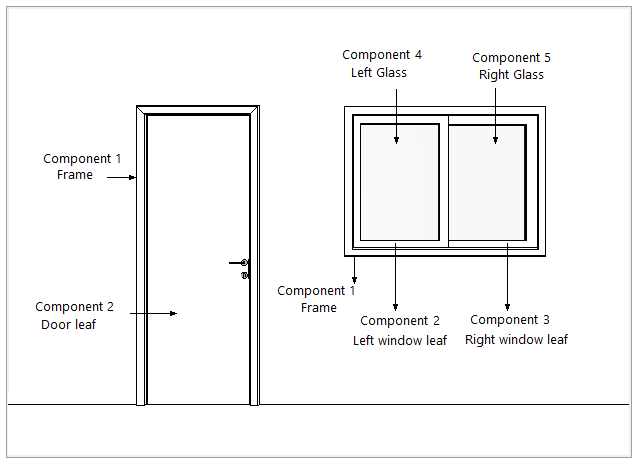
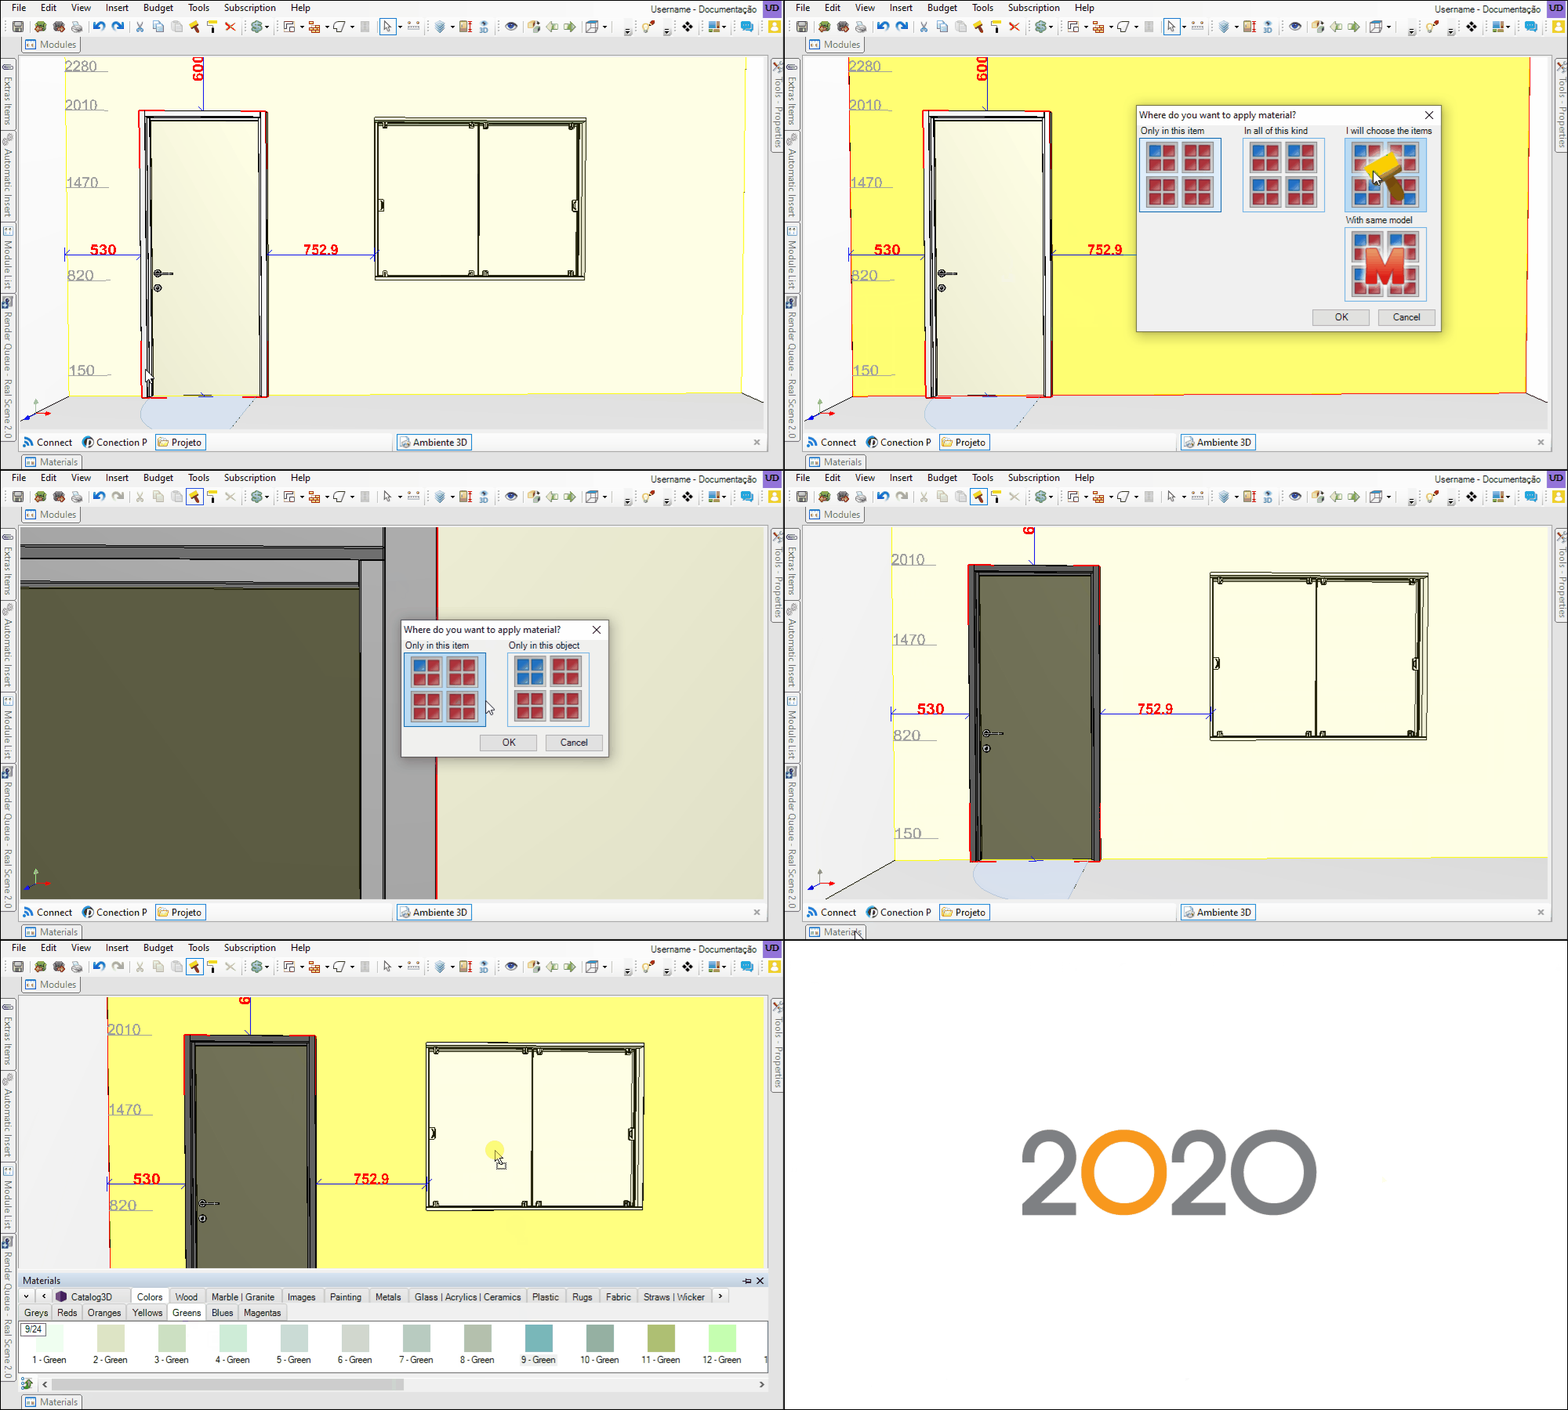
The process of defining finishes for the doors and windows inserted in the project is similar to the process of applying finishes to the walls and floor. The difference is that the openings are divided into components that allow the assignment of different materials. Look at the picture:
1. On the bottom bar of Promob, access the Materials tab.
2. Select the material to be applied and drag it over the Opening component.
IMPORTANT: The application of materials in openings is done in their components. So, when dragging a material to the opening, drag it to the component you want to apply the material to.
3. Release the mouse, and define the location where the material should be applied:
- Only on this item: applies the material only to the component where the material was dragged;
- In all of this type: apply the material to all common components in the environment;
- Items of my choice: enable the Brush tool, so that, through clicks, the material is applied to the desired items;
Open the Openings
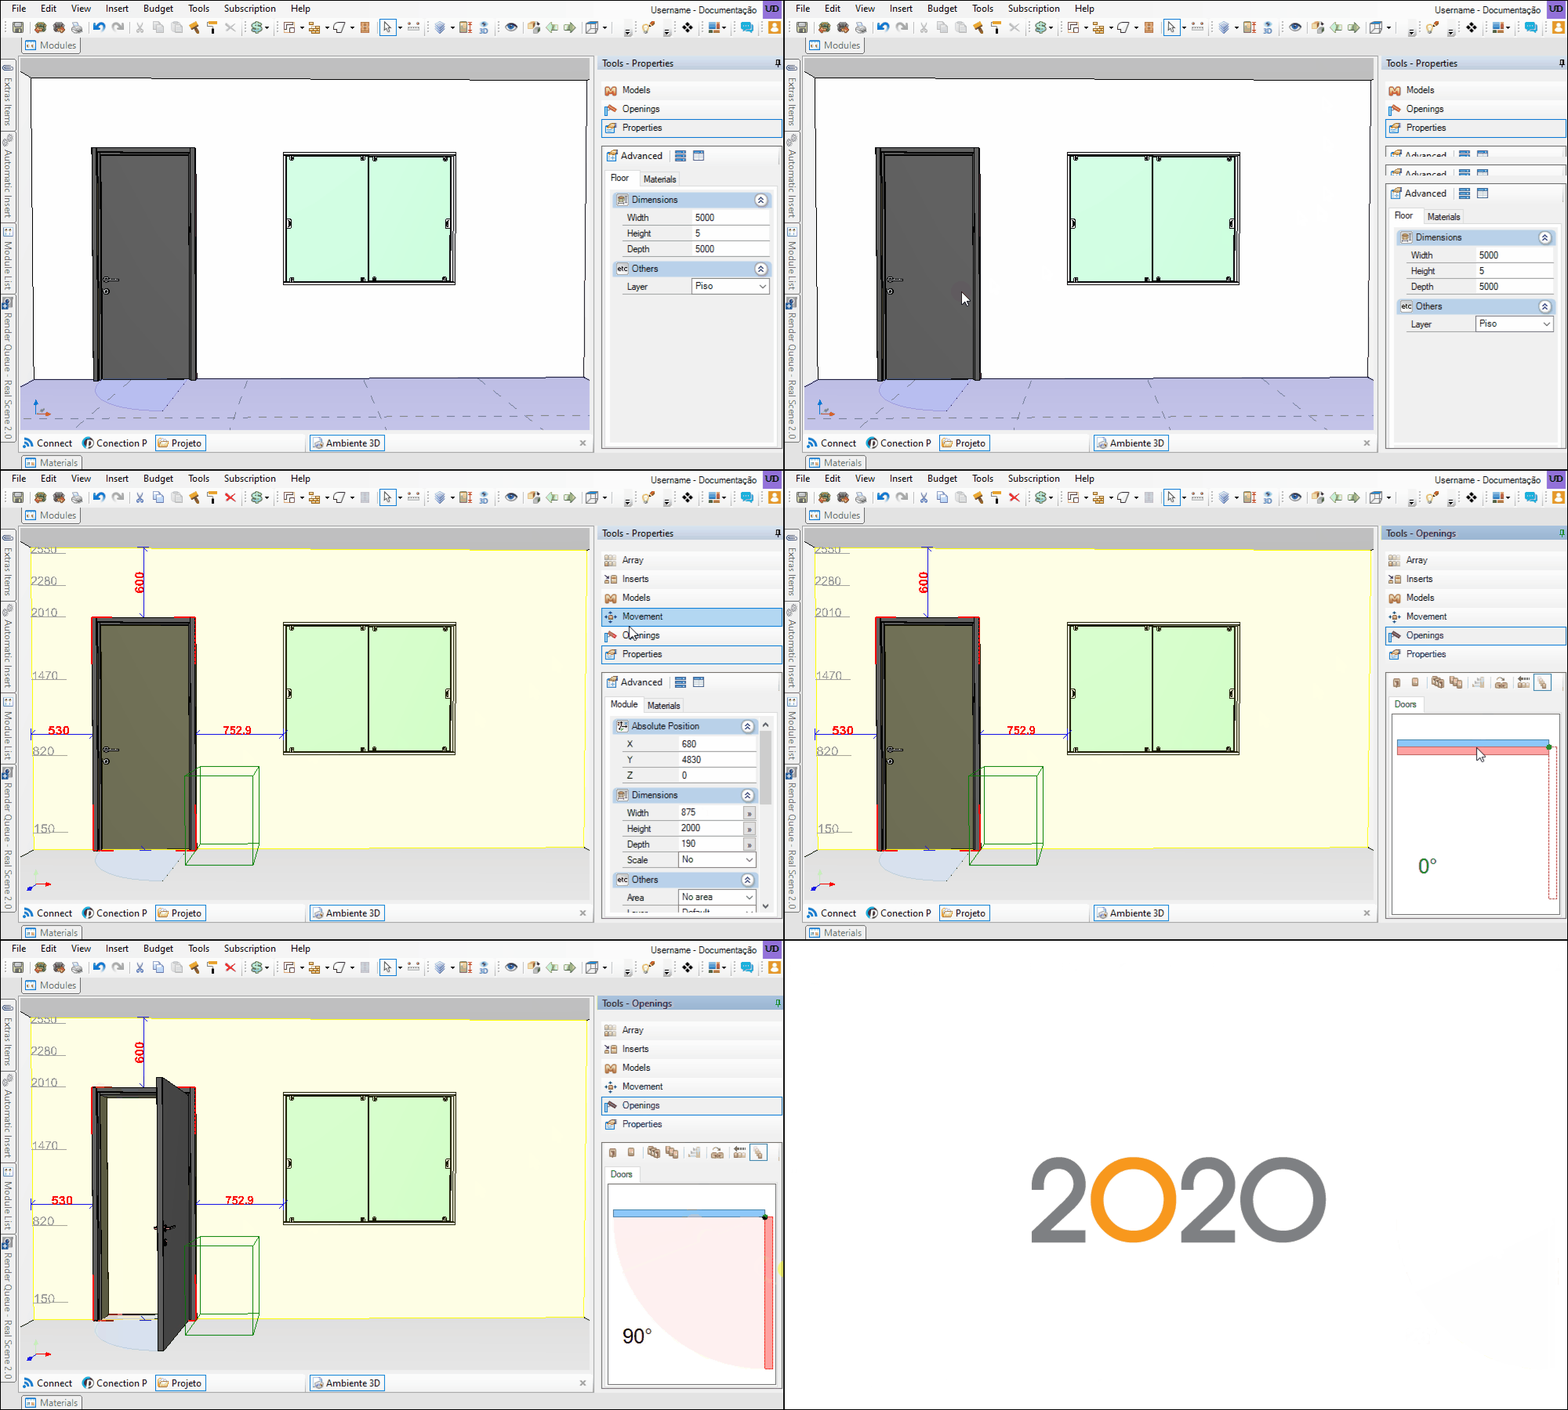
The Openings tool allows the user to perform the opening movement in the system, whether doors of the Openings, or the doors of the modules (sliding, drawers or lift up module). It is an excellent resource to demonstrate your design to the client. For this:
1. Select the opening.
2. Go to Tools - Openings, and perform the opening movement as desired.
Opening options:
| Icon | Description |
 |
Open: opens only the selected module of the environment. |
 |
Close: closes only the selected module in the environment. |
 |
Open All: Opens all items in the 3D environment at the same time. |
 |
Close all: close the 3D environment items at the same time. |
 |
Invert selected: to invert the opening side of a module. |
 |
Slow motion: opens and closes doors, windows or drawers in slow motion mode. |
 |
Automatic update: when this option is enabled, all open and closed doors and drawers are automatically visualized in the project environment. If it is not enabled, the changes will be previewed after clicking with the mouse in the 3D environment. |