Check below the specifications and configurations available in the Twister 750NX plugin.
Machine Type: CNC Machining Center
Manufacturer: Vertimaq
Programs example: BOT0133A
Generated file extension: .GWF
INTEGRATION PLUGINS
Plugin Twister 750NX
IMPORTANT: To import files generated within Promob to the Twister750NX Machine, it is necessary to purchase a release key for the machine from the manufacturer.
Machine import steps:
1. Access CNC - CNC configuration;

2. Access the machine settings and configure the Plugin Vertimaq Twister_750NX, with tool code identification normally;
Settings
To check the settings on CNC Machines, click here.Machine 1
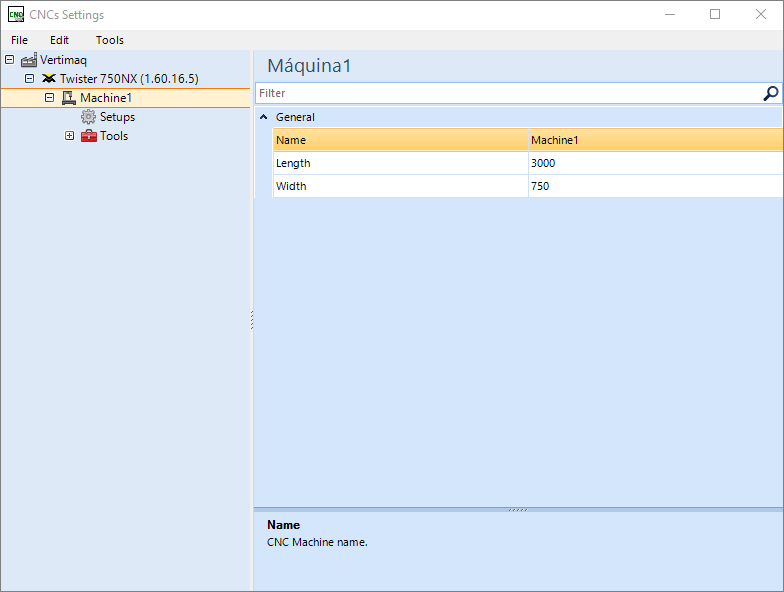
General
Name: define the name for the machine.
IMPORTANT: The name set in this field also changes the name of the folder where the generated files will be saved.
Length X (mm): the value entered in this field indicates the maximum usable length of the machine.
Width Y (mm): the value entered in this field indicates the maximum usable width of the machine.
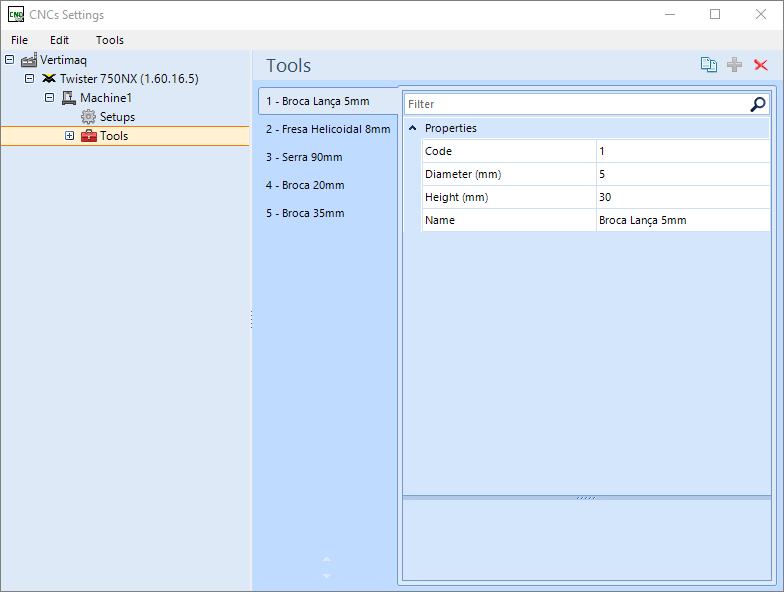
Tools
To check the settings about CNC Tools, click here.
Setups
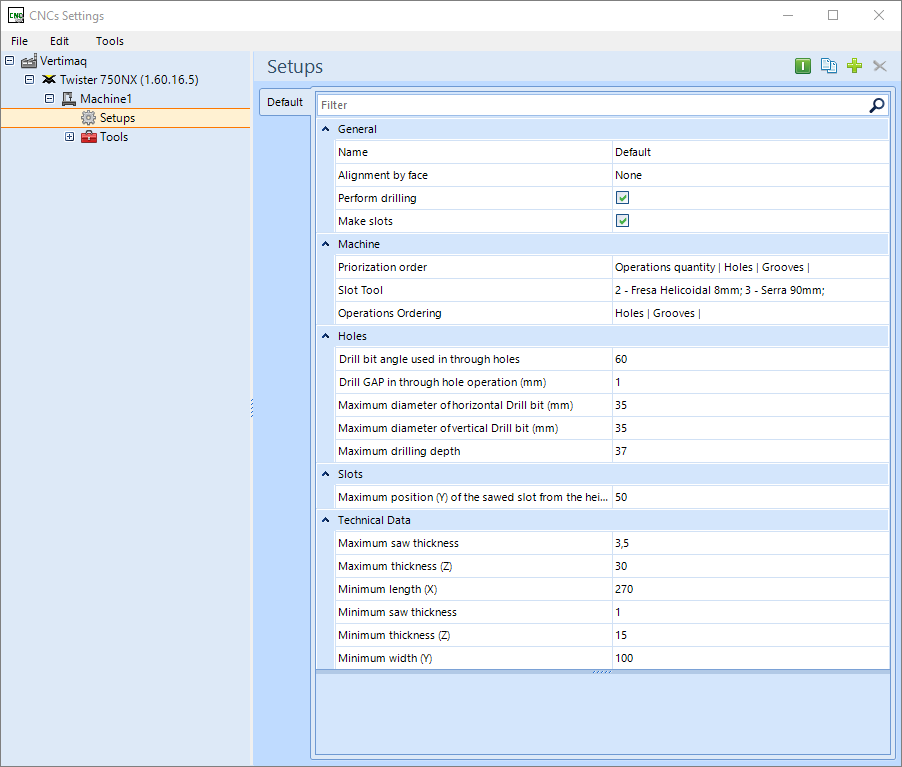
General
Name: the name set in this field also changes the name of the folder where the generated files will be saved.
Alignment by face: defines whether the alignment face registered on each part is considered when generating programs. If yes, this face will be aligned according to the selected configuration. For more information, click here.
Perform drilling: machine is enabled to drill holes.
Make slots: with the option checked, the registered slot will be generated in the machine programs.
Machine
Priorization order: defines the order of prioritization of operations for program generation. According to the order indicated in this field, the plugin will prioritize, in program A, the selected option.
Example: In a part that has holes on one side and tears on the other side, the order indicated in this field will determine which of them will be prioritized in the A program.
Slot tool: tool used for slots. IMPORTANT: This option is available when the Make Slots option is selected.
Operations ordering: order that the machine performs operations.
Example: in a part that has holes and tears on the same face, the order indicated in this field will determine the sequence in which they will be executed by the machine.
Holes
Drill bit angle used in through holes: determine the drill bit end angle for through hole usage (from 25 to 90 degrees). This value is used in the calculation to determine the increment in the through-hole depth to ensure that the hole passes completely through the part.
Drill GAP in through hole operation (mm): determine the clearance of the drill for use in through holes.
Maximum diameter of horizontal drill bit (mm): maximum diameter of horizontal drills.
Maximium diameter of vertical drill bit (mm): maximum diameter of vertical drills.
Maximum drilling depth: Maximum drilling depth, in millimeters;
Slots
Maximium position for sawed slots in (Y): maximum position at which the machine can make (Y) saw cuts.
Technical Data
Maximum saw thickness: maximum thickness at which the saw can perform operations.
Maximum thickness(Z): maximum thickness of the part that the machine can perform operations.
Minimum length (X): minimum thickness of the part that the machine can perform operations.
Minimum saw thickness: minimum thickness at which the saw can perform operations.
Minimum thickness (Z): minimum thickness of the part that the machine can perform operations.
Minimum width (Y): minimum part length for the machine to perform operations.
3. In CNC - Vertimaq generates the GWF file extension;

Velox
1. Check the parts folder, noted in the Velox machine tool register.
2. Insert the GWF files generated by Promob into the folder.
- In this example the path is C:/Users\User\Desktop\Vertimaq\Twister_750NX
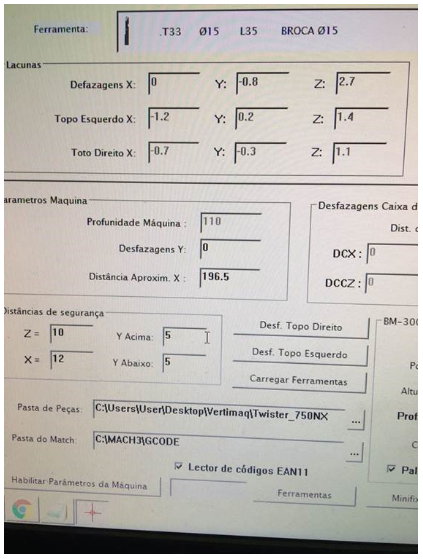
3. In the machine software, GCad, access File-Convert DWF Files and convert the files that are in the folder in GWF format, to files identified by the machine;
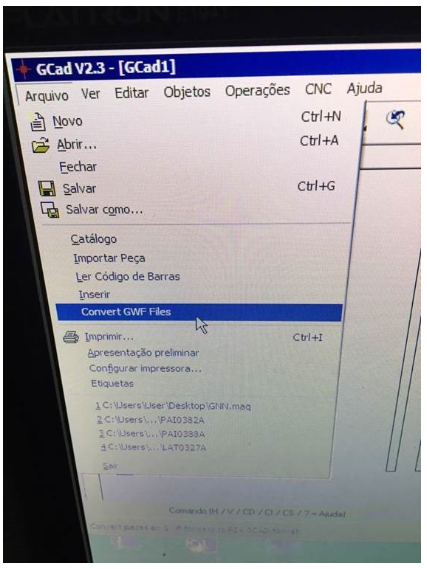
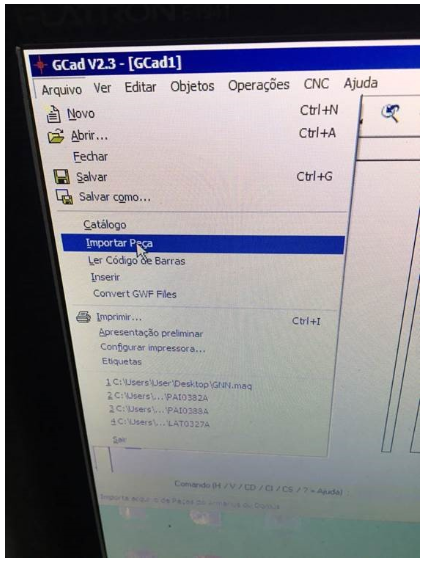
4. After the files have been converted, import the parts to be able to open them, in File-Import Part;
5. After importing the part, it is necessary to generate the GCODE for machining the program;
6. To generate the GCODE, in the machine's GCad software, access the Operations tab, on the top bar.
7. After this process, machining is possible.