Available for products
Editor
Cut Pro
The Purchasing List presents the list of items needed to manufacture the modules, such as plates, edges, and modulation accessories (handles, slides, hinges, among others).
- When submitting a Promob project to Promob Cut Pro, the item information used to manufacture the project modules is also imported;
- In the Purchasing List it is possible to change the quantity of the items to add or remove them;
Content
Select below, one of the contents shown in this documentation, to directly access the desired information:Purchasing list information
The purchasing list is divided into categories: Panels, Remnants, Edges, and Accessories.
IMPORTANT: The Remnants category is available as of version 1.2.3.18. If the Cut Pro is in a lower version, the leftovers will be listed within the Panels category along with the other plates.
The purchasing list information is divided into the following columns:
Description: name of the item;
Width: width of the item;
Height: height of the item;
Depth: item depth;
Supplier: name of the supplier of the item;
Supplier Reference: item reference according to the supplier;
Supplier Reference: item reference according to the supplier;
Quantity: number of items to be purchased;
Cut Length: indicates the saw displacement of the item;
Cuts: indicates the quantities of cuts of the item;
Cost: cost to purchase the item;
Total: based on the number of items and their cost, the total cost is obtained;
Unit: unit being budgeted.
IMPORTANT: The columns of Cuts and Cut Length, are available only for Panels and Remnants.
NOTES: On the Show Observations icon found in the Accessories field, when you click on this option, you can display or not display these observations, this also affects the display of the field in the purchasing report.
Item Changes
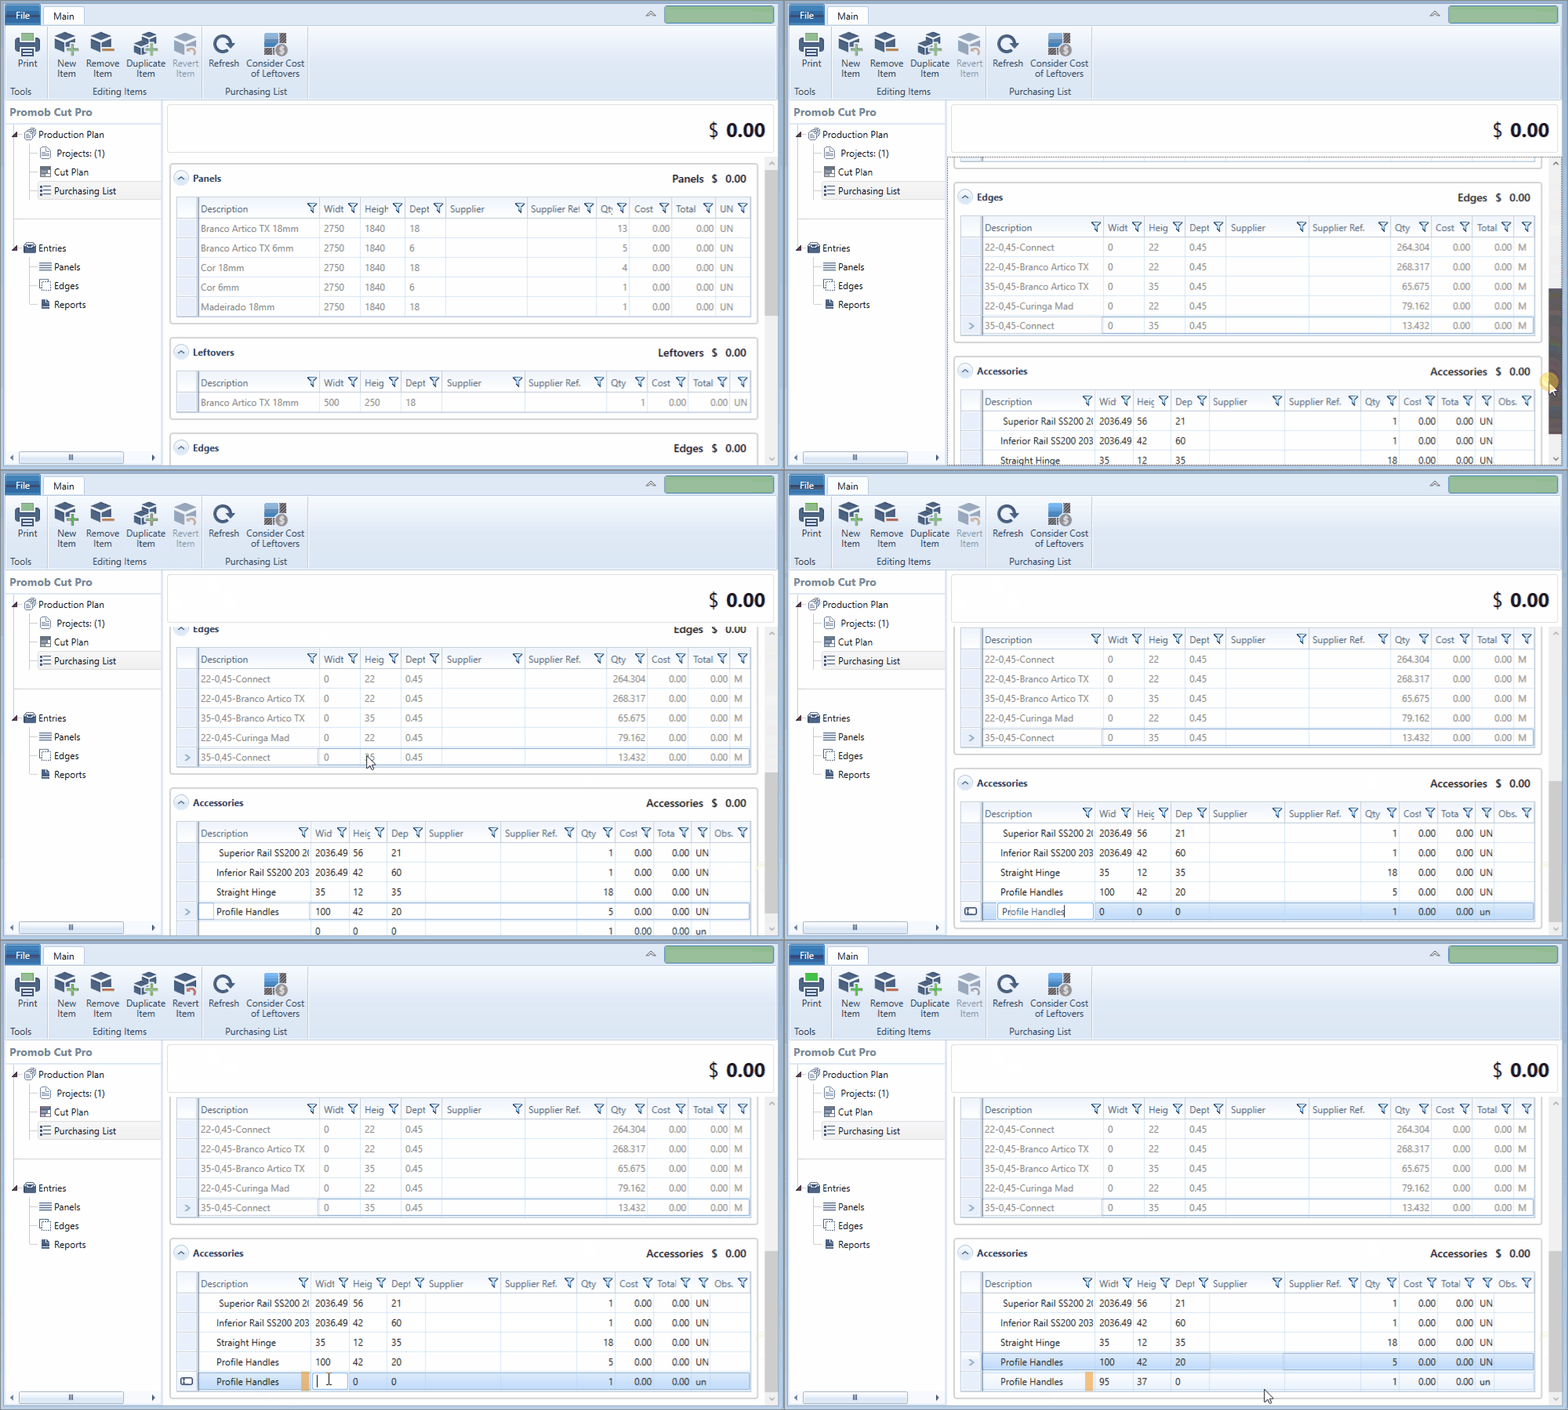
Add item to purchasing list
1. Click on the New Item button;
2. In the blank line displayed at the end of the table, register the information;
3. The new item will be inserted in the Accessories category.
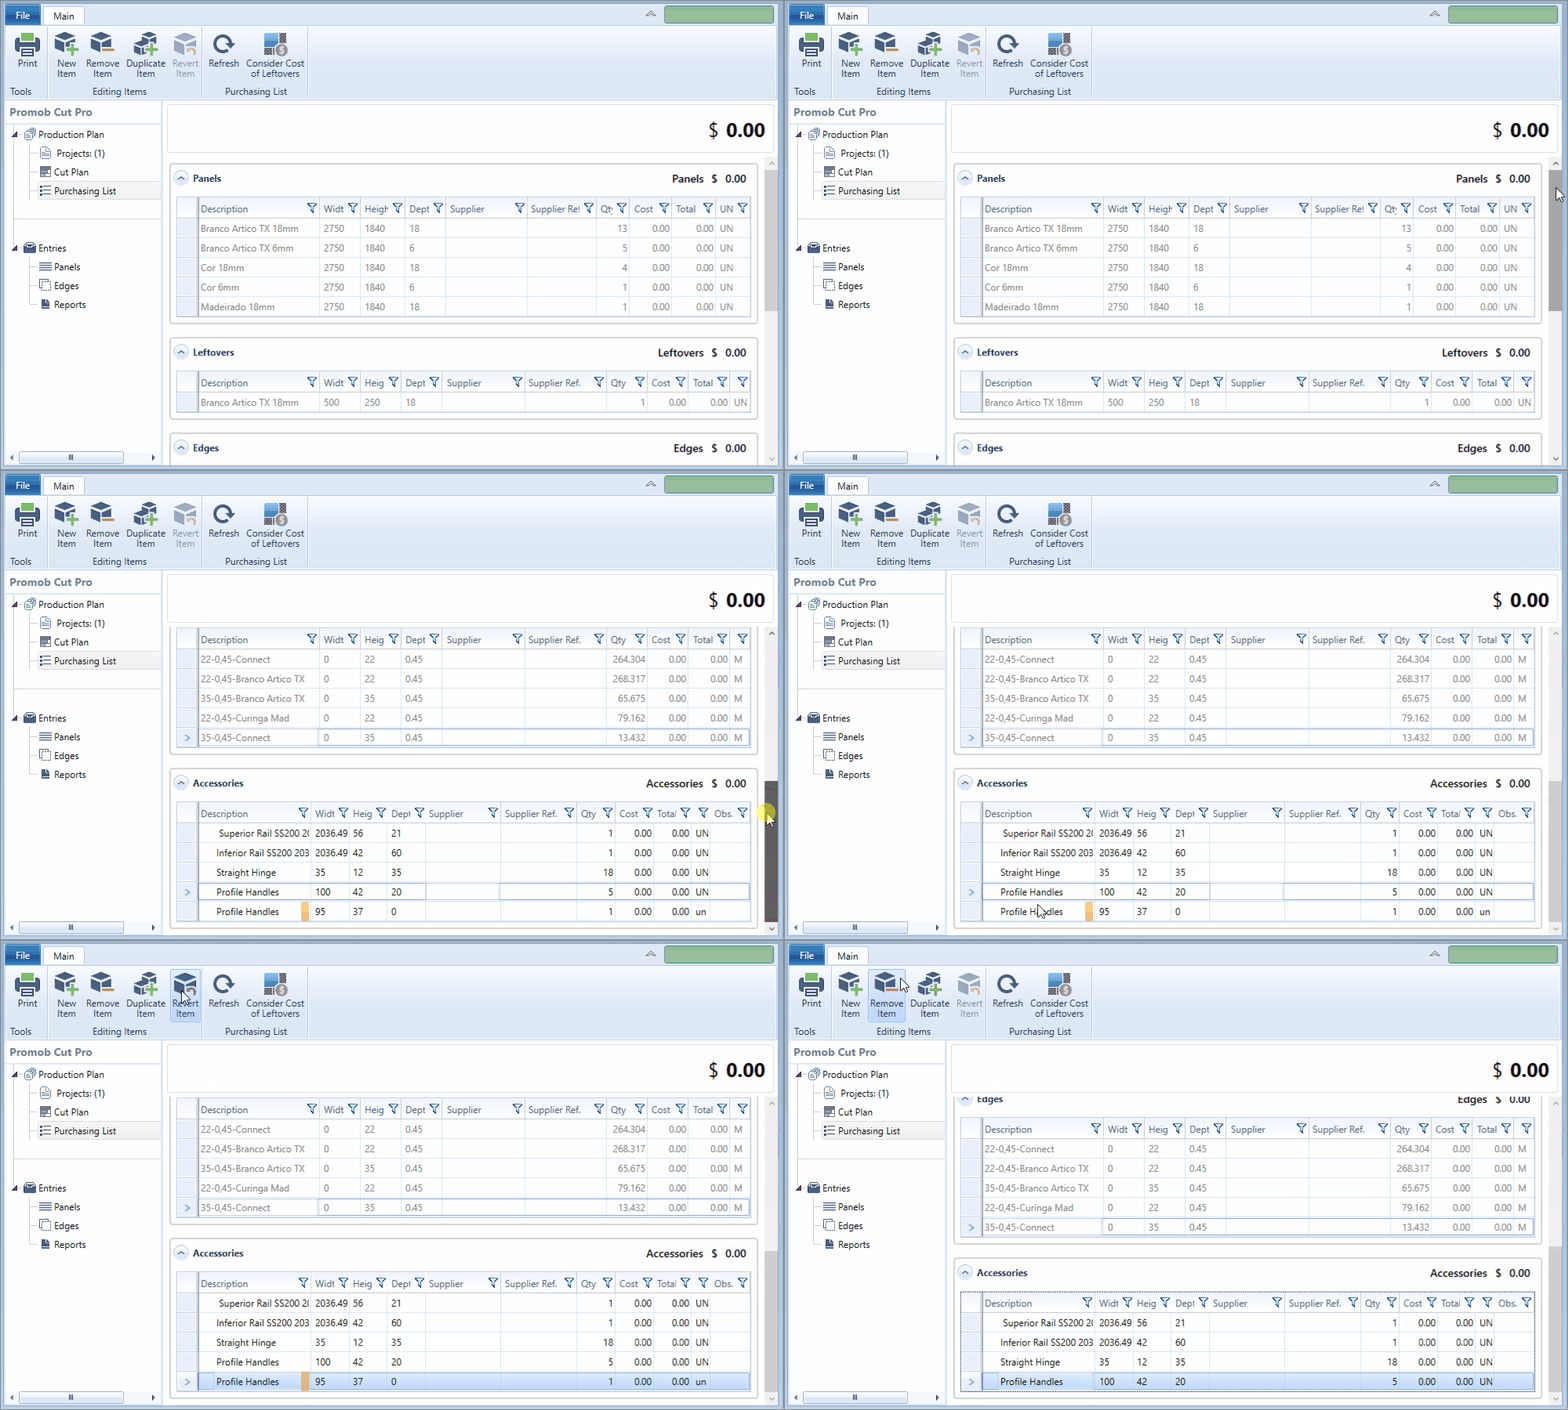
Remove an item from the purchasing list
1. Select the table row for the item you want to delete;
2. Click the Remove Item button;
3. Press the Delete key to remove it from the list.
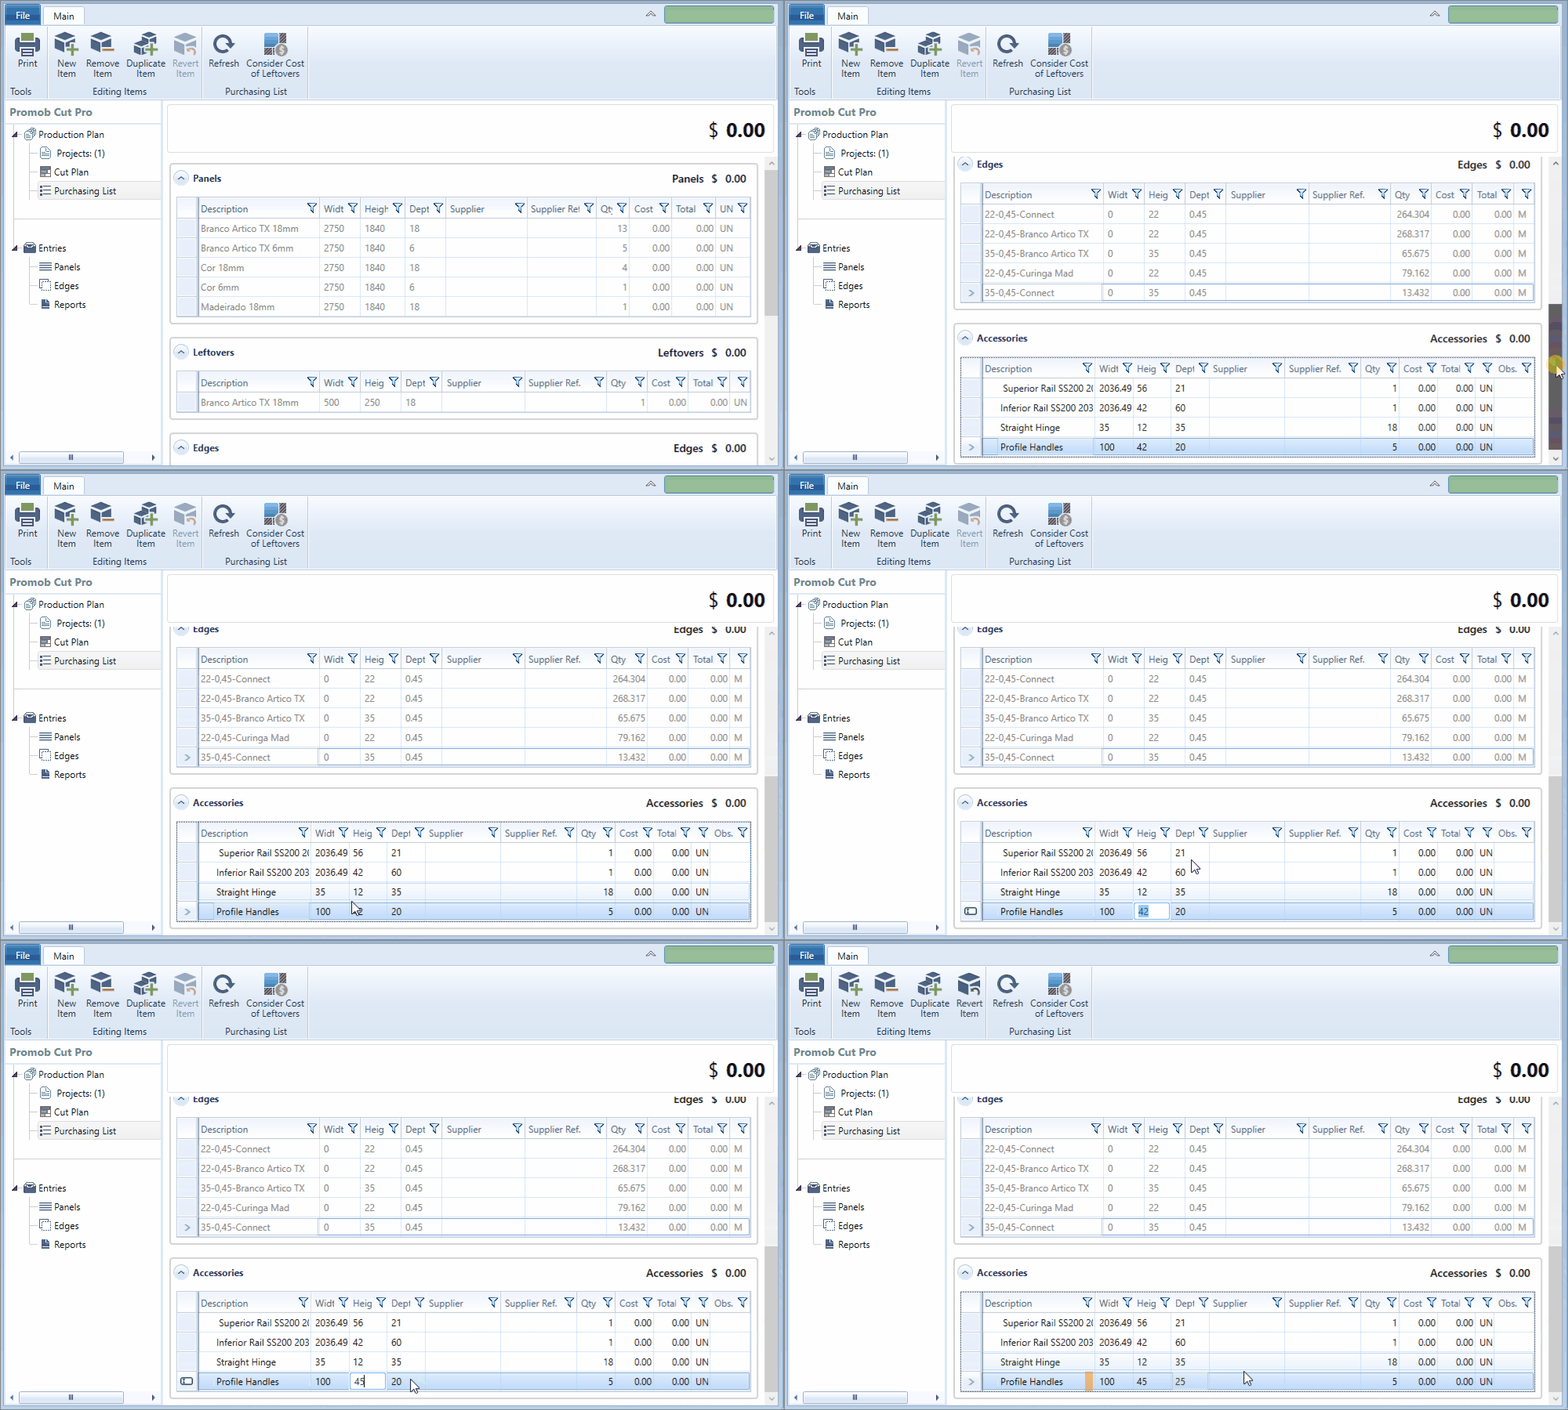
Edit purchasing list items
1. Select the table line for the item you want to edit;
2. Make the necessary changes;
Update the purchasing list
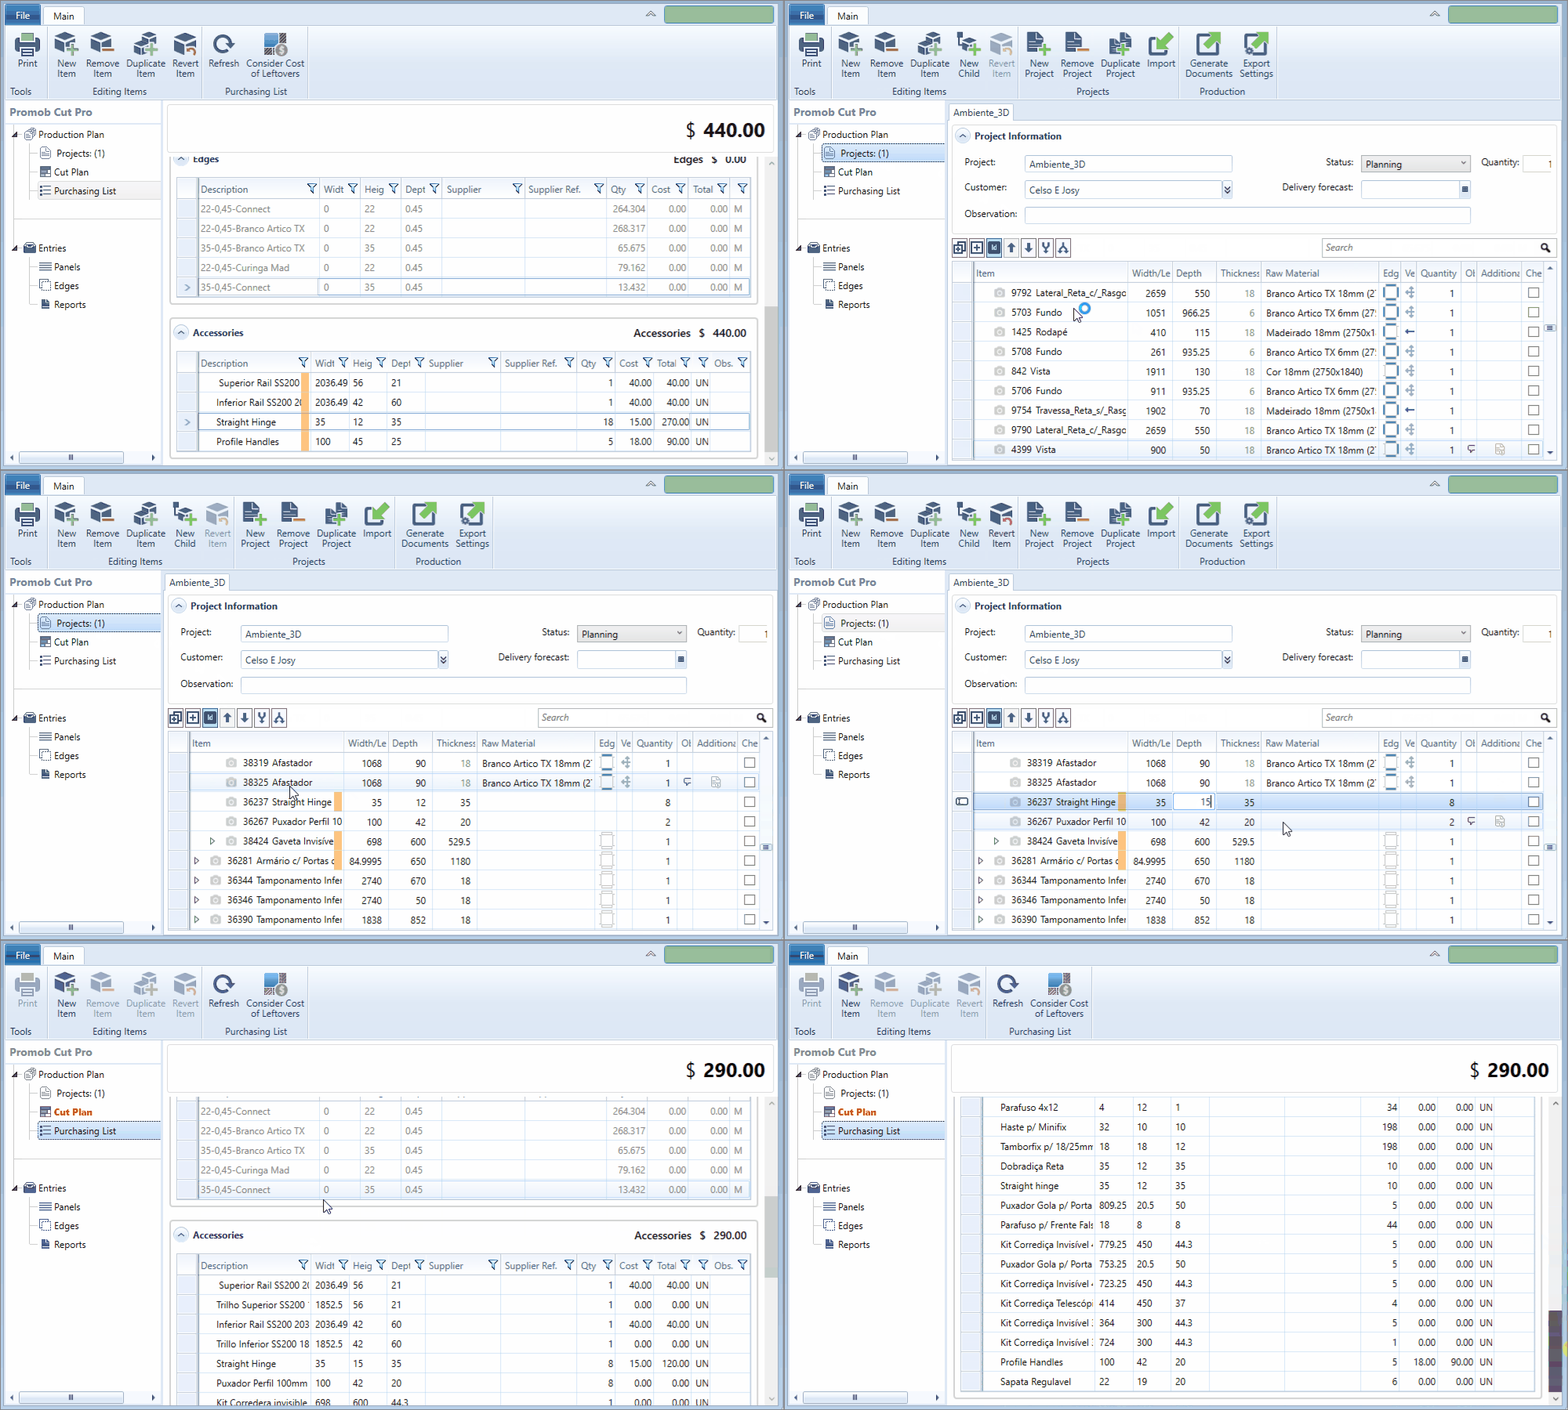
- When making any changes to the project, such as changing dimensions or adding a new item, the Purchasing List option will appear in red.
- When any changes are made to the panels registration, border registration, and project items, it is necessary to perform the update by clicking on the Purchasing List option which is highlighted in red;
- Note that when any changes to the modules are made, a message is displayed in the Purchasing List informing that it is out of date.
IMPORTANT: when updating the purchasing list, any changes that were made manually and directly to the purchasing list will be lost, and the original purchasing list will be loaded;
Register price in the purchasing list
1. With the shopping list open, click on the Cost column
2. Enter the item's Unit or Metro value in the field.
3. The Total column is automatically calculated, and the total price is displayed at the top of the screen.
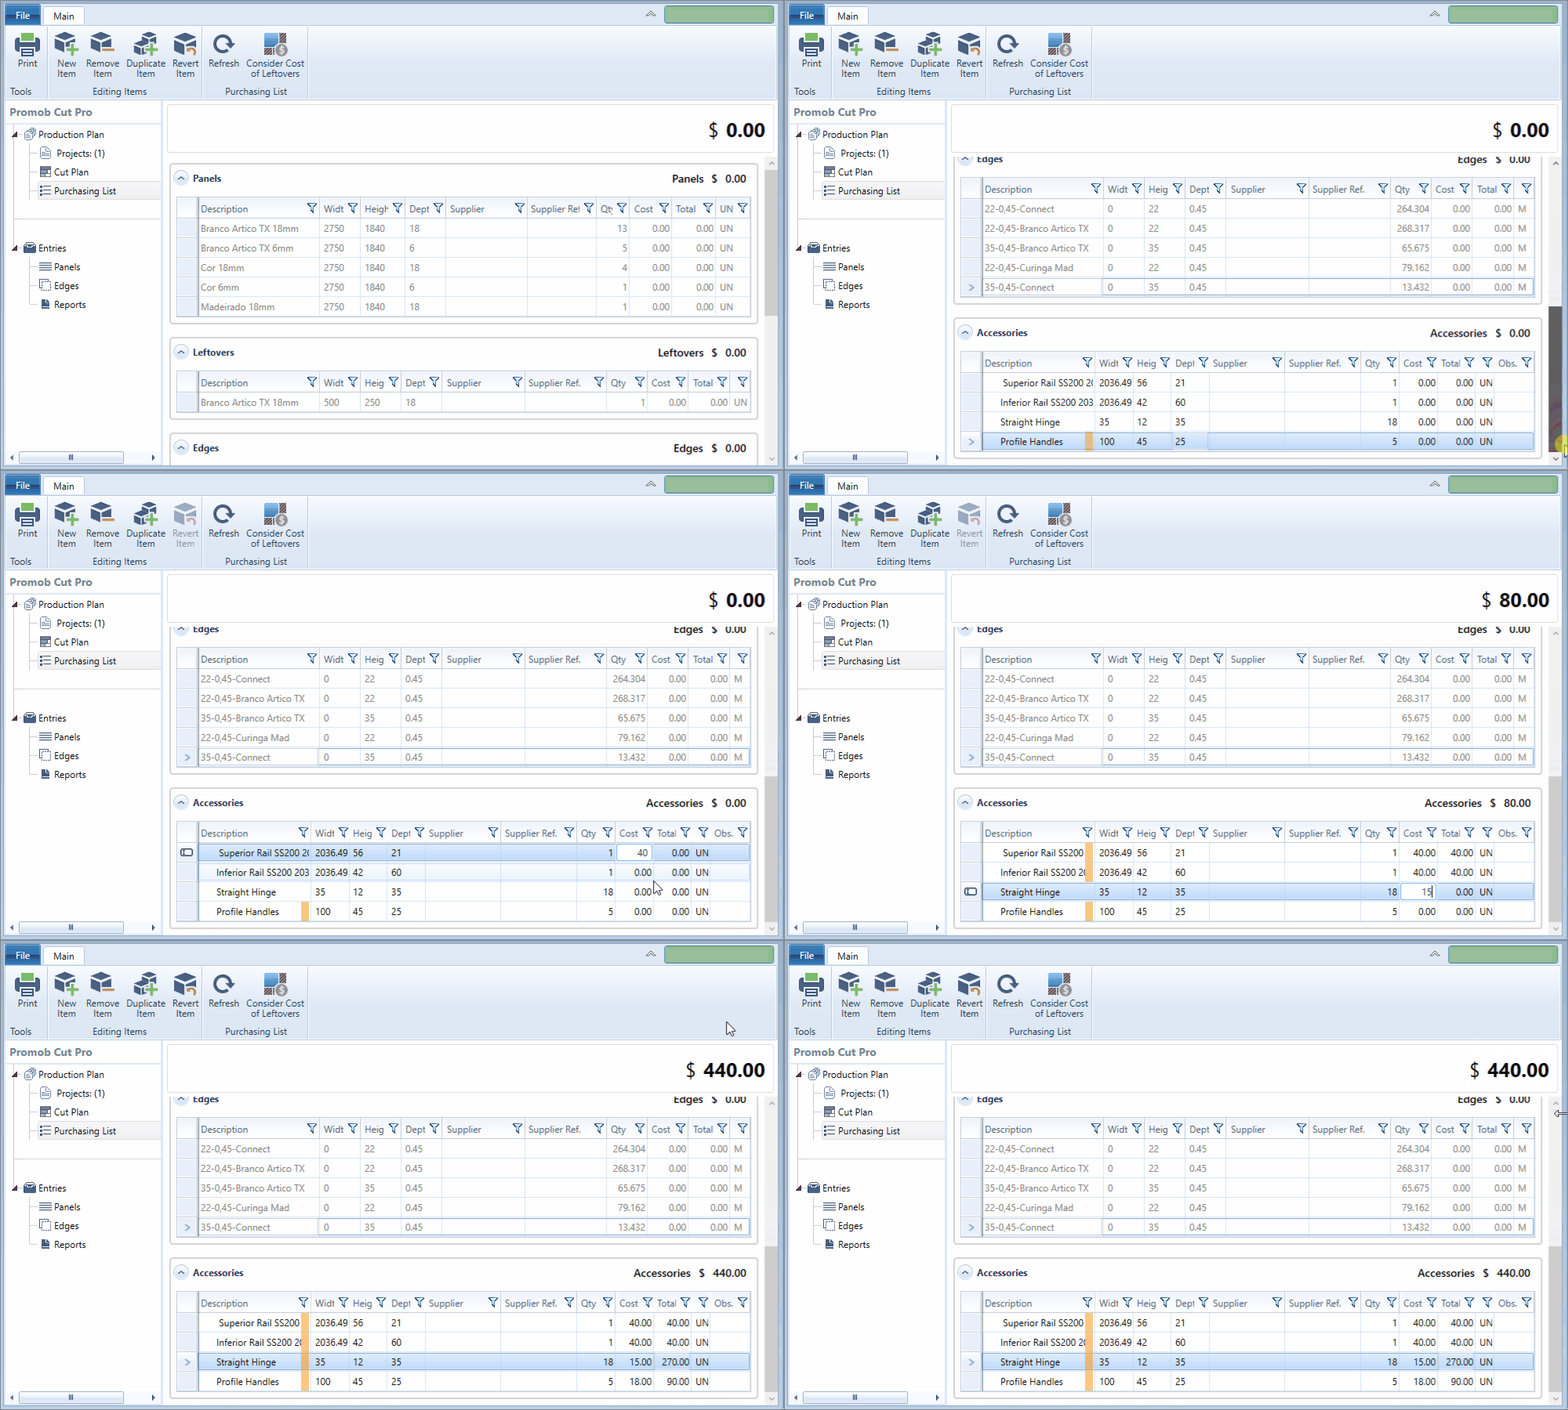
OBSERVATIONS: When enabling the button to Consider Leftovers Value, the cost is calculated in proportion to the size of the leftovers, when the leftovers already have a value registered in the Cost column within the Panels Registration window.
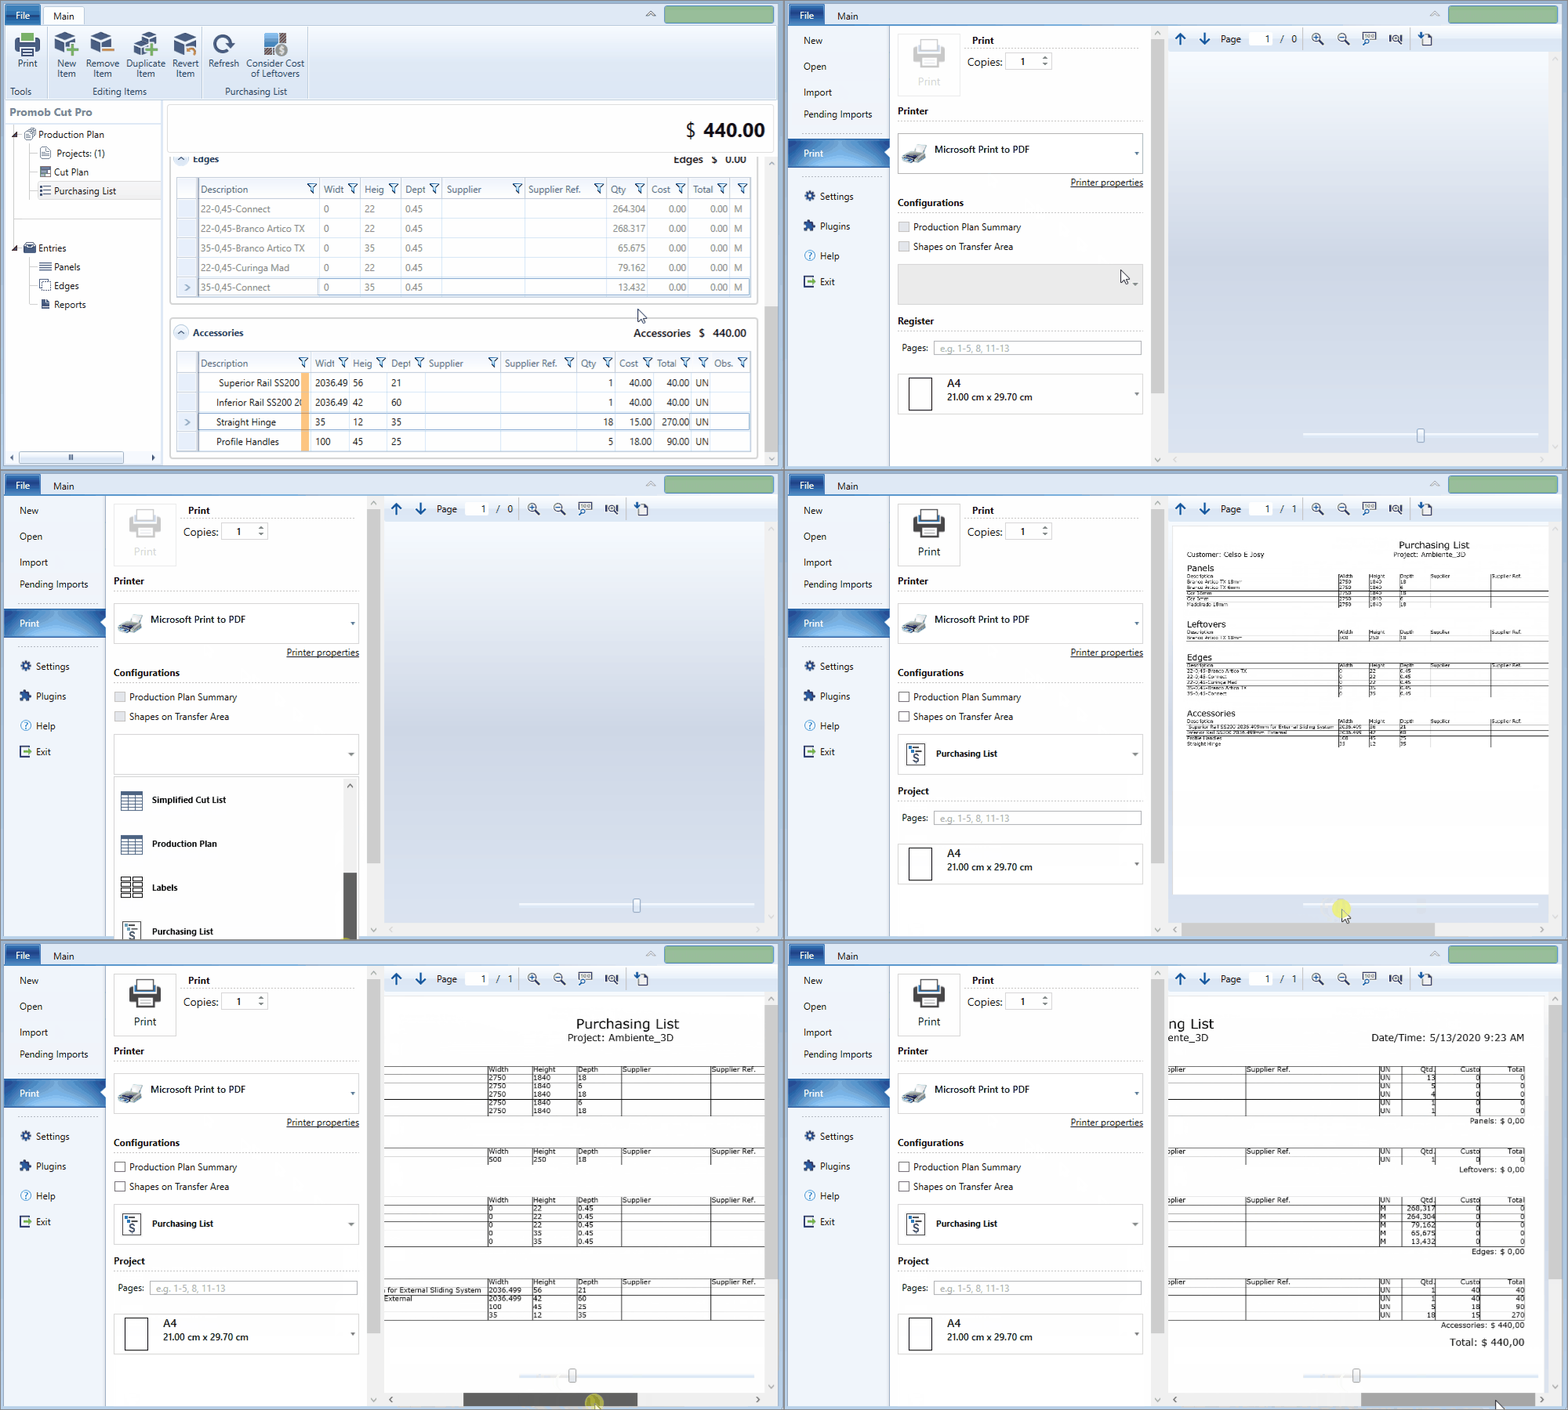
To print the purchasing list:
1. Click on Print;
2. In Settings find the Purchasing List option;
3. Check here for more information on print settings
