


In Promob there are several ways to insert buffers in modules, to insert, create and edit buffers, see the options:
How can I insert a top manually?
To manually insert top into the module:
1. Position the design in order to visualize the module(s);
2. Locate the top in the module bar, drag it to the top of the module and release the mouse;

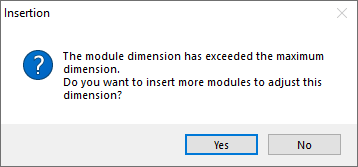
4. If the dimension of the module(s) has exceeded the maximum dimension of the linear item, the message below is displayed. Click Yes to adjust the top measures in relation to the modules;
5. The top is inserted into the modules.
How to insert top automatically?
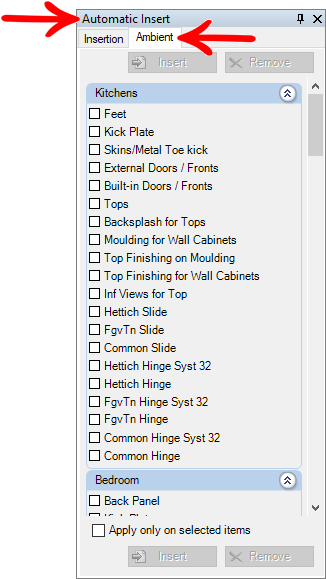
Through the Automatic Insert tool it is possible to perform the insertion of aggregates in several modules simultaneously, automating the process of insertion of aggregates. To insert top automatically:
IMPORTANT:
Aggregate options vary by Manufacturer;
The Automatic Insert tool is not available for Promob Base.
1. Access the tool Automatic Insert and click on the Ambient tab;
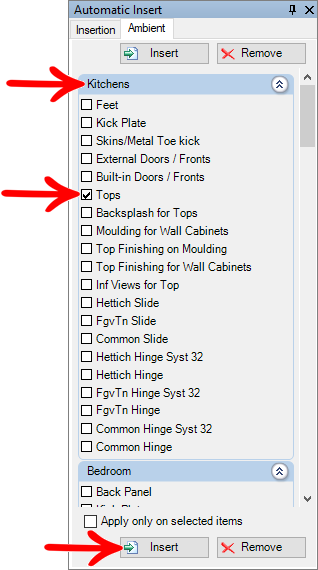
2. Click on the library Kitchens and mark the aggregate Tops. Click the Insert button.
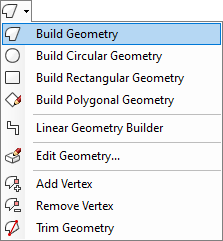
How to build rectangular top?
To build a rectangular top:
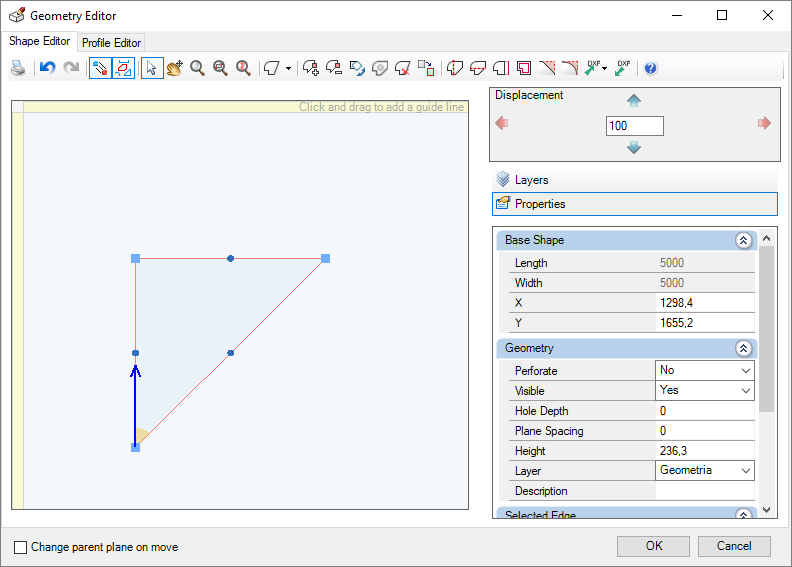
1. Construct rectangular geometry and edit its dimensions in Tools - Properties;
2. Access the Geometry Editor to make adjustments to the top.
How to build L-tops?
To build L-top:
1. Build a geometry and edit its dimensions in the Tools - Properties;
2. Access the Geometry Editor to make adjustments to the top.
How to build a rounded top?
To build a rounded top:
1. Build a geometry and edit its dimensions in the Tools - Properties;
2. Access the Geometry Editor, insert new vertices and move the midpoints to bend the geometry;

3. Click OK to view the top in the space;
How to build a curved top?
To build a curved top:
1. Construct a rectangular geometry and edit its dimensions in Tools - Properties;
2. Access the Geometry Editor to make adjustments to the shape of the top and to make its curvature by moving the midpoint;
3. Click OK to view the top in the space.
How to build oblique top?
To build oblique top:
1. Build a geometry and edit its dimensions in Tools - Properties;
2. If necessary, edit the depth of the top and apply a profile to the edges of the geometry.
How to build a beveled top?
To build a beveled top:
1. Construct a geometry and edit its dimensions in Tools - Properties;
2. Access the Geometry Editor and click on the Profile Editor tab:
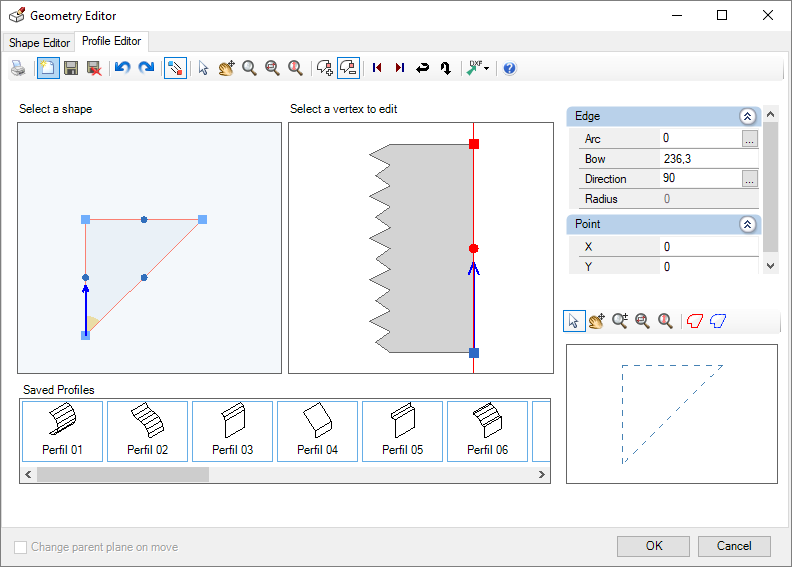
- Click on the top vertex and move it to create the beveled profile;
- Select the faces of the geometry where the profile will be applied.
3. Click OK to view the desktop in the space.
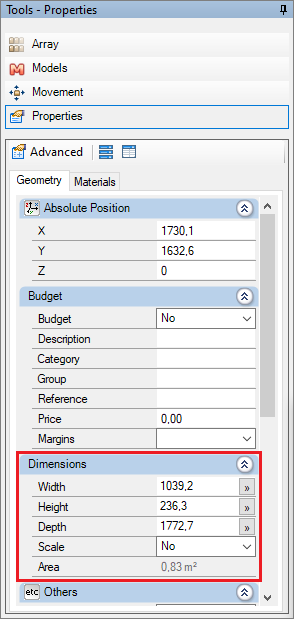
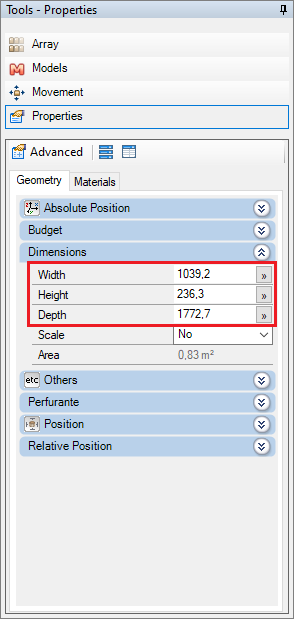
How to change the top measurements?
To change the top measurements:
1. Select the top and access Tools - Properties to edit the values of the Width, Height and Depth properties.
How to edit the top depth?
To edit the top depth:
1. When selecting the top, the resize arrows are displayed in red. Click on the arrow of the first segment of the top. Note that when selecting the arrow, it is displayed in green. Access Tools - Arrow and Increment inform the value for the depth of the top. Click Apply;

2. Repeat the procedure to change the depth of the other top segment.
How to build granite or marble top?
To build granite or marble top:
1. Build the top with the Build Geometry tool;
2. Access the materials window and click on the Marble/Granite tab;
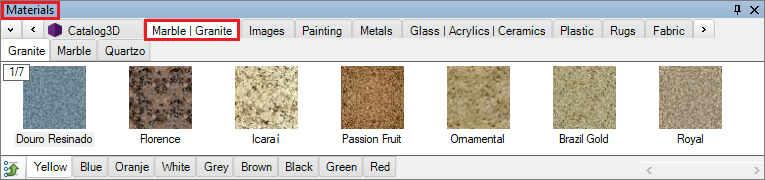
3. Select one of the granite or marble options and drag it onto the wall. Define the location where the material is to be applied. Granite or marble texture can also be inserted by applying external texture.
How to build a glass top?
To build a glass top:
1. Build the top with the Build Geometry tool;
2. Access the materials window and click on the Glass/Acrylics/Ceramics tab;
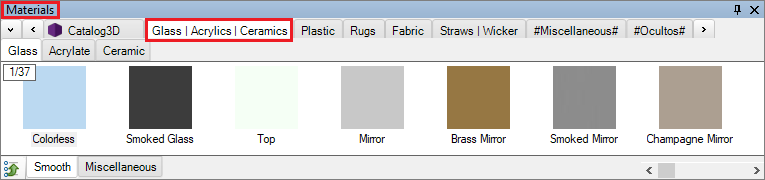
3. Select one of the glass options and drag it onto the wall. Define the location where the material is to be applied. The glass texture can also be inserted by applying an external texture;
4. Render the design to visualize the effects of the material.
How to build stainless steel top?
To build stainless steel top:
1. Build the top with the Build Geometry tool;
2. Access the materials window and click on the Metals tab;
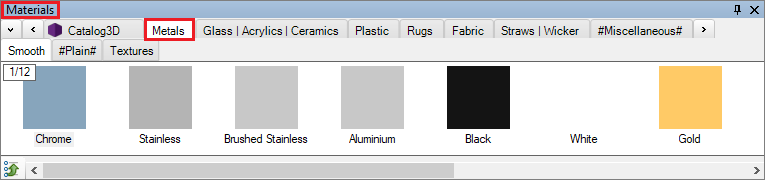
3. Select one of the stainless steel options and drag it onto the wall. Define the location where the material is to be applied. The glass texture can also be inserted by applying an external texture;
4. Render the design to visualize the effects of the material.
How to build a top with a tub?
To build a top with a tub:
1. Build the top with the Build Geometry tool;
2. In the modulation bar access the Decore - Kitchens - Sinks and Counters - Sinks and locate the vat to be inserted;
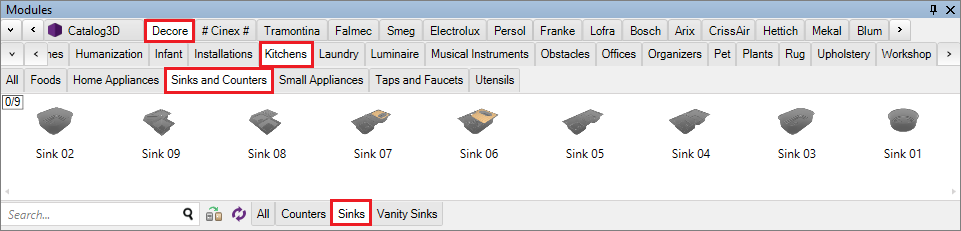
3. Drag it to the top and release the mouse. The perforation of the top is carried out automatically;
4. Position the tub in the desired location.
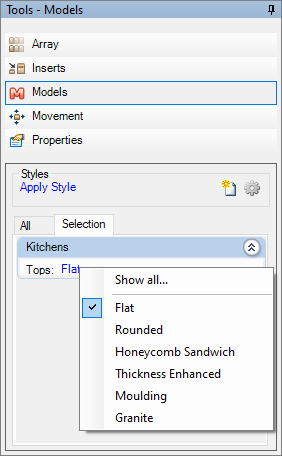
How to change the top model?
To change the top model:
1. Modulation top
Select the top and go to Tools - Models. On the Selection tab, click on the current top model and select one of the available options.
2. Geometry top
Access the materials window, click on the finish to be applied and drag it to the top. Click on the place where you want to apply the material;
Another way to define the finish for a geometry top is through the insertion of external textures.
How to apply profile to the top?
To apply profile to the top:
1. After building the top, go to the Geometry Editor and click on the Profile Editor tab;
2. Select one of the saved profiles or click on the vertices to change the shape of the profile and on the intermediate points to create curves;
3. Define the faces of the geometry where the profile will be applied;
4. Note the profile applied to the top.