1.Promob Plus Professional, Promob Enterprise
1.1 Promob 2014 and previous versions
IMPORTANT:
- The inserts of each module and the number of items that can be inserted vary according to each Manufacturer;
- In versions prior to 2014, Promob provides inserts with dimension and fixed position definitions that were inserted in the module through the Tools - Inserts.
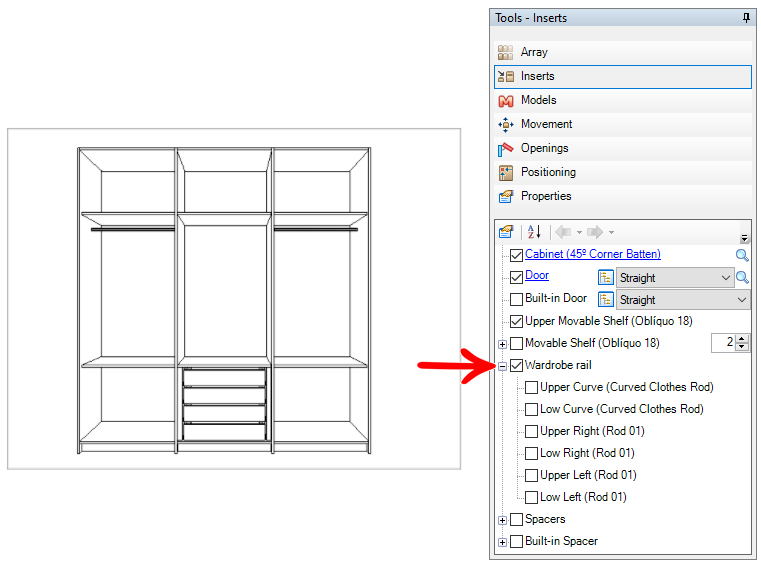
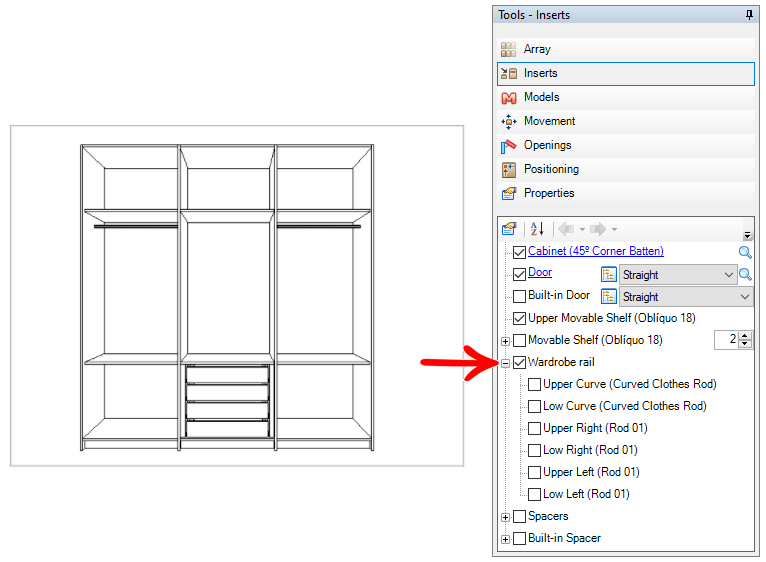
1. Select the module and access the Tools - Inserts. Locate the clothes rail item and click the plus sign (+) to view the inserts options. Check the clothes rail you want to insert.
1.2 Promob 2015
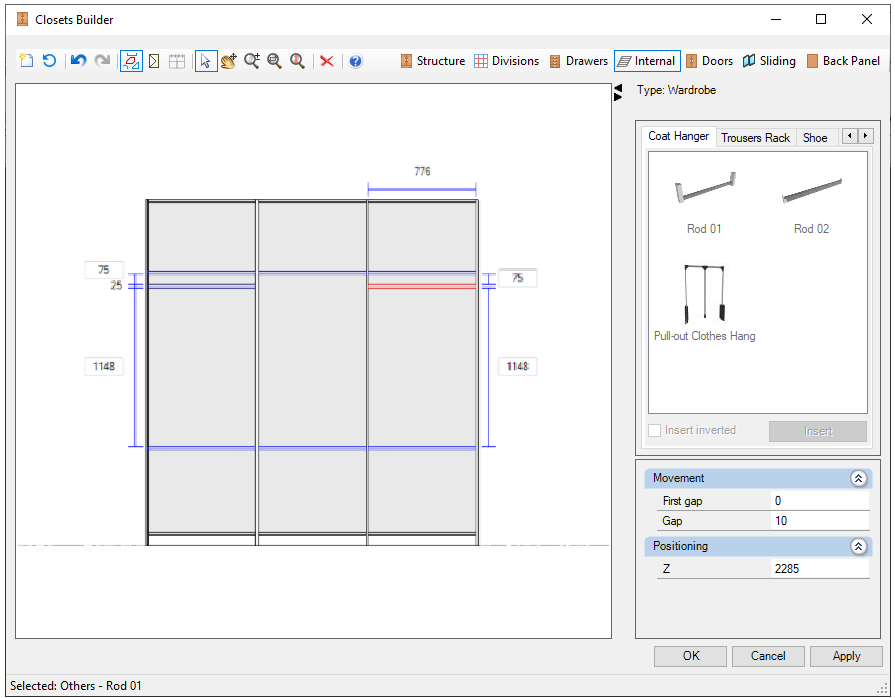
IMPORTANT: as of Promob 2015, it is possible to insert all the insert options available for the module and also define its positioning and dimension through the Closet Builder.
1. Access the Closet Builder and click on the Internal view. Select the clothes rail you want to insert in the closet and drag it to the gap. To define the height of the clothes rail, select it and change the Z property;
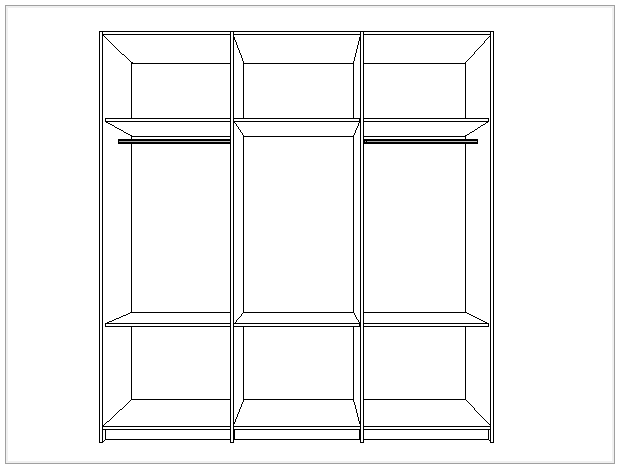
2. Observe the clothes rail inserted in the closet.
2. Promob Premium, Studio and Start
To insert clothes rail in the closet:
IMPORTANT: the inserts of each module and the number of items that can be inserted vary according to each manufacturer.
- Select the module and access the Tools - Inserts. Locate the clothes rail item and click the plus sign (+) to view the inserts options. Check the clothes rail you want to insert.