To restore the factory settings of the Zebra GC420t printer, perform the following procedures:
1. Click here to download the file RestaurarConfiguracoesFabrica.zip ;
2. Unzip the downloaded file, and paste the RestaurarConfiguracoesFabrica.etq file into the C: \ directory of the computer;
3. Access the Start Menu on your computer;
4. Locate and open the Command Prompt;
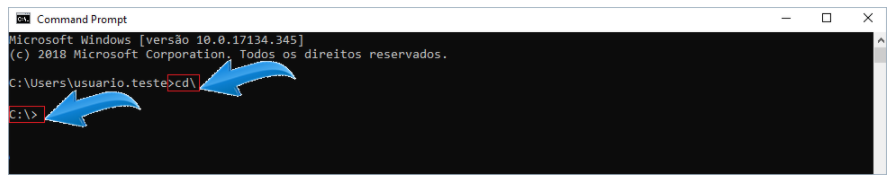
5. Navigate to the C: \ folder through the following command: CD\ .

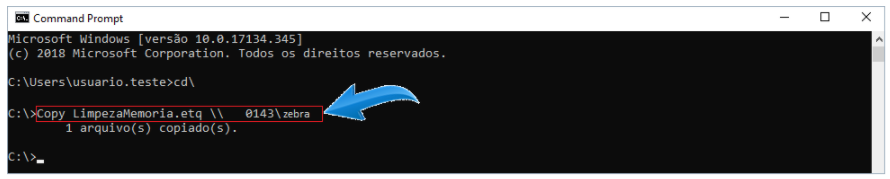
6. Inside the directory C:\> run the following command:
Copy RestaurarConfiguracoesFabrica.etq \\ path where the printer is installed \ zebra and press Enter;
IMPORTANT: Consider the network directory where the printer is installed.
Example:

7. Pressing the Enter key will clear the printer memory.