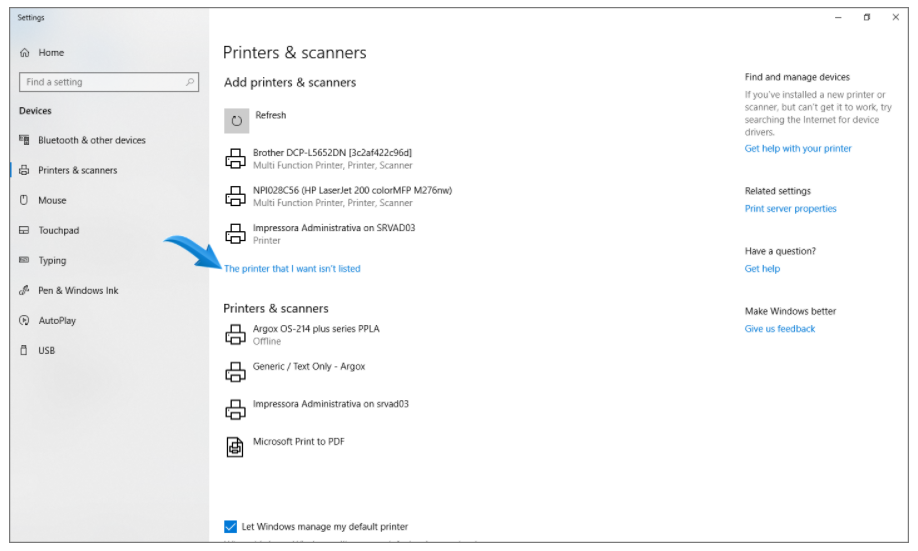
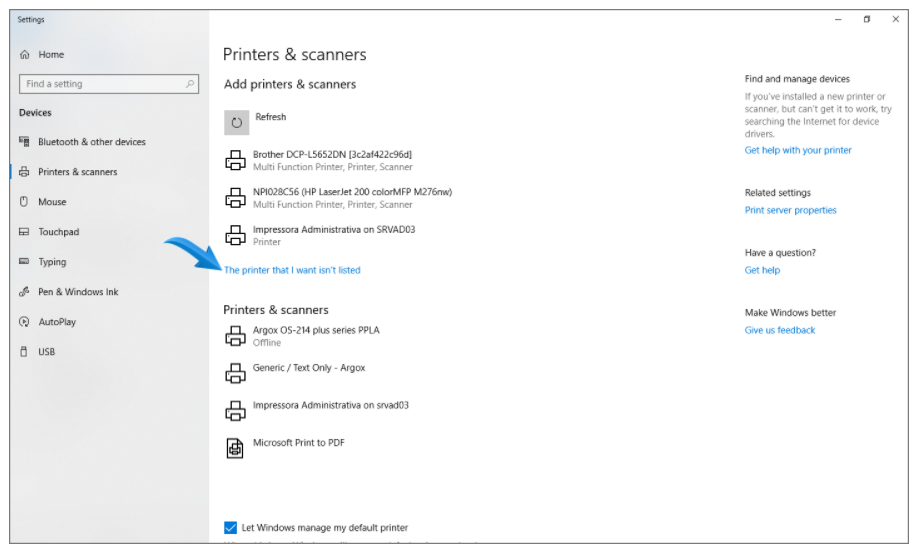
2. The available printers will be displayed. Select the option The printer that I want isn’t listed;
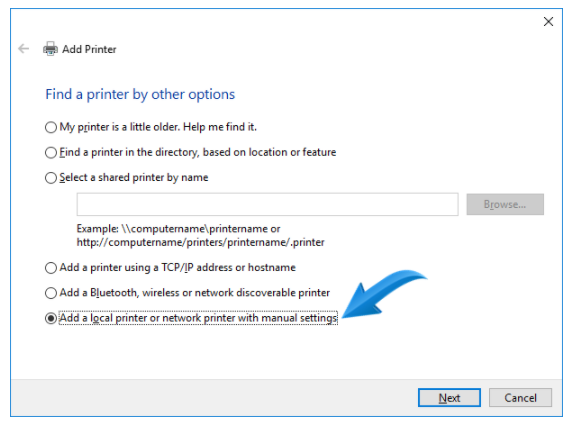
3. Check the Add a local or network printer with manual settings option and click Next;
4. On the next screen select the option Use an existing port and select the USB port where the printer is connected, in the case of Zebra GC420t, the port will be USB001. After, click Next;
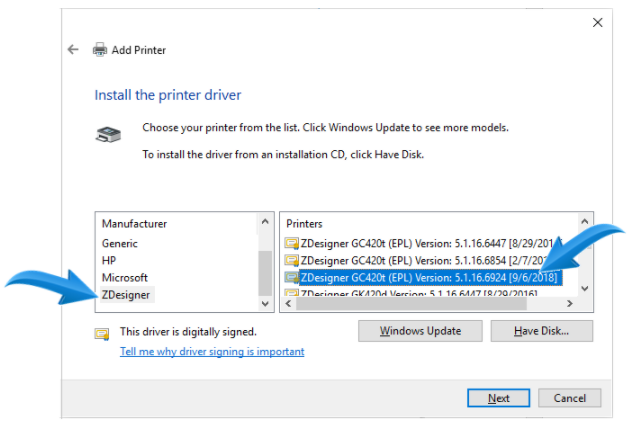
5. Select the Zdesigner impressora option in the left box, and in the right box select ZDesigner GC420t (EPL) Versão:5.1.16.6924 [06/09/2018] then click next.
IMPORTANT: Be aware of the selected name, the printer model, and the date of the printer firmware update, the information must be the same as that reported in this procedure.
6. Select the driver that will be used, check the Use driver already installed (recommended) option and click on Next;
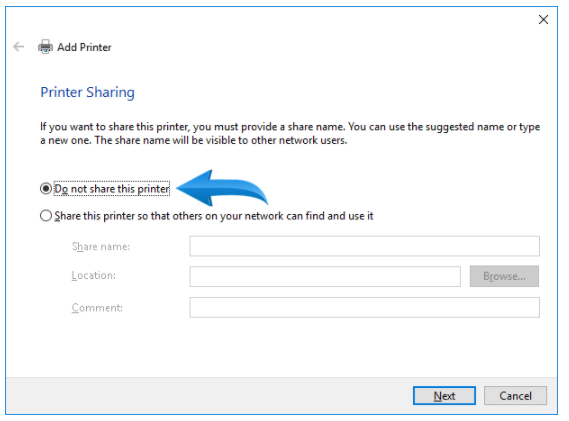
7. Check Do not share this printer and click Next;
8. Click Finish;
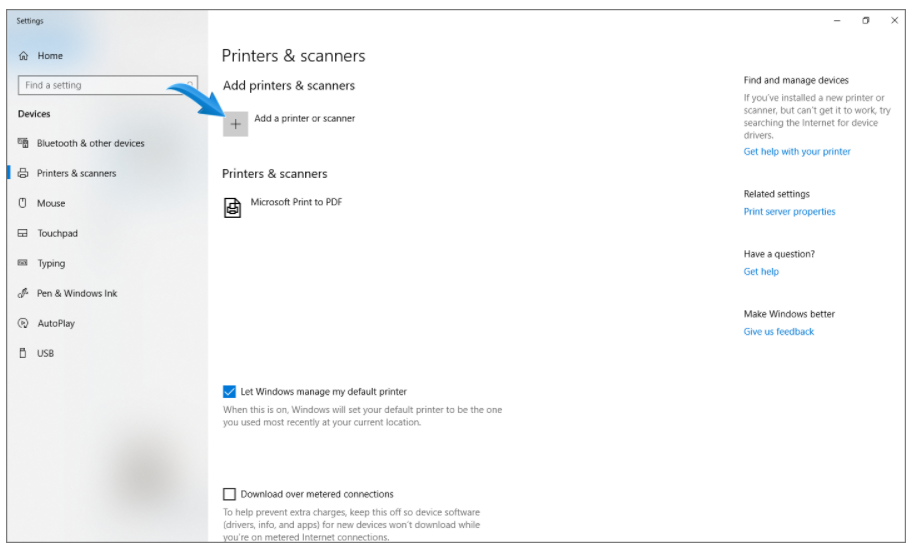
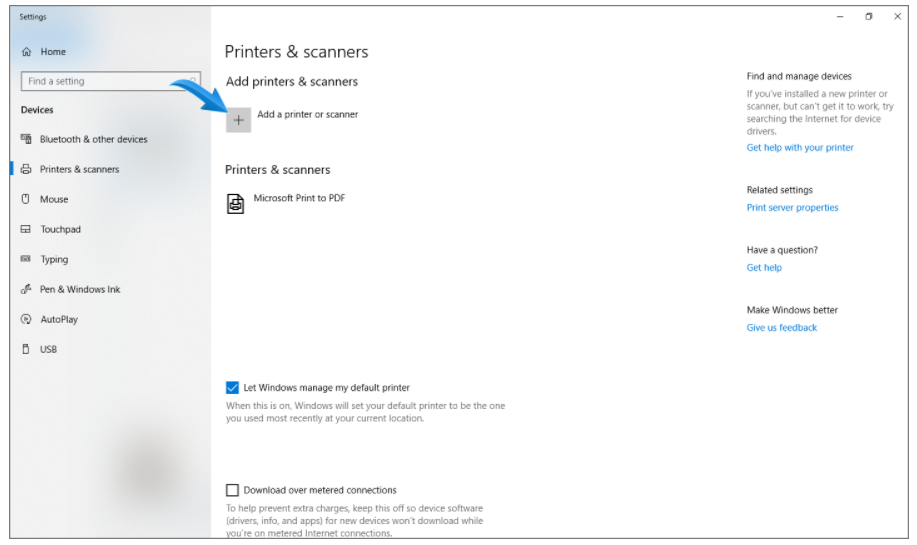
9. Open the Computer Printers and Scanners screen again. Click the Add a printer or scanner;
10. The available printers will be displayed. Click The printer I want is not in the list.
11. Check the Add a local or network printer using manual settings option and click Next.
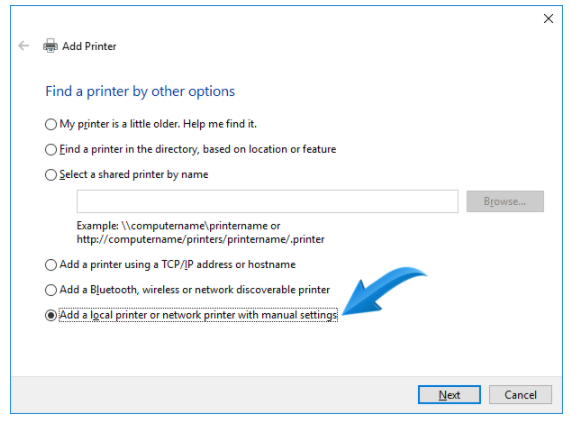
12. On the next screen, check theUse an Existing Port option, select the USB001 port and click Next;
13. Select the Generic option in the left box, and in the right box select Generic/Text Only then click next
14. Select the driver that will be used, check the Use driver already installed (recommended) option and click on Next;
15. Enter the printer name, change from Generic / Text Only to Generic / Text Only Zebra .
16. Check Do not share this printer and click Next;
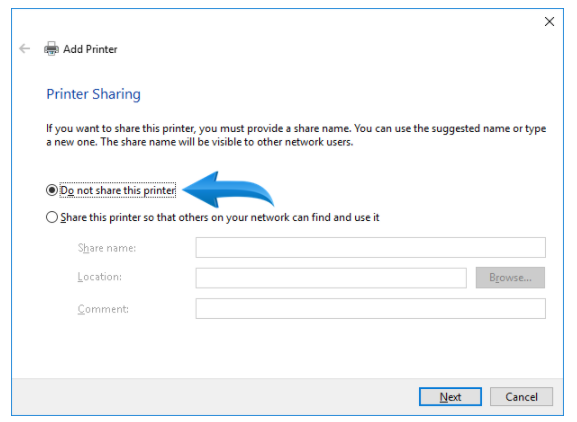
17. Click Finish
18. Open the Computer Printers and Scanners screen again. Click on the Generic/Text Only - Zebra printer already installed, and select the Manage option;
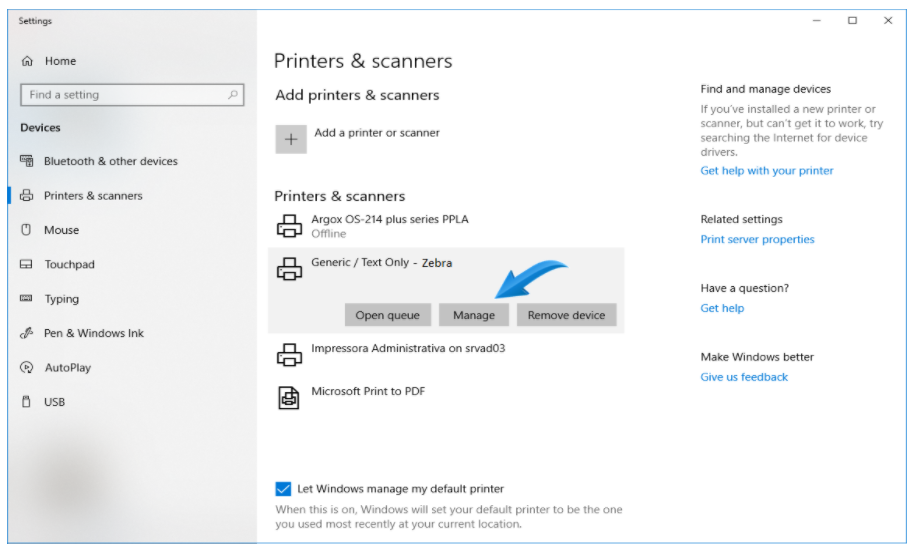
19. Click Printer Properties;
20. Select the Sharing tab, and check the Share this printer option. In the Sharing name field, change the name of Generic Text Only- Zebra to Zebra only.
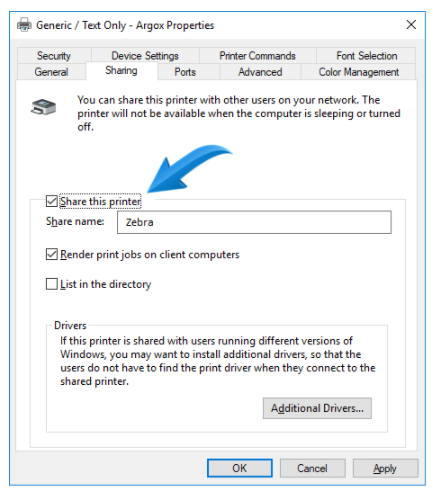
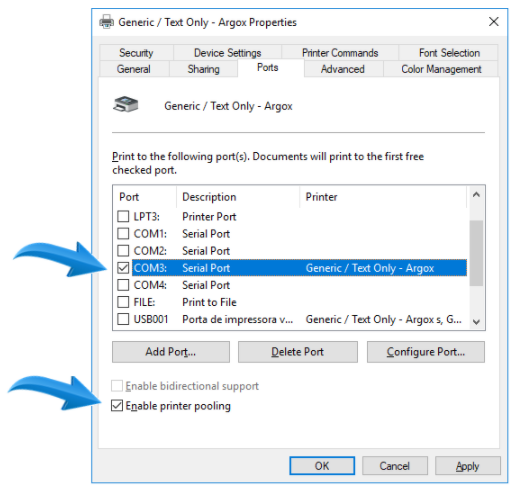
21. Access the Ports tab, check Enable Print Pooling, and select the COM3 option. After click Apply and OK;
