Available from Builder version 1.12.12.13 or superior.
IMPORTANT: This installation procedure will only be performed once. The Argox 214 Plus printer must be connected to a power source and connected to the computer's USB port.
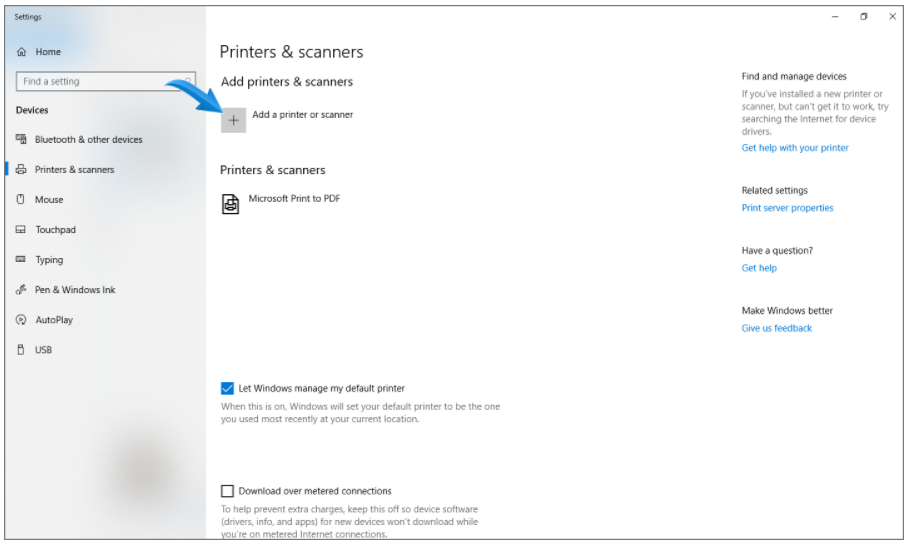
1. With the printer turned on, access the Printers & Scanners settings on the computer. Click the Add a printer or scanner;
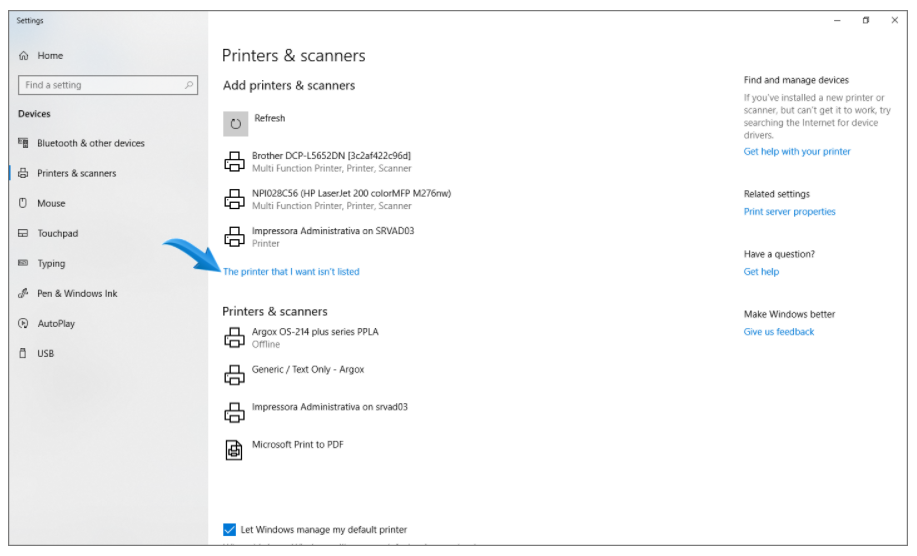
2. The available printers will be displayed. Select the option The printer that I want isn’t listed;
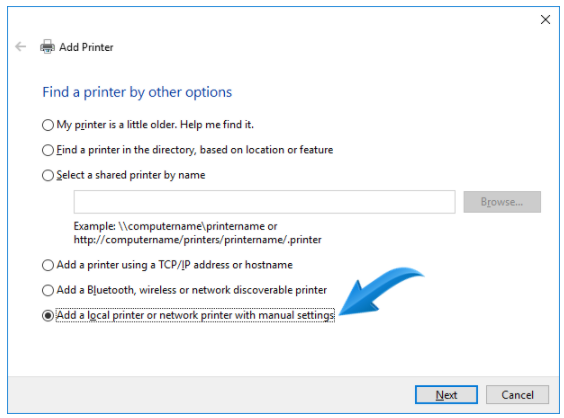
3. Check the Add a local or network printer with manual settings option and click Next;
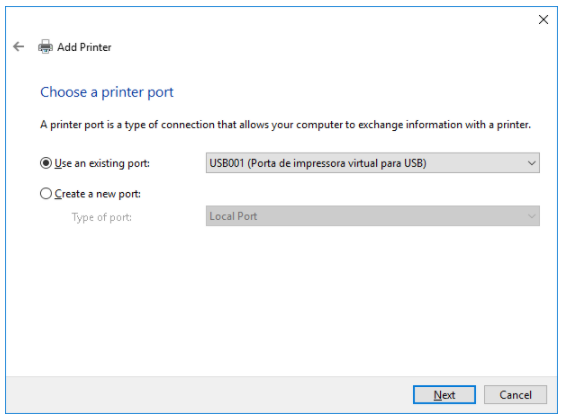
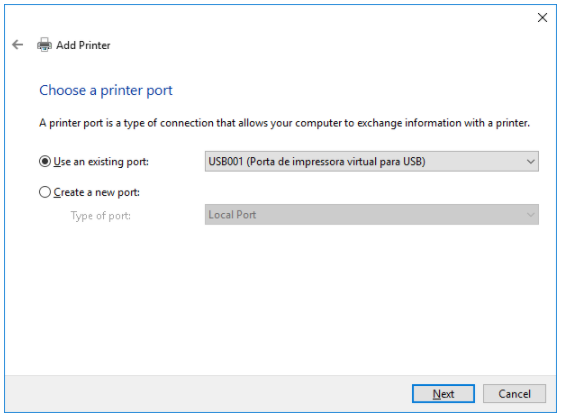
4. On the next screen select the option Use an existing port and select the USB port where the printer is connected, in the case of Argox OS-214 plus, the port will be USB001. After, click Next;
5. Select the Generic option in the left box, and in the right box select Generic/Text Only then click next.
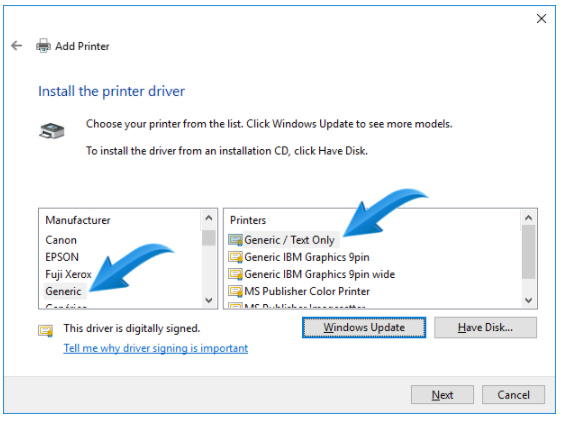
6. In this screen it is necessary to select the driver that will be used, check the Use driver already installed (recommended) option and click on forward;
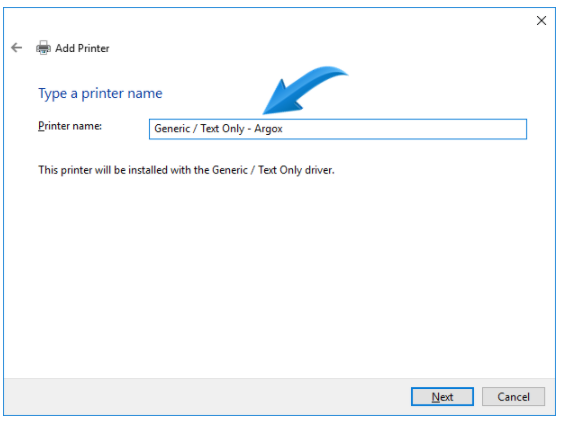
7. Enter the name of the printer, for example: Generic / Text Only - Argox and click Next.
IMPORTANT: The chosen name of the printer must contain the Argox information.
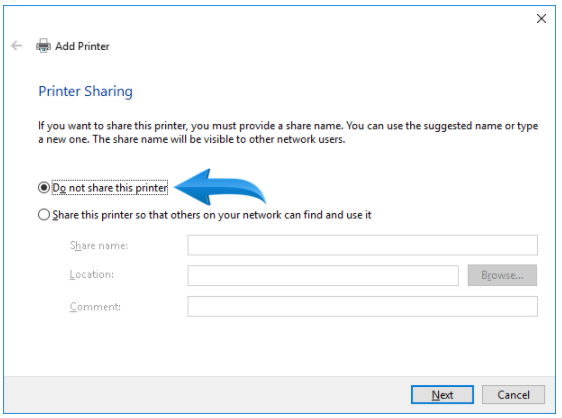
8. Check Do not share this printer and click Next;
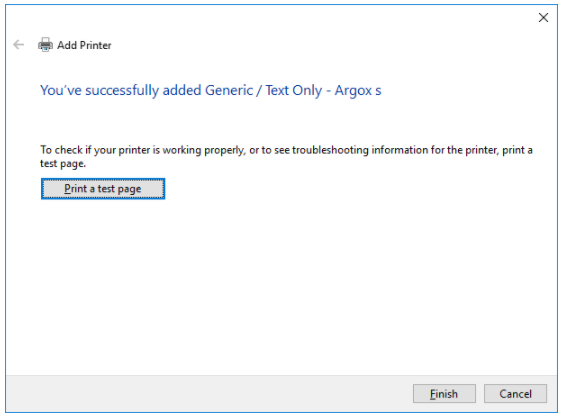
9. If all steps have been successfully completed, the following screen will be displayed. Click Finish;
10. Open the Computer Printers and Scanners screen again. Click on the Argox printer already installed, and select the Manage option;
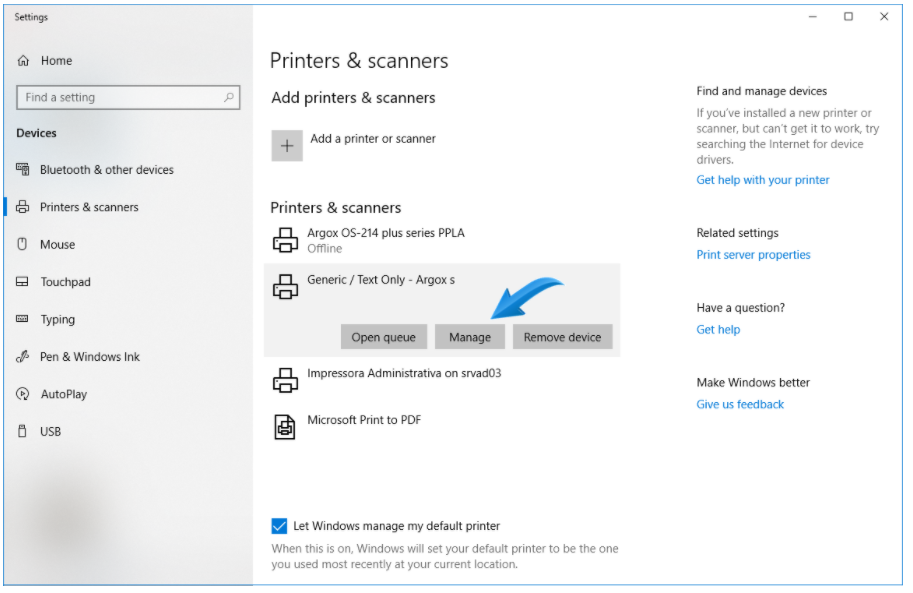
11. Click Printer Properties;
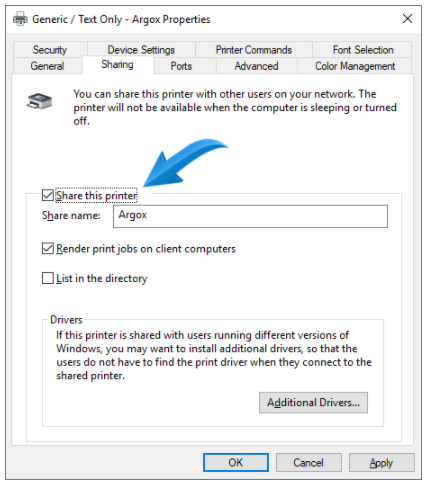
12. Select the Sharing tab, and check the Share this printer option. In the share name field, enter the name of the printer, this will be the name that will identify the printer to other networked computers;
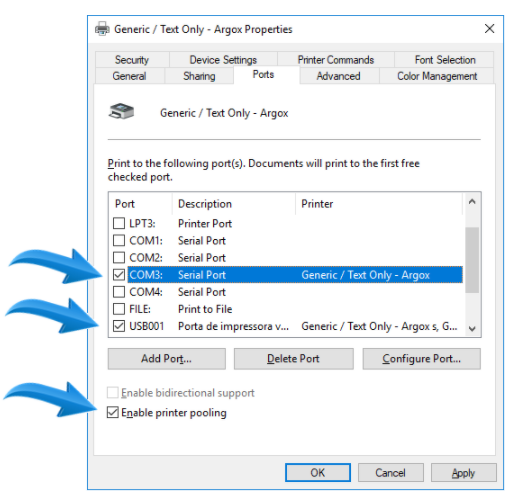
13. Access the Ports tab, check Enable Print Pooling, and select the COM3 and USB001 options. After click Apply and OK;
14. On the Printers and Scanners screen, click Add a printer or scanner. The available printers will be displayed. Click The printer I want is not on the list.
15. Check the Add a local or network printer using manual settings option and click Next.
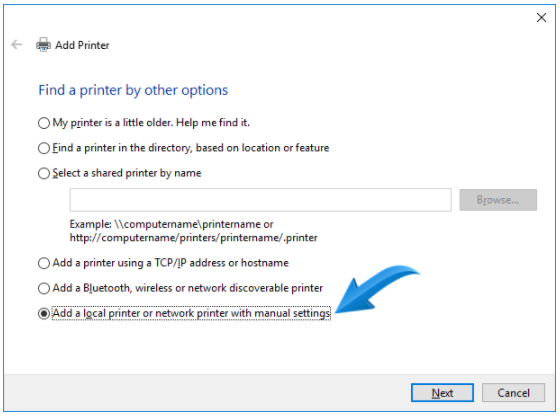
16. In the Use an Existing Port option, select the USB001 port and click Next;
17.Copy and access the link below and download the Argox printer driver.
http://www.argox.com/wp-content/uploads/largedriver/Argox_2020.1_M-1.exe
18. Save this folder to your computer's desktop.
19. On this screen, select the Have Disk option, then click Next;
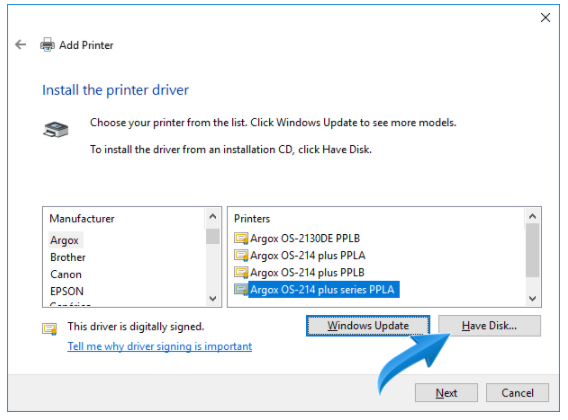
20. Select the printer driver, click Browse, select the path where the printer driver folder was saved, and click OK.
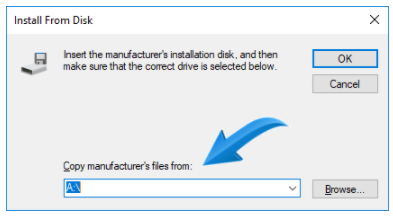
IMPORTANT: Always remember to select the executable file Argox.info in the directory.
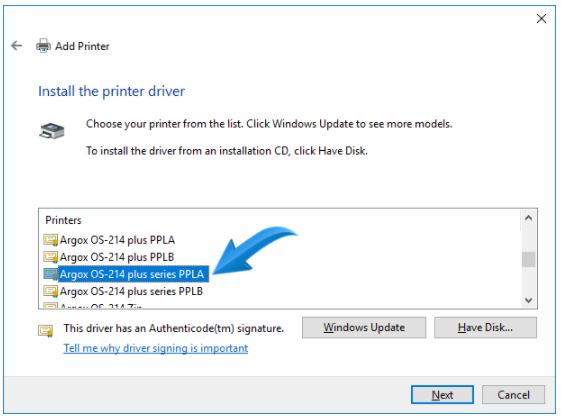
21. On this screen, select the Argox OS-214 plus series PPLA option and click Next.
22. To add the printer, select the Use the driver that is currently installed (recommended) and click Next;
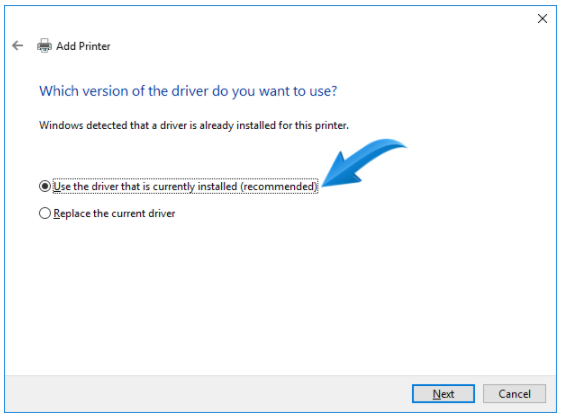
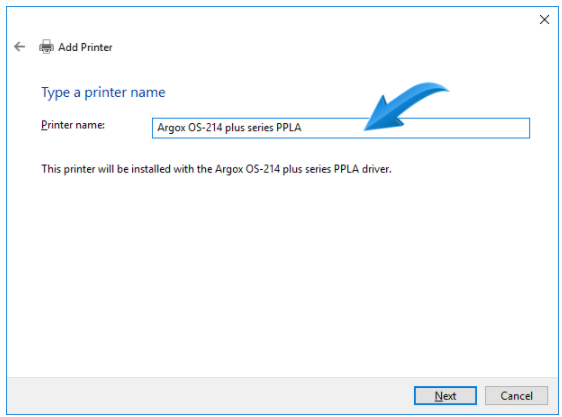
23. On the next screen, click Next;
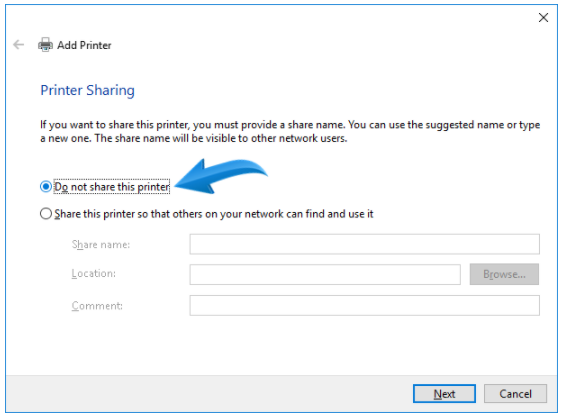
24. Check Do not share this printer, and click Next;
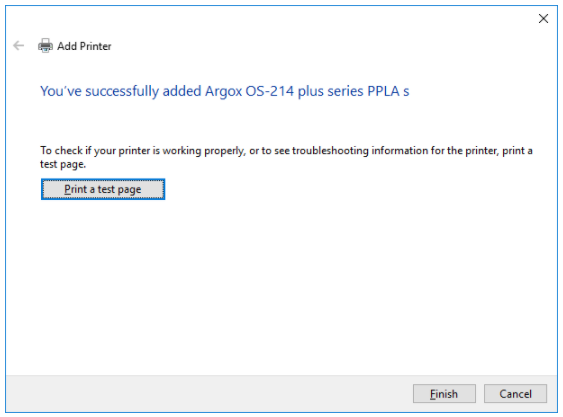
25. If all the steps have been successful, the following screen will be displayed. You have successfully added Argox OS-214 plus series PPLA.
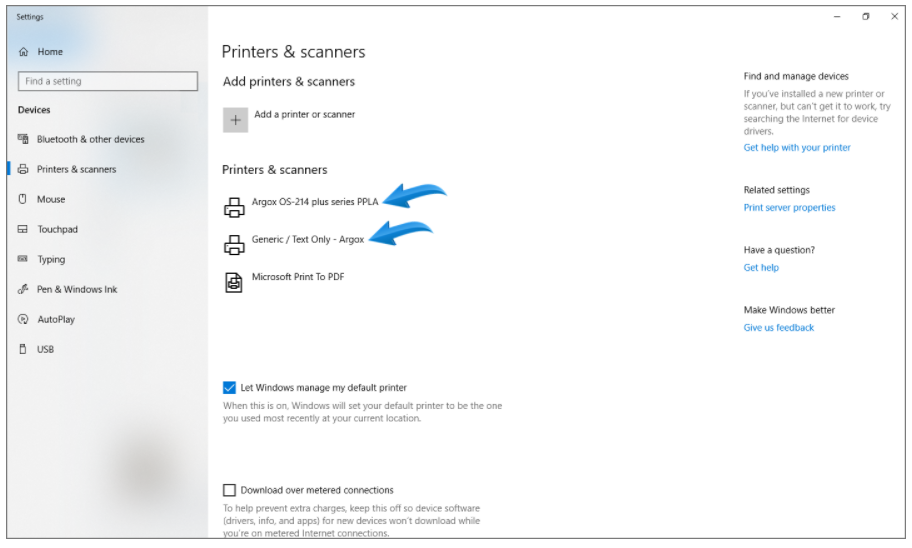
26. In the list of scanners and printers you can now see the two printers: Argox OS-214 plus PPLA series and Generic / Text Only - Argox.
IMPORTANT: When printing labels on Promob Cut and Cut Pro, use the Other Printer - Argox printer. As a result, the default print settings will be respected.
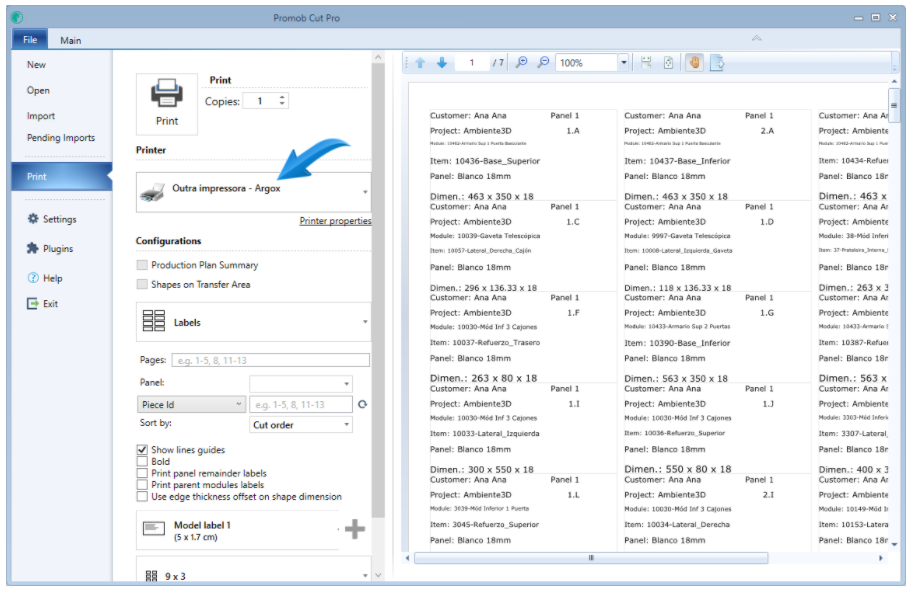
After installing the printer, perform the following procedure to print the labels on Promob Cut and Cut Pro:
1. Go to the Promob Cut Pro Tag Settings page ;
2. Create a label according to the following settings:
1. Paper: Select the Unknown type and enter the width and height values;
1.1 Width: Enter the total paper width (A + e + f)
1.2 Height: Enter the height of the label + borders (B + c + d)
2. Lines:enter the value 1;
3. Columns: enter the value 1;
4. Label Width (A): :enter the width of the label set on the paper size set in step 11;
5. Label Height (B): : enter the height of the label set on the paper size set in step 11;
6. Other Settings (except Internal Margin): : measure the sizes and report them in cm.