Available in products
Cut Pro
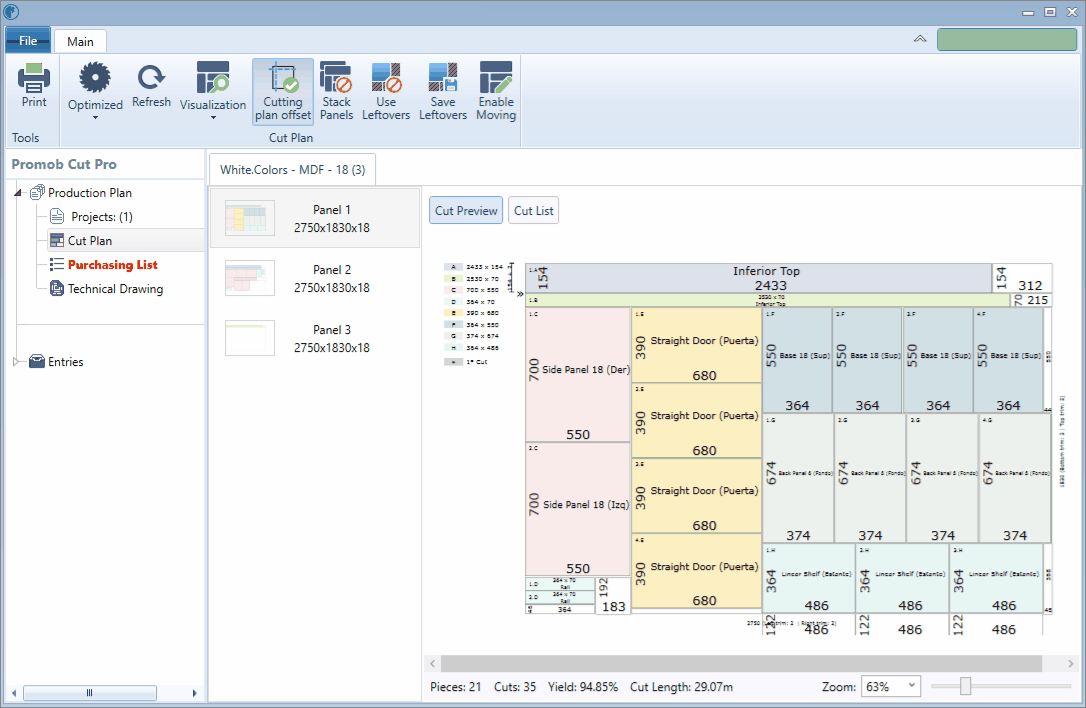
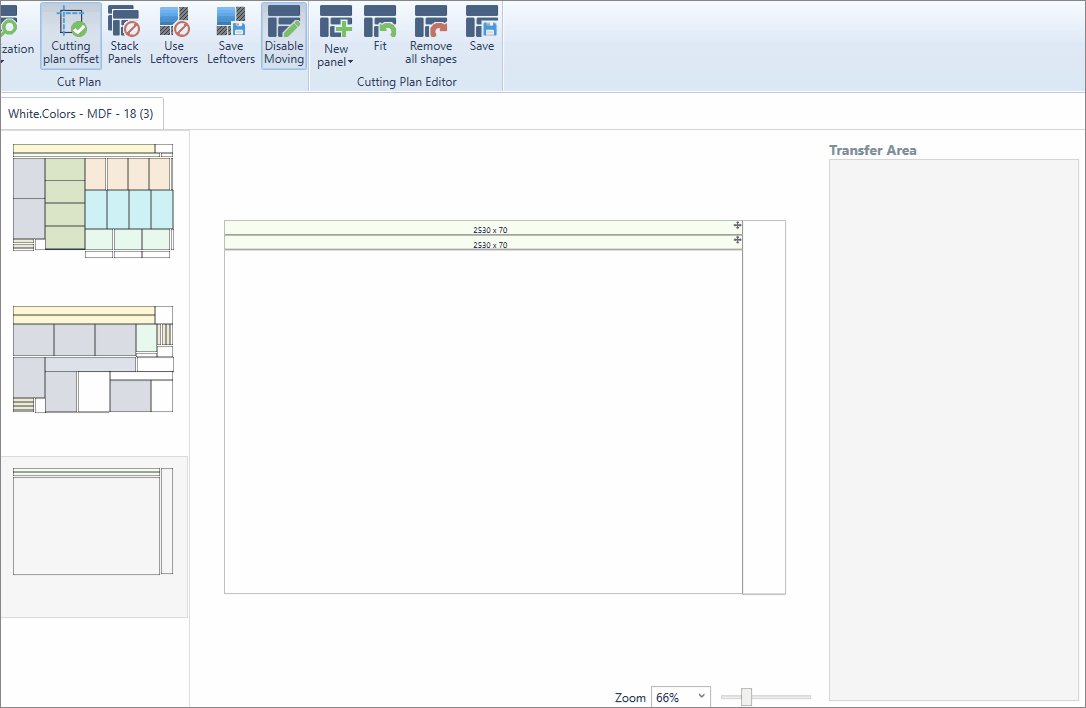
Promob Cut Pro allows the movement of parts on the Cut Plan. This movement is only available for the Saw cut pattern.

IMPORTANT: The Cut Manager files will not be generated if the cut plan has been edited by moving parts
To move the parts:
1. Click on the Cut Plan;
2. Click the Enable Moving button; 
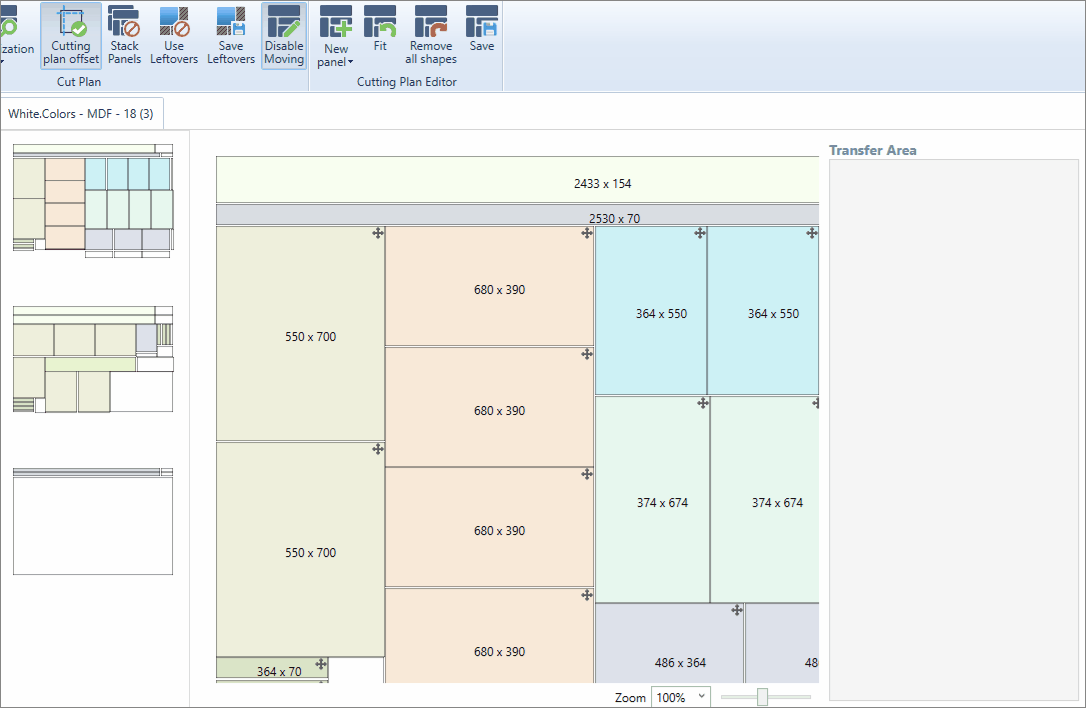
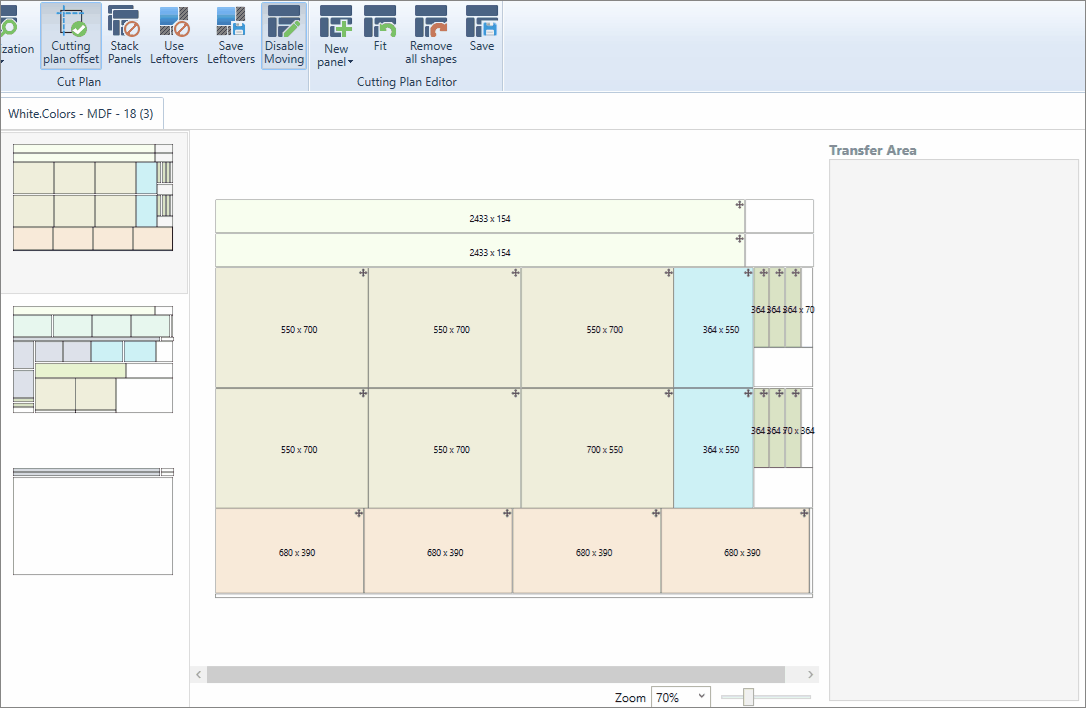
3. Move the pieces by clicking on them and dragging them;
4. To rotate the pieces, double-click on the piece to change the direction;
IMPORTANT:
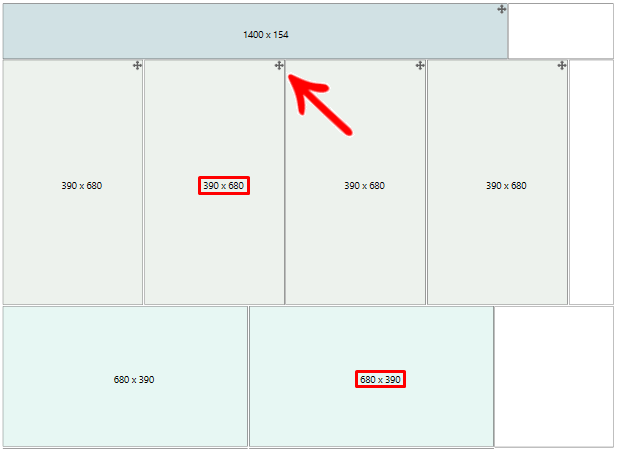
- Parts that already have registered vein will have the rotation unavailable;
- A symbol will indicate when the part has no indication of the position of the shaft and can rotate;
- When this symbol is absent, the part cannot be rotated;
- Check the example below of parts with the same dimension, but one has an indication of vein position and the other does not;
5. To change the direction of the cut, click with the right button on the part;
6. Click Save. 
IMPORTANT: As of Cut Pro version 1.2.4.26, the manual movement of parts now follows the same Reference Point used in the cutting plan and registered in Preview.
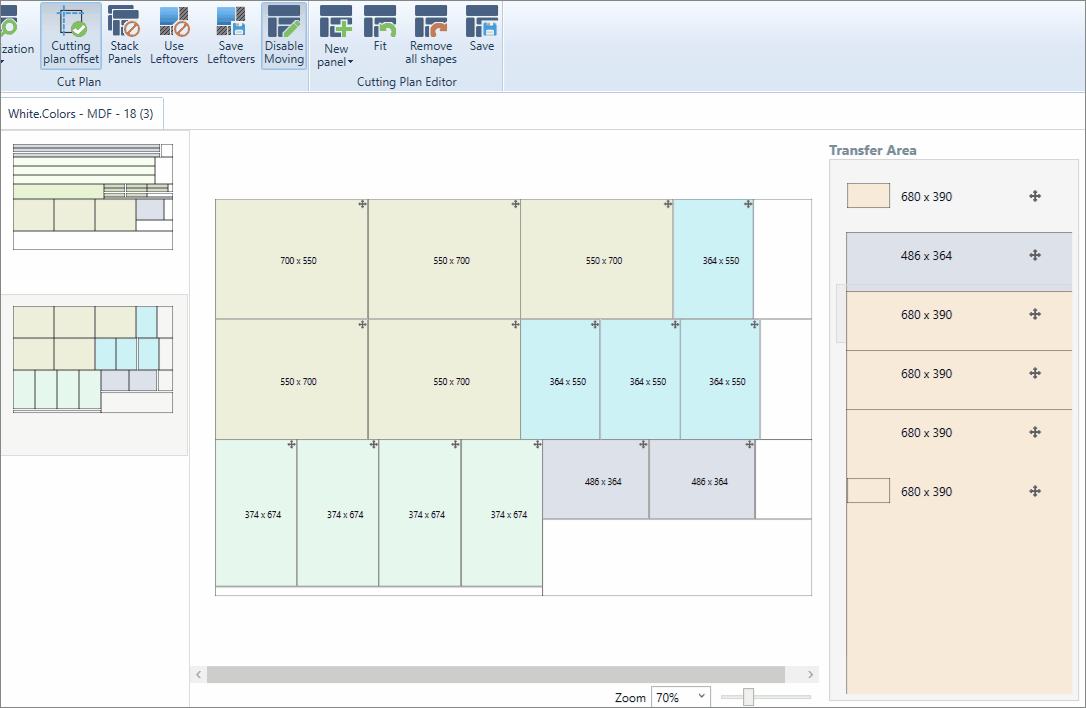
Transfer Area
In this window, you can drag the parts to facilitate replacement on the plate, where it is possible to drag the parts individually, or all at once.
- To move a single piece, simply select the piece and drag it to the Transfer Area;
- To move all parts at once to the Transfer Area, click Remove all shapes.

Fit Parts
This function allows you to make a random fit that will be defined by Cut Pro. Therefore, with this function:
- You will be able to undo all the movements made;
- Or assist in moving specific parts, when there is no need to reposition all parts.
To undo all movements made:
1. Click on the Remove all shapes option;
2. Click Fit; 
To assist in moving specific parts:
1. With the pieces already on the Transfer Area, place only pieces that you need to adjust;
2. Then click Fit;
- The remaining pieces will fit into a position defined by Cut Pro.
Add plates
To add plates:
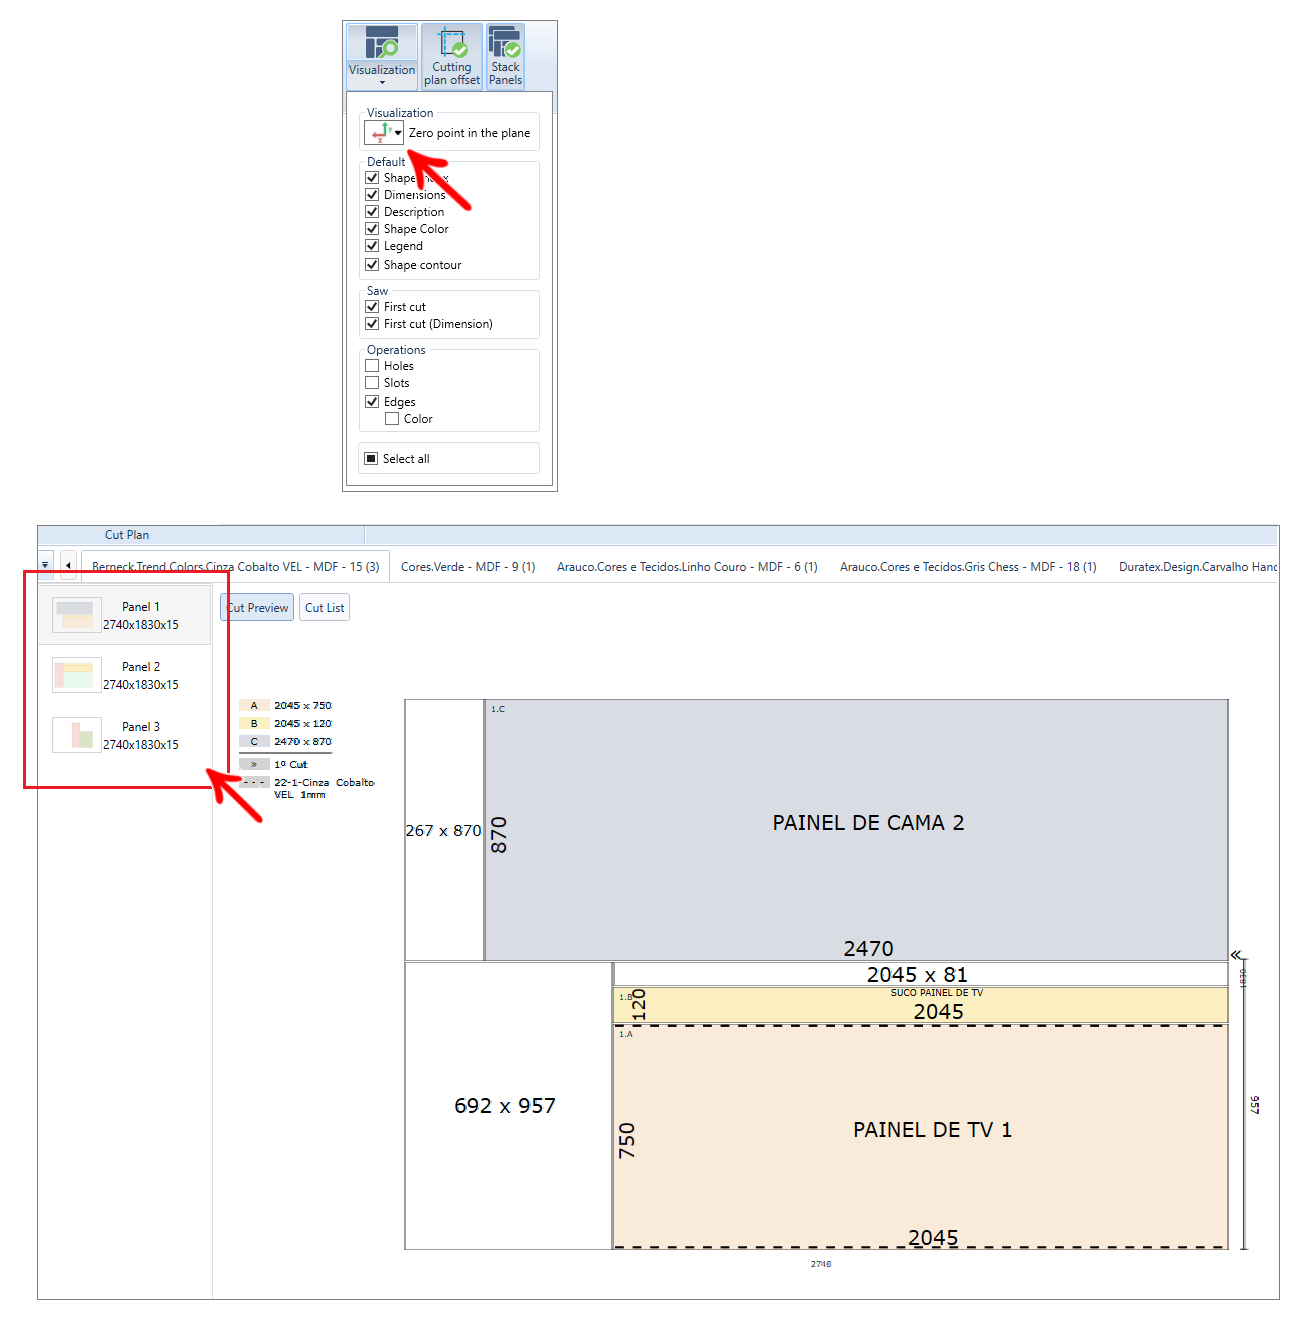
1. Click the New panel button; 
2. Select the raw material of the plate;
- In this tab will appear leftovers that are available for use;
- After choosing the plate type, a new plate will be inserted.
3. Use the Transfer Area, to change parts from one plate to another;
OBSERVATIONS:
- If a plate is empty, when saving changes, that empty plate will be disregarded.