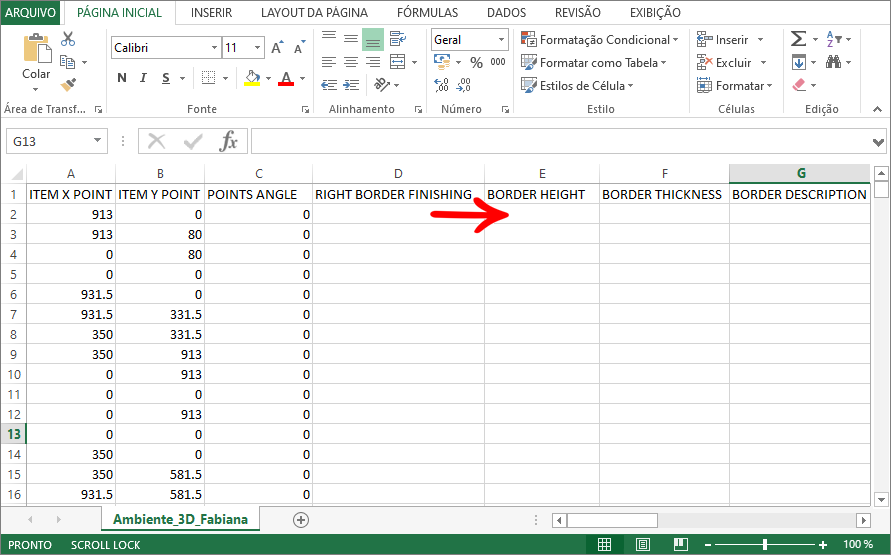
The integration of the Promob Builder with cut optimizers is carried out through the export of specific plugins for each optimizer, but also a list of information that must be sent for each optimizer, and this information has various configurations for export.
If necessary, you can access the configuration of the optimizers and adjust the export columns, according to some examples of export plans:
Optimizer configuration
IMPORTANT: Each optimizer has specific settings.
To define the settings for an optimizer, go to Cut Plan - Optimizer Settings - Optimizer - Settings.
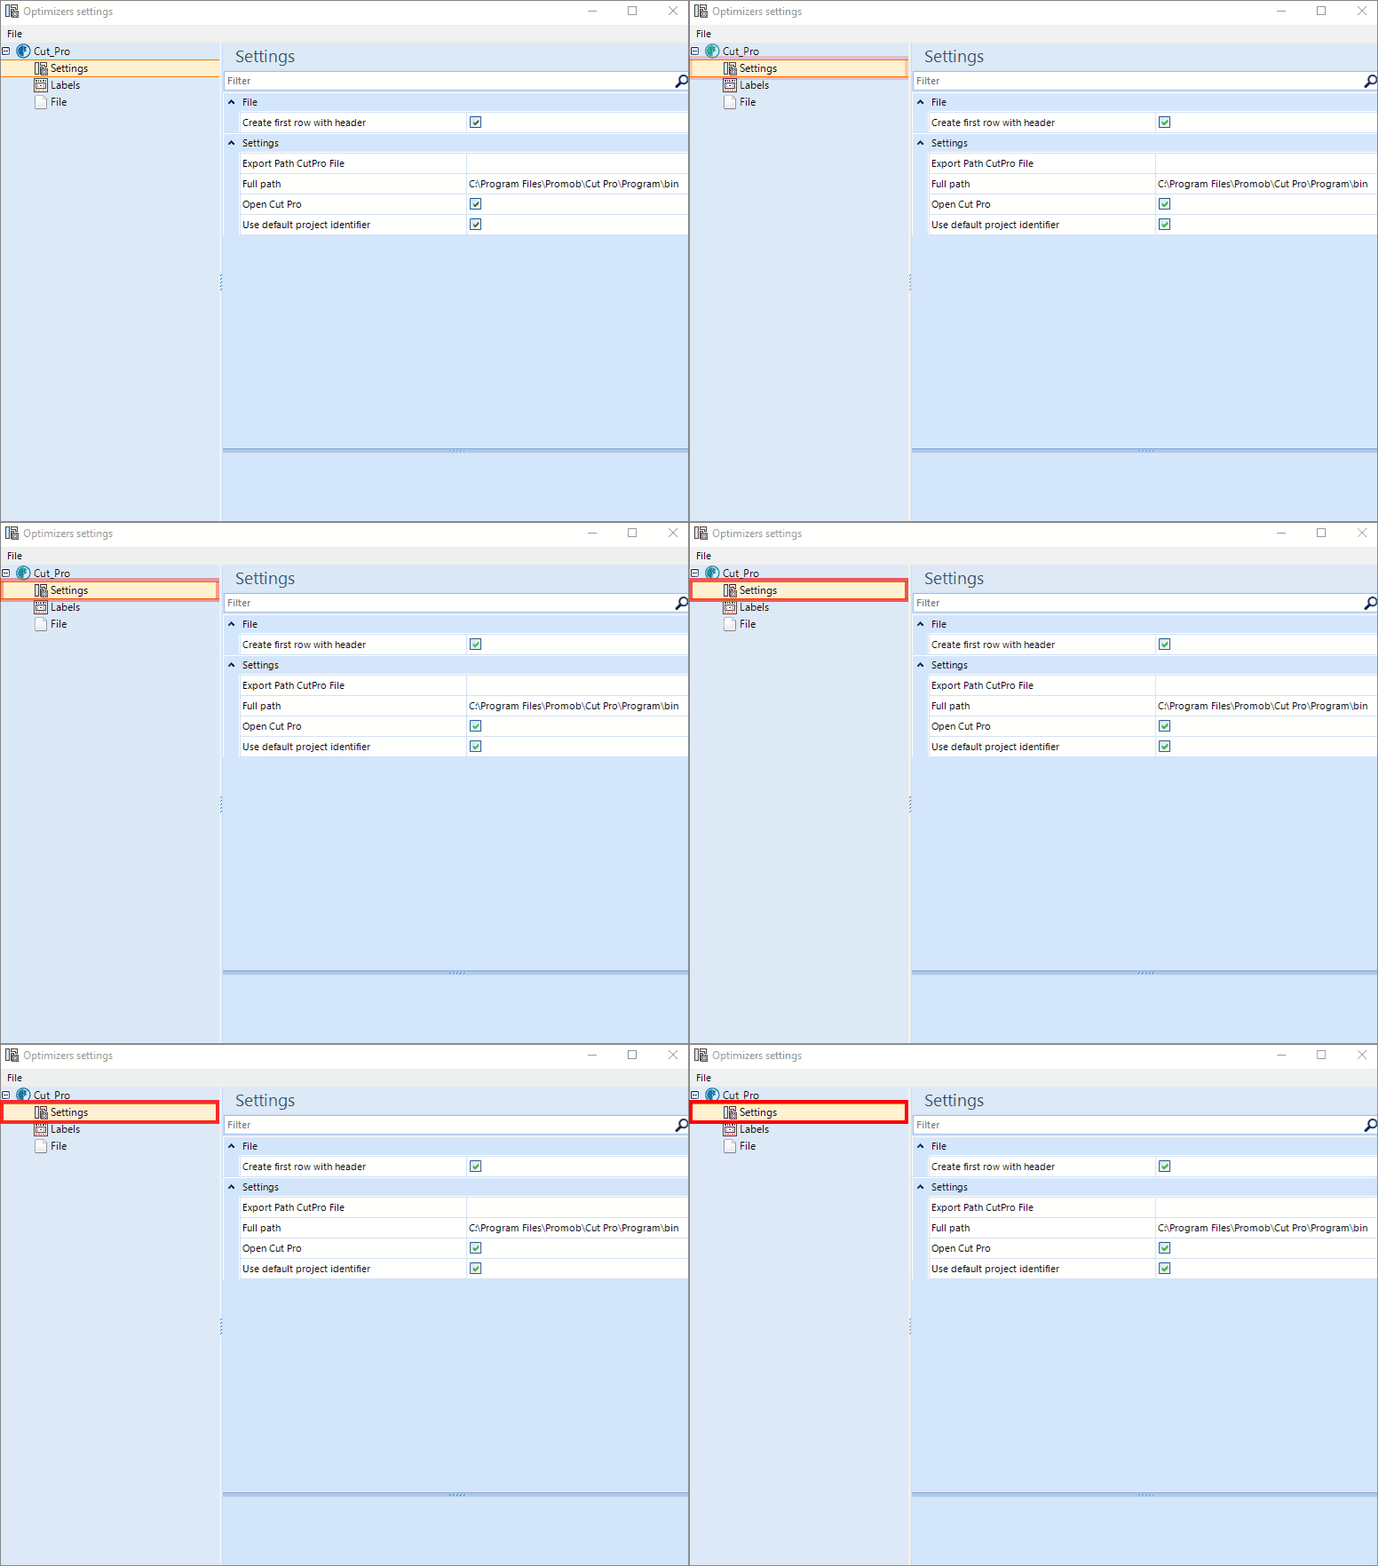
File
Create first row with header: Defines whether the file generated by the optimizer will display a header. This rule does not apply for the Corte Certo and Ottimo-Perfect CUT.
Settings
Use default project identifier: Defines whether the final file name will be standard (Environment_Client_Name_3D) or if it will be defined by the user.
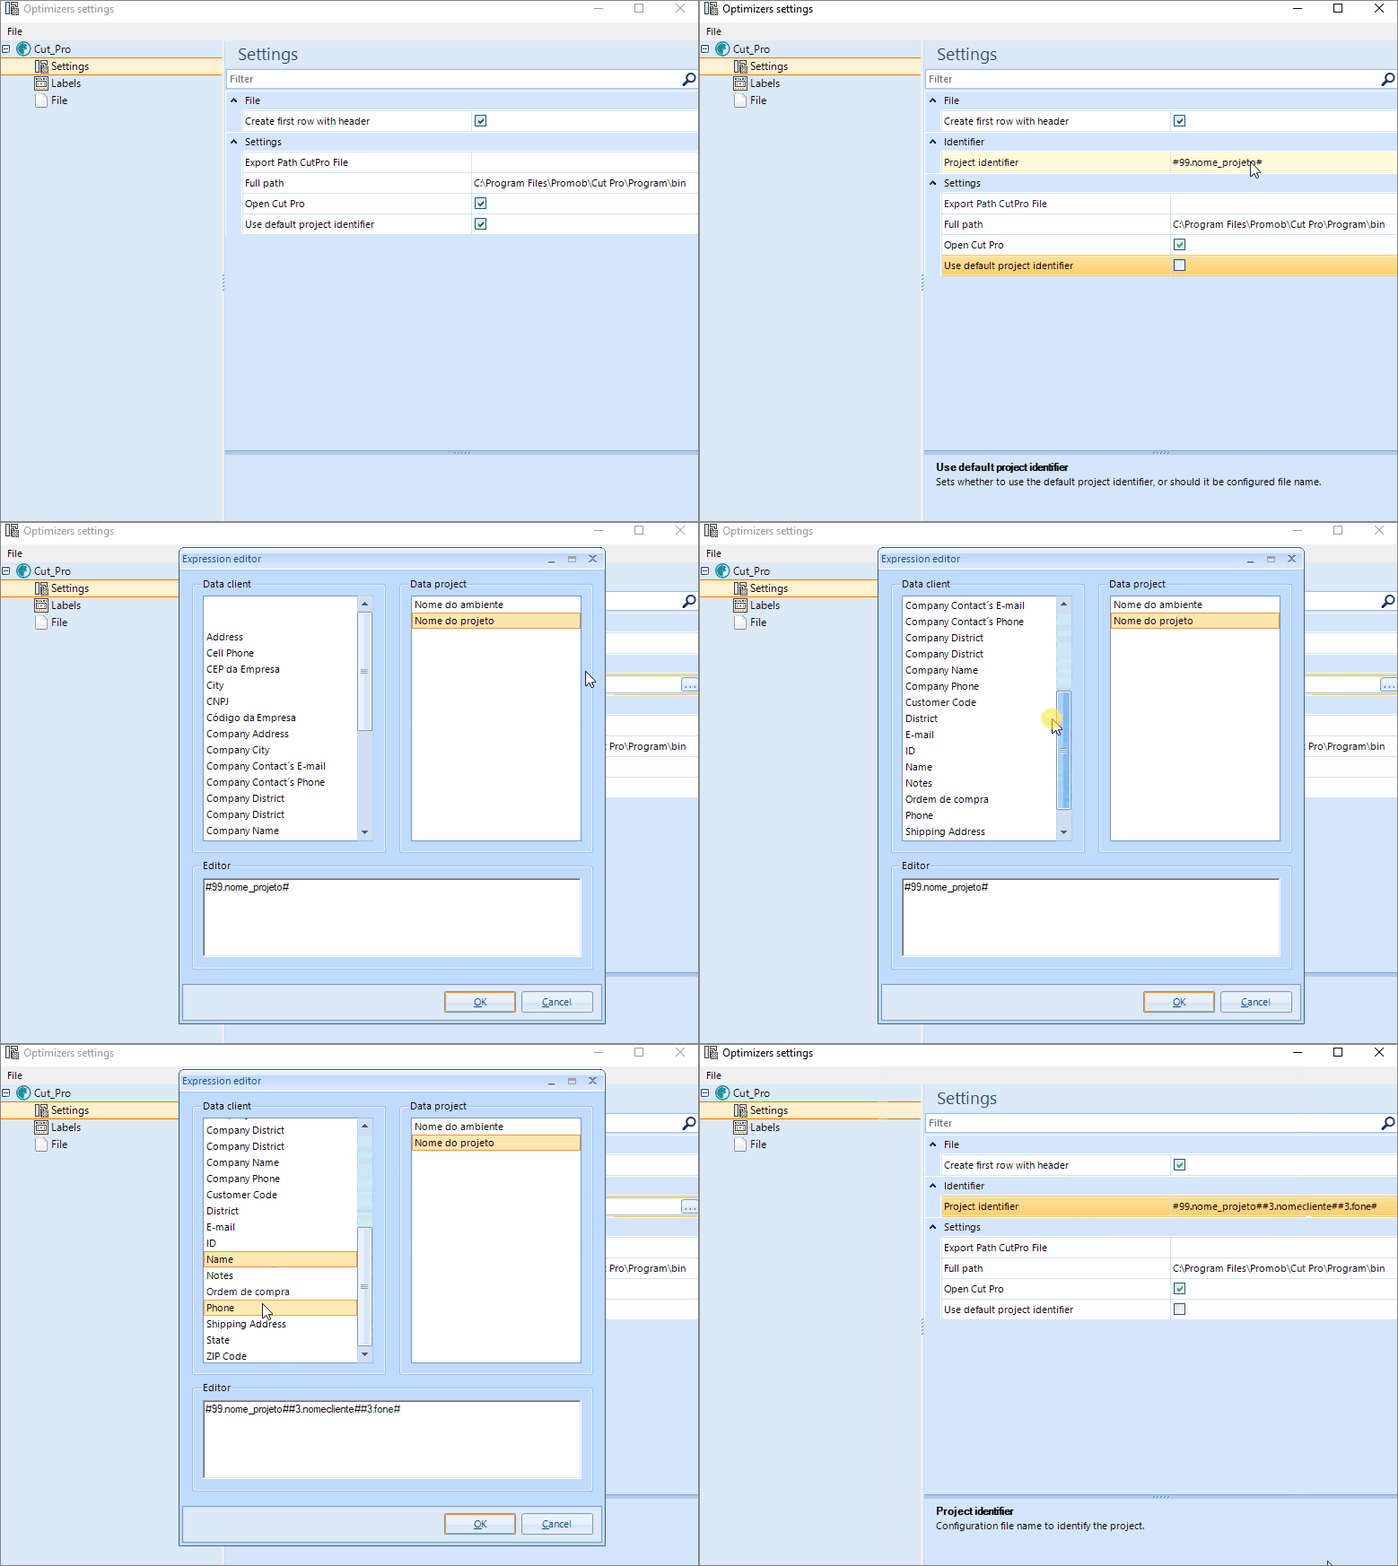
Identifier - Project identification:
- Allows the user to define the final file name;
- Editing is done on the Expression Editor screen;
- The Editor field allows the user to manually enter information in addition to that selected in Customer data and Project data.
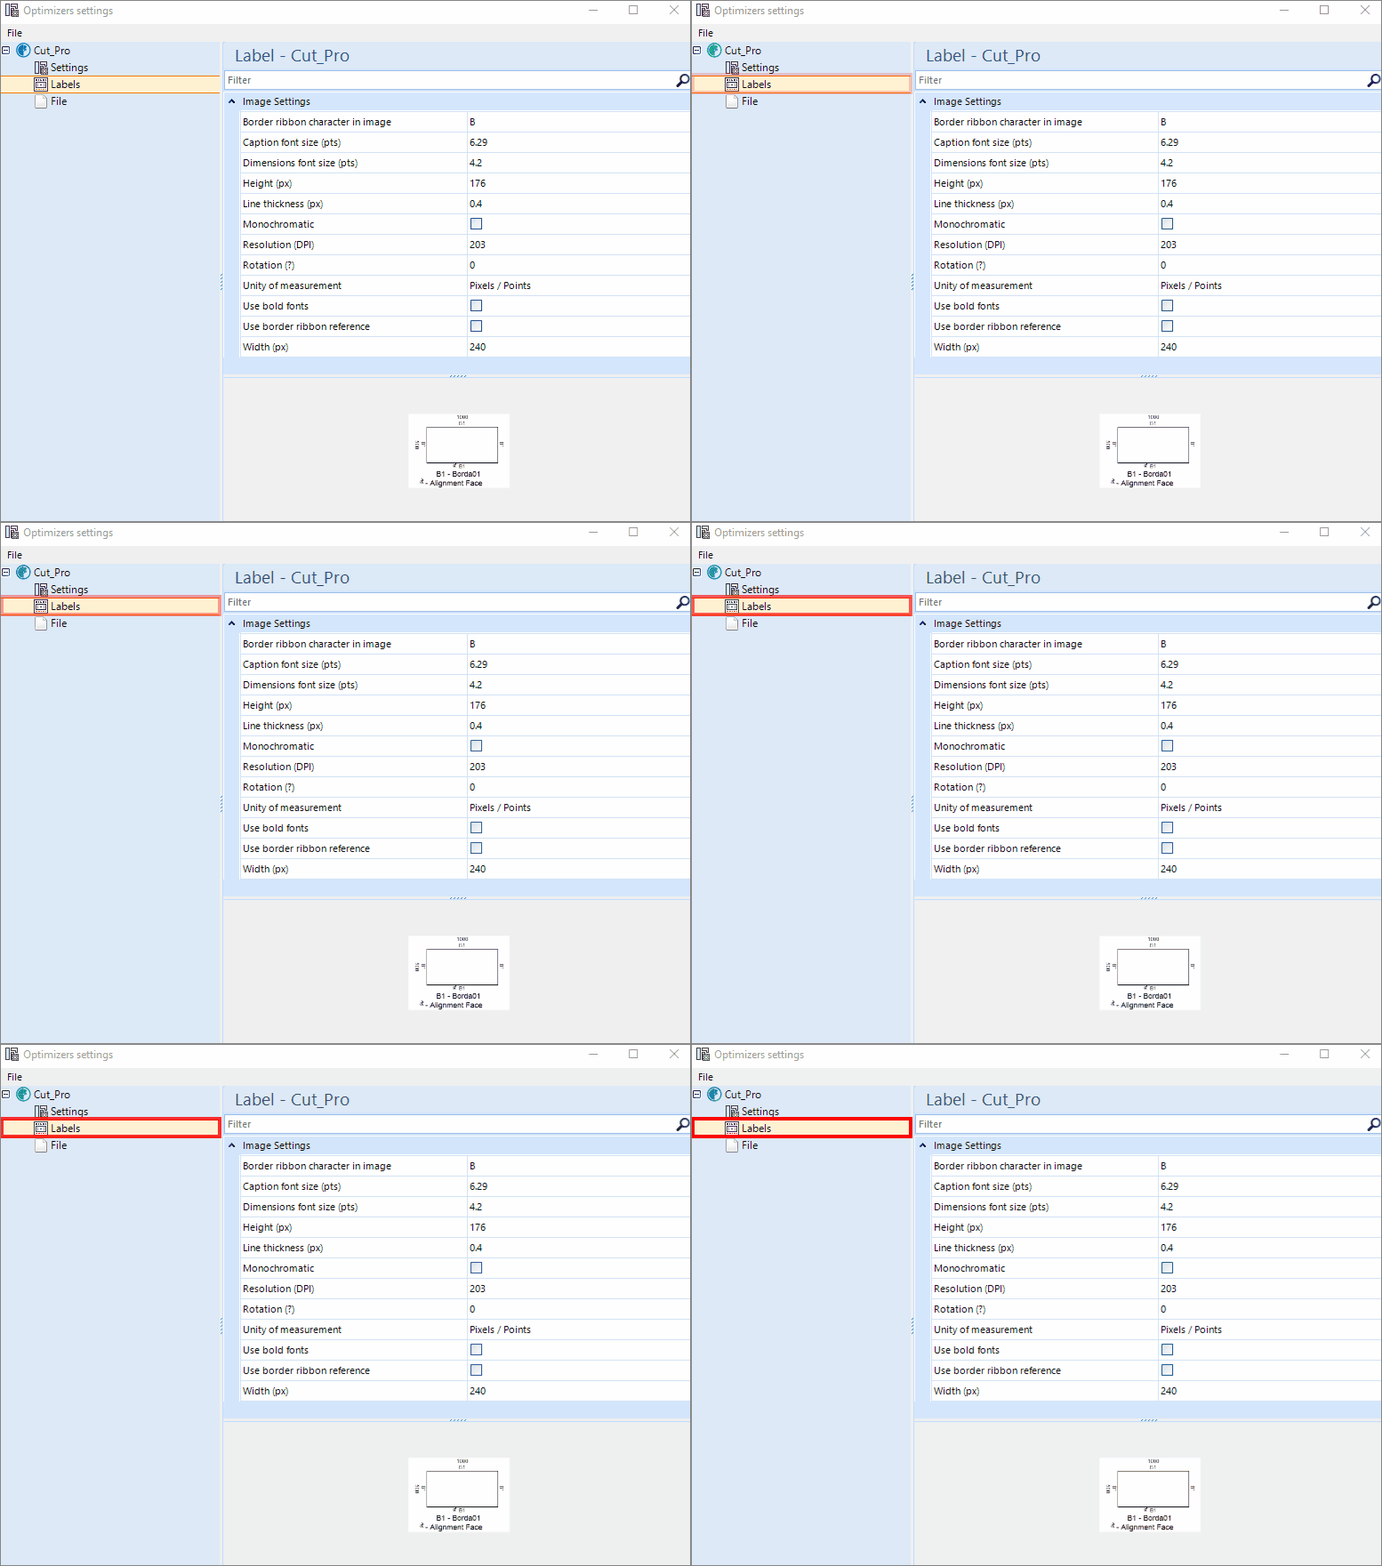
Labels
To define the settings of the labels, access Cut Plan - Optimizer Settings - Optimizer - Labels.
Change path: Allows you to change the path where the label will be saved. By default, the label is saved at the same address as the file generated by the optimizer.
Path: Defines the directory where the labels will be saved.
Border ribbon character in image: Define a character for border representation, when there are borders on the pieces.
Caption text size: Sets the caption font size on the label.
Dimension font size: Defines the dimension font size on the label.
Height: Defines the height of the label in pixels.
Line thickness: Defines the thickness of the lines drawn on the label.
Monochromatic: Defines whether the image of the label will be monochrome (black and white) or will have 256 colors.
Resolution (DPI): defines the amount of DPI present in the label image;
Rotation (º): defines the rotation of the label;
Unit of measurement: defines the unit of measurement for the label size in Millimeters or Pixels / Points.
Use bold fonts: defines whether the captions on the label will be in Bold or not.
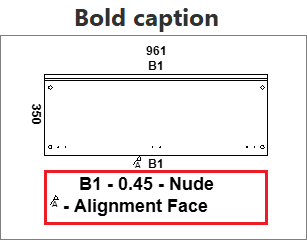
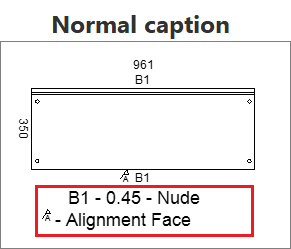
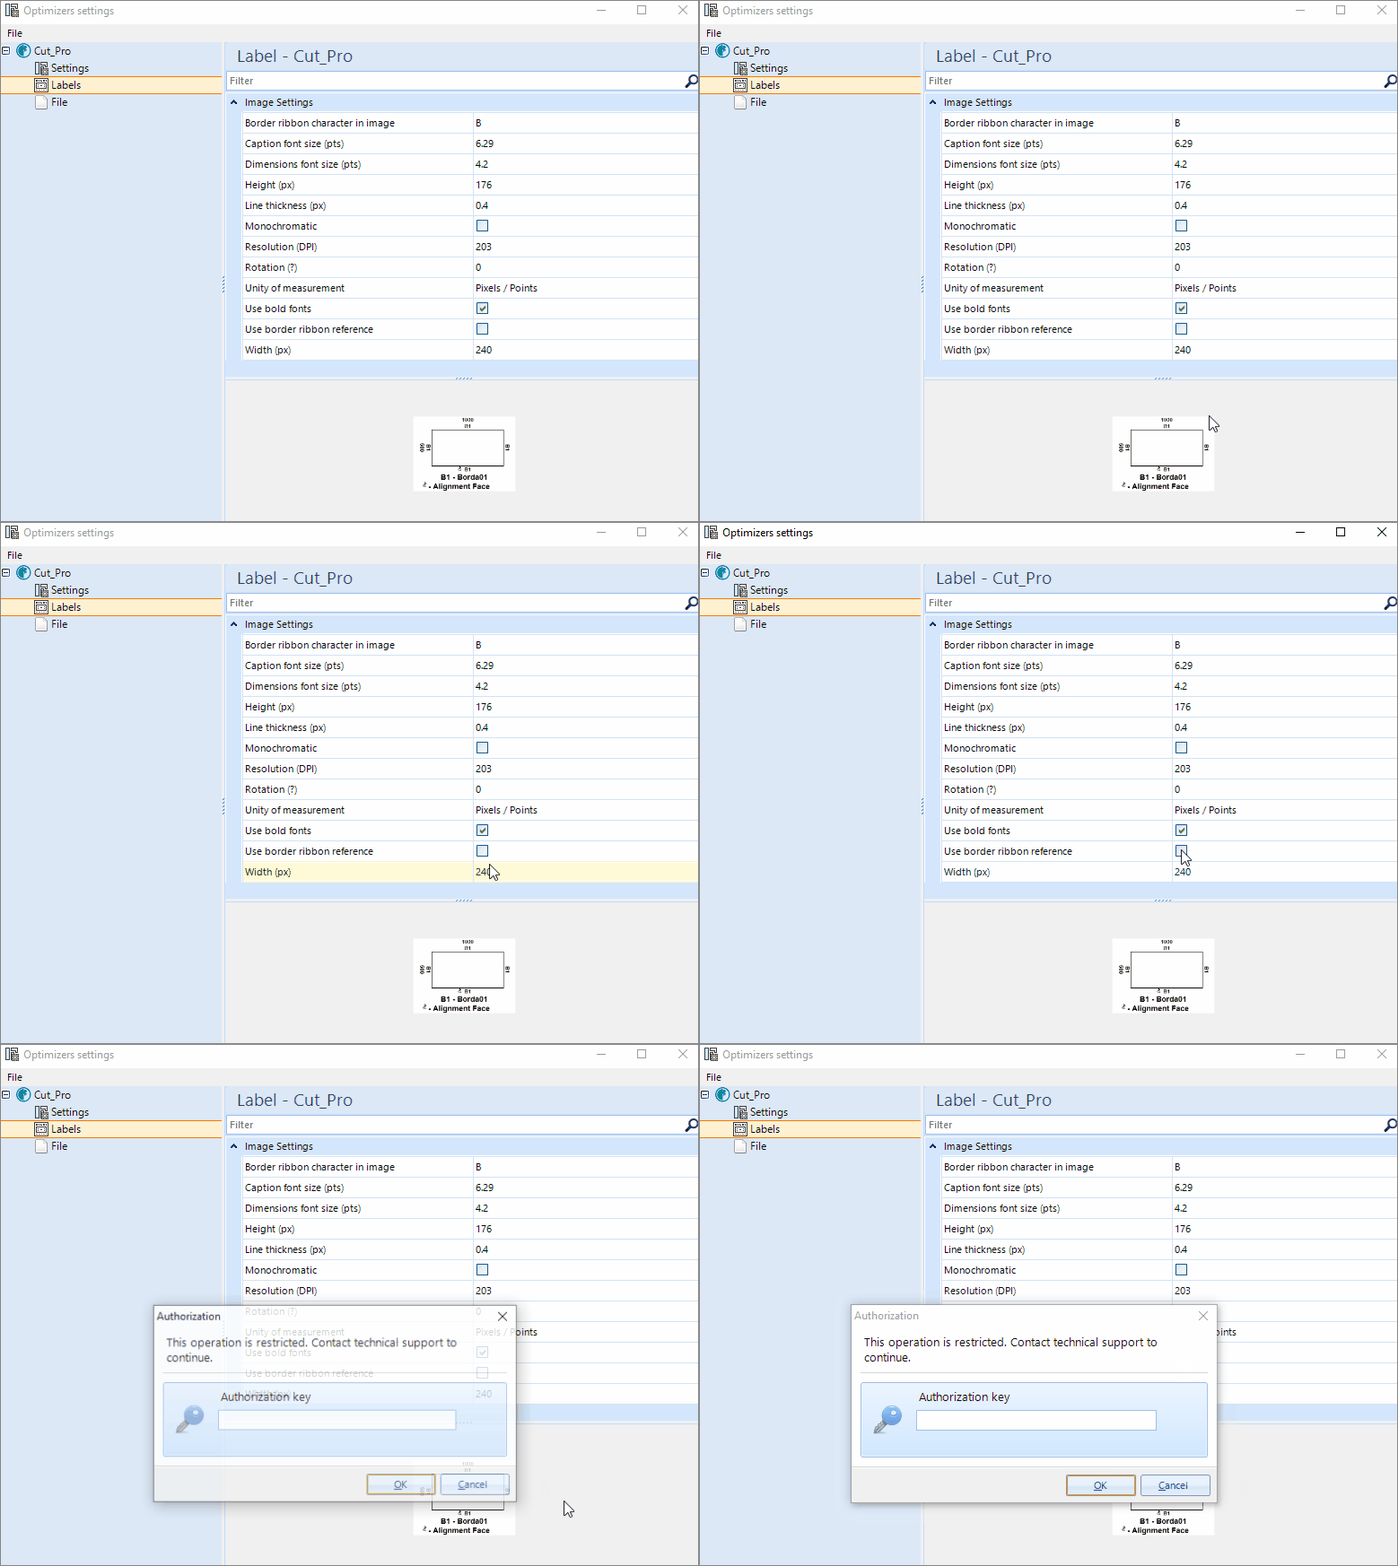
Use border ribbon reference:
- Defines whether the edge banding information will be forwarded to Cut Pro or not.
- This information is very specific, for this reason, when clicking on this option a security key will be requested, and you should ask for support from Support to configure it.
Width: Sets the width of the label in pixels.
File
To define the columns that will be generated in the final file, access the Cut Plan - Optimizer Settings - Optimizer - File
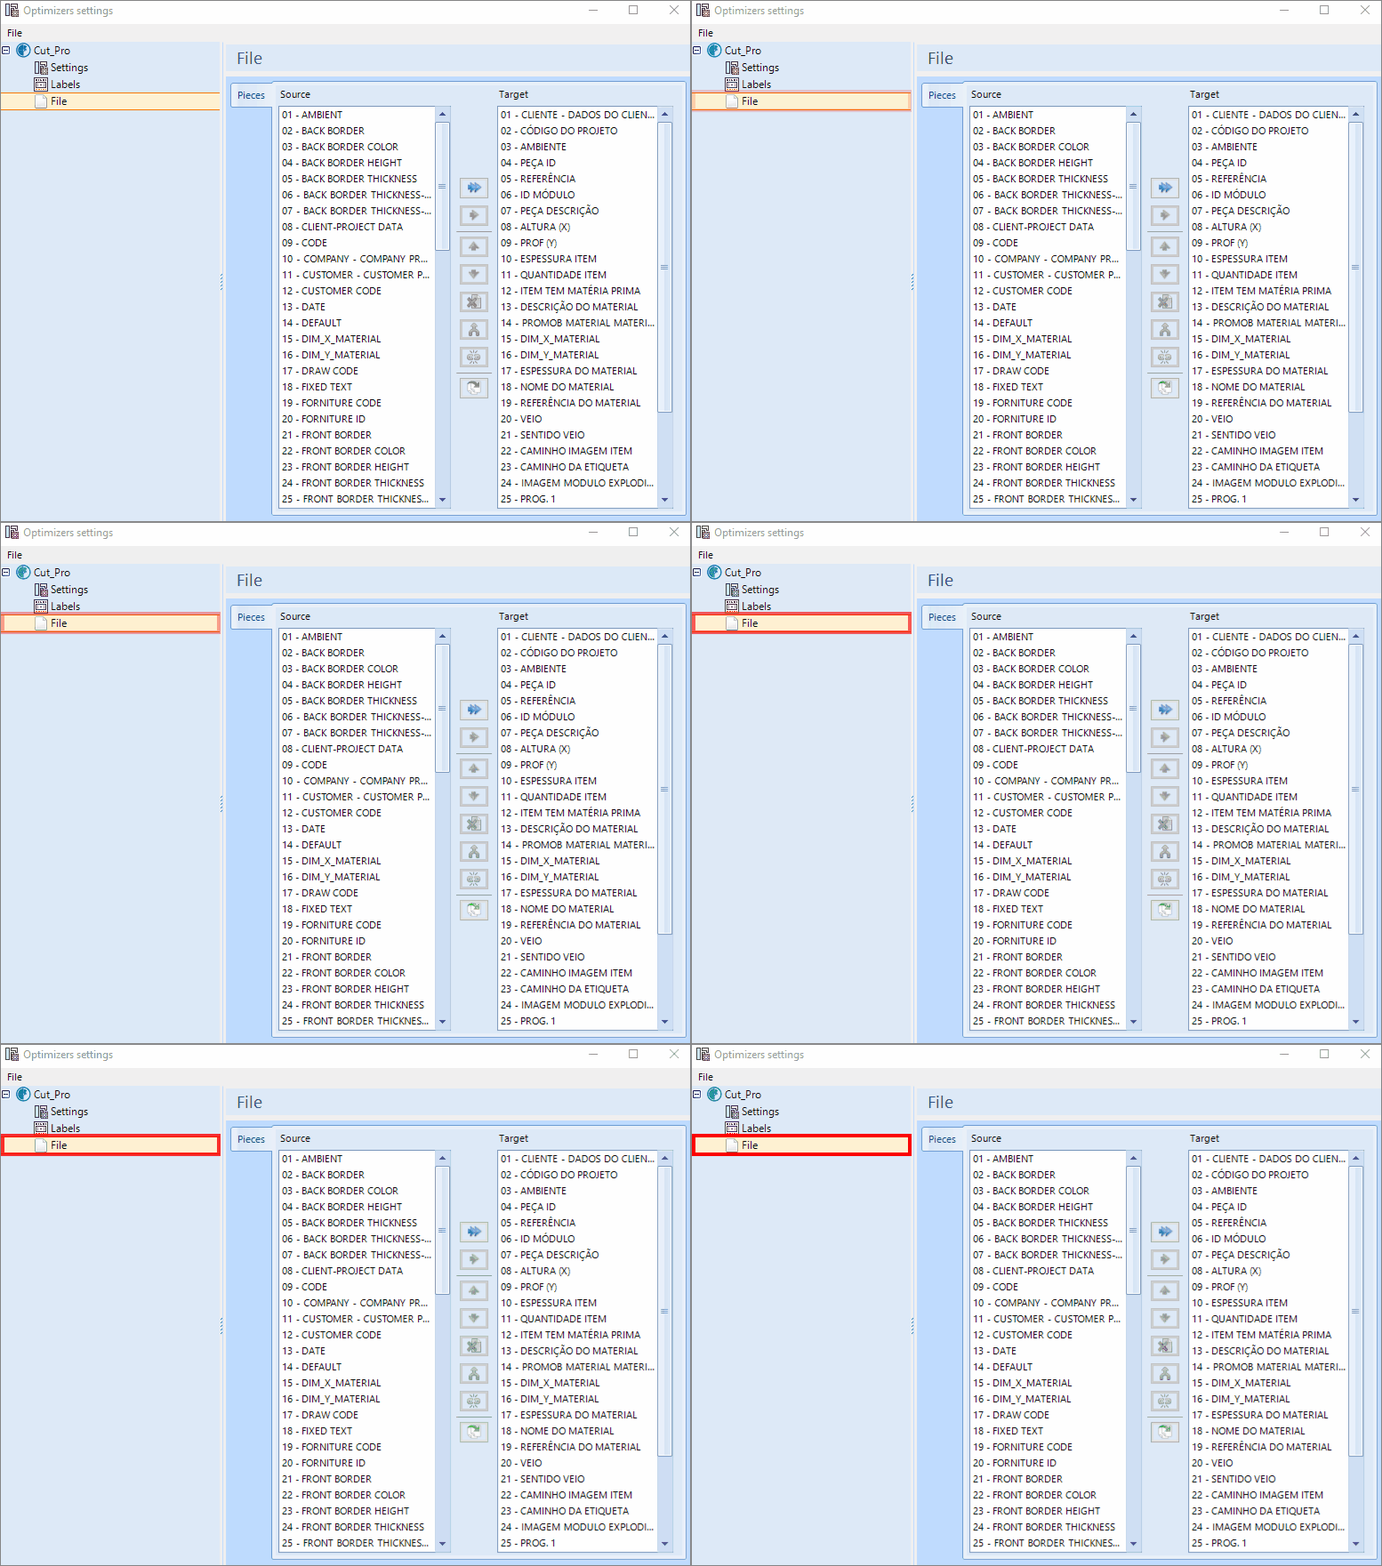
Source: Displays the columns that are available for the user to add to the final file.
Target: Displays the columns that will be generated in the final file.
The columns of the Target can be edited, for that, double click on the desired column, which then the Field Editor screen will be displayed:
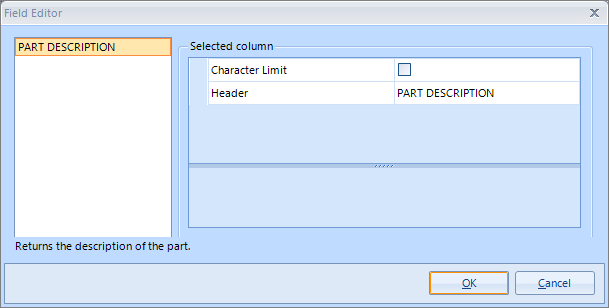
- Header: Defines the selected column header.
- Character limit: Defines whether the column has a character limit.
- Maximum size: Defines the maximum character size that the column has.
- Type: Defines the maximum character size that the column has.
IMPORTANT: It is not necessary to double-select the column to view its contents, just position the mouse over the desired column and its contents will be displayed.
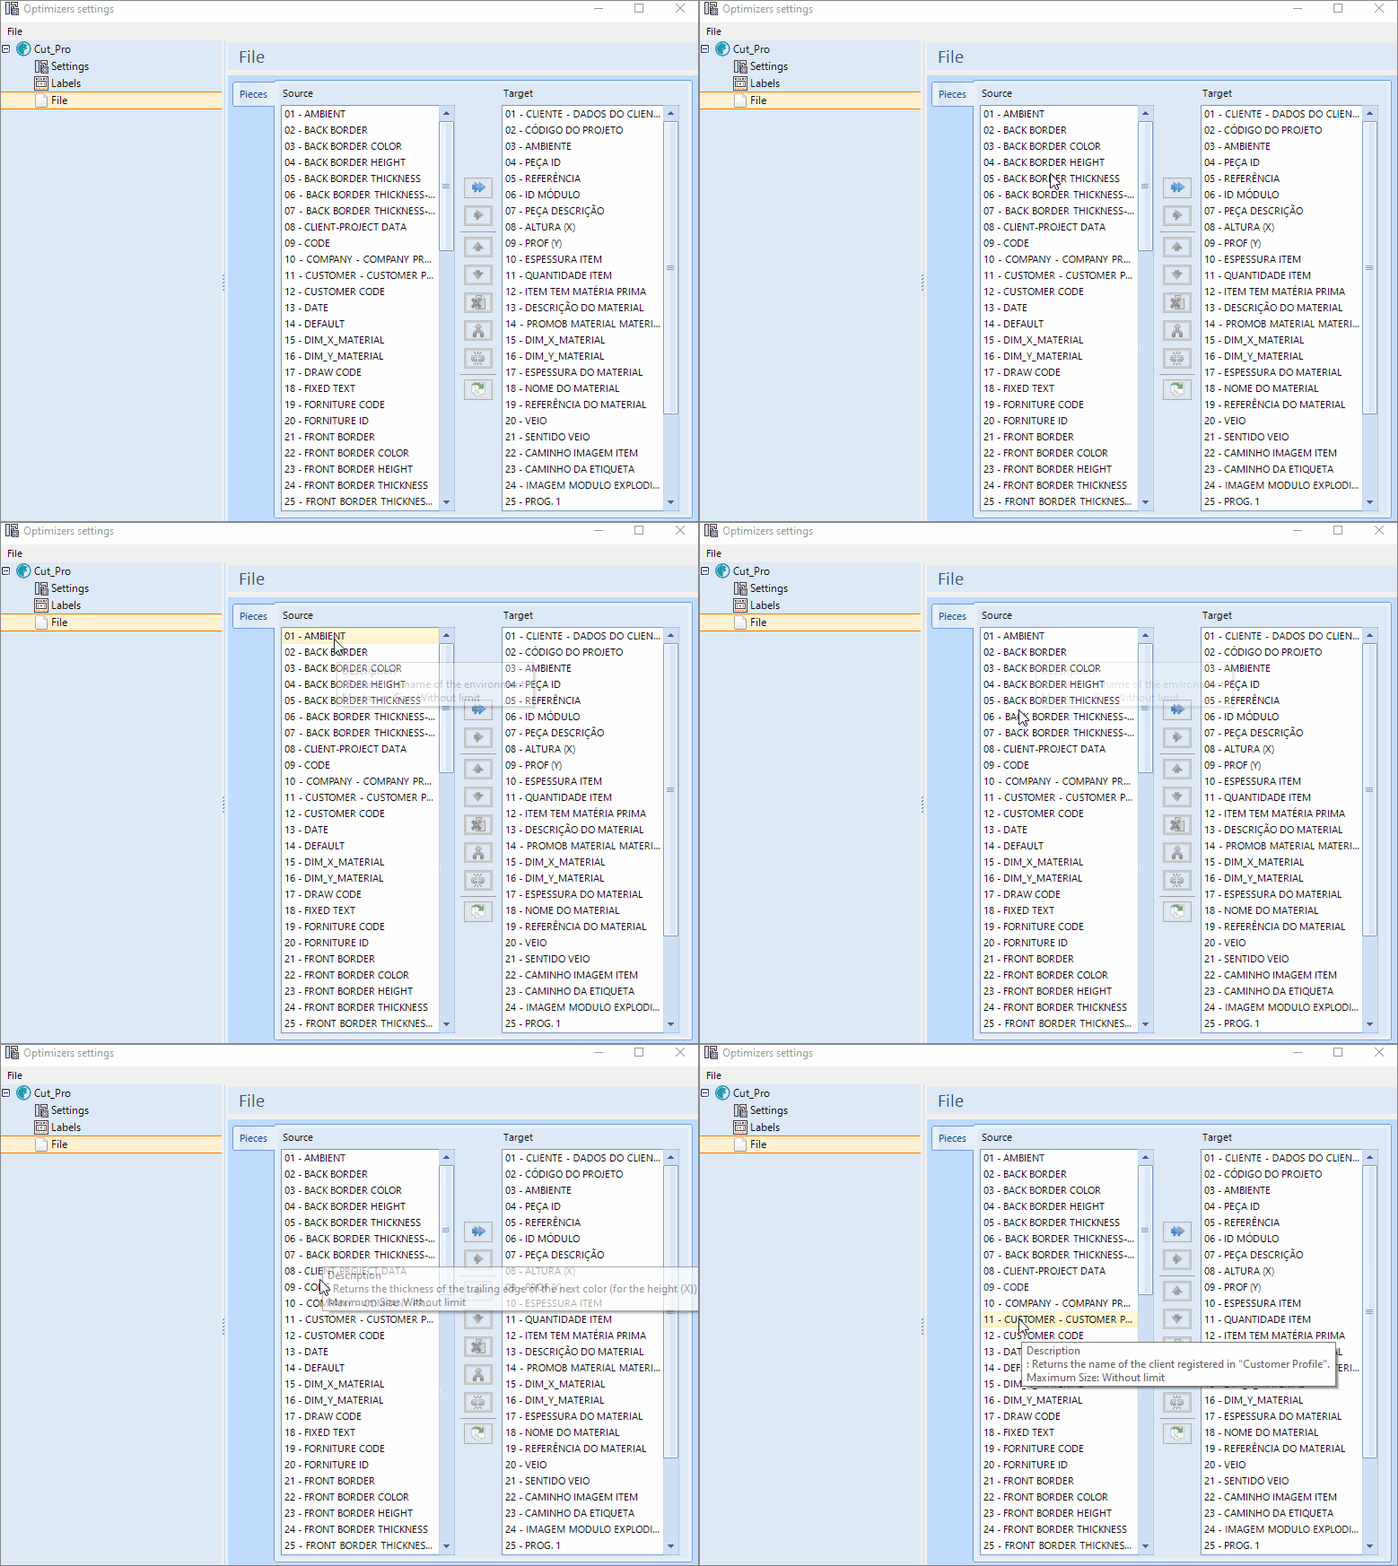
The ORDER NUMBER column allows the order number to be sent and their value will be informed in the Cutting Plan file.
In order for the ORDER NUMBER column to be sent to the cutting plane, it is necessary to follow the following steps:
1. Go to Optimizer Setup;
2. Open the optimizer navigation window and click on the File option and then select the ORDER NUMBER item in the Source column and click on the Move Selected button;
3. In the Field Editor window, edit the header and set character limits.
NOTE: If the optimizer is Cut Pro, it will return the order number as shown below:

This table is generated by Builder for import into the cut optimizer with order number.
For other optimizers the value that will be returned will be ZERO.
Selection buttons
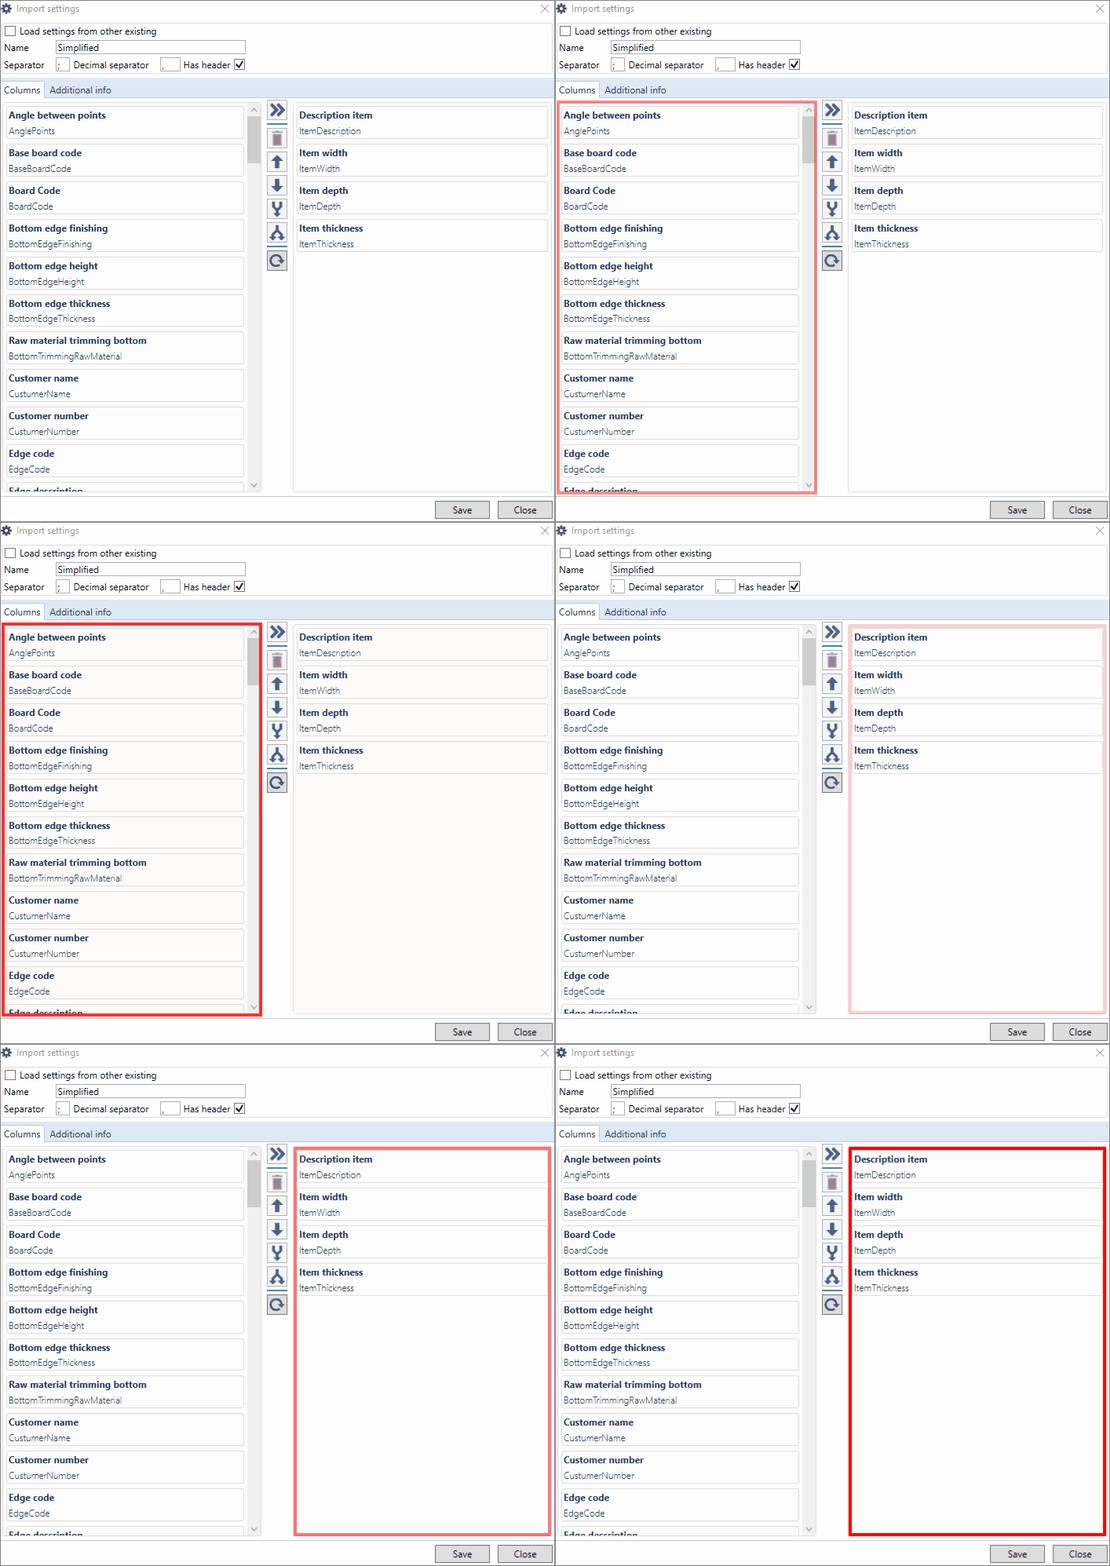
1. Move all Source-Target
Moves all columns from Source to the Target, making it possible to edit them through the editing window.
2. Move Source-Target
Moves the selected column from the Source to the Target, making it possible to edit it through the editing window.
3. Move up
Moves the selected Target column up one level.
4. Move down
Moves the selected Target column down one level.
5. Remove Selected (s)
Moves the selected column from the Target to the Source, resetting the property to the default.
6. Joining columns
It allows joining two or more columns, only columns that are in the Target can be joined. To join the columns, press the Ctrl tab, and select the columns desired.
Use the settings below:
- Character limit: This field is updated automatically through the selected columns.
- Separator: Defines the separator between the columns joined in the final file.
7. Undo union
Undo the union of column, preserving the contents of the joined column.
8. Load defult
Reverses the changes made and loads the default columns for the selected optimizer.
Column types
In File, some columns have specific settings, such as:
Sequential column: Returns a sequential code, starting at zero or one, as shown in the image below.
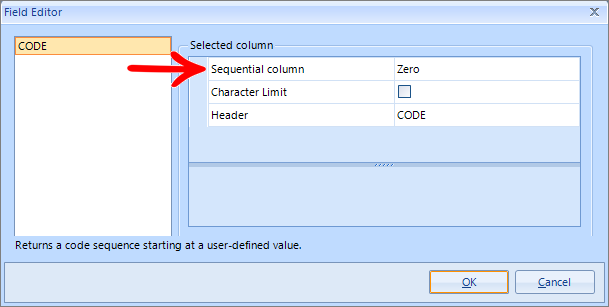
- Start at: Defines by what value the sequence will start at zero or one.
Fixed text column: Returns text defined manually by the user.
- Text: Editable field for the user to customize the final text of the column.
Wood grain column: Returns the direction of the configured shaft.

- Evaluation direction of the shaft: Defines how the spindle direction will be evaluated.
- 0 - without vein / 1 - with vein: Defines how the direction of the vein will be evaluated.
- 0 - with vein / 1 - without vein: Returns 0 if the part has a shaft, 1 if it does not.
- True - with vein/ Empty without vein: Retorna True se a peça possui veio, vazio se ela não possui.
Floating type column: Allows the user to change the number of decimal places in the column that returns a decimal number (height, thickness).
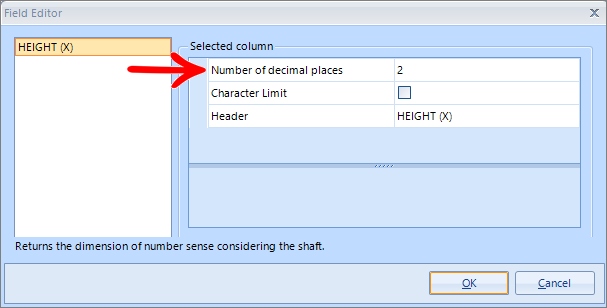
- Number of decimal places: Defines the number of decimal places of the final value, there is a maximum limit of 15 decimal places.
Customer Data - Project
Available from version:
- Plugin Builder 1.11.24 or higher.
The CUSTOMER-PROJECT DATA column allows you to select information registered on the Customer Data screen.
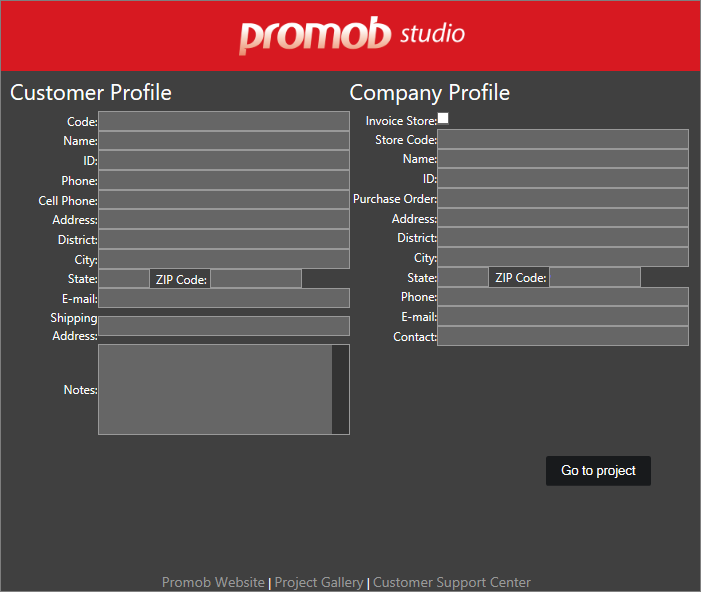
In order for the CUSTOMER-PROJECT DATA column to be sent to the cut plane, the following steps must be followed:
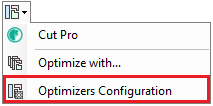
1. Access Optimizer Configuration;
2. Open the navigation window of the desired optimizer and click on the File option and then select the item CUSTOMER-PROJECT DATA in the Source column and click the Move Selected button.
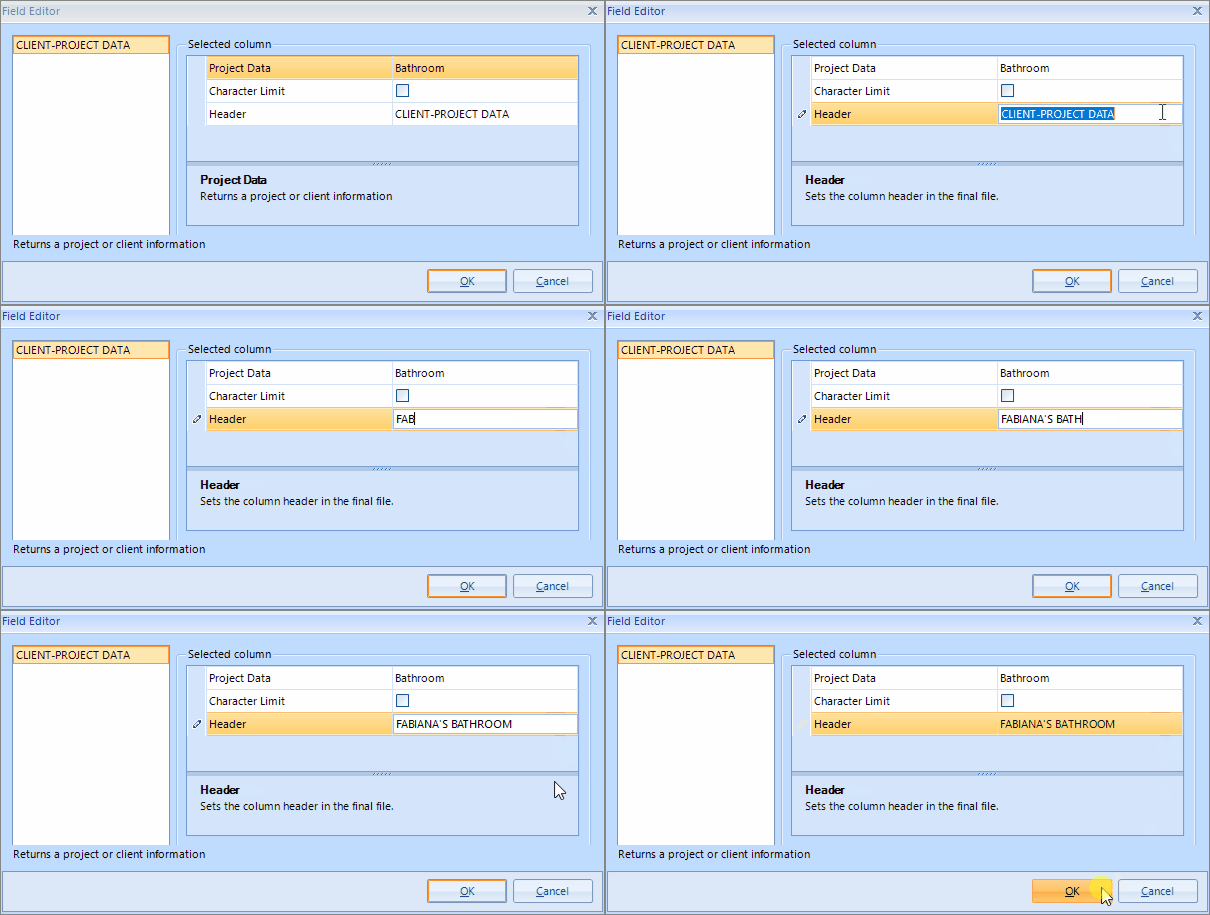
3. Clicking on the send button will open the column configuration window, where you can edit the header, set character limits and choose which fields on the customer's screen will be informed.
4. To choose the customer data fields, just click on the suspension points button located next to the Project / Customer Data field.
5. When selecting the desired options, click the OK button. and again on the OK button on the field editor screen so that the Customer Data column is sent to the cut optimizer.
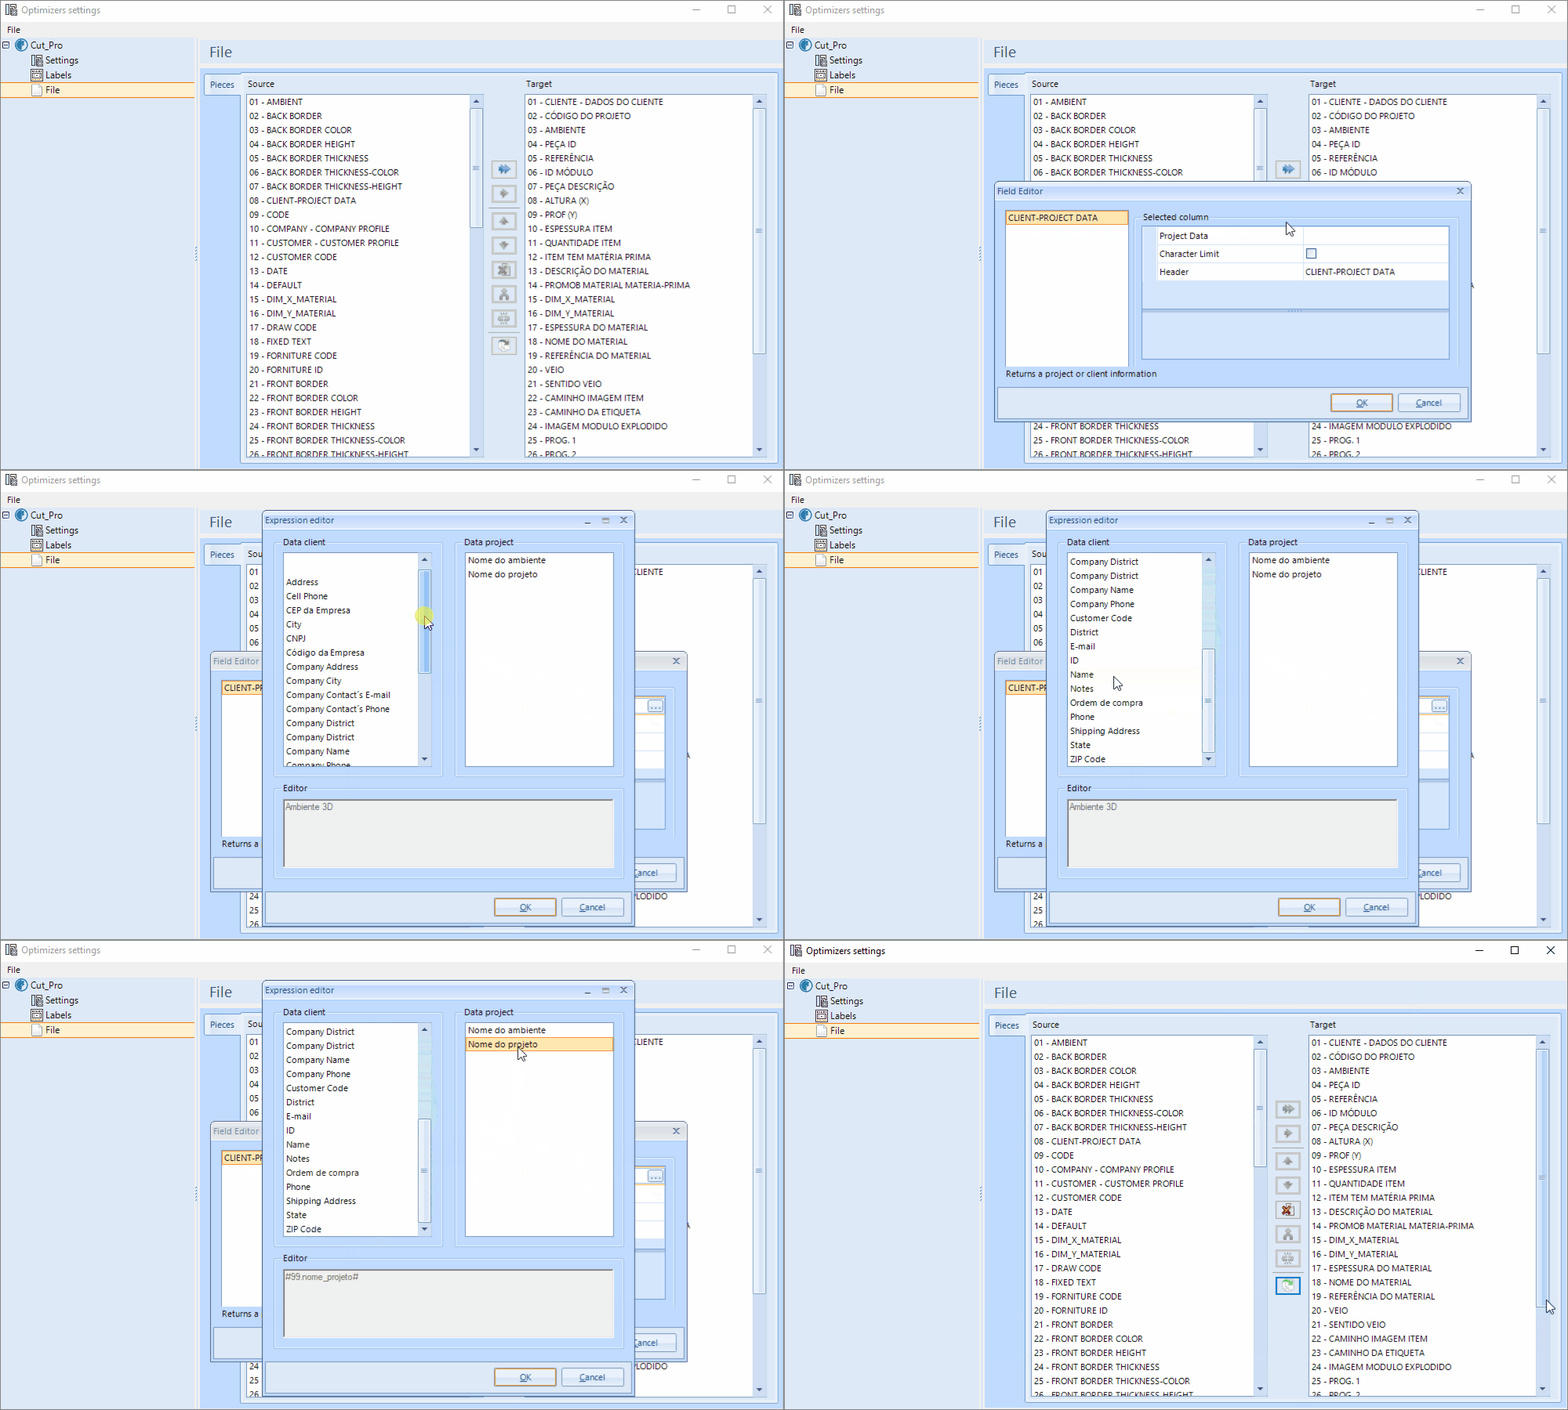
TIP: Always rename the header column to the name of the chosen customer's data to facilitate the user's understanding.
System Attributes column
Available from version:
- Plugin Builder 1.11.25 or higher.
The SYSTEM ATTRIBUTE column loads the attributes present in the library and allows the user to select the information sent to the cut plane.
In order for the SYSTEM ATTRIBUTE column to be sent to the cut plane it is necessary to follow the following steps:
1. Go to the Optimizer Configuration.

2. Open the navigation window of the desired optimizer and click on the option File and then select in the Source column the item SYSTEM ATTRIBUTE and click on the Move Selected button.
3. In the Field Editor window, click the suspension points button located next to the System Attributes field;
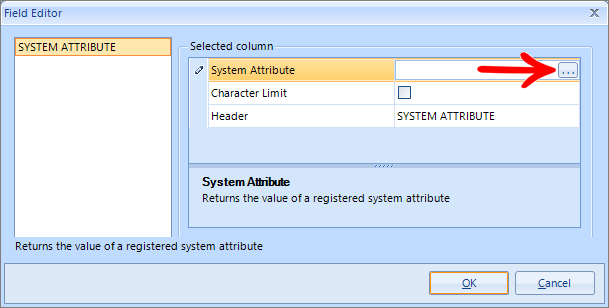
4. In the System Attribute Selector window, select the desired attribute, click the OK button and again the OK button in the Field Editor window;
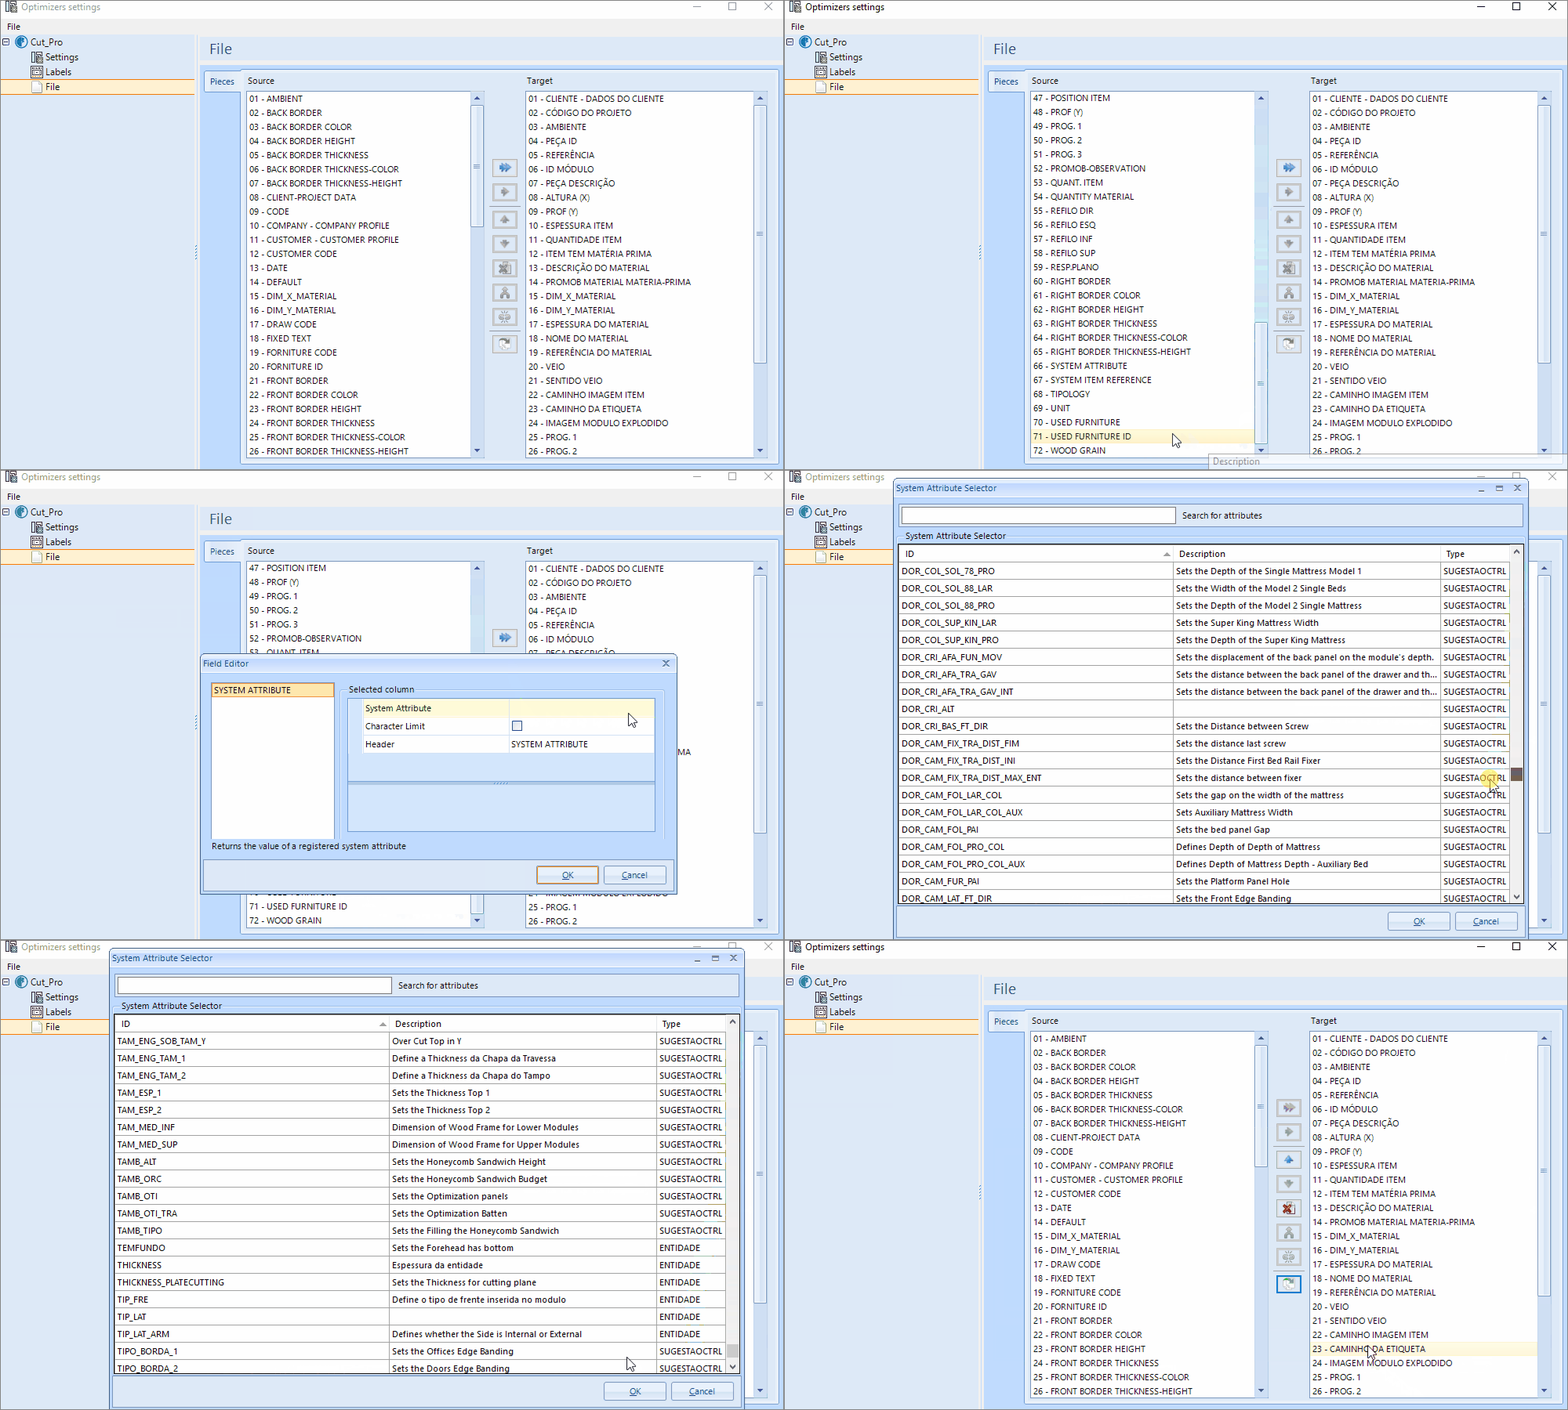
TIP: Always rename the header column to the name of the referenced attribute entered to facilitate user understanding.
Reference column
Available from version:
- Plugin Builder 1.11.25 or higher.
The SYSTEM ITEM REFERENCE column allows the user to enter the ID of a reference, and so the modules that have it will have their value informed in the Cut Plan file.
In order for the SYSTEM ITEM REFERENCE column to be sent to the cutting plane it is necessary to follow the following steps:
1. Access the Optimizer Configuration.

2. Open the navigation window of the desired optimizer and click on the option File and then select the item ITEM REFERENCE IN THE SYSTEM in the Source column and click the Move Selected button
3. In the Field Editor window, enter the desired reference, click the OK button.
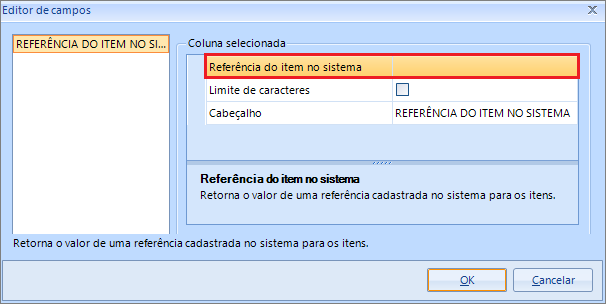
IMPORTANT: If the piece does not contain the informed reference, its field in that column will be empty, so you must pay attention to its correct writing.
TIP: Always rename the header column to the name of the typed reference to facilitate user compression.
Observation column
Available from version:
- Plugin Builder 1.11.25 or higher.
The OBSERVATIONS-PROMOB column allows the value of the Observations field of the part's properties in the environment to be sent to the Cut Plan.
In order for the OBSERVATIONS-PROMOB column to be sent to the cutting plane, it is necessary to follow the following steps:
1. Access the Optimizer Configuration.

2. Open the navigation window of the desired optimizer and click on the option File and then select the item OBSERVATIONS-PROMOB in the Source column and click on the Move Selected button.
3. In the Field Editor window, edit the header and set the character limits.
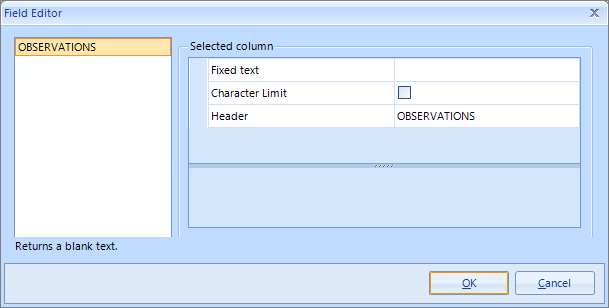
The Observation column will display the information registered in the Observations field of the 3D environment.
To register this information:
1. With the module in the environment, select the desired part or module;
2. Open the Tools-Properties menu.
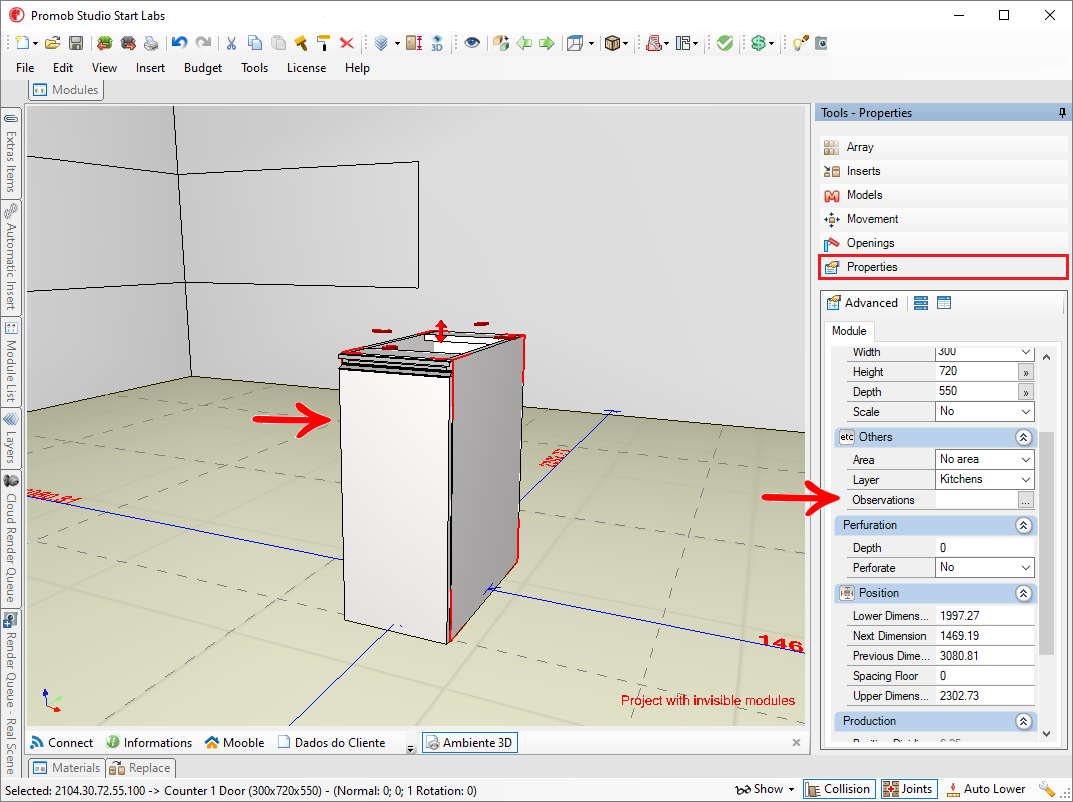
3. The field is in the Other category, so just enter the desired observation in it.

Add columns in the Cut Pro file
Available from version:
- Plugin Builder 1.11.26 or higher.
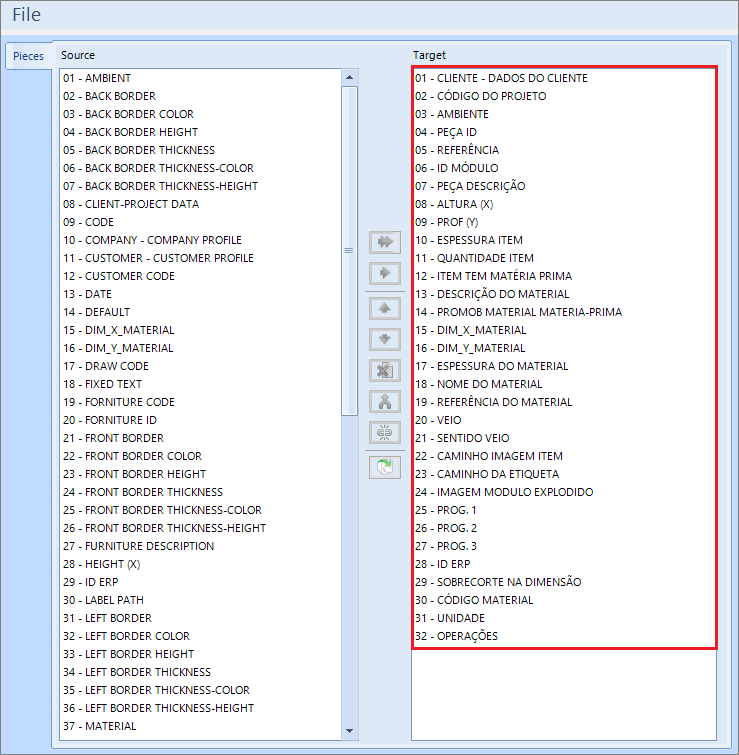
In the configuration of optimizers, within the Target window, it is possible to add columns in addition to the standard columns, just as in the other optimizers.
They can be modified and their order changed as desired, as long as they are all after the standard columns.
The standard columns, in turn, cannot be deleted and their order cannot be changed.
EXAMPLE:
In the image below, the columns up to number 32 refer to the standard table.
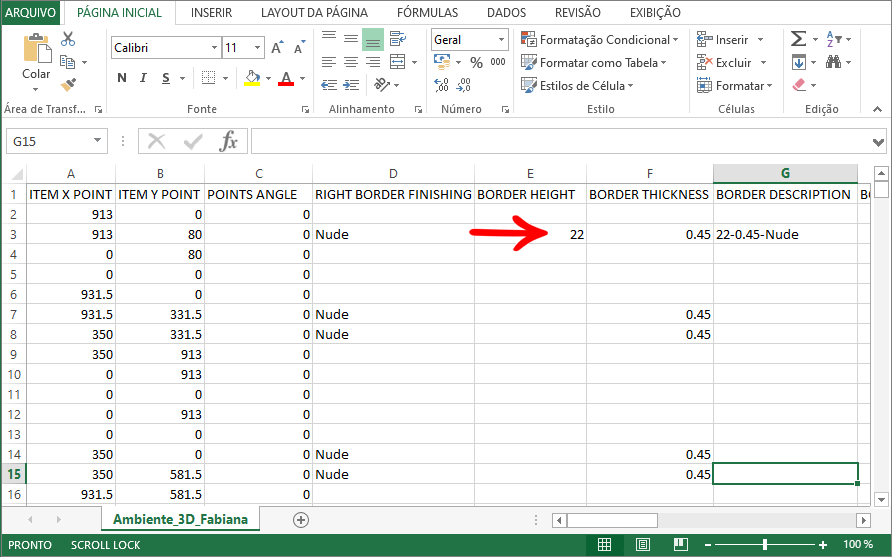
Border Height field
For the export option for the cut optimizers, Border Height (edge band) work correctly, the following information is required:
In the part where the edge is registered, the edge tape structure must be applied.
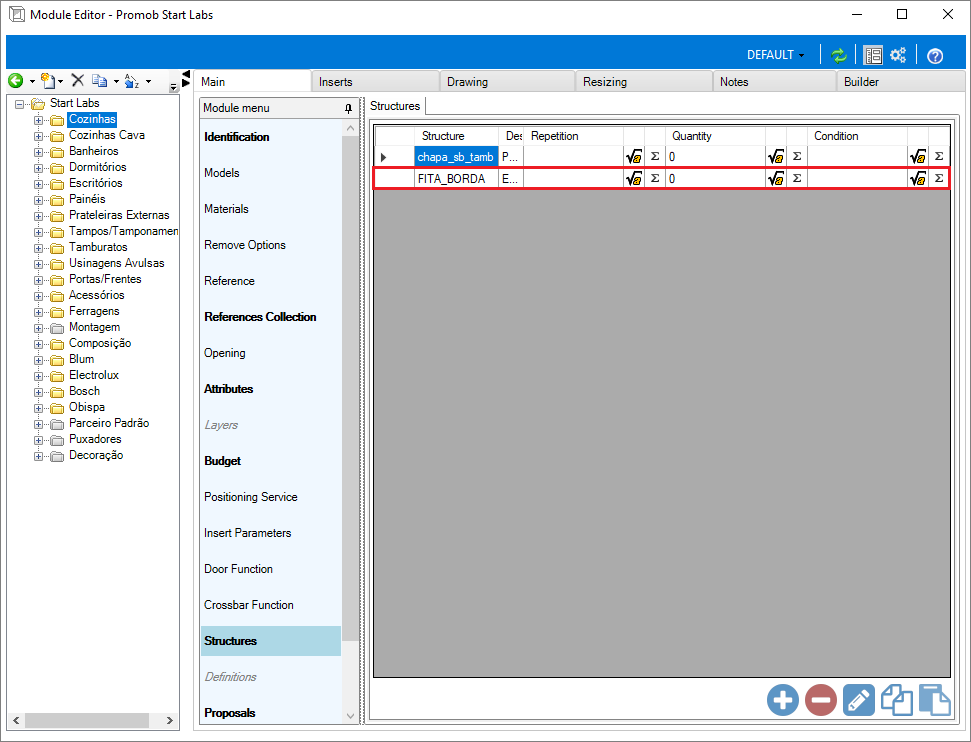
This structure must have the ID FITA_BORDA, if the structure has any other ID it will not be sent for the export of the cut optimizer.
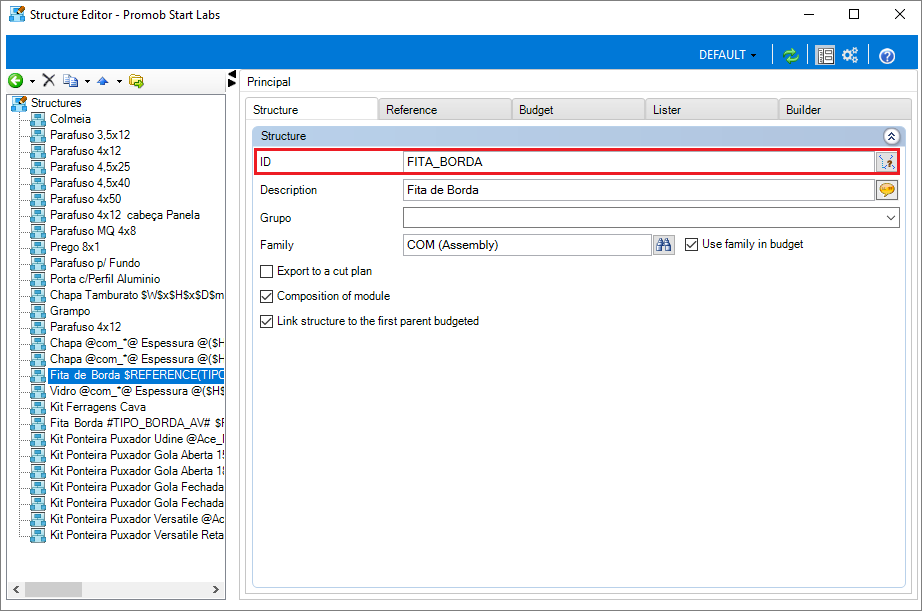
EXAMPLE:
- Case 01: Part with Structure with ID = FITA_BORDA

Builder-generated table for import into the cut optimizer.
- Case 02: Part with Structure with ID other than FITA_BORDA
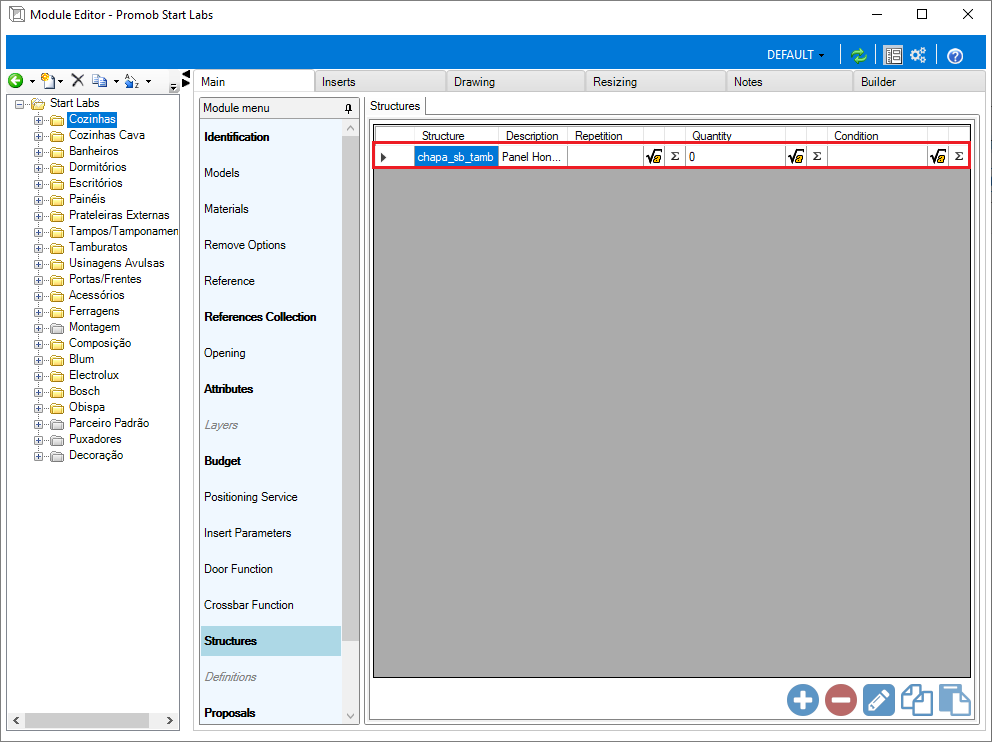
Builder-generated table for import into the cut optimizer.
