Check out the general settings for crop optimizers in this article. If necessary, go directly to one of the topics below:
|
GENERAL SETTINGS
THERMAL PRINTER DRIVER |
PROMOB X ERP LABEL |
Start/Builder Integrations with Beam Saw Machine Switches
IMPORTANT
- The label generation is the responsibility of the cut optimization software;
- Configuration and support of this software must be handled with the technical area of each supplier. Our plugin only generates the parts information.
Guidelines
- If you have a Giben machine, we advise you to use Gplan;
- If you have a Homag machine, Cut-Rite must be used;
- If you have a Usikraft machine, Cut-Planning must be used;
- If you have a Tecmatic machine, you must check which program it has, if it is WinCUT it is used with the Corte Certo optimizer, if it is the ICut the optimizer may be Cut-Planning or Corte Certo.
Optimizers

- Machines that receive information from the following software: Wincut (Tecmatic, Gabbiani, and Grupo SCM in general) and Elipse (Tecmatic).
- Integrates with Icut for Tecmatic machines.
|
ATTENTION: If Corte Certo is already working correctly with your current machine, then there will be no difficulties in the integration. Remember to have the updated version of Corte Certo version Plus. |

- This optimizer is used by Tecmatic machines. In some situations, Tecmatic instead of offering Corte Certo, offers this optimizer to be sold with the saw;
- A structured text file with *.mlc extension is generated which is opened by Ottimo and the BMP images to be placed on the label;
- In addition to the plugin, the Promob.fme file must be copied to the c:\ottimo\labels directory, this will allow additional information such as environment, client, module, etc... to be printed on the label. Furthermore, in the machine's WinCut, this same Promob.fme file must be copied to the ...\labels and ...\frmeti directory.

- Giben beam saw machine are integrated through Gplan, where the import system via Excel will be enabled;
- It is necessary to generate the Excel file to be imported. The information contained in the spreadsheet was defined in conjunction with Giben's technical area;
- In addition to the plugin, the Promob_Start.FST file must be installed, which allows other information to be imported into Gplan, such as environment, module, module id, part id;
- Gplan also exports data to Gvision, for this the minimum version of Gplan must be version 9 full;
- When you already have Gplan, the minimum compatible version is 9. The ideal is to update the version to Gplan12, which has more tools, better optimization, etc.
- In both cases, it is essential to contact Giben do Brasil's Technical Assistance Department for guidance and questions.

- Cut Rite is Homag's cut optimizer. All switches of this brand are sold with this software;
- The information we have is that the other optimizers do not generate a cutting plan for Homag machines;
- Through the Builder plugin, Promob generates the information through a text file saved in *.csv extension. The columns in this file must be related to the Cut Rite information;
- In case of doubts about the Cut Rite configuration, contact Homag technical assistance;
- Our technicians are not able or authorized to make settings in Cut Rite.

- Through the Builder plugin, Promob generates a *.txt file with the cutting information and the BMP images to be imported by the program and placed on the label;
- One more detail, for the Optimizer the raw material code must be changed in the library to use WPS ERP codes. This code can change from user to user. These hours must be considered in the plugin sales budget;
- If you have any questions regarding the configuration of the Optimizer, please contact WPS technical support.
- Our technicians are neither able nor authorized to configure the Optimizer.

- Through the Builder plugin, Promob generates a text file (in this case *.csv) with the cutting information and the BMP images to be imported by the program;
- If you have any questions regarding the configuration of Cut Planning, please contact Geek System technical assistance;
- Our technicians are neither able nor authorized to make settings in Cut Planning;
- Tecmatic's Star PN servo machines already have CutPlanning as standard (along with Icut), machines from Usikraft and CVL machines.

- OptiPlanning is Biesse's cutting optimizer (Selco);
- Disconnect switches of this brand are sold with this software;
- The information we have is that the other optimizers do not generate a cutting plan for their machines;
- Through the Builder plugin, Promob generates a text file saved in *.csv extension. Columns in this file must relate to OptiPlanning information. The BPM images that can be used on the label are also generated;
- If you have any questions regarding the configuration of OptiPlanning, please contact Biesse technical assistance. The contact for this is Gilvane from Elitec in São Paulo;
- Our technicians are neither able nor authorized to make settings in OptiPlanning.
- Developed by a German company, very similar to Corte Certo, we still don't have the correct information about which machines are integrated. This software is currently being sold in conjunction with TopSolid;
Thermal Printer Suggestion and Label Sheets
- Argox OS-214 Thermal Power
- Thermal Zebra TLP2844
If printed on a normal printer, it is recommended that it be a laser.
Provide label sheet: PIMACO 2 columns x 4 lines, making the label 100x60mm.
NOTE: Suggested Options.
Label information for all optimizers
Procedures to be performed in Promob to generate tag information:
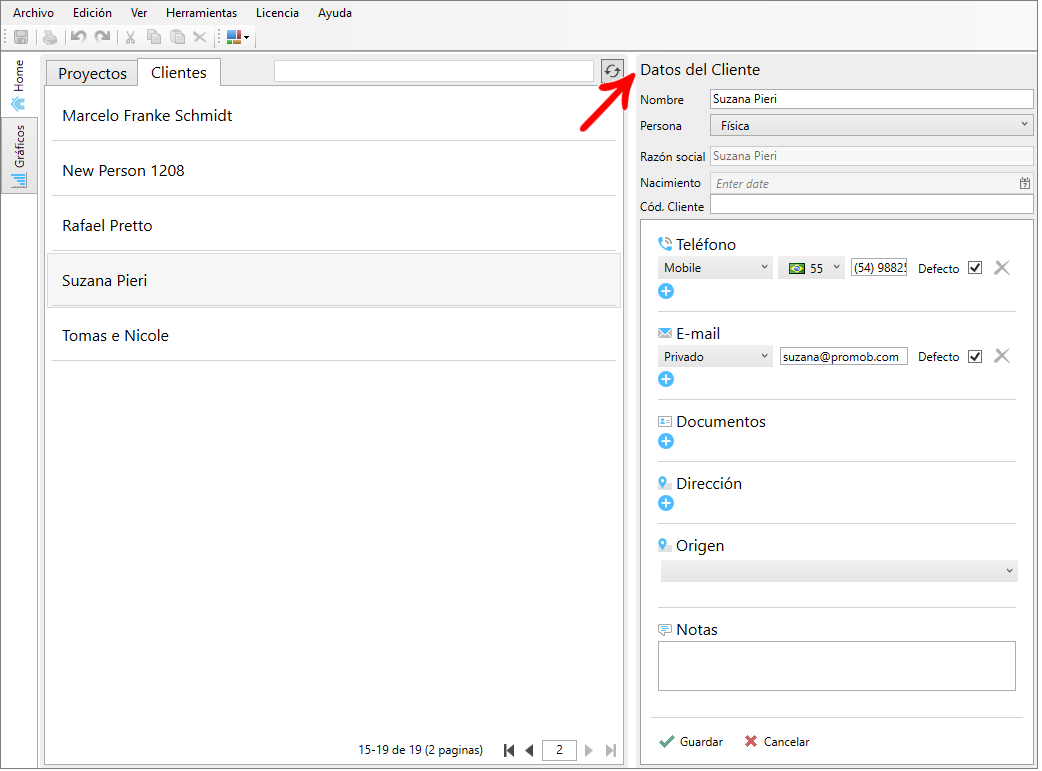
1. Fill in the Customer Data field;
2. Rename the design document to 3D Space;
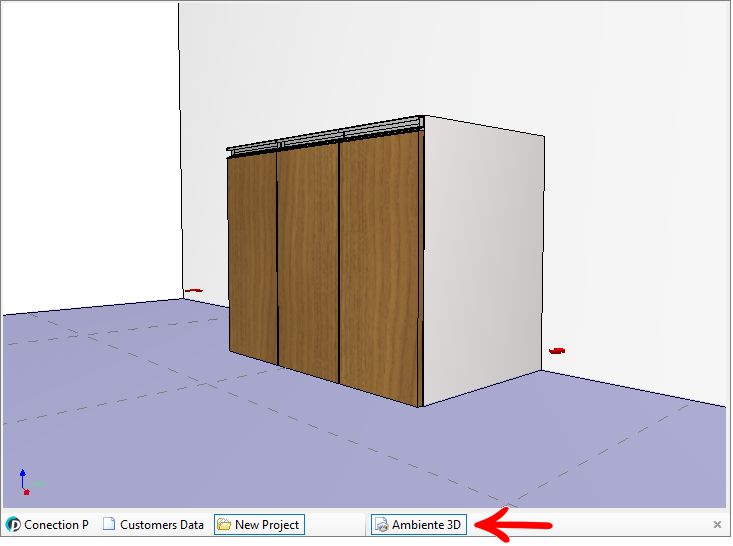
3. Insert a 1P Bottom Module - Straight Door - Handleless to run the production test;
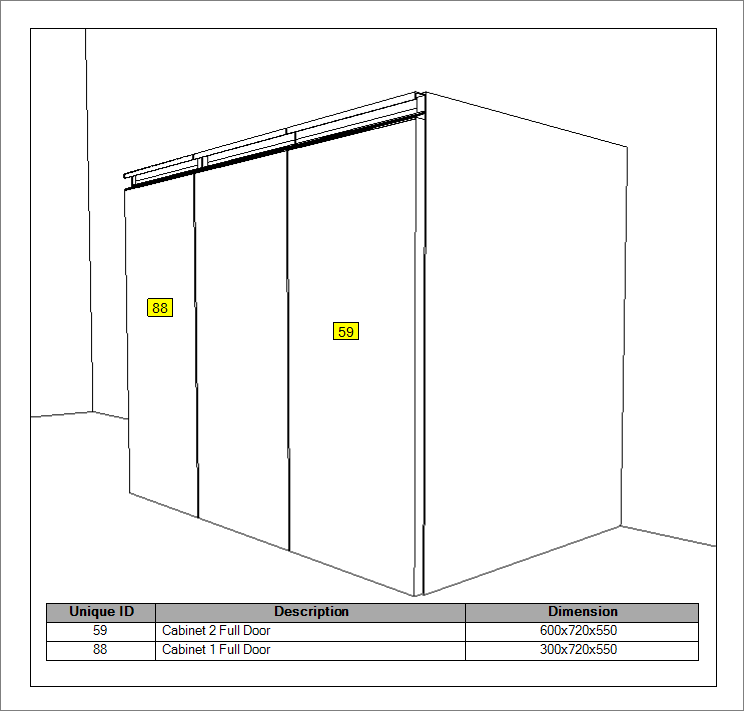
4. Create the detailed design of the design, as shown in the image below, to generate the ID of each module;
IMPORTANT:
- The location to which the arrows in the images above are pointing corresponds to other ID'S, as the project is not the same, as in the example of the Corte Certo label;
- Nas etiquetas do Gplan, Cut Rite e Corte Certo - Wincut não está aparecendo a ID, pois o campo tem que ser aumentado;
- It is essential that the IDS appear to link the parts with the module.
5. On all labels the barcode in the design field and its respective name will appear.
Barcode will only appear in programs when the part has operation because when it is deep it doesn't have and with that, it doesn't disturb the operators regarding the optimization process in the machines.
Labels - Image Resolution
IMPORTANT: The procedures below are compatible with Promob Cut Pro and Builder
Final label size in relation to pixel density/resolution
Pixel density (DPI) implies the number of pixels per inch in the images.
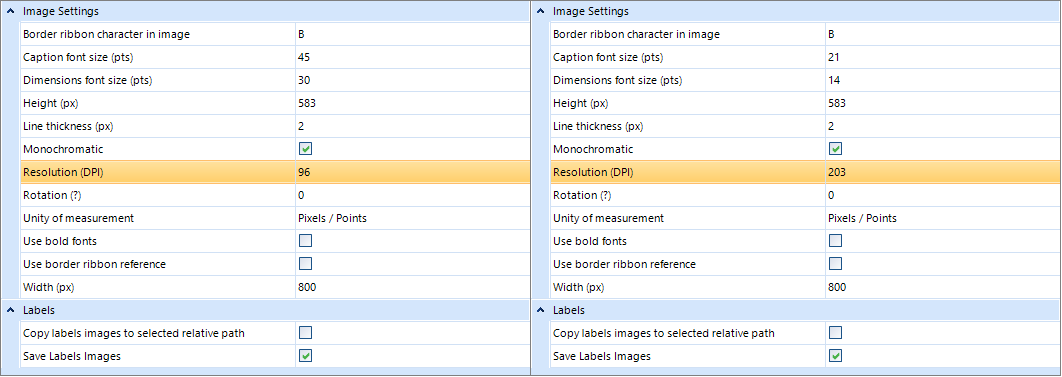
It is possible to enter values between 96dpi up to 203dpi.
The field to define this option is presented as Resolution in the label settings, when changing the value of this field, the font size is also changed, seeking to maintain the proportion.
The images below illustrate the impact of this option with respect to final size, each square in the images represents 10 pixels:
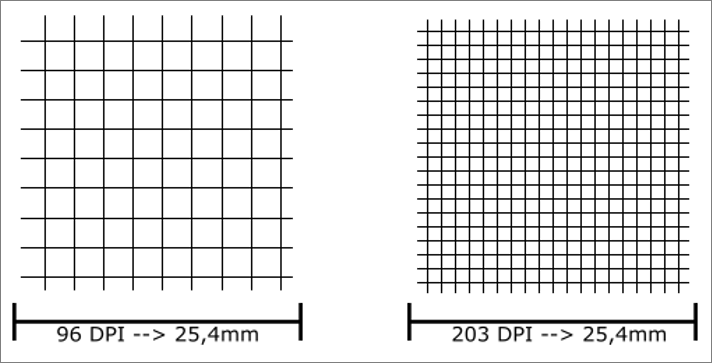
When comparing the images it is possible to notice that both measure 25.4mm X 25.4mm, but in pixels they measure respectively 96px X 96px and 203px X 203px.
In the end, if we generate images at both resolutions with equal pixel measurements, the final image size in millimeters will be different.
Font size in relation to pixel density/resolution
Depending on the resolution chosen in the label settings, the fonts increase or decrease. This is because the font size respects the relationship between the number of pixels and the size of the image. If we keep the measurements in pixels, interleaving the resolutions, these same measurements, when converted to millimeters, are different.
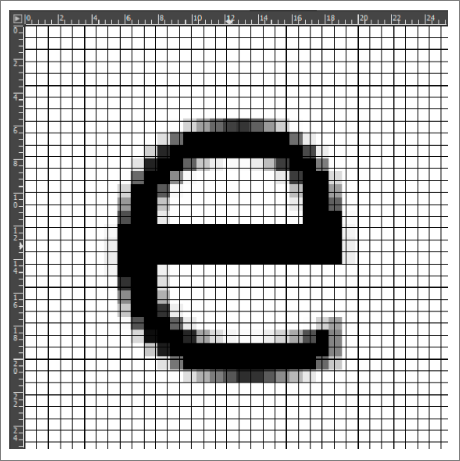
The images below demonstrate the printing of the text "e" with the font size proportional to its resolution, the rulers measure in millimeters:
16dpi X 16pts:
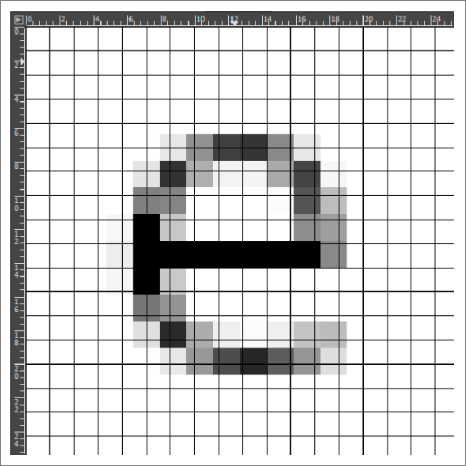
32dpi X 35pts:
The following images demonstrate text printed with the same font size and position. The images have the same size in millimeters, the change only occurs in resolutions:

Because of this difference, font sizes automatically vary when the label resolution is changed.
No machine integration (free/traditional standard)
1. Create the column ID_ERP in Settings - Columns to be used in the design table;
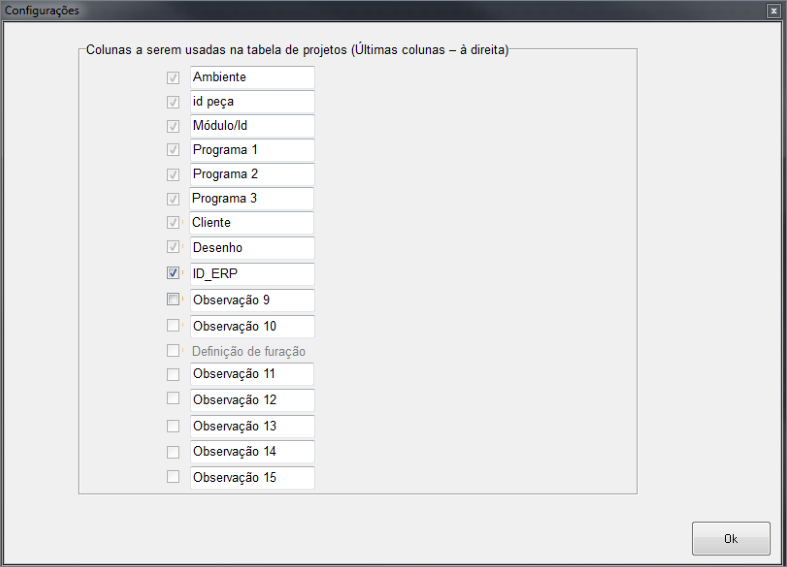
2. Seven new .INI file attached, in the following computer path:
C:\corte_certo_plus: rename the old .INI to (.INI_) and paste the new INI into this folder.
This is already configured to receive the ID_ERP (field created in item 1) and must be standard 100 x 60mm, which is the standard Promob label.
In case you have A4 sheet printing, the recommendation is Pimaco 2 rows X 4 columns that make up the standard measure of 100 x 60mm.
If you do not have a thermal label printer, it is recommended to use a “laser” for printing on A4 sheet mentioned above. The configuration for this type of sheet is passed on in training.
NOTE: The Promob option in Settings - Default Settings must be unchecked for ERP integration.
With machine integration (standard Wincut/Beam Saw Machine). Disconnect switch from SCM/Tecmatic with "Wincut" software installed
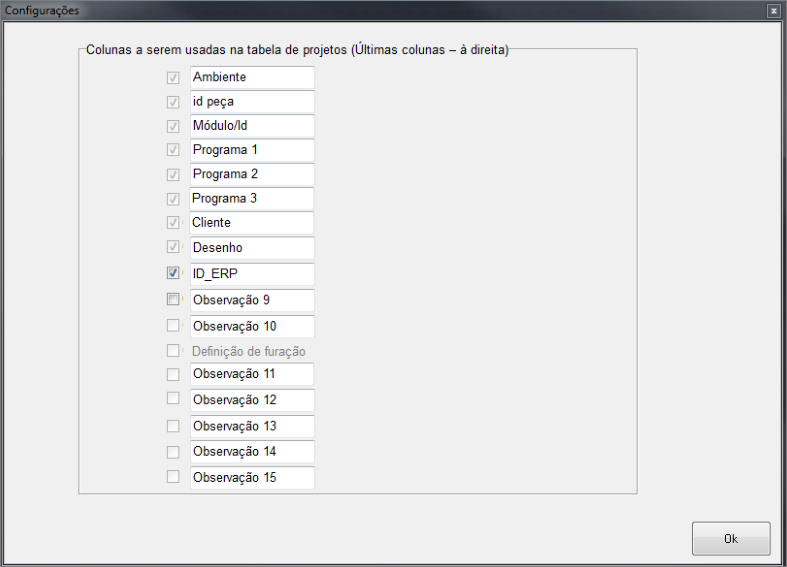
1. Create the column ID_ERP in Settings - Columns to be used in the design table;
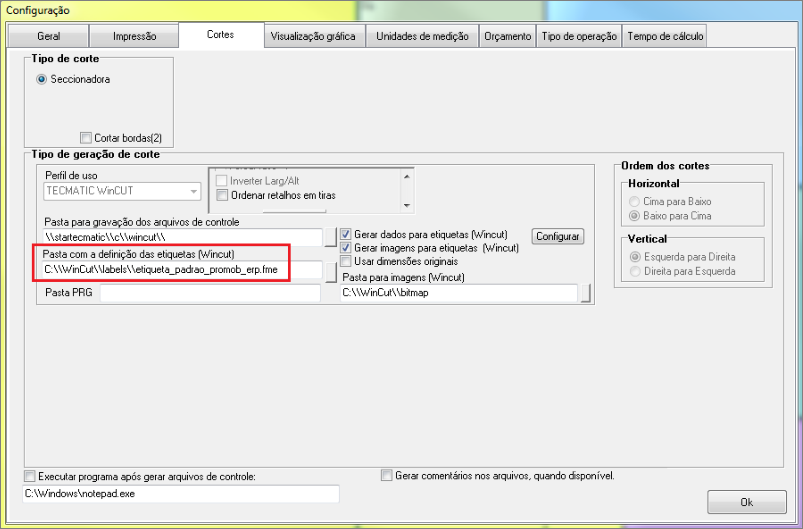
2. Define in the computer mapping, the new label name to be set as default in the machine's Wincut, as shown below:
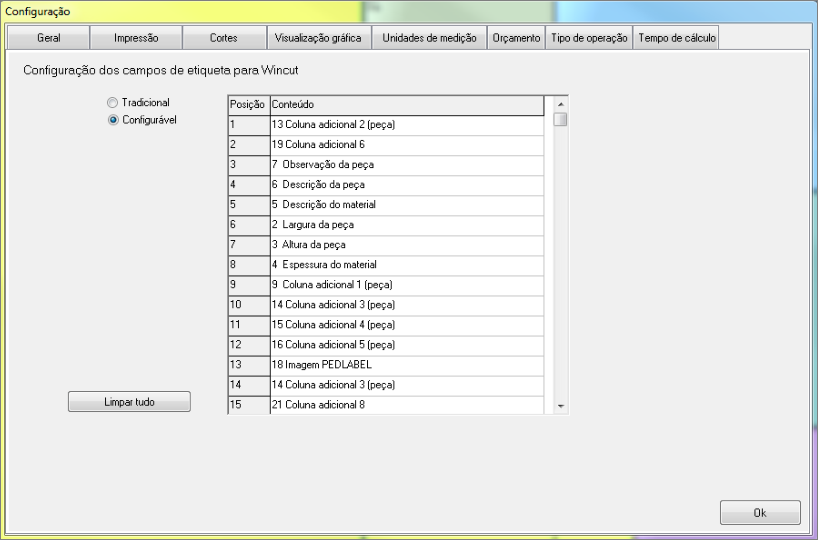
3. Make a new configuration of the label fields for Wincut as shown in the image below: (column 15 - 21 was created, additional column 8 more), which corresponds to ID_ERP.
NOTE: The Promob option in Settings - Default Settings must be unchecked for ERP integration.