In Promob Cut Pro you can print the leftover labels generated in the cutting plane.
To generate the labels, after the leftovers have been saved, follow the procedures below:
1. Click on the Print icon;
2. Select the Labels option;
3. Select the Print leftover labels field.

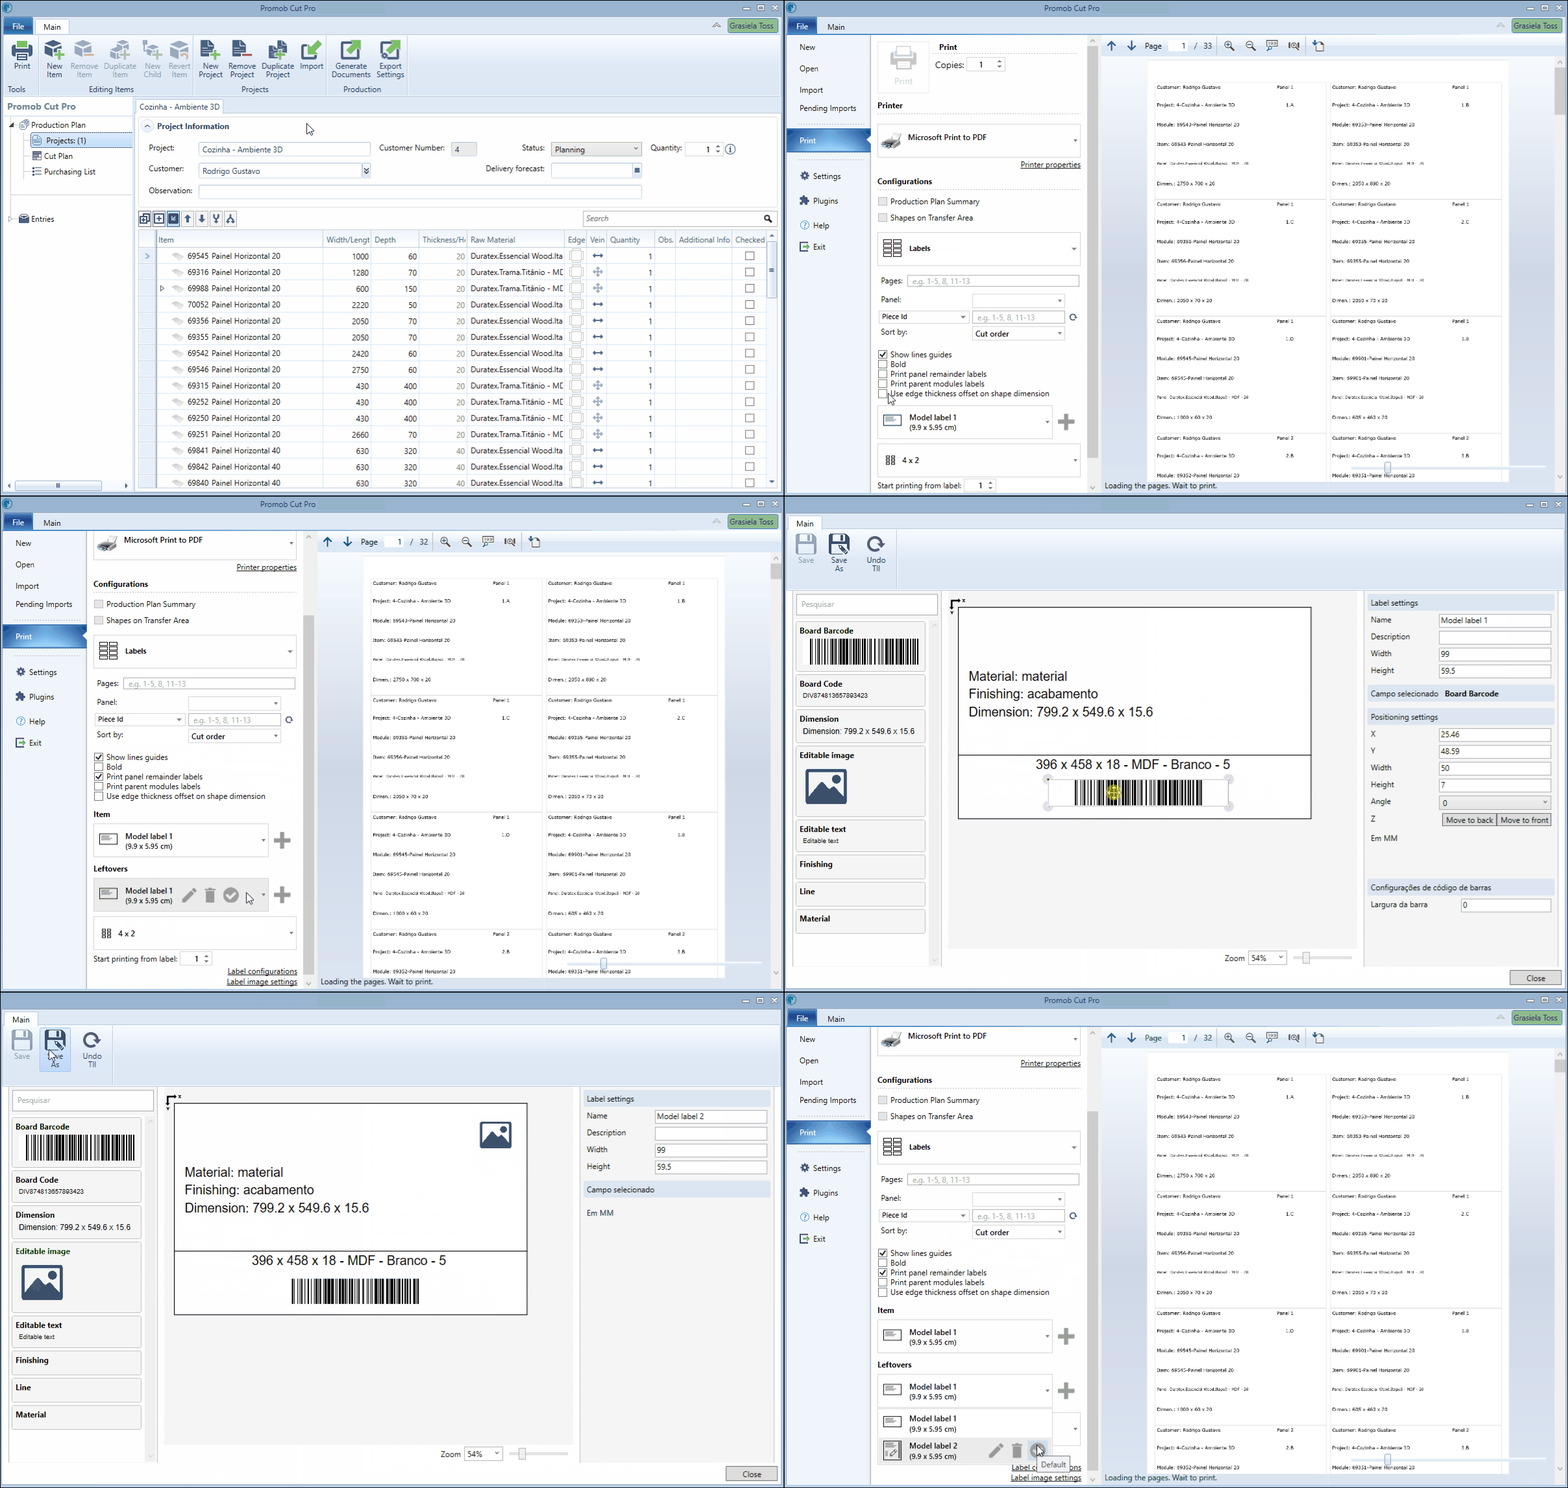
The leftover labels will be printed along with the other project labels in the format illustrated in the image below.

IMPORTANT: It is possible to print the labels individually, to print only leftover labels, check only the Print leftover labels option.


In addition to this label format, Promob Cut Pro allows you to edit or create new leftover label templates.
To do this, by checking the Print leftover labels option, a new field is enabled.
In this field, you can edit, delete, set as default, or add a new leftover label template.
IMPORTANT: In the leftover label editor, only fields related to leftover will be available.

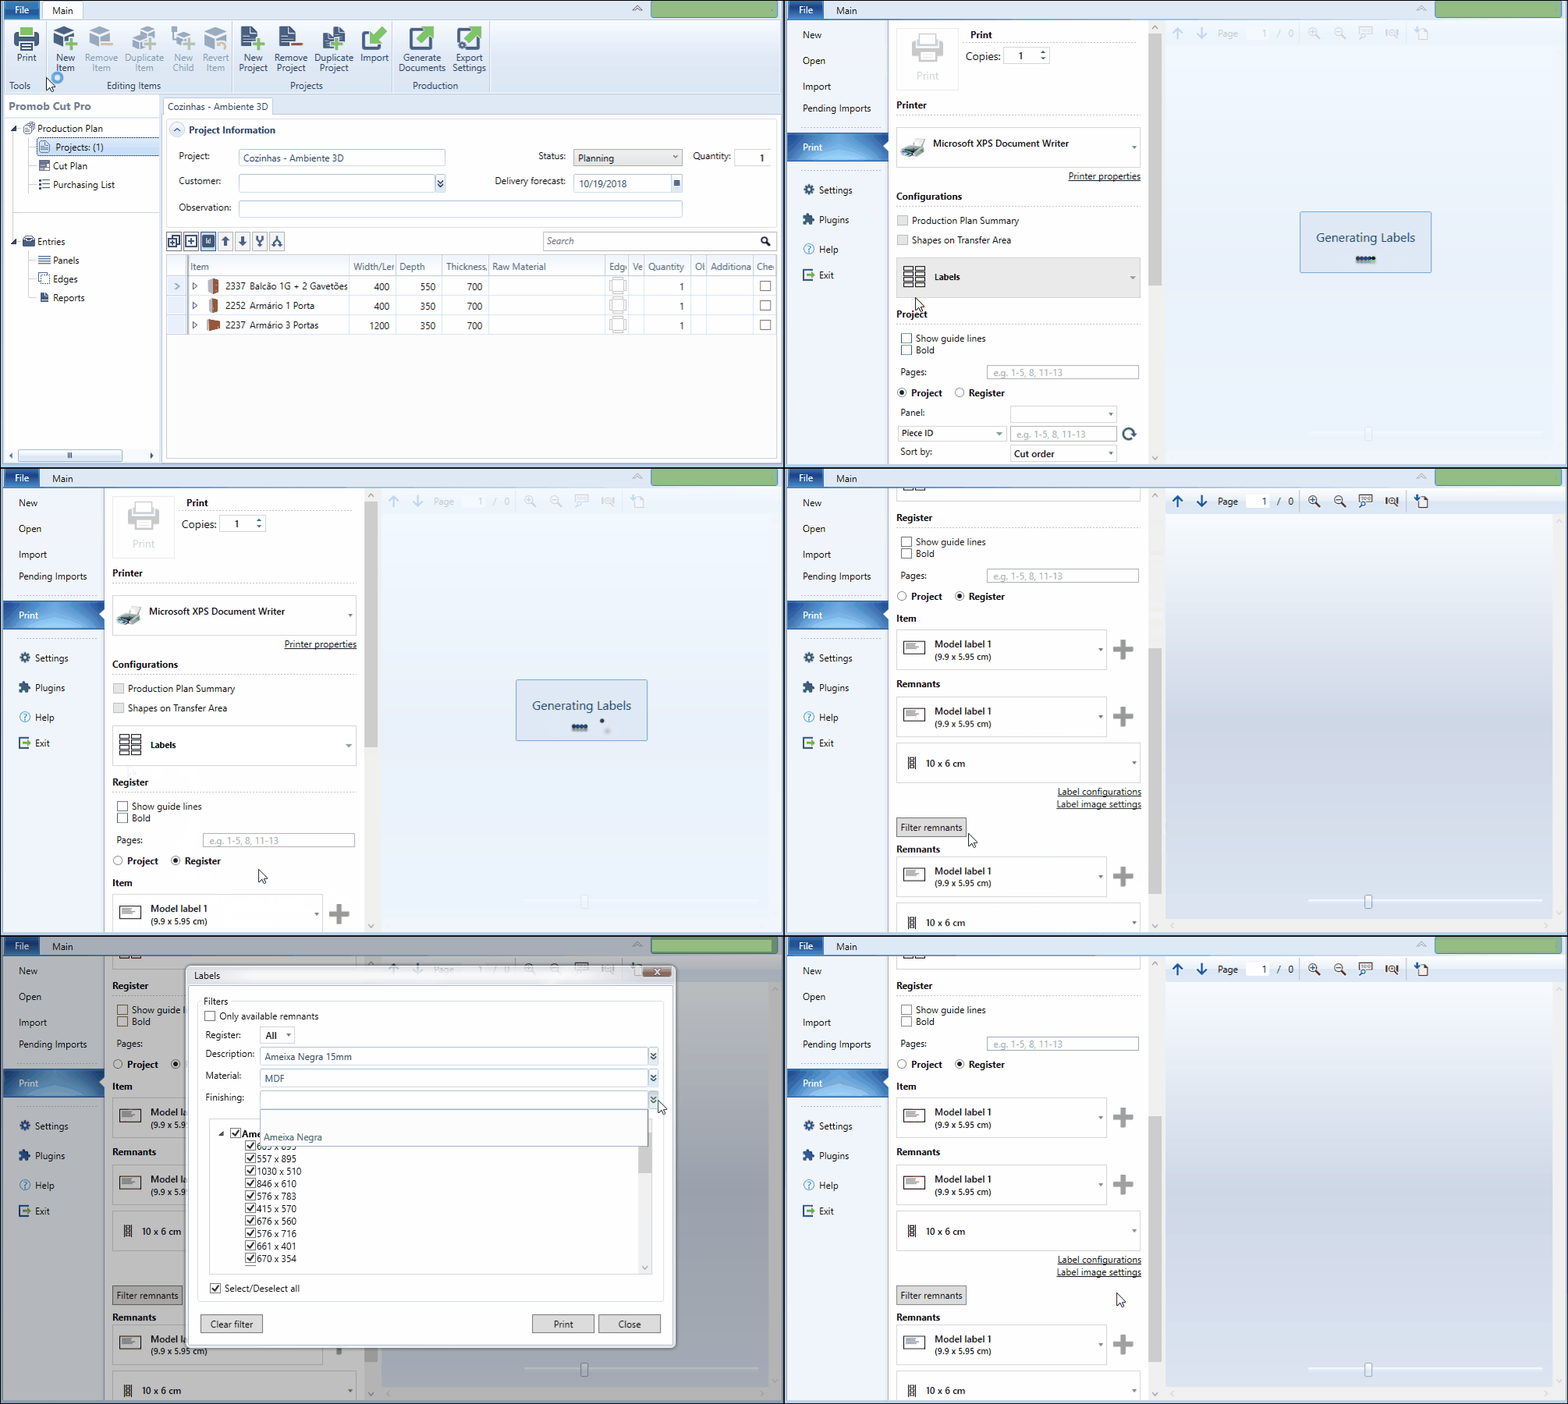
Starting with Promob Cut Pro version 1.2.2.41, you can print leftover labels that have been manually registered. For this, it is necessary to inform Cut Pro that the printing of leftover labels will refer to the manually registered leftovers and not to the leftovers generated in the project cutting plan.
To print manually registered scrap labels:
1. Access the File menu Print;
2. Select the labels option;
3. Check the option Register;
4. Click Filter Remnants;
5. Set the leftover criteria for label printing. Specify material, description, and dimensions.
6. Apply the filter and click Print.

Sort leftover labels
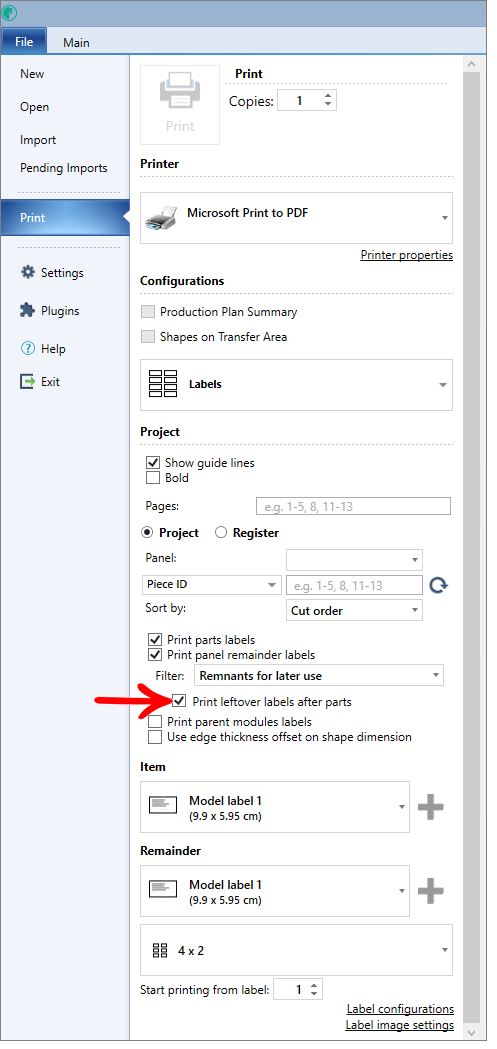
Using the Print leftover labels after parts option you can order the remnant labels of each sheet to be printed after the part labels of each plate.

Example:
Selecting the Print leftover labels after parts option will print all parts from panel 1 and then all leftovers from panel 1, then all parts from panel 2 and all leftovers from panel 2.
